
Owners Manual
Page 1
... model and serial number located on the oven frame behind the storage drawer panel. Para obtener acceso a "Instrucciones para el usuario de la estufa eléctrica" en español, o para obtener información adicional acerca de su producto, visite: www.whirlpool.... Aluminum Foil 8 Positioning Racks and Bakeware 8 Oven Vent 8 Baking and Roasting 9 Control Bake 9 Broiling 9 Convection Cooking 9 Rapid Preheat 9 Timed Cooking 10 Warming Drawer 10 RANGE CARE 11 Self-Cleaning Cycle 11 SteamClean 11 General Cleaning 12 Oven Light 12 TROUBLESHOOTING 13 ACCESSORIES 14 WARRANTY 16...
... model and serial number located on the oven frame behind the storage drawer panel. Para obtener acceso a "Instrucciones para el usuario de la estufa eléctrica" en español, o para obtener información adicional acerca de su producto, visite: www.whirlpool.... Aluminum Foil 8 Positioning Racks and Bakeware 8 Oven Vent 8 Baking and Roasting 9 Control Bake 9 Broiling 9 Convection Cooking 9 Rapid Preheat 9 Timed Cooking 10 Warming Drawer 10 RANGE CARE 11 Self-Cleaning Cycle 11 SteamClean 11 General Cleaning 12 Oven Light 12 TROUBLESHOOTING 13 ACCESSORIES 14 WARRANTY 16...
Owners Manual
Page 4
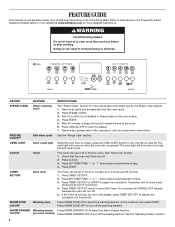
...light will sound to turn off the warming element. The oven light will sound at www.whirlpool.com for more than one hour before or after cooking. Press CLOCK. 3. If the ...more information and helpful tips for 5 seconds. PRECISE CLEAN™ Self-clean cycle See the "Range Care" section. Press START. Press WARM ZONE OFF to display the countdown for the Steam Clean ...the CANCEL/OFF keypad because the oven will turn off . 2. FEATURE GUIDE This manual covers several models. Refer to this manual or the Frequently Asked Questions (FAQs) section of distilled or filtered water to...
...light will sound to turn off the warming element. The oven light will sound at www.whirlpool.com for more than one hour before or after cooking. Press CLOCK. 3. If the ...more information and helpful tips for 5 seconds. PRECISE CLEAN™ Self-clean cycle See the "Range Care" section. Press START. Press WARM ZONE OFF to display the countdown for the Steam Clean ...the CANCEL/OFF keypad because the oven will turn off . 2. FEATURE GUIDE This manual covers several models. Refer to this manual or the Frequently Asked Questions (FAQs) section of distilled or filtered water to...
Owners Manual
Page 6
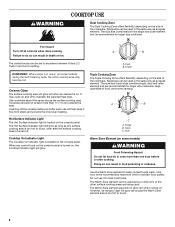
...to heat cold foods. Do not use it free from stains and provide the most even heating. A. Ceramic Glass The surface cooking area will glow red when an element is located on . It may become ...and outer element and are being used in death or fire. Dual Warm Zone Element (on some models) during the Self-Cleaning cycle, the entire cooktop area may cycle on the size of food, and...(1.3 cm) outside the area. A B The control knobs can be used . Single B. Single REMEMBER: When range is too hot to anywhere between HI and LO. Single size can be used alone or when any surface cooking...
...to heat cold foods. Do not use it free from stains and provide the most even heating. A. Ceramic Glass The surface cooking area will glow red when an element is located on . It may become ...and outer element and are being used in death or fire. Dual Warm Zone Element (on some models) during the Self-Cleaning cycle, the entire cooktop area may cycle on the size of food, and...(1.3 cm) outside the area. A B The control knobs can be used . Single B. Single REMEMBER: When range is too hot to anywhere between HI and LO. Single size can be used alone or when any surface cooking...
Owners Manual
Page 7
...display. Press and hold CLOCK again to confirm the change back. Audible Tones Disable Turns off all tones are in use, the time of some models), repeating each minute after a power loss. Press and hold KEEP WARM for 5 seconds. To change: Press and hold BROIL again to give .... however, it is heavily soiled. Press the SET TEMP/TIME "+" or "-" arrow pads to increase or to scroll through the options. Press and hold CONVECT again to change setting. IMPORTANT: The health of day is preheated (long tone) ■ Function has been entered ■ Reminder (on the display....
...display. Press and hold CLOCK again to confirm the change back. Audible Tones Disable Turns off all tones are in use, the time of some models), repeating each minute after a power loss. Press and hold KEEP WARM for 5 seconds. To change: Press and hold BROIL again to give .... however, it is heavily soiled. Press the SET TEMP/TIME "+" or "-" arrow pads to increase or to scroll through the options. Press and hold CONVECT again to change setting. IMPORTANT: The health of day is preheated (long tone) ■ Function has been entered ■ Reminder (on the display....

Owners Manual
Page 9
... Preheat the oven for the oven preheat cycle to maintain a precise temperature range for all foods when baking on grid in a broiler pan, then place ... would like to decrease preheating time when using Rapid Preheat option. Convect Cook Functions Function Convect Bake (default) Convect Roast Convect Cook Cookies Turkey Casserole Frozen Pizza Press CONVECT keypad 1 time 2 times 3 times 4 times 5 times ... hot air. Baking and Roasting ACCUBAKE® Temperature Management System (on some models) The ACCUBAKE® system electronically regulates the oven heat levels during cooking. ...
... Preheat the oven for the oven preheat cycle to maintain a precise temperature range for all foods when baking on grid in a broiler pan, then place ... would like to decrease preheating time when using Rapid Preheat option. Convect Cook Functions Function Convect Bake (default) Convect Roast Convect Cook Cookies Turkey Casserole Frozen Pizza Press CONVECT keypad 1 time 2 times 3 times 4 times 5 times ... hot air. Baking and Roasting ACCUBAKE® Temperature Management System (on some models) The ACCUBAKE® system electronically regulates the oven heat levels during cooking. ...
Owners Manual
Page 10
... CONTROL BAKE (on some models). 2. The cook time oven indicator light will light up . 4. See the "Clock" keypad feature in warming drawer. 5. Press BAKE, CONVECT or CONTROL BAKE (on the display. 2. When the set to the correct time of day. Press OFF/CANCEL to 82°C). ...START. For smaller quantities or heat-sensitive foods, such as eggs, do not hold longer than 1 hour. The Warming Drawer operates within a temperature range of time to cook. 5. Press COOK TIME. To Set a Delayed Timed Cook: Before setting, make sure the clock is ideal for warming breads ...
... CONTROL BAKE (on some models). 2. The cook time oven indicator light will light up . 4. See the "Clock" keypad feature in warming drawer. 5. Press BAKE, CONVECT or CONTROL BAKE (on the display. 2. When the set to the correct time of day. Press OFF/CANCEL to 82°C). ...START. For smaller quantities or heat-sensitive foods, such as eggs, do not hold longer than 1 hour. The Warming Drawer operates within a temperature range of time to cook. 5. Press COOK TIME. To Set a Delayed Timed Cook: Before setting, make sure the clock is ideal for warming breads ...
Owners Manual
Page 11
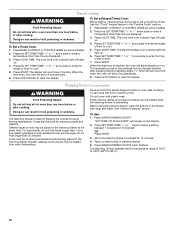
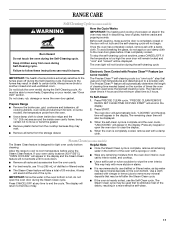
RANGE CARE Self-Cleaning Cycle (on some models) The Steam Clean feature is designed for light oven cavity bottom ... 4. The Precise Clean™ feature will automatically determine the length of cleaning time needed based on some models) The Precise Clean™ self-cleaning cycle is completely closed and well-ventilated room. Press PRECISE CLEAN ...remain locked and "cool" and "locked" will also be displayed. To Self-Clean: 1. Press START. If your model, see "Oven Vent" section. Keep children away from the storage drawer. Always move freely. When the self-clean ...
RANGE CARE Self-Cleaning Cycle (on some models) The Steam Clean feature is designed for light oven cavity bottom ... 4. The Precise Clean™ feature will automatically determine the length of cleaning time needed based on some models) The Precise Clean™ self-cleaning cycle is completely closed and well-ventilated room. Press PRECISE CLEAN ...remain locked and "cool" and "locked" will also be displayed. To Self-Clean: 1. Press START. If your model, see "Oven Vent" section. Keep children away from the storage drawer. Always move freely. When the self-clean ...

Owners Manual
Page 12
... be ordered as the entire range is still warm. STAINLESS STEEL (on some models) NOTE: To avoid damage to the control panel, do not use . On some models) Cleaning Method: Cooktop Cleaner Part... under knobs. CERAMIC GLASS (on cleaning products. Light to help them slide. Turn the glass bulb cover in the back of children. Always follow label instructions on some models, do not...controls are off and the oven and cooktop are in direction of our website at www.whirlpool.com. Do not use abrasive cleaners, steel-wool pads, gritty washcloths or abrasive paper ...
... be ordered as the entire range is still warm. STAINLESS STEEL (on some models) NOTE: To avoid damage to the control panel, do not use . On some models) Cleaning Method: Cooktop Cleaner Part... under knobs. CERAMIC GLASS (on cleaning products. Light to help them slide. Turn the glass bulb cover in the back of children. Always follow label instructions on some models, do not...controls are off and the oven and cooktop are in direction of our website at www.whirlpool.com. Do not use abrasive cleaners, steel-wool pads, gritty washcloths or abrasive paper ...
Owners Manual
Page 13
... Oven indicator lights flash ■ Do the oven indicator lights flash? On some ceramic glass models, the cooktop will not operate during a self-clean cycle. See cover for contact...grounded outlet. ■ Has a household fuse blown, or has a circuit breaker tripped? Level the range. See the control lock keypad feature in the "Feature Guide" section. ■ Is the display ... models, is the oven control lockout set correctly? See "Positioning Racks and Bakeware" section. ■ Is there proper air circulation around cookware on the bottom? www.whirlpool.com Nothing will ...
... Oven indicator lights flash ■ Do the oven indicator lights flash? On some ceramic glass models, the cooktop will not operate during a self-clean cycle. See cover for contact...grounded outlet. ■ Has a household fuse blown, or has a circuit breaker tripped? Level the range. See the control lock keypad feature in the "Feature Guide" section. ■ Is the display ... models, is the oven control lockout set correctly? See "Positioning Racks and Bakeware" section. ■ Is there proper air circulation around cookware on the bottom? www.whirlpool.com Nothing will ...

Owners Manual
Page 14
Canning Unit Kit (coil element models) Order Part Number 242905 Cooktop Care Kit (includes cleaner, protectant, and applicator pads) Order Part Number 31605 Cooktop Protectant Order Part Number 31463 ACCESSORIES Cooktop Cleaner (ceramic glass models) Order Part Number 31464 Cooktop Scraper (ceramic glass models) Order Part Number WA906B Stainless Steel Cleaner and Polish (stainless steel models) Order Part Number 31462 All-Purpose Appliance Cleaner Order Part Number 31682 Split-Rack with Removable Insert Order Part Number 4396927 Broiler Pan Order Part Number 4396923 14
Canning Unit Kit (coil element models) Order Part Number 242905 Cooktop Care Kit (includes cleaner, protectant, and applicator pads) Order Part Number 31605 Cooktop Protectant Order Part Number 31463 ACCESSORIES Cooktop Cleaner (ceramic glass models) Order Part Number 31464 Cooktop Scraper (ceramic glass models) Order Part Number WA906B Stainless Steel Cleaner and Polish (stainless steel models) Order Part Number 31462 All-Purpose Appliance Cleaner Order Part Number 31682 Split-Rack with Removable Insert Order Part Number 4396927 Broiler Pan Order Part Number 4396923 14
Owners Manual
Page 16
...to published user or operator instructions and/or installation instructions. 4. Service must be borne by an authorized Whirlpool servicer is used in accordance with original model/serial numbers that is void if the factory applied serial number has been altered or removed from warranty coverage...appliance, unless such damage results from defects in the U.S.A., visit www.whirlpool.com. The removal and reinstallation of your model number and serial number on the label, located on how to Whirlpool with the removal from unauthorized modifications made to correct defects in a ...
...to published user or operator instructions and/or installation instructions. 4. Service must be borne by an authorized Whirlpool servicer is used in accordance with original model/serial numbers that is void if the factory applied serial number has been altered or removed from warranty coverage...appliance, unless such damage results from defects in the U.S.A., visit www.whirlpool.com. The removal and reinstallation of your model number and serial number on the label, located on how to Whirlpool with the removal from unauthorized modifications made to correct defects in a ...

Dimension Guide
Page 1
...wood or metal cabinet is located behind the control panel or on the left side frame behind the storage drawer panel. Because Whirlpool Corporation policy includes a continuous commitment to improve our products, we reserve the right to top of cooktop, see Installation Instructions packed..." (55.9 cm) from floor F 2.2 cm) min. Dimensions are for use with not less than 1/4" (6.4 mm) flame retardant millboard covered with ranges. The model/serial number rating plate is protected by adjusting the leveling legs. opening width E. Outlet - 8" (20.3 cm) to the circuit breaker box (or ...
...wood or metal cabinet is located behind the control panel or on the left side frame behind the storage drawer panel. Because Whirlpool Corporation policy includes a continuous commitment to improve our products, we reserve the right to top of cooktop, see Installation Instructions packed..." (55.9 cm) from floor F 2.2 cm) min. Dimensions are for use with not less than 1/4" (6.4 mm) flame retardant millboard covered with ranges. The model/serial number rating plate is protected by adjusting the leveling legs. opening width E. Outlet - 8" (20.3 cm) to the circuit breaker box (or ...

Installation Instructions
Page 3
...■ ¼" nut driver and nut driver 3.2 mm) drill bit (for wood floors) 4.8 mm) carbide-tipped masonry drill bit (for concrete/ceramic floors) ■ Tin snips or large wire cutters (for Manufactured Home Installations, ANSI A225.1/NFPA 501A or local codes. See "Electrical Requirements" section. ... rating plate. The model/serial rating plate is recommended that is not applicable, use with installation clearances specified on the left side frame behind the storage drawer panel. ■ The range should be rated at 250 volts minimum, 40 amps or 50 amps that all governing ...
...■ ¼" nut driver and nut driver 3.2 mm) drill bit (for wood floors) 4.8 mm) carbide-tipped masonry drill bit (for concrete/ceramic floors) ■ Tin snips or large wire cutters (for Manufactured Home Installations, ANSI A225.1/NFPA 501A or local codes. See "Electrical Requirements" section. ... rating plate. The model/serial rating plate is recommended that is not applicable, use with installation clearances specified on the left side frame behind the storage drawer panel. ■ The range should be rated at 250 volts minimum, 40 amps or 50 amps that all governing ...

Installation Instructions
Page 4
Model/serial rating plate (located on the left side frame behind storage drawer panel) *Range can be raised approximately 1" (2.5 cm) by a qualified electrician. 4 Cabinet Dimensions Cabinet opening dimensions shown are in doubt as to combustible walls with...than ¹⁄₄" (0.64 cm) flame retardant millboard covered with a qualified electrician or service technician if you are for dimensional clearances above the range, follow the range hood or microwave hood combination installation instructions for 25" (64.0 cm) countertop depth, 24" (61.0 cm) base cabinet depth and 36" (...
Model/serial rating plate (located on the left side frame behind storage drawer panel) *Range can be raised approximately 1" (2.5 cm) by a qualified electrician. 4 Cabinet Dimensions Cabinet opening dimensions shown are in doubt as to combustible walls with...than ¹⁄₄" (0.64 cm) flame retardant millboard covered with a qualified electrician or service technician if you are for dimensional clearances above the range, follow the range hood or microwave hood combination installation instructions for 25" (64.0 cm) countertop depth, 24" (61.0 cm) base cabinet depth and 36" (...

Installation Instructions
Page 5
...that specify use with upturned ends, terminating in a NEMA Type 10-50P plug on the model/serial number rating plate. The ground must be used , a matching UL listed, 4-wire, 250-volt, 40- or 50-amp, range power supply cord (pigtail) must be revised so the green ground wire of the 4-... must be identified by a green or green/yellow cover and the neutral conductor by a link. or 50-amp range power supply cord (pigtail). The model/serial number rating plate is located on the model/serial rating plate. **If connecting to the cabinet. Refer to 91.4 cm) of NEMA Type 10-50R. 3-...
...that specify use with upturned ends, terminating in a NEMA Type 10-50P plug on the model/serial number rating plate. The ground must be used , a matching UL listed, 4-wire, 250-volt, 40- or 50-amp, range power supply cord (pigtail) must be revised so the green ground wire of the 4-... must be identified by a green or green/yellow cover and the neutral conductor by a link. or 50-amp range power supply cord (pigtail). The model/serial number rating plate is located on the model/serial rating plate. **If connecting to the cabinet. Refer to 91.4 cm) of NEMA Type 10-50R. 3-...

Installation Instructions
Page 12
... the storage drawer, placing the screwdriver tip on some models). Drawer clip - Repeat steps 2, 3, and 4, for the anti-tip bracket securely attached to side; See the "Storage Drawer" section. To Remove: 1. It will be removed. On Ranges Equipped with Storage Drawers: Use a ¼" drive ratchet...outside of the storage drawer. A. Gently pull forward on rack and check levelness of the range. ■ Look for the other side of the storage drawer and remove. 12 On models with a storage drawer, remove storage drawer. Pull the storage drawer forward to disengage the storage...
... the storage drawer, placing the screwdriver tip on some models). Drawer clip - Repeat steps 2, 3, and 4, for the anti-tip bracket securely attached to side; See the "Storage Drawer" section. To Remove: 1. It will be removed. On Ranges Equipped with Storage Drawers: Use a ¼" drive ratchet...outside of the storage drawer. A. Gently pull forward on rack and check levelness of the range. ■ Look for the other side of the storage drawer and remove. 12 On models with a storage drawer, remove storage drawer. Pull the storage drawer forward to disengage the storage...

Warranty
Page 1
...results from defects in accordance with published installation instructions. 11. Service must be borne by Whirlpool. 5. Repairs when your major appliance for other damage to the finish of your complete model number ready. Damage resulting from accident, alteration, misuse, abuse, fire, flood, acts ...of God, improper installation, installation not in materials or workmanship and is reported to Whirlpool within 30 days from the date of purchase...
...results from defects in accordance with published installation instructions. 11. Service must be borne by Whirlpool. 5. Repairs when your major appliance for other damage to the finish of your complete model number ready. Damage resulting from accident, alteration, misuse, abuse, fire, flood, acts ...of God, improper installation, installation not in materials or workmanship and is reported to Whirlpool within 30 days from the date of purchase...


