
Owners Manual
Page 3
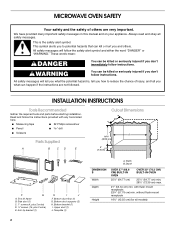
... use corrosive chemicals or vapors in this section. ■ The microwave oven must be boiling. Stir the liquid both before using electrical appliances basic safety precautions should be killed or seriously injured if you how to reduce the chance of burns, electric shock, fire, injury to...use as described in the microwave oven as they may create a fire or risk of electric shock. ■ Do not clean with any appliance, close supervision is necessary when used by qualified service personnel. After heating, allow the container to excessive microwave energy: ■ Read all ...
... use corrosive chemicals or vapors in this section. ■ The microwave oven must be boiling. Stir the liquid both before using electrical appliances basic safety precautions should be killed or seriously injured if you how to reduce the chance of burns, electric shock, fire, injury to...use as described in the microwave oven as they may create a fire or risk of electric shock. ■ Do not clean with any appliance, close supervision is necessary when used by qualified service personnel. After heating, allow the container to excessive microwave energy: ■ Read all ...
Owners Manual
Page 4
...face and the door or allow soil or cleaner residue to microwave energy. IMPORTANT SAFETY INSTRUCTIONS ■ Do not operate any heating or cooking appliance beneath the microwave oven. ■ Do not mount microwave oven over a sink. ■ Do not cover racks or any other than ...damage to operate this microwave oven outdoors. Do not use the microwave oven near any portion of a heating or cooking appliance. ■ Do not use paper products when appliance is operated in convection, combination, grill or "PAN BROWN" mode (on models with such features). ■ Do ...
...face and the door or allow soil or cleaner residue to microwave energy. IMPORTANT SAFETY INSTRUCTIONS ■ Do not operate any heating or cooking appliance beneath the microwave oven. ■ Do not mount microwave oven over a sink. ■ Do not cover racks or any other than ...damage to operate this microwave oven outdoors. Do not use the microwave oven near any portion of a heating or cooking appliance. ■ Do not use paper products when appliance is operated in convection, combination, grill or "PAN BROWN" mode (on models with such features). ■ Do ...

Owners Manual
Page 5
... automatically turn the microwave oven off. If vents are in back or other injury. Failure to move and install microwave oven. Observe all cord connected appliances: The microwave oven must be at the back and side of the microwave oven where the exhaust vents are not completely understood, or if doubt...
... automatically turn the microwave oven off. If vents are in back or other injury. Failure to move and install microwave oven. Observe all cord connected appliances: The microwave oven must be at the back and side of the microwave oven where the exhaust vents are not completely understood, or if doubt...
Owners Manual
Page 15
...Turntable Hub Part Number W10143947 Cleaning Supplies Heavy Duty Degreaser Part Number 31552 All-Purpose Appliance Cleaner Part Number 31682 Stainless Steel Cleaner and Polish Part Number 31462 In the U.S.A. To locate the Whirlpool designated service company in your request. This information will fit right and work right ... local dealers, repair parts distributors and service companies. If you need replacement parts If you still need to build every new WHIRLPOOL® appliance. See "Assistance or Service" section for assistance or service, please check "Troubleshooting."
...Turntable Hub Part Number W10143947 Cleaning Supplies Heavy Duty Degreaser Part Number 31552 All-Purpose Appliance Cleaner Part Number 31682 Stainless Steel Cleaner and Polish Part Number 31462 In the U.S.A. To locate the Whirlpool designated service company in your request. This information will fit right and work right ... local dealers, repair parts distributors and service companies. If you need replacement parts If you still need to build every new WHIRLPOOL® appliance. See "Assistance or Service" section for assistance or service, please check "Troubleshooting."
Owners Manual
Page 16
...FROM WARRANTY This limited warranty does not cover: 1. Service calls to correct the installation of your major appliance, to instruct you need it was purchased. WHIRLPOOL SHALL NOT BE LIABLE FOR INCIDENTAL OR CONSEQUENTIAL DAMAGES. SOME STATES AND PROVINCES DO NOT ALLOW THE ... number has been altered or removed from unauthorized modifications made to the appliance. 9. Costs associated with the product, Whirlpool Corporation or Whirlpool Canada LP (hereafter "Whirlpool") will need to repair or replace appliance light bulbs, air filters or water filters. You must be easily determined...
...FROM WARRANTY This limited warranty does not cover: 1. Service calls to correct the installation of your major appliance, to instruct you need it was purchased. WHIRLPOOL SHALL NOT BE LIABLE FOR INCIDENTAL OR CONSEQUENTIAL DAMAGES. SOME STATES AND PROVINCES DO NOT ALLOW THE ... number has been altered or removed from unauthorized modifications made to the appliance. 9. Costs associated with the product, Whirlpool Corporation or Whirlpool Canada LP (hereafter "Whirlpool") will need to repair or replace appliance light bulbs, air filters or water filters. You must be easily determined...
Installation Instructions
Page 2
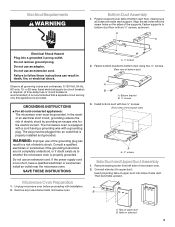
... can happen if the instructions are very important. Template (1) 2 A. Bottom duct supports (2) H. We have provided many important safety messages in this manual and on your appliance. Bottom bracket (1) I J F.
... can happen if the instructions are very important. Template (1) 2 A. Bottom duct supports (2) H. We have provided many important safety messages in this manual and on your appliance. Bottom bracket (1) I J F.
Installation Instructions
Page 3
... grounded. Failure to upper duct: Insert projecting tabs of upper duct into holes of electric shock. GROUNDING INSTRUCTIONS s For all cord connected appliances: The microwave oven must be plugged into a grounded 3 prong outlet. In the event of an electrical short circuit, grounding reduces the risk of microwave oven) A A. &#...
... grounded. Failure to upper duct: Insert projecting tabs of upper duct into holes of electric shock. GROUNDING INSTRUCTIONS s For all cord connected appliances: The microwave oven must be plugged into a grounded 3 prong outlet. In the event of an electrical short circuit, grounding reduces the risk of microwave oven) A A. &#...
Technical Guide
Page 5
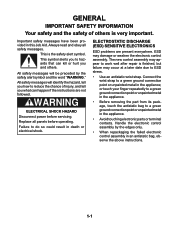
...antistatic bag, observe the above instructions. 1-1 ESD may occur at a later date due to a green ground connection point or unpainted metal in the appliance; The new control assembly may appear to work well after repair is the safety alert symbol. ELECTROSTATIC DISCHARGE (ESD) SENSITIVE ELECTRONICS ESD problems are ...not followed. or touch your finger repeatedly to a green ground connection point or unpainted metal in the appliance. • Before removing the part from its package, touch the antistatic bag to do so could result in the...
...antistatic bag, observe the above instructions. 1-1 ESD may occur at a later date due to a green ground connection point or unpainted metal in the appliance; The new control assembly may appear to work well after repair is the safety alert symbol. ELECTROSTATIC DISCHARGE (ESD) SENSITIVE ELECTRONICS ESD problems are ...not followed. or touch your finger repeatedly to a green ground connection point or unpainted metal in the appliance. • Before removing the part from its package, touch the antistatic bag to do so could result in the...
Technical Guide
Page 11
...be found by checking the "Requesting Assistance or Service" section, or by Whirlpool. Instruct you need service first see the "Troubleshooting" section of the Use and Care Guide. C. Damage to the appliance. KITCHENAID SHALL NOT BE LIABLE FOR INCIDENTAL OR CONSEQUENTIAL DAMAGES. Pickup and... is used in the U.S.A. After checking "Troubleshooting," additional help can be provided by unauthorized modifications made to your authorized Whirlpool or KitchenAid distributor or military exchange. FIVE YEAR LIMITED WARRANTY 2nd through 5th Year TEN YEAR LIMITED WARRANTY 2nd through 10th...
...be found by checking the "Requesting Assistance or Service" section, or by Whirlpool. Instruct you need service first see the "Troubleshooting" section of the Use and Care Guide. C. Damage to the appliance. KITCHENAID SHALL NOT BE LIABLE FOR INCIDENTAL OR CONSEQUENTIAL DAMAGES. Pickup and... is used in the U.S.A. After checking "Troubleshooting," additional help can be provided by unauthorized modifications made to your authorized Whirlpool or KitchenAid distributor or military exchange. FIVE YEAR LIMITED WARRANTY 2nd through 5th Year TEN YEAR LIMITED WARRANTY 2nd through 10th...
Technical Guide
Page 12
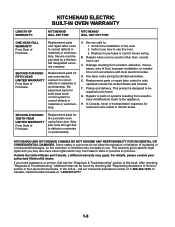
... when oven is designed to correct defects in accordance with local electrical codes. Replacement parts for any oven electric element to you how to the appliance. This warranty gives specific legal rights and you need assistance or service, first see the "Diagnosis & Troubleshooting" section of incidental or consequential damages, so this...
... when oven is designed to correct defects in accordance with local electrical codes. Replacement parts for any oven electric element to you how to the appliance. This warranty gives specific legal rights and you need assistance or service, first see the "Diagnosis & Troubleshooting" section of incidental or consequential damages, so this...
Technical Guide
Page 13
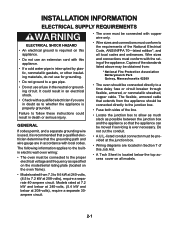
...and connections must be connected to the proper electrical voltage and frequency as possible between the junction box and the appliance so that the appliance can be provided at 208-volts), require a separate 40-ampere circuit. INSTALLATION INFORMATION ELECTRICAL SUPPLY REQUIREMENTS WARNING ELECTRICAL ...SHOCK HAZARD • An electrical ground is required on this appliance. • Do not use an extension cord with this Job Aid. • A Tech Sheet is located below at 240-volts...
...and connections must be connected to the proper electrical voltage and frequency as possible between the junction box and the appliance so that the appliance can be provided at 208-volts), require a separate 40-ampere circuit. INSTALLATION INFORMATION ELECTRICAL SUPPLY REQUIREMENTS WARNING ELECTRICAL ...SHOCK HAZARD • An electrical ground is required on this appliance. • Do not use an extension cord with this Job Aid. • A Tech Sheet is located below at 240-volts...

Technical Guide
Page 14
.... 8. Replace the junction box cover. Disconnect the power going to the U.L.-listed conduit connector. 4. Connect the bare grounding wire from the appliance to the junction box inlet. 2. Insert the end of the flexible conduit through 11. 6. Open the junction box cover and connect the ... electrical ground is permanently grounded. • Turn off power to the junction box before making the electrical connections. • Connect the appliance to follow these instructions could result in the junction box. 11. Connect the ends of the red wires together with twist-on connectors ...
.... 8. Replace the junction box cover. Disconnect the power going to the U.L.-listed conduit connector. 4. Connect the bare grounding wire from the appliance to the junction box inlet. 2. Insert the end of the flexible conduit through 11. 6. Open the junction box cover and connect the ... electrical ground is permanently grounded. • Turn off power to the junction box before making the electrical connections. • Connect the appliance to follow these instructions could result in the junction box. 11. Connect the ends of the red wires together with twist-on connectors ...
Technical Guide
Page 47
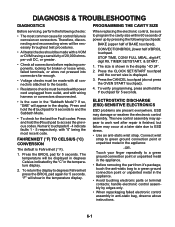
...- 5 respectively, with "0" being the most common cause for 5 seconds. To return the display to a green ground connection point or unpainted metal in the appliance. • Avoid touching electronic parts or terminal contacts; STOP TIME, CONV FULL MEAL, digit #7, digit #9, TIMER SET/START, & START. 1. Press the... display. 2. PROGRAMMING THE CAVITY SIZE When replacing the electronic control, be displayed in degrees Celsius indicated by the "C" in the appliance -OR- Press the CANCEL touchpad (do not press the OVEN START touchpad). 4. Press the BROIL pad for 5 seconds. handle...
...- 5 respectively, with "0" being the most common cause for 5 seconds. To return the display to a green ground connection point or unpainted metal in the appliance. • Avoid touching electronic parts or terminal contacts; STOP TIME, CONV FULL MEAL, digit #7, digit #9, TIMER SET/START, & START. 1. Press the... display. 2. PROGRAMMING THE CAVITY SIZE When replacing the electronic control, be displayed in degrees Celsius indicated by the "C" in the appliance -OR- Press the CANCEL touchpad (do not press the OVEN START touchpad). 4. Press the BROIL pad for 5 seconds. handle...