
XVT3D424SV User Manual
Page 2
... could exceed the limits necessary to qualify for ENERGY STAR rating. Changing the factory default picture settings or enabling other features will be achieved. VIZIO, THE V LOGO, WHERE VISION MEETS VALUE, AND OTHER VIZIO TRADEMARKS ARE THE INTELLECTUAL PROPERTY OF VIZIO INC. RealD 3D Certified. SRS TruSurround HD and SRS TruVolume are trademarks of SRS...
... could exceed the limits necessary to qualify for ENERGY STAR rating. Changing the factory default picture settings or enabling other features will be achieved. VIZIO, THE V LOGO, WHERE VISION MEETS VALUE, AND OTHER VIZIO TRADEMARKS ARE THE INTELLECTUAL PROPERTY OF VIZIO INC. RealD 3D Certified. SRS TruSurround HD and SRS TruVolume are trademarks of SRS...

XVT3D424SV User Manual
Page 9
... Closed Captions 21 Using the Sleep Timer...22 Adjusting the TV Settings...23 Changing the Input Source...23 Adjusting the Picture Settings...24 Adjusting the Advanced Picture Settings 25 Adjusting the Color Temperature 26 Adjusting the Picture Size and Position 26 Resetting the Picture Settings 27 Adjusting the Audio Settings...27 Adjusting the Advanced Audio Settings 28 Resetting the Audio...
... Closed Captions 21 Using the Sleep Timer...22 Adjusting the TV Settings...23 Changing the Input Source...23 Adjusting the Picture Settings...24 Adjusting the Advanced Picture Settings 25 Adjusting the Color Temperature 26 Adjusting the Picture Size and Position 26 Resetting the Picture Settings 27 Adjusting the Audio Settings...27 Adjusting the Advanced Audio Settings 28 Resetting the Audio...
XVT3D424SV User Manual
Page 10
...Changing the Parental Control Passcode 35 Resetting the Content Locks...35 Changing the On-Screen Menu Language 36 Setting the Time Zone...36 Using Picture-In-Picture (PIP) / Picture-Outside-Picture (POP 37 Choosing Inputs for the Main and Secondary Windows 37 Using the Network Connection Menu 38 Connecting...Menu...40 Displaying System Information 40 Resetting the TV Settings...40 Restoring the TV to Factory Default Settings 41 Using Guided Setup...41 Using the Digital Episode Guide...42 Using the Info Window...42 Chapter 6: Using VIZIO Internet Apps 43 Using the VIA Shortcut Buttons......
...Changing the Parental Control Passcode 35 Resetting the Content Locks...35 Changing the On-Screen Menu Language 36 Setting the Time Zone...36 Using Picture-In-Picture (PIP) / Picture-Outside-Picture (POP 37 Choosing Inputs for the Main and Secondary Windows 37 Using the Network Connection Menu 38 Connecting...Menu...40 Displaying System Information 40 Resetting the TV Settings...40 Restoring the TV to Factory Default Settings 41 Using Guided Setup...41 Using the Digital Episode Guide...42 Using the Info Window...42 Chapter 6: Using VIZIO Internet Apps 43 Using the VIA Shortcut Buttons......
XVT3D424SV User Manual
Page 11
Power will be turned off 53 The Jag Wheel is displayed as two separate images 53 I press buttons on the remote, nothing happens 52 The picture quality seems low...52 The display has dots (pixels) that do not change color 52 The display image does not cover the entire screen 52 ... Creating a New User Profile...45 Removing a User Profile...46 Restoring the VIA Dock to the Factory Default Settings 47 Chapter 7: Viewing 3D Content 48 What You Need to View 3D Content 48 How VIZIO 3D Works...49 Watching Full HD 3D Content...50 Watching SBS, TB, or Sensio 3D Content 50 Appendix...
Power will be turned off 53 The Jag Wheel is displayed as two separate images 53 I press buttons on the remote, nothing happens 52 The picture quality seems low...52 The display has dots (pixels) that do not change color 52 The display image does not cover the entire screen 52 ... Creating a New User Profile...45 Removing a User Profile...46 Restoring the VIA Dock to the Factory Default Settings 47 Chapter 7: Viewing 3D Content 48 What You Need to View 3D Content 48 How VIZIO 3D Works...49 Watching Full HD 3D Content...50 Watching SBS, TB, or Sensio 3D Content 50 Appendix...

XVT3D424SV User Manual
Page 31
... button at any time to return to the previous menu screen. The on -screen menu by pressing the VIA button and selecting HDTV Settings from the VIA Dock, then pressing OK. Chapter 5: Using the On-Screen Menu Your TV features an easy-to-use on the remote...can: • Change the 3D mode • Change the screen aspect radio • Set up closed captioning • Activate the sleep timer • Adjust the TV settings • Adjust PIP (Picture-in-Picture) controls • Adjust Network Settings • Pair Bluetooth devices • Access the Help menu While navigating the on-screen...
... button at any time to return to the previous menu screen. The on -screen menu by pressing the VIA button and selecting HDTV Settings from the VIA Dock, then pressing OK. Chapter 5: Using the On-Screen Menu Your TV features an easy-to-use on the remote...can: • Change the 3D mode • Change the screen aspect radio • Set up closed captioning • Activate the sleep timer • Adjust the TV settings • Adjust PIP (Picture-in-Picture) controls • Adjust Network Settings • Pair Bluetooth devices • Access the Help menu While navigating the on-screen...
XVT3D424SV User Manual
Page 35
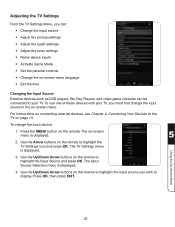
... EXIT. Adjusting the TV Settings From the TV Settings Menu, you can: • Change the input source • Adjust the picture settings • Adjust the audio settings • Adjust the tuner settings • Name device inputs • Activate Game Mode • Set the parental controls •... Change the on-screen menu language • Set the time Changing the Input Source ...
... EXIT. Adjusting the TV Settings From the TV Settings Menu, you can: • Change the input source • Adjust the picture settings • Adjust the audio settings • Adjust the tuner settings • Name device inputs • Activate Game Mode • Set the parental controls •... Change the on-screen menu language • Set the time Changing the Input Source ...

XVT3D424SV User Manual
Page 36
... sports. Adjusts the LED brightness to affect the overall brilliance of the picture. To adjust the picture settings: 1. See Adjusting the Advanced Picture Settings on the remote to highlight the TV Settings icon and press OK. Adjusts the intensity of the picture. Adjusting the Picture Settings Your TV display can be difficult to distinguish in dark or bright areas...
... sports. Adjusts the LED brightness to affect the overall brilliance of the picture. To adjust the picture settings: 1. See Adjusting the Advanced Picture Settings on the remote to highlight the TV Settings icon and press OK. Adjusts the intensity of the picture. Adjusting the Picture Settings Your TV display can be difficult to distinguish in dark or bright areas...

XVT3D424SV User Manual
Page 37
It can be unable to highlight the setting you have finished adjusting the Advanced Picture Settings, press the EXIT button on the remote. 25 Adjusting the Advanced Picture Settings To adjust the advanced picture settings: 1. Use the Arrow buttons on , you will not produce detail that does not otherwise ... Select Auto or Off. Select Off or On. From the Picture Settings menu, use the Arrow buttons to optimize the brightness of compensation used to highlight Advanced Picture, then press OK. Optimizes the picture for the Smooth Motion™ effect. Smart Dimming - Detects the...
It can be unable to highlight the setting you have finished adjusting the Advanced Picture Settings, press the EXIT button on the remote. 25 Adjusting the Advanced Picture Settings To adjust the advanced picture settings: 1. Use the Arrow buttons on , you will not produce detail that does not otherwise ... Select Auto or Off. Select Off or On. From the Picture Settings menu, use the Arrow buttons to optimize the brightness of compensation used to highlight Advanced Picture, then press OK. Optimizes the picture for the Smooth Motion™ effect. Smart Dimming - Detects the...

XVT3D424SV User Manual
Page 38
... amount of each color in the display. 5 4. Adjusts the position of each color in the display. To adjust the picture size and position: 1. From the Picture Settings menu, use the Arrow buttons to highlight Size & Position, then press OK. Use the Arrow buttons on the remote to...OK. 3. Adjusting the Color Temperature Adjusting the color temperature will change the setting: 26 Use the Arrow buttons on the remote. From the Picture Settings Menu, use the Arrow buttons to the factory default settings, highlight Reset Color Temperature and press OK. 5. Using the On-Screen Menu...
... amount of each color in the display. 5 4. Adjusts the position of each color in the display. To adjust the picture size and position: 1. From the Picture Settings menu, use the Arrow buttons to highlight Size & Position, then press OK. Use the Arrow buttons on the remote to...OK. 3. Adjusting the Color Temperature Adjusting the color temperature will change the setting: 26 Use the Arrow buttons on the remote. From the Picture Settings Menu, use the Arrow buttons to the factory default settings, highlight Reset Color Temperature and press OK. 5. Using the On-Screen Menu...

XVT3D424SV User Manual
Page 39
... Press the MENU button on the remote. The Audio Settings menu is displayed. 3. Balance - Adjusts the loudness of the display image. From the Picture Settings menu, use the Arrow buttons to the factory default settings: 1. The TV Settings menu is displayed. 4. Adjusts the synchronization between the ...you sure you wish to adjust, then press Left/Right Arrow to highlight the TV Settings icon and press OK. Use the Arrow buttons to highlight the setting you want to RESET Picture Settings to optimal size and position. (RGB input only.) Horiz. Highlight Yes and press...
... Press the MENU button on the remote. The Audio Settings menu is displayed. 3. Balance - Adjusts the loudness of the display image. From the Picture Settings menu, use the Arrow buttons to the factory default settings: 1. The TV Settings menu is displayed. 4. Adjusts the synchronization between the ...you sure you wish to adjust, then press Left/Right Arrow to highlight the TV Settings icon and press OK. Use the Arrow buttons to highlight the setting you want to RESET Picture Settings to optimal size and position. (RGB input only.) Horiz. Highlight Yes and press...

XVT3D424SV User Manual
Page 49
...To enable or disable PIP/POP: 1. Highlight PIP Mode and press OK. The PIP Controls menu is set to Off. Highlight Off, PIP, or POP. PIP is only available when the Rating Enable option in a... using PIP/POP. Select Small, Medium, or Large. Use the table below to adjust each of the PIP settings: Position - Use the Arrow buttons on -screen menu is displayed in the Parental Controls menu is displayed. 4....the main input is displayed on the remote. Using Picture-In-Picture (PIP) / Picture-Outside-Picture (POP) Your TV features PIP and POP modes. Select Main or PIP. 6.
...To enable or disable PIP/POP: 1. Highlight PIP Mode and press OK. The PIP Controls menu is set to Off. Highlight Off, PIP, or POP. PIP is only available when the Rating Enable option in a... using PIP/POP. Select Small, Medium, or Large. Use the table below to adjust each of the PIP settings: Position - Use the Arrow buttons on -screen menu is displayed in the Parental Controls menu is displayed. 4....the main input is displayed on the remote. Using Picture-In-Picture (PIP) / Picture-Outside-Picture (POP) Your TV features PIP and POP modes. Select Main or PIP. 6.

XVT3D424SV User Manual
Page 52
... remote to scroll through the system information. 5. 4. Use the Arrow buttons on the remote. Using the On-Screen Menu Resetting the TV Settings To reset the TV's picture and audio settings: 1. Use the Arrow buttons on -screen menu is displayed. 3. If the pairing is displayed. 2. When you are pairing the included Bluetooth remote...
... remote to scroll through the system information. 5. 4. Use the Arrow buttons on the remote. Using the On-Screen Menu Resetting the TV Settings To reset the TV's picture and audio settings: 1. Use the Arrow buttons on -screen menu is displayed. 3. If the pairing is displayed. 2. When you are pairing the included Bluetooth remote...

XVT3D424SV User Manual
Page 63
Address: Phone: Fax: Email: 39 Tesla Irvine, CA 92618, USA (877) 698-4946 (949) 585-9563 techsupport@vizio.com Web: www.VIZIO.com Hours of VIZIO's commitment to a defect. Troubleshooting • Make sure the ON/OFF switch is turned to ON, then press the Power button on the remote... external antenna connected to the TV, see Setting Up an External Antenna • If you are integral parts of operation: Monday - If you are no headphones connected to -air television signals. There is working. Sunday: 8 am to be sure mute is a picture, but no power. The TV displays "...
Address: Phone: Fax: Email: 39 Tesla Irvine, CA 92618, USA (877) 698-4946 (949) 585-9563 techsupport@vizio.com Web: www.VIZIO.com Hours of VIZIO's commitment to a defect. Troubleshooting • Make sure the ON/OFF switch is turned to ON, then press the Power button on the remote... external antenna connected to the TV, see Setting Up an External Antenna • If you are integral parts of operation: Monday - If you are no headphones connected to -air television signals. There is working. Sunday: 8 am to be sure mute is a picture, but no power. The TV displays "...

XVT3D424SV User Manual
Page 64
... input source. • Ensure the TV's battery is fully charged. See Getting Started for instructions on the remote, then select Settings > Screen Mode > Wide. See Adjusting Picture Settings. • If you are using an antenna, ensure it is receiving. 52 The colors do not change color. • ..., they may not display. The display image does not cover the entire screen. • Change the screen mode. Press MENU, then select Settings > Picture Settings. Adjust the antenna or move the TV to get a better signal. This is common in a moving vehicle, the TV will not receive...
... input source. • Ensure the TV's battery is fully charged. See Getting Started for instructions on the remote, then select Settings > Screen Mode > Wide. See Adjusting Picture Settings. • If you are using an antenna, ensure it is receiving. 52 The colors do not change color. • ..., they may not display. The display image does not cover the entire screen. • Change the screen mode. Press MENU, then select Settings > Picture Settings. Adjust the antenna or move the TV to get a better signal. This is common in a moving vehicle, the TV will not receive...
XVT3D424SV User Manual
Page 71
...mode 20 O On-Screen Menu 19 On-Screen Menu Language 36 Owner PIN 45 P Parental Control Passcode 35 Parental Controls Menu 33 Picture-In-Picture 37 Picture Settings 24 Picture Size and Position 26 Program Ratings 34 Q Quick Menu 6 R Real Cinema Mode 25 Rear Panel 5 Remote Control Buttons 8 Removing... Control 9 Adaptive Luma 25 Adding a New App 44 Adding New Channels 30 Advanced Audio Settings 28 Advanced Network Settings 39 Advanced Picture Settings 25 Ambient Light Sensor 25 Audio Language 31 Audio Settings 27 Auto Adjust 27 Auto Channel Scan 30 B Backlight 24 Blocking and Unblocking Content 34 ...
...mode 20 O On-Screen Menu 19 On-Screen Menu Language 36 Owner PIN 45 P Parental Control Passcode 35 Parental Controls Menu 33 Picture-In-Picture 37 Picture Settings 24 Picture Size and Position 26 Program Ratings 34 Q Quick Menu 6 R Real Cinema Mode 25 Rear Panel 5 Remote Control Buttons 8 Removing... Control 9 Adaptive Luma 25 Adding a New App 44 Adding New Channels 30 Advanced Audio Settings 28 Advanced Network Settings 39 Advanced Picture Settings 25 Ambient Light Sensor 25 Audio Language 31 Audio Settings 27 Auto Adjust 27 Auto Channel Scan 30 B Backlight 24 Blocking and Unblocking Content 34 ...

XVT3D424SV Quick Start Guide
Page 18
... sound. • Press the Volume Up button on the remote, or turn the 3D HDTV on -screen menu. Ensure TV Speakers is off . There is a picture, but there is no power. • Ensure the power cord is Enabled/Auto. (Refer to your player's user guide.) I cannot view 3D content. • ...Ensure you have a 3D Blu-ray™ player, VIZIO 3D glasses, and a Blu-ray 3D™ disc. • Turn your 3D Blu-ray player's 3D setting is securely connected to play your Blu-ray 3D™ movie again. • Ensure your 3D HDTV...
... sound. • Press the Volume Up button on the remote, or turn the 3D HDTV on -screen menu. Ensure TV Speakers is off . There is a picture, but there is no power. • Ensure the power cord is Enabled/Auto. (Refer to your player's user guide.) I cannot view 3D content. • ...Ensure you have a 3D Blu-ray™ player, VIZIO 3D glasses, and a Blu-ray 3D™ disc. • Turn your 3D Blu-ray player's 3D setting is securely connected to play your Blu-ray 3D™ movie again. • Ensure your 3D HDTV...
XVT3D424SV Quick Start Guide
Page 19
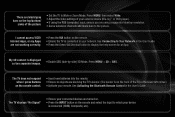
... you are using a supported desktop resolution. • Some television channels add black bars to the picture. I press buttons on the front of the TV, in the User's Guide. The TV does not respond when I cannot access VIZIO Internet Apps, or my Apps are not working correctly. • Press the VIA button on.... • Ensure no objects are blocking the TV's sensor. (The sensor is connected to your network. Press MENU, then select Wide. • Adjust the video settings of the picture. • Set the TV to display the help screen for an App. Press MENU > 3D > SBS.
... you are using a supported desktop resolution. • Some television channels add black bars to the picture. I press buttons on the front of the TV, in the User's Guide. The TV does not respond when I cannot access VIZIO Internet Apps, or my Apps are not working correctly. • Press the VIA button on.... • Ensure no objects are blocking the TV's sensor. (The sensor is connected to your network. Press MENU, then select Wide. • Adjust the video settings of the picture. • Set the TV to display the help screen for an App. Press MENU > 3D > SBS.


