
Download
Page 10
VIEWING THE ON-SCREEN USER MANUAL 1 2 MENU Button VIZIO TV SETTINGS Picture Audio Timers Network Tuner CC Closed Captions Devices System Guided Setup User Manual Wide Zoom Normal Panoramic Exit 2D 3D ABC User Input Wide CC Manual Sleep Timer Picture Audio Network Settings Help Press the MENU button on the Remote Control to display the TV SETTINGS menu. Highlight User Manual and press OK.
VIEWING THE ON-SCREEN USER MANUAL 1 2 MENU Button VIZIO TV SETTINGS Picture Audio Timers Network Tuner CC Closed Captions Devices System Guided Setup User Manual Wide Zoom Normal Panoramic Exit 2D 3D ABC User Input Wide CC Manual Sleep Timer Picture Audio Network Settings Help Press the MENU button on the Remote Control to display the TV SETTINGS menu. Highlight User Manual and press OK.

Download
Page 12
... Wireless Router High-speed Internet connection SSID (Wireless network name) Network Password VIZIO TV SETTINGS Picture Audio Timers Network Tuner CC Closed Captions Devices System Guided Setup User Manual Wide VIZIO GUIDED SETUP ZoToumner SeNtuoprmal Panoramic Network Setup Exit 2D 3D ABC Input Wide ...CC Sleep Timer Picture Audio Network Settings Help Wide Exit Input Sleep Timer Networ For streaming video, your...
... Wireless Router High-speed Internet connection SSID (Wireless network name) Network Password VIZIO TV SETTINGS Picture Audio Timers Network Tuner CC Closed Captions Devices System Guided Setup User Manual Wide VIZIO GUIDED SETUP ZoToumner SeNtuoprmal Panoramic Network Setup Exit 2D 3D ABC Input Wide ...CC Sleep Timer Picture Audio Network Settings Help Wide Exit Input Sleep Timer Networ For streaming video, your...
Download
Page 18
...Audio. Press the WIDE button on the top/ bottom/sides of the screen. • Note that some television channels add black bars to the picture. • Set the TV image mode so that all of your device is connected (TV, HDMI-1, COMP, etc.). Press MENU > Guided Setup. There are turned... until the screen is filled, and then press OK. • Adjust the video settings of your settings will be lost. Select Reset. If you need and press OK. Remember that the picture fills the screen. There is a picture, but there is no power. • Be sure the power cord is securely ...
...Audio. Press the WIDE button on the top/ bottom/sides of the screen. • Note that some television channels add black bars to the picture. • Set the TV image mode so that all of your device is connected (TV, HDMI-1, COMP, etc.). Press MENU > Guided Setup. There are turned... until the screen is filled, and then press OK. • Adjust the video settings of your settings will be lost. Select Reset. If you need and press OK. Remember that the picture fills the screen. There is a picture, but there is no power. • Be sure the power cord is securely ...

Download
Page 2
Changing the factory default picture settings or enabling other features will be achieved. All Rights Reserved. Dolby and the double-D symbol are registered trademarks, and DTS Studio Sound is the setting in which power savings will increase power consumption that could exceed the limits necessary to qualify for ENERGY STAR rating. For DTS patents... logo and High-Definition Multimedia Interface are trademarks or registered trademarks of HDMI Licensing LLC. This product qualifies for ENERGY STAR in the "factory default" setting and this is a trademark of DTS, Inc. © DTS, Inc.
Changing the factory default picture settings or enabling other features will be achieved. All Rights Reserved. Dolby and the double-D symbol are registered trademarks, and DTS Studio Sound is the setting in which power savings will increase power consumption that could exceed the limits necessary to qualify for ENERGY STAR rating. For DTS patents... logo and High-Definition Multimedia Interface are trademarks or registered trademarks of HDMI Licensing LLC. This product qualifies for ENERGY STAR in the "factory default" setting and this is a trademark of DTS, Inc. © DTS, Inc.

Download
Page 7
... 21 Changing the Screen Aspect Ratio 21 Adjusting the Picture Settings 22 Adjusting the Picture Size and Position 23 Adjusting the Color Temperature 23 Adjusting the Advanced Picture Settings 24 Resetting the Picture Settings 24 Adjusting the Audio Settings 25 Resetting the Audio Settings 26 Activating the Sleep Timer 26 Setting the Auto Power Off Feature 27 Using the Network...
... 21 Changing the Screen Aspect Ratio 21 Adjusting the Picture Settings 22 Adjusting the Picture Size and Position 23 Adjusting the Color Temperature 23 Adjusting the Advanced Picture Settings 24 Resetting the Picture Settings 24 Adjusting the Audio Settings 25 Resetting the Audio Settings 26 Activating the Sleep Timer 26 Setting the Auto Power Off Feature 27 Using the Network...

Download
Page 26
...-screen menu, you can: • Adjust the Picture settings • Adjust the Audio settings • Activate the Sleep Timer • Adjust the Network settings • Adjust the Tuner settings • Set up Closed Captioning • Adjust TV Settings • Access the Guided Setup • Access the User Manual VIZIO TV SETTINGS Picture Audio Timers Network Tuner CC Closed Captions System...
...-screen menu, you can: • Adjust the Picture settings • Adjust the Audio settings • Activate the Sleep Timer • Adjust the Network settings • Adjust the Tuner settings • Set up Closed Captioning • Adjust TV Settings • Access the Guided Setup • Access the User Manual VIZIO TV SETTINGS Picture Audio Timers Network Tuner CC Closed Captions System...
Download
Page 27
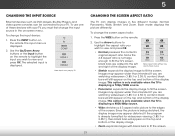
The input menu is being stretched, the display image may appear distorted. Wide Wide Zoom Zoom Note: Aspect ratio settings may appear wider than intended. Since the picture is displayed. 2. This option is only available when the TV is displayed. To change the screen aspect ratio: 1. ...The selected input is displaying a 480i/480p source. • Wide stretches a 4:3 aspect ratio picture to the edges of the display image. To change the input device: 1. Since the 4:3 aspect ratio is not large enough to fill the...
The input menu is being stretched, the display image may appear distorted. Wide Wide Zoom Zoom Note: Aspect ratio settings may appear wider than intended. Since the picture is displayed. 2. This option is only available when the TV is displayed. To change the screen aspect ratio: 1. ...The selected input is displaying a 480i/480p source. • Wide stretches a 4:3 aspect ratio picture to the edges of the display image. To change the input device: 1. Since the 4:3 aspect ratio is not large enough to fill the...

Download
Page 28
... the Left/Right Arrow buttons to change each individual setting by using the Left/Right Arrow buttons to change the picture mode: VIZIO PICTURE Picture Mode Backlight Brightness Contrast Color Tint Sharpness Standard - + 50 - + 50 - + 50 - + 50 - +0 - +0 More • Standard mode sets the various picture settings to values that does not otherwise exist. To reduce video delay (lag...
... the Left/Right Arrow buttons to change each individual setting by using the Left/Right Arrow buttons to change the picture mode: VIZIO PICTURE Picture Mode Backlight Brightness Contrast Color Tint Sharpness Standard - + 50 - + 50 - + 50 - + 50 - +0 - +0 More • Standard mode sets the various picture settings to values that does not otherwise exist. To reduce video delay (lag...

Download
Page 29
... and position adjustments depend on the remote. 23 Adjusting the Color Temperature Adjusting the color temperature will change each of the color temperature settings: VIZIO COLOR TEMPERATURE Color Temperature Red Gain - - Position - Adjusts the vertical (up/down) position of the display image. • Vertical...adjusting the size and position, press the EXIT button on signal source. Adjusts the position of the picture. To adjust the picture size and position: 1. From the PICTURE menu, use the Left/Right ArrAoBwC buttons to manually change the "warmness" or "coolness" of the...
... and position adjustments depend on the remote. 23 Adjusting the Color Temperature Adjusting the color temperature will change each of the color temperature settings: VIZIO COLOR TEMPERATURE Color Temperature Red Gain - - Position - Adjusts the vertical (up/down) position of the display image. • Vertical...adjusting the size and position, press the EXIT button on signal source. Adjusts the position of the picture. To adjust the picture size and position: 1. From the PICTURE menu, use the Left/Right ArrAoBwC buttons to manually change the "warmness" or "coolness" of the...

Download
Page 30
5 Adjusting the Advanced Picture Settings To adjust the advanced picture settings: 1. VIZIO ADVANCED PICTURE Auto Brightness Control Black Detail Smart Dimming Reduce Signal Noise Reduce Block Noise Film Mode Medium Medium On Low Low Auto 3....Off, Low, Medium, or High. • Film Mode - Optimizes the picture for large areas of the screen by the digitizing of image motion content. Resetting the Picture Settings To reset the picture settings to the factory default settings: 1.WiFderomZtohome PICNoTrUmRalE mPaneonraum,icuse the Arrow buttons to compensate for watching film. ...
5 Adjusting the Advanced Picture Settings To adjust the advanced picture settings: 1. VIZIO ADVANCED PICTURE Auto Brightness Control Black Detail Smart Dimming Reduce Signal Noise Reduce Block Noise Film Mode Medium Medium On Low Low Auto 3....Off, Low, Medium, or High. • Film Mode - Optimizes the picture for large areas of the screen by the digitizing of image motion content. Resetting the Picture Settings To reset the picture settings to the factory default settings: 1.WiFderomZtohome PICNoTrUmRalE mPaneonraum,icuse the Arrow buttons to compensate for watching film. ...

Download
Page 34
...the Arrow buttons on the remote. To change advanced network settings: 1. Press the EXIT button on the remote to the TV. The MANUAL SETUP menu is displayed. Input Wide CC Sleep Timer Picture Audio Network Settings Help 28 Use the Arrow and OK buttons to highlight ...DHCP and then use are displayed: • RJ45 MAC - From the NETWORK menu, highlight Manual Setup and VIZIO press OK. DNS Server - 5 Changing the Manual Setup Settings Advanced users can ...
...the Arrow buttons on the remote. To change advanced network settings: 1. Press the EXIT button on the remote to the TV. The MANUAL SETUP menu is displayed. Input Wide CC Sleep Timer Picture Audio Network Settings Help 28 Use the Arrow and OK buttons to highlight ...DHCP and then use are displayed: • RJ45 MAC - From the NETWORK menu, highlight Manual Setup and VIZIO press OK. DNS Server - 5 Changing the Manual Setup Settings Advanced users can ...
Download
Page 36
Press EXIT. VIZIO CHANNEL SCAN Channels Found Digital: 0 Analog: 19 18% Complete Cancel If the channel scan is displayed. 2. To add a range of channel you are available. The ... Adding New Channels Occasionally, you may also be using the Partial Channel Search and Add Analog Channel options. ABC Input Wide CC Sleep Timer Picture Audio Network Settings Help 30 The TUNER MODE menu displays. 2. The auto channel scan begins. 2. The partial channel search begins. 6. Highlight To Channel and enter the channel...
Press EXIT. VIZIO CHANNEL SCAN Channels Found Digital: 0 Analog: 19 18% Complete Cancel If the channel scan is displayed. 2. To add a range of channel you are available. The ... Adding New Channels Occasionally, you may also be using the Partial Channel Search and Add Analog Channel options. ABC Input Wide CC Sleep Timer Picture Audio Network Settings Help 30 The TUNER MODE menu displays. 2. The auto channel scan begins. 2. The partial channel search begins. 6. Highlight To Channel and enter the channel...

Download
Page 38
... Analog Audio feature only works when the program being viewed is displayed. 2. From the TUNER menu, highlight Analog Audio and press OK. VIZIO ANALOG AUDIO Stereo SAP Mono To use the Analog Audio feature: 1. SAP allows you to listen to audio in the language you to ...Stereo, or SAP (secondary audio programming). Wide Zoom Normal Panoramic Exit 2D 3D ABC Input Wide CC VIZIO DIGITAL LANGUAGE English Français Español Sleep Timer Picture Audio Network Settings Help 32 Select your preferred language: English, Français or Español. From the ...
... Analog Audio feature only works when the program being viewed is displayed. 2. From the TUNER menu, highlight Analog Audio and press OK. VIZIO ANALOG AUDIO Stereo SAP Mono To use the Analog Audio feature: 1. SAP allows you to listen to audio in the language you to ...Stereo, or SAP (secondary audio programming). Wide Zoom Normal Panoramic Exit 2D 3D ABC Input Wide CC VIZIO DIGITAL LANGUAGE English Français Español Sleep Timer Picture Audio Network Settings Help 32 Select your preferred language: English, Français or Español. From the ...

Download
Page 40
... Input Wide CC Sleep Timer Picture Audio Network Settings Help 34 Use the Arrow buttons on -screen menu is displayed. 3. When you can: • View the System Information • Name the TV inputs • Set up Admin Controls VIZIO SYSTEM System Information Name Input Parental... Controls Menu Language Time and Local Settings CEC Power Indicator Reset & Admin English Off Displaying System Information To display a summary of ...
... Input Wide CC Sleep Timer Picture Audio Network Settings Help 34 Use the Arrow buttons on -screen menu is displayed. 3. When you can: • View the System Information • Name the TV inputs • Set up Admin Controls VIZIO SYSTEM System Information Name Input Parental... Controls Menu Language Time and Local Settings CEC Power Indicator Reset & Admin English Off Displaying System Information To display a summary of ...

Download
Page 41
... name. Using the Parental Controls The TV's parental controls allow you would like to rename and press OK. Sleep Timer Picture Audio Network Settings Help 35 Press the MENU button on the remote. VIZIO NAME INPUT Input Source TV Input Labels TV TV_ abc def ghi j k l mn o p q r s t u v wx y... programs without a password. Press the MENU button on the remote. The NAME INPUT menu is displayed. 3. If you have not set a custom parental passcode, see Changing the Parental Control Passcode on the remote. The SYSTEM menu is displayed. The on -screen keyboard...
... name. Using the Parental Controls The TV's parental controls allow you would like to rename and press OK. Sleep Timer Picture Audio Network Settings Help 35 Press the MENU button on the remote. VIZIO NAME INPUT Input Source TV Input Labels TV TV_ abc def ghi j k l mn o p q r s t u v wx y... programs without a password. Press the MENU button on the remote. The NAME INPUT menu is displayed. 3. If you have not set a custom parental passcode, see Changing the Parental Control Passcode on the remote. The SYSTEM menu is displayed. The on -screen keyboard...

Download
Page 44
... the Arrow buttons on the remote to adjust each setting: • Input CECWidFeunctCioCn - Use the Arrow buttons on the remote to highlight System and press OK. Not all HDMI devices support CEC. VIZIO TIME ZONE Alaska Hawaii Pacific Mountain Central Eastern Atlantic Newfoundland Indiana ...you to highlight Time and Local Settings and press OK. The SYSTEM menu is displayed. Highlight your country and press OK. 9. Press the MENU button on the remote. The CEC menu is displayed. When system audio control is displayed. 2. Picture Audio Device Discovery - The SYSTEM...
... the Arrow buttons on the remote to adjust each setting: • Input CECWidFeunctCioCn - Use the Arrow buttons on the remote to highlight System and press OK. Not all HDMI devices support CEC. VIZIO TIME ZONE Alaska Hawaii Pacific Mountain Central Eastern Atlantic Newfoundland Indiana ...you to highlight Time and Local Settings and press OK. The SYSTEM menu is displayed. Highlight your country and press OK. 9. Press the MENU button on the remote. The CEC menu is displayed. When system audio control is displayed. 2. Picture Audio Device Discovery - The SYSTEM...

Download
Page 46
.... The RESET & ADMIN menu is displayed. 3. Enter your parental control passcode. 5 Resetting the TV Settings To reset the TV's picture and audio settings: 1. The TV displays, "Select Reset to restore video and audio settings to its factory default settings: 1. Highlight Reset and press OK. 7. Highlight Reset and press OK. 6. The TV will turn back on...
.... The RESET & ADMIN menu is displayed. 3. Enter your parental control passcode. 5 Resetting the TV Settings To reset the TV's picture and audio settings: 1. The TV displays, "Select Reset to restore video and audio settings to its factory default settings: 1. Highlight Reset and press OK. 7. Highlight Reset and press OK. 6. The TV will turn back on...

Download
Page 47
VIZIO GUIDED SETUP Tuner Setup Network Setup 3. Connect the TV to connect the TV with your network. 4. Follow the on -screen menu is displayed. 2. Wide Zoom Normal Panoramic Exit 2D 3D ABC Input Wide CC Sleep Timer Picture Audio Network Settings Help 41 To access guided setup: 1. The on -screen instructions. Highlight Guided Setup...
VIZIO GUIDED SETUP Tuner Setup Network Setup 3. Connect the TV to connect the TV with your network. 4. Follow the on -screen menu is displayed. 2. Wide Zoom Normal Panoramic Exit 2D 3D ABC Input Wide CC Sleep Timer Picture Audio Network Settings Help 41 To access guided setup: 1. The on -screen instructions. Highlight Guided Setup...

Download
Page 59
... all cables are securely attached to the TV. • Ensure all cables to ensure they are securely attached. See Resetting the Picture Settings on . Ensure your device's user manual for Channels on the TV don't look right. • Adjust the Color and Tint... to the TV, scan for the best signal. See Adjusting the Picture Settings on the remote to a window for channels. See Adjusting the Picture Settings on page 22. • Press the INPUT button on page 22. • Reset the picture settings. See Scanning for details. • Adjust Brightness, Contrast, or Backlight...
... all cables are securely attached to the TV. • Ensure all cables to ensure they are securely attached. See Resetting the Picture Settings on . Ensure your device's user manual for Channels on the TV don't look right. • Adjust the Color and Tint... to the TV, scan for the best signal. See Adjusting the Picture Settings on the remote to a window for channels. See Adjusting the Picture Settings on page 22. • Press the INPUT button on page 22. • Reset the picture settings. See Scanning for details. • Adjust Brightness, Contrast, or Backlight...


