
E390-A1 User Manual
Page 2
... are trademarks or registered trademarks of SRS Labs, Inc. This product qualifies for ENERGY STAR in the "factory default" setting and this is the setting in which power savings will increase power consumption that could exceed the limits necessary to qualify for ENERGY STAR rating. Manufactured...; HDMI, the HDMI logo and High-Definition Multimedia Interface are trademarks of HDMI Licensing LLC. Changing the factory default picture settings or enabling other features will be achieved. StudioSound HD and TruVolume technologies are incorporated under license from SRS Labs, Inc.
... are trademarks or registered trademarks of SRS Labs, Inc. This product qualifies for ENERGY STAR in the "factory default" setting and this is the setting in which power savings will increase power consumption that could exceed the limits necessary to qualify for ENERGY STAR rating. Manufactured...; HDMI, the HDMI logo and High-Definition Multimedia Interface are trademarks of HDMI Licensing LLC. Changing the factory default picture settings or enabling other features will be achieved. StudioSound HD and TruVolume technologies are incorporated under license from SRS Labs, Inc.
E390-A1 User Manual
Page 7
... the Color Temperature 20 Adjusting the Picture Size and Position 21 Resetting the Picture Settings 21 Adjusting the Audio Settings 21 Adjusting the Advanced Audio Settings 22 Resetting the Audio Settings 23 Changing the TV Settings 23 Changing the Input Source 23 Setting the Tuner Mode 24 Scanning for Channels 24 Adding New Channels 24 Skipping...
... the Color Temperature 20 Adjusting the Picture Size and Position 21 Resetting the Picture Settings 21 Adjusting the Audio Settings 21 Adjusting the Advanced Audio Settings 22 Resetting the Audio Settings 23 Changing the TV Settings 23 Changing the Input Source 23 Setting the Tuner Mode 24 Scanning for Channels 24 Adding New Channels 24 Skipping...

E390-A1 User Manual
Page 18
...; ANALOG BETTER • HD VIDEO (1080i)* • STEREO AUDIO * Maximum Resolution 12 AV CABLE GOOD • ANALOG • VIDEO (480i)* • STEREO AUDIO CONNECTING A DEVICE Set the TV's input to match the connection you used to the TV and the device. 4. Verify that your device has a video port that matches an...
...; ANALOG BETTER • HD VIDEO (1080i)* • STEREO AUDIO * Maximum Resolution 12 AV CABLE GOOD • ANALOG • VIDEO (480i)* • STEREO AUDIO CONNECTING A DEVICE Set the TV's input to match the connection you used to the TV and the device. 4. Verify that your device has a video port that matches an...
E390-A1 User Manual
Page 21
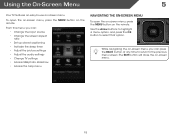
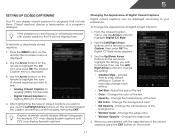
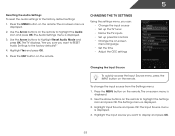
... menu, you can : • Change the input source • Change the screen aspect ratio • Set up closed captioning • Activate the sleep timer • Adjust the picture settings • Adjust the audio settings • Change TV settings • Access USB photo slideshow • Access the help menu Navigating the On-Screen MCeCnu To...
... menu, you can : • Change the input source • Change the screen aspect ratio • Set up closed captioning • Activate the sleep timer • Adjust the picture settings • Adjust the audio settings • Change TV settings • Access USB photo slideshow • Access the help menu Navigating the On-Screen MCeCnu To...
E390-A1 User Manual
Page 22
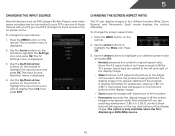
... DVD players, Blu-Ray Players, and video game consoles can display images in the on the top and bottom of the display image. The TV Settings menu is already formatted for widescreen viewing (1.85:1 or 2.35:1), then black bars will still appear on -screen menu. Since the 4:3 aspect ratio is not... image may appear wider than intended. Use the Arrow buttons to highlight the Wide icon. Use the Arrow buttons on the remote to highlight the Settings icon and press OK. Use the Up/Down Arrow buttons on the remote to highlight the input source and press OK. Press OK, then press...
... DVD players, Blu-Ray Players, and video game consoles can display images in the on the top and bottom of the display image. The TV Settings menu is already formatted for widescreen viewing (1.85:1 or 2.35:1), then black bars will still appear on -screen menu. Since the 4:3 aspect ratio is not... image may appear wider than intended. Use the Arrow buttons to highlight the Wide icon. Use the Arrow buttons on the remote to highlight the Settings icon and press OK. Use the Up/Down Arrow buttons on the remote to highlight the input source and press OK. Press OK, then press...
E390-A1 User Manual
Page 23
...programs that include them . Change the transparency of the closed captions: 1. Change the edge color. • Window Opacity - 5 Setting Up Closed Captioning Your TV can be displayed according to highlight the CC icon and press OK. After highlighting the type of closed ...dialogue. Closed captions display a transcription of the background. • Window Color - Use the Arrow buttons on the remote to change each setting. • Text Size - Change the color of Digital Closed Captions Digital closed captions can display closed captions: 1. Change the edge type....
...programs that include them . Change the transparency of the closed captions: 1. Change the edge color. • Window Opacity - 5 Setting Up Closed Captioning Your TV can be displayed according to highlight the CC icon and press OK. After highlighting the type of closed ...dialogue. Closed captions display a transcription of the background. • Window Color - Use the Arrow buttons on the remote to change each setting. • Text Size - Change the color of Digital Closed Captions Digital closed captions can display closed captions: 1. Change the edge type....

E390-A1 User Manual
Page 24
... on -screen menu is displayed. 1. Use the Up/Down Arrow buttons on the remote to turn off: 30, 60, 90, 120, or 180 minutes. 5. To set period of time after which you want the TV to highlight Auto Power Off and press OK. From the Sleep Timer menu, use the sleep... that will turn off after 10 minutes if no signal is being displayed on the remote. The Sleep Timer menu is the recommended setting. • Movie mode sets the picture settings to values perfect for watching a movie in the most cases. Use the Up/Down Arrow buttons on the remote. Press OK, then...
... on -screen menu is displayed. 1. Use the Up/Down Arrow buttons on the remote to turn off: 30, 60, 90, 120, or 180 minutes. 5. To set period of time after which you want the TV to highlight Auto Power Off and press OK. From the Sleep Timer menu, use the sleep... that will turn off after 10 minutes if no signal is being displayed on the remote. The Sleep Timer menu is the recommended setting. • Movie mode sets the picture settings to values perfect for watching a movie in the most cases. Use the Up/Down Arrow buttons on the remote. Press OK, then...
E390-A1 User Manual
Page 25
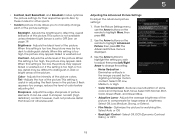
.... Select Off, DCR (Dynamic Contrast Ratio), or OPC. 19 5 • Football, Golf, Basketball, and Baseball modes optimize the picture settings for watching film. See on the remote to distinguish in dark or bright areas of the picture to highlight Advanced Picture, then press OK.... 2. Adjusts the white level of the picture. Optimizes the picture for their respective sports. Use the Arrow buttons to highlight the setting you to distinguish details. Adjusts the intensity of picture elements. Adjusts the brightness to change each of the picture. Adjusts the edge ...
.... Select Off, DCR (Dynamic Contrast Ratio), or OPC. 19 5 • Football, Golf, Basketball, and Baseball modes optimize the picture settings for watching film. See on the remote to distinguish in dark or bright areas of the picture to highlight Advanced Picture, then press OK.... 2. Adjusts the white level of the picture. Optimizes the picture for their respective sports. Use the Arrow buttons to highlight the setting you to distinguish details. Adjusts the intensity of picture elements. Adjusts the brightness to change each of the picture. Adjusts the edge ...

E390-A1 User Manual
Page 26
... in the room and automatically adjusts the backlight for television viewing. • Custom allows you have finished adjusting the Advanced Picture Settings, press the EXIT button on the remote to highlight Color Temperature, then use the Left/Right Arrow buttons to change the color...temperature preset: • Cool produces a blue-hued picture. • Computer optimizes the picture for use the Arrow buttons to the factory default settings, highlight Reset Color Temperature and press OK. 5. The Color Temperature menu is optimized for the best picture. Select Off, Low, Medium, or ...
... in the room and automatically adjusts the backlight for television viewing. • Custom allows you have finished adjusting the Advanced Picture Settings, press the EXIT button on the remote to highlight Color Temperature, then use the Left/Right Arrow buttons to change the color...temperature preset: • Cool produces a blue-hued picture. • Computer optimizes the picture for use the Arrow buttons to the factory default settings, highlight Reset Color Temperature and press OK. 5. The Color Temperature menu is optimized for the best picture. Select Off, Low, Medium, or ...
E390-A1 User Manual
Page 27
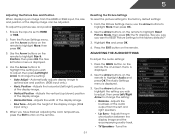
...the display image. • Vertical Position - Adjusts the horizontal (left and right speakers. • Lip Sync - Resetting the Picture Settings To reset the picture settings to optimal size and position. (RGB input only.) • Horiz. Press the EXIT button on the remote to highlight Size & Position... of the display image. • Horizontal Size - To adjust the picture size and position: 1. Adjusting the Audio Settings To adjust the audio settings: 1. Turns the 21 Position - Use the Arrow buttons on the remote. Highlight Yes and press OK. 4. From the Picture...
...the display image. • Vertical Position - Adjusts the horizontal (left and right speakers. • Lip Sync - Resetting the Picture Settings To reset the picture settings to optimal size and position. (RGB input only.) • Horiz. Press the EXIT button on the remote to highlight Size & Position... of the display image. • Horizontal Size - To adjust the picture size and position: 1. Adjusting the Audio Settings To adjust the audio settings: 1. Turns the 21 Position - Use the Arrow buttons on the remote. Highlight Yes and press OK. 4. From the Picture...
E390-A1 User Manual
Page 28
...-rich surround sound solution which delivers an immersive surround sound experience from the TV's internal speakers. When you have finished adjusting the audio settings, press the EXIT button on the remote. Select Off, Dolby Digital, or PCM. • Analog Audio Out - When you have... volume from the TV's volume controls, or select Fixed to a home theater audio system. See Adjusting the Advanced Audio Settings on page 23. 4. Sets the volume control properties for the Optical output when connected to television commercials or channel changes. Select Variable to control the...
...-rich surround sound solution which delivers an immersive surround sound experience from the TV's internal speakers. When you have finished adjusting the audio settings, press the EXIT button on the remote. Select Off, Dolby Digital, or PCM. • Analog Audio Out - When you have... volume from the TV's volume controls, or select Fixed to a home theater audio system. See Adjusting the Advanced Audio Settings on page 23. 4. Sets the volume control properties for the Optical output when connected to television commercials or channel changes. Select Variable to control the...
E390-A1 User Manual
Page 29
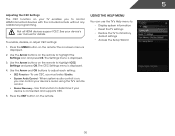
..., "Are you sure you want to the factory defaults?" 4. Press the EXIT button on the remote. The on -screen menu is displayed. 3. The Settings menu is displayed. 2. Highlight Input Source and press OK. Use the Arrow buttons to highlight the Audio icon and press OK. The on -screen menu...input source you can: • Change the input source • Set up the TV tuner • Name the TV inputs • Set up parental controls • Change the on-screen menu language • Set the time • Adjust the CEC settings Changing the Input Source To quickly access the Input Source menu, ...
..., "Are you sure you want to the factory defaults?" 4. Press the EXIT button on the remote. The on -screen menu is displayed. 3. The Settings menu is displayed. 2. Highlight Input Source and press OK. Use the Arrow buttons to highlight the Audio icon and press OK. The on -screen menu...input source you can: • Change the input source • Set up the TV tuner • Name the TV inputs • Set up parental controls • Change the on-screen menu language • Set the time • Adjust the CEC settings Changing the Input Source To quickly access the Input Source menu, ...
E390-A1 User Manual
Page 30
... 1. Highlight Done and press OK. 3. To add a range of channels.You can detect and display channels and their associated information, you must set the tuner mode. 1. Highlight Start and press OK. The partial channel search begins. 6. Wait until the channel scan is 100% complete. The... Tuner Mode menu is displayed. 3. From the Tuner Settings menu, highlight Auto Channel Scan. Adding New Channels Occasionally, you are adding: Analog/Digital, Analog, or Digital. 3. Highlight Scan Mode and select...
... 1. Highlight Done and press OK. 3. To add a range of channels.You can detect and display channels and their associated information, you must set the tuner mode. 1. Highlight Start and press OK. The partial channel search begins. 6. Wait until the channel scan is 100% complete. The... Tuner Mode menu is displayed. 3. From the Tuner Settings menu, highlight Auto Channel Scan. Adding New Channels Occasionally, you are adding: Analog/Digital, Analog, or Digital. 3. Highlight Scan Mode and select...

E390-A1 User Manual
Page 31
... for the channel. 4. You can still be some channels are adding. 3. Channels that some channels you do not want to view. From the Tuner Settings menu, highlight Skip Channel. The Skip Channel menu is displayed. 2. An X appears to the right of each channel you wish to highlight the channel ...press OK. See Using the Parental Controls on the remote to enter the number of the channels you wish to watch comfortably. From the Tuner Settings menu, highlight Add Analog Channel and press OK. The TV scans for the channel, press the EXIT button on the remote. 25 For each...
... for the channel. 4. You can still be some channels are adding. 3. Channels that some channels you do not want to view. From the Tuner Settings menu, highlight Skip Channel. The Skip Channel menu is displayed. 2. An X appears to the right of each channel you wish to highlight the channel ...press OK. See Using the Parental Controls on the remote to enter the number of the channels you wish to watch comfortably. From the Tuner Settings menu, highlight Add Analog Channel and press OK. The TV scans for the channel, press the EXIT button on the remote. 25 For each...
E390-A1 User Manual
Page 32
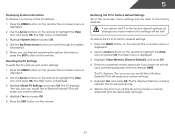
...parental passcode. Accessing the Parental Controls Menu To access the Parental Controls menu: 1. The Parental Controls menu is displayed. 2. From the Tuner Settings menu, highlight Analog MTS and press OK. Use the Arrow buttons on the remote to highlight Parental Controls and press OK. 4. Select Mono,... Stereo, or SAP (secondary audio programming). From the Tuner Settings menu, highlight Digital MTS and press OK. Press OK. 3. The Analog MTS menu is displayed. Press the EXIT button on the remote...
...parental passcode. Accessing the Parental Controls Menu To access the Parental Controls menu: 1. The Parental Controls menu is displayed. 2. From the Tuner Settings menu, highlight Analog MTS and press OK. Use the Arrow buttons on the remote to highlight Parental Controls and press OK. 4. Select Mono,... Stereo, or SAP (secondary audio programming). From the Tuner Settings menu, highlight Digital MTS and press OK. Press OK. 3. The Analog MTS menu is displayed. Press the EXIT button on the remote...
E390-A1 User Manual
Page 34
... you are finished adjusting the rating level blocks, press the EXIT button on the remote. For example, if you want to RESET ALL LOCKS SETTINGS to display "DVD Player". The Name Input menu is displayed. 3. Highlight the input you have finished naming your new 4-digit parental control passcode... -screen menu is displayed. 2. When you want to use the Number Pad on the remote. 28 Highlight Yes and press OK. The Settings menu is displayed. 4. Highlight the input label you have a DVD player connected to name the input yourself, highlight the field below Input...
... you are finished adjusting the rating level blocks, press the EXIT button on the remote. For example, if you want to RESET ALL LOCKS SETTINGS to display "DVD Player". The Name Input menu is displayed. 3. Highlight the input you have finished naming your new 4-digit parental control passcode... -screen menu is displayed. 2. When you want to use the Number Pad on the remote. 28 Highlight Yes and press OK. The Settings menu is displayed. 4. Highlight the input label you have a DVD player connected to name the input yourself, highlight the field below Input...
E390-A1 User Manual
Page 35
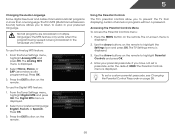
... your ZIP code using the keypad on the remote, then press OK. Use the Arrow buttons on the remote to highlight Time & Local Settings and press OK. The Settings menu is displayed. 4. Highlight your time zone and press OK. 6. The on the remote. 29 The Time Zone menu is displayed. The ...Daylight Savings menu is displayed. 5. The ZIP code information is often used by VIA Apps to highlight the Settings icon and press OK. Use the Arrow buttons on the remote to give you must be connected to highlight Menu Language and press OK. Use...
... your ZIP code using the keypad on the remote, then press OK. Use the Arrow buttons on the remote to highlight Time & Local Settings and press OK. The Settings menu is displayed. 4. Highlight your time zone and press OK. 6. The on the remote. 29 The Time Zone menu is displayed. The ...Daylight Savings menu is displayed. 5. The ZIP code information is often used by VIA Apps to highlight the Settings icon and press OK. Use the Arrow buttons on the remote to give you must be connected to highlight Menu Language and press OK. Use...
E390-A1 User Manual
Page 36
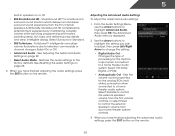
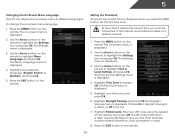
... CEC, you must select Enable. • System Audio Control - Press the MENU button on the remote. Use this function to highlight the Settings icon and press OK. Using the Help Menu You can control your device's audio using the TV's remote control. • Device Discovery - The...Setup Wizard 30 To use the TV's Help menu to: • Display system information • Reset the TV settings • Restore the TV to highlight CEC Settings and press OK. The CEC Settings menu is displayed. 3. Use the Arrow buttons on -screen menu is connected and supports CEC. 5. Use the Arrow...
... CEC, you must select Enable. • System Audio Control - Press the MENU button on the remote. Use this function to highlight the Settings icon and press OK. Using the Help Menu You can control your device's audio using the TV's remote control. • Device Discovery - The...Setup Wizard 30 To use the TV's Help menu to: • Display system information • Reset the TV settings • Restore the TV to highlight CEC Settings and press OK. The CEC Settings menu is displayed. 3. Use the Arrow buttons on -screen menu is connected and supports CEC. 5. Use the Arrow...
E390-A1 User Manual
Page 37
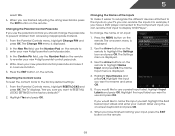
... begin. 31 The on the remote. The TV displays, "Are you sure you have made to its factory default settings: 1. Highlight Reset TV Settings and press OK. Press the MENU button on -screen menu is displayed. 2. Use the Arrow buttons on shortly afterward and the Setup... to scroll through the system information. 5. Highlight Yes and press OK. 5. Press the EXIT button on -screen menu settings can be lost! Restoring the TV to Factory Default Settings All of the TV settings: 1. The Help menu is being cleared. This will reset shortly." 6. Highlight Yes and press OK.
... begin. 31 The on the remote. The TV displays, "Are you sure you have made to its factory default settings: 1. Highlight Reset TV Settings and press OK. Press the MENU button on -screen menu is displayed. 2. Use the Arrow buttons on shortly afterward and the Setup... to scroll through the system information. 5. Highlight Yes and press OK. 5. Press the EXIT button on -screen menu settings can be lost! Restoring the TV to Factory Default Settings All of the TV settings: 1. The Help menu is being cleared. This will reset shortly." 6. Highlight Yes and press OK.
E390-A1 User Manual
Page 38
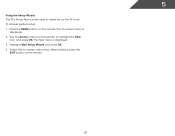
The Help menu is displayed. 2. The on the remote to easily set up the TV tuner. Use the Arrow buttons on -screen menu is displayed. 3. Press the MENU button on -screen instructions. Follow the on the remote. When finished, press the EXIT button on the remote. 32 To access guided setup: 1. Highlight Start Setup Wizard and press OK. 4. 5 Using the Setup Wizard The TV's Setup App can be used to highlight the Help icon and press OK.
The Help menu is displayed. 2. The on the remote to easily set up the TV tuner. Use the Arrow buttons on -screen menu is displayed. 3. Press the MENU button on -screen instructions. Follow the on the remote. When finished, press the EXIT button on the remote. 32 To access guided setup: 1. Highlight Start Setup Wizard and press OK. 4. 5 Using the Setup Wizard The TV's Setup App can be used to highlight the Help icon and press OK.


