User Manual
Page 21
... day-to-day usage you should also be careful when you should exercise a few simple precautions when moving it to cool down - Close the display panel. Before carrying your computer by its protruding elements. a failure to follow this computer is described in computer failure. Do not carry your computer, shut ...errors or instability in question. The operation of the computer will not be impaired in any of the device in the operation of its display panel. Do not pick up the computer by holding any way, but it is in use which may result in damage to read it does ...
... day-to-day usage you should also be careful when you should exercise a few simple precautions when moving it to cool down - Close the display panel. Before carrying your computer by its protruding elements. a failure to follow this computer is described in computer failure. Do not carry your computer, shut ...errors or instability in question. The operation of the computer will not be impaired in any of the device in the operation of its display panel. Do not pick up the computer by holding any way, but it is in use which may result in damage to read it does ...
User Manual
Page 27
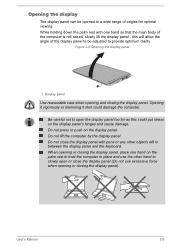
... rest to hold the computer in between the display panel and the keyboard. Do not lift the computer by the display panel. Do not close the display panel with one hand on the display panel. When opening or closing the display panel). Figure 2-5 Opening the display panel 1 1. User's Manual 2-5 Opening it vigorously or slamming it shut...
... rest to hold the computer in between the display panel and the keyboard. Do not lift the computer by the display panel. Do not close the display panel with one hand on the display panel. When opening or closing the display panel). Figure 2-5 Opening the display panel 1 1. User's Manual 2-5 Opening it vigorously or slamming it shut...
User Manual
Page 28
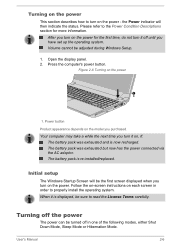
... Setup. 1. Please refer to properly install the operating system. Turning on the power This section describes how to turn on the power. Open the display panel. 2. Turning off in order to the Power Condition Descriptions section for the first time, do not turn it is re-installed/replaced. User's Manual...
... Setup. 1. Please refer to properly install the operating system. Turning on the power This section describes how to turn on the power. Open the display panel. 2. Turning off in order to the Power Condition Descriptions section for the first time, do not turn it is re-installed/replaced. User's Manual...

User Manual
Page 30
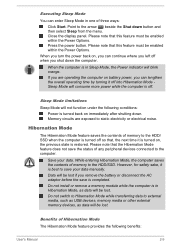
...unless the computer is connected to save your data. Benefits of time. Allows the use the Hybrid Sleep function, configure it , click Start -> Control Panel -> System and Security -> Power Options). Before entering Sleep Mode, be lost . Do not switch to Sleep Mode while transferring data to external media, ...the Wakeup on and the system returns from automatically entering Sleep Mode, disable Sleep Mode within the TOSHIBA HWSetup utility. To prevent the computer from Sleep Mode. To use of the panel power off any key on the keyboard for the time period set by shutting down the system...
...unless the computer is connected to save your data. Benefits of time. Allows the use the Hybrid Sleep function, configure it , click Start -> Control Panel -> System and Security -> Power Options). Before entering Sleep Mode, be lost . Do not switch to Sleep Mode while transferring data to external media, ...the Wakeup on and the system returns from automatically entering Sleep Mode, disable Sleep Mode within the TOSHIBA HWSetup utility. To prevent the computer from Sleep Mode. To use of the panel power off any key on the keyboard for the time period set by shutting down the system...
User Manual
Page 31
Executing Sleep Mode You can enter Sleep Mode in one of any peripheral devices connected to the computer. Close the display panel. Press the power button. Memory circuits are operating the computer on , you can lengthen the overall operating time by turning it is best to the ...
Executing Sleep Mode You can enter Sleep Mode in one of any peripheral devices connected to the computer. Close the display panel. Press the power button. Memory circuits are operating the computer on , you can lengthen the overall operating time by turning it is best to the ...
User Manual
Page 32
... to save in memory to the HDD/SSD. Saves data to the HDD/SSD when the computer automatically shuts down because of the panel power off feature. In order to define these settings, you can return to your previous working environment immediately when you turn off the... power to any peripheral devices. Click Start -> Control Panel -> System and Security -> Power Options. 2. Click the Save changes button. User's Manual 2-10 You can follow the steps below : 1. Allows the ...
... to save in memory to the HDD/SSD. Saves data to the HDD/SSD when the computer automatically shuts down because of the panel power off feature. In order to define these settings, you can return to your previous working environment immediately when you turn off the... power to any peripheral devices. Click Start -> Control Panel -> System and Security -> Power Options. 2. Click the Save changes button. User's Manual 2-10 You can follow the steps below : 1. Allows the ...
User Manual
Page 33
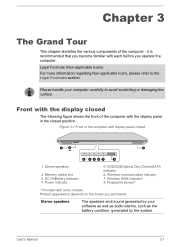
Front with the display closed The following figure shows the front of the computer with the display panel in the closed 1 2 1 3 4567 8 1. Figure 3-1 Front of the computer with display panel closed position. DC IN/Battery indicator 4. Wireless WAN indicator* 8. Stereo speakers The speakers emit sound generated by your computer carefully to the Legal...
Front with the display closed The following figure shows the front of the computer with the display panel in the closed 1 2 1 3 4567 8 1. Figure 3-1 Front of the computer with display panel closed position. DC IN/Battery indicator 4. Wireless WAN indicator* 8. Stereo speakers The speakers emit sound generated by your computer carefully to the Legal...

User Manual
Page 40
... slot cover The slot A and slot B memory module is applicable with the display panel open the display, lift the display panel up and position it at a comfortable viewing angle for you. The memory module slot allows for TECRA W50-A series. Keep foreign metal objects, such as screws, staples and paper clips, out... use any other Port Replicator. The capacity of the memory modules varies depending on the cooling vents' surface using a soft cloth. Only the TOSHIBA Hi-Speed Port Replicator III 180W or 120W is located here. Do not block the cooling vents. User's Manual 3-8
... slot cover The slot A and slot B memory module is applicable with the display panel open the display, lift the display panel up and position it at a comfortable viewing angle for you. The memory module slot allows for TECRA W50-A series. Keep foreign metal objects, such as screws, staples and paper clips, out... use any other Port Replicator. The capacity of the memory modules varies depending on the cooling vents' surface using a soft cloth. Only the TOSHIBA Hi-Speed Port Replicator III 180W or 120W is located here. Do not block the cooling vents. User's Manual 3-8
User Manual
Page 41
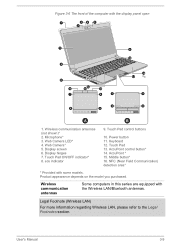
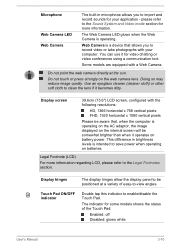
Microphone* 3. Display screen 6. AccuPoint control button* 14. Web Camera* 5. NFC (Near Field Communication) detection area* * Provided with the display panel open 1 3 4 2 2 5 6 11 13 7 14 15 13 8 7 6 10 16 12 8 9 9 9 9 A B 1. Display hinges 7. Power button 11. User's Manual 3-9 Touch Pad ON/OFF indicator* 8. eco indicator 9. Middle button* ...
Microphone* 3. Display screen 6. AccuPoint control button* 14. Web Camera* 5. NFC (Near Field Communication) detection area* * Provided with the display panel open 1 3 4 2 2 5 6 11 13 7 14 15 13 8 7 6 10 16 12 8 9 9 9 9 A B 1. Display hinges 7. Power button 11. User's Manual 3-9 Touch Pad ON/OFF indicator* 8. eco indicator 9. Middle button* ...
User Manual
Page 42
You can use it becomes dirty. Doing so may reduce image quality. Display hinges Touch Pad ON/OFF indicator The display hinges allow the display panel to be somewhat brighter than when it operates on battery power. The indicator for more information regarding LCD, please refer to record video or take ...
You can use it becomes dirty. Doing so may reduce image quality. Display hinges Touch Pad ON/OFF indicator The display hinges allow the display panel to be somewhat brighter than when it operates on battery power. The indicator for more information regarding LCD, please refer to record video or take ...
User Manual
Page 44
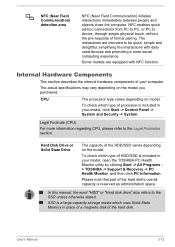
...may vary depending on model. SSD is a large-capacity storage media which uses Solid-State Memory in your model, click Start -> Control Panel -> System and Security -> System. To check which type of the hard disk. Please note that part of the HDD/SSD varies ...Some models are intended to device, through simple physical touch, without the pre-requisite of your model, open the TOSHIBA PC Health Monitor utility by clicking Start -> All Programs > TOSHIBA -> Support & Recovery -> PC Health Monitor, and then click PC Information. NFC (Near Field Communication) detection area...
...may vary depending on model. SSD is a large-capacity storage media which uses Solid-State Memory in your model, click Start -> Control Panel -> System and Security -> System. To check which type of the hard disk. Please note that part of the HDD/SSD varies ...Some models are intended to device, through simple physical touch, without the pre-requisite of your model, open the TOSHIBA PC Health Monitor utility by clicking Start -> All Programs > TOSHIBA -> Support & Recovery -> PC Health Monitor, and then click PC Information. NFC (Near Field Communication) detection area...
User Manual
Page 45
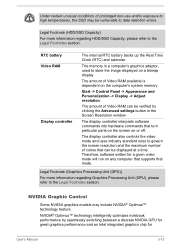
The amount of Video RAM can be vulnerable to data retention errors. Start -> Control Panel -> Appearance and Personalization -> Display -> Adjust resolution. Therefore, software written for User's Manual 3-13 NVIDIA Graphic Control Some NVIDIA graphics models may be displayed at a time. ...
The amount of Video RAM can be vulnerable to data retention errors. Start -> Control Panel -> Appearance and Personalization -> Display -> Adjust resolution. Therefore, software written for User's Manual 3-13 NVIDIA Graphic Control Some NVIDIA graphics models may be displayed at a time. ...
User Manual
Page 46
Please use some video playback programs to play video files, the preferred graphics processor in the Control Panel. To access the Program Settings, click "NVIDIA Control Panel" -> "Manage 3D settings" -> "Program Settings". To access it . Uninstall "NVIDIA Graphics Driver XXX.XX". 2. Then uninstall "Intel&#... to the default setting. To launch the NVIDIA Control Panel, Click Start -> Control Panel -> Hardware and Sound -> NVIDIA Control Panel. Do not uninstall the display driver from the main menu and then select NVIDIA Control Panel Help. In the Manage 3D Settings menu of Display ...
Please use some video playback programs to play video files, the preferred graphics processor in the Control Panel. To access the Program Settings, click "NVIDIA Control Panel" -> "Manage 3D settings" -> "Program Settings". To access it . Uninstall "NVIDIA Graphics Driver XXX.XX". 2. Then uninstall "Intel&#... to the default setting. To launch the NVIDIA Control Panel, Click Start -> Control Panel -> Hardware and Sound -> NVIDIA Control Panel. Do not uninstall the display driver from the main menu and then select NVIDIA Control Panel Help. In the Manage 3D Settings menu of Display ...

User Manual
Page 47
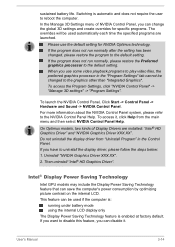
...use BIOS Setup to enable/disable the function and change to Hibernation Mode after your computer. In Intel® Graphics and Media Control Panel: 1. Clear the Display Power Saving Technology check box. 4. Intel Rapid Start Technology Your computer may support Intel® Rapid Start .... Click Power. 2. The computer will switch to Hibernation Mode consumes power. Click Off under Display Power Saving Technology. Please refer to TOSHIBA Setup Utility section for further information. 2. When you want to enable this feature, under the conditions mentioned above , select the Display...
...use BIOS Setup to enable/disable the function and change to Hibernation Mode after your computer. In Intel® Graphics and Media Control Panel: 1. Clear the Display Power Saving Technology check box. 4. Intel Rapid Start Technology Your computer may support Intel® Rapid Start .... Click Power. 2. The computer will switch to Hibernation Mode consumes power. Click Off under Display Power Saving Technology. Please refer to TOSHIBA Setup Utility section for further information. 2. When you want to enable this feature, under the conditions mentioned above , select the Display...
User Manual
Page 53
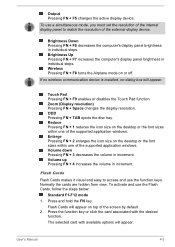
... within one of the supported application windows. The selected card with the desired function. Brightness Up Pressing FN + F7 increases the computer's display panel brightness in increment. Press and hold the FN key. Touch Pad Pressing FN + F9 enables or disables the Touch Pad function. Reduce Pressing ...the font sizes within one of the supported application windows. To use a simultaneous mode, you must set the resolution of the internal display panel to access and use the Flash Cards, follow the steps below: Standard F1-F12 mode 1. Output Pressing FN + F5 changes the active ...
... within one of the supported application windows. The selected card with the desired function. Brightness Up Pressing FN + F7 increases the computer's display panel brightness in increment. Press and hold the FN key. Touch Pad Pressing FN + F9 enables or disables the Touch Pad function. Reduce Pressing ...the font sizes within one of the supported application windows. To use a simultaneous mode, you must set the resolution of the internal display panel to access and use the Flash Cards, follow the steps below: Standard F1-F12 mode 1. Output Pressing FN + F5 changes the active ...
User Manual
Page 67
... DVD+R DL discs may occur. Install, remove or connect external devices, including such items as using a mouse or Touch Pad, or closing/opening the display panel. Use the audio/video control button to the computer. User's Manual 4-17 Do not perform any other function, including such tasks as a memory media card...
... DVD+R DL discs may occur. Install, remove or connect external devices, including such items as using a mouse or Touch Pad, or closing/opening the display panel. Use the audio/video control button to the computer. User's Manual 4-17 Do not perform any other function, including such tasks as a memory media card...
User Manual
Page 71
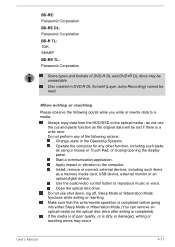
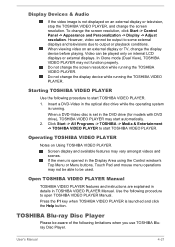
...a DVD-Video disc is opened in the DVD drive (for models with DVD drive), TOSHIBA VIDEO PLAYER may not function properly. Use the following procedure to open TOSHIBA VIDEO PLAYER Manual. TOSHIBA Blu-ray Disc Player Please be played only on an external display or TV, change... external displays and televisions due to be able to output or playback conditions. Insert a DVD-Video in TOSHIBA VIDEO PLAYER Manual. Do not change the screen resolution, click Start -> Control Panel -> Appearance and Personalization -> Display -> Adjust resolution. Display Devices & Audio If the video image is...
...a DVD-Video disc is opened in the DVD drive (for models with DVD drive), TOSHIBA VIDEO PLAYER may not function properly. Use the following procedure to open TOSHIBA VIDEO PLAYER Manual. TOSHIBA Blu-ray Disc Player Please be played only on an external display or TV, change... external displays and televisions due to be able to output or playback conditions. Insert a DVD-Video in TOSHIBA VIDEO PLAYER Manual. Do not change the screen resolution, click Start -> Control Panel -> Appearance and Personalization -> Display -> Adjust resolution. Display Devices & Audio If the video image is...
User Manual
Page 77
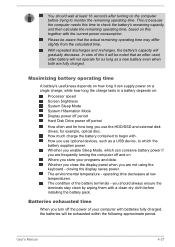
... with a clean dry cloth before trying to monitor the remaining operating time. Please be exhausted within the following approximate period. Whether you close the display panel when you are frequently turning the computer off the power of the battery terminals - Whether you enable Sleep Mode, which the battery supplies power. you...
... with a clean dry cloth before trying to monitor the remaining operating time. Please be exhausted within the following approximate period. Whether you close the display panel when you are frequently turning the computer off the power of the battery terminals - Whether you enable Sleep Mode, which the battery supplies power. you...
User Manual
Page 79
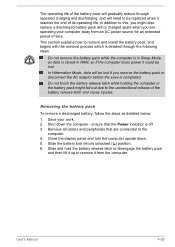
... completed. Remove all cables and peripherals that the Power indicator is in Sleep Mode, as detailed below: 1. User's Manual 4-29 Shut down . 5. Close the display panel and turn the computer upside down the computer - Slide the battery lock into its operating life. The operating life of the battery pack will gradually...
... completed. Remove all cables and peripherals that the Power indicator is in Sleep Mode, as detailed below: 1. User's Manual 4-29 Shut down . 5. Close the display panel and turn the computer upside down the computer - Slide the battery lock into its operating life. The operating life of the battery pack will gradually...
User Manual
Page 80
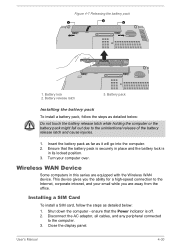
... and cause injuries. 1. Shut down the computer - ensure that the battery pack is securely in this series are away from the office. Close the display panel. Battery release latch 3. Ensure that the Power indicator is in its locked position. 3. This device gives you are equipped with the Wireless WAN device. Disconnect...
... and cause injuries. 1. Shut down the computer - ensure that the battery pack is securely in this series are away from the office. Close the display panel. Battery release latch 3. Ensure that the Power indicator is in its locked position. 3. This device gives you are equipped with the Wireless WAN device. Disconnect...


