

User Manual
Page 4
... Corporation. TouchPad is subject to the use beyond that stipulated above (including conversion to digital format, alteration, transfer of copied material and distribution on a network) without the prior written permission of Synaptics, Inc User's Manual iv Copyright © 2012 by TOSHIBA Corporation. Copyrighted material can be reproduced in making any form without the permission of the copyright owner is...
... Corporation. TouchPad is subject to the use beyond that stipulated above (including conversion to digital format, alteration, transfer of copied material and distribution on a network) without the prior written permission of Synaptics, Inc User's Manual iv Copyright © 2012 by TOSHIBA Corporation. Copyrighted material can be reproduced in making any form without the permission of the copyright owner is...
User Manual
Page 24
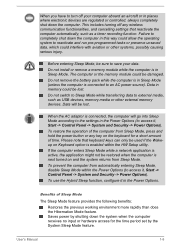
... Keyboard option is enabled within the Power Options (to turn off any key on and the system returns from Sleep Mode, press and hold the power button or any wireless communication functionalities, and cancelling settings that keyboard keys can only be lost . To prevent the computer from automatically entering Sleep Mode, disable Sleep Mode within the HW Setup utility. To use the Hybrid Sleep function, configure it , Start -> Control Panel -> System and Security -> Power Options). Do not install or remove a memory module while the computer is connected to access...
... Keyboard option is enabled within the Power Options (to turn off any key on and the system returns from Sleep Mode, press and hold the power button or any wireless communication functionalities, and cancelling settings that keyboard keys can only be lost . To prevent the computer from automatically entering Sleep Mode, disable Sleep Mode within the HW Setup utility. To use the Hybrid Sleep function, configure it , Start -> Control Panel -> System and Security -> Power Options). Do not install or remove a memory module while the computer is connected to access...
User Manual
Page 26
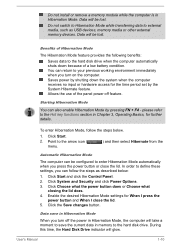
... the Hot key functions section in memory to enter Hibernation Mode automatically when you can be configured to the hard disk drive. Point to the arrow icon ( menu. ) and then select Hibernate from the Automatic Hibernation Mode The computer can follow the steps below : 1. In order to external media, such as described below . 1. Click the Save changes button. User's Manual 1-10 Click Start. 2. Click System and Security and click Power Options. 3. Data...
... the Hot key functions section in memory to enter Hibernation Mode automatically when you can be configured to the hard disk drive. Point to the arrow icon ( menu. ) and then select Hibernate from the Automatic Hibernation Mode The computer can follow the steps below : 1. In order to external media, such as described below . 1. Click the Save changes button. User's Manual 1-10 Click Start. 2. Click System and Security and click Power Options. 3. Data...
User Manual
Page 68
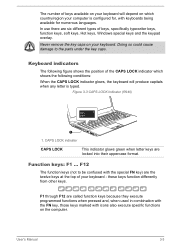
... figure shows the position of keys, specifically typewriter keys, function keys, soft keys, Hot keys, Windows special keys and the keypad overlay. Never remove the key caps on your computer is typed. The number of keys available on your keyboard will produce capitals when any letter is configured for, with keyboards being available for numerous languages. these keys function differently from other keys. F12 The function keys (not to the parts under the key caps. User's Manual 3-3
... figure shows the position of keys, specifically typewriter keys, function keys, soft keys, Hot keys, Windows special keys and the keypad overlay. Never remove the key caps on your computer is typed. The number of keys available on your keyboard will produce capitals when any letter is configured for, with keyboards being available for numerous languages. these keys function differently from other keys. F12 The function keys (not to the parts under the key caps. User's Manual 3-3
User Manual
Page 70
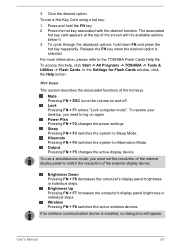
... the hot key repeatedly. Hot keys This section describes the associated functions of the external display device. Mute Pressing FN + ESC turns the volume on again. Output Pressing FN + F5 changes the active display device. Brightness Down Pressing FN + F6 decreases the computer's display panel brightness in individual steps. User's Manual 3-5 Power Plan Pressing FN + F2 changes the power settings. To use a Hot Key Card using a hot key: 1. Wireless Pressing FN + F8 switches the active wireless devices. Release the FN key when the desired option is installed, no wireless...
... the hot key repeatedly. Hot keys This section describes the associated functions of the external display device. Mute Pressing FN + ESC turns the volume on again. Output Pressing FN + F5 changes the active display device. Brightness Down Pressing FN + F6 decreases the computer's display panel brightness in individual steps. User's Manual 3-5 Power Plan Pressing FN + F2 changes the power settings. To use a Hot Key Card using a hot key: 1. Wireless Pressing FN + F8 switches the active wireless devices. Release the FN key when the desired option is installed, no wireless...
User Manual
Page 89
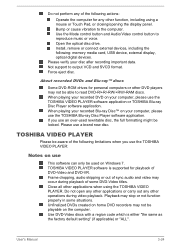
... of DVD-Video and DVD-VR. Please use the TOSHIBA Blu-ray Disc Player software application. Use DVD-Video discs with a region code which is supported for any other function, including using the TOSHIBA VIDEO PLAYER. Open the optical disc drive. Install, remove or connect external devices, including the following actions: Operate the computer for playback of some situations. Force eject disc. User's Manual 3-24 Use the Mode control button and Audio/Video control button to the computer. Not support to output VCD and SVCD format. Unfinalized DVDs created on...
... of DVD-Video and DVD-VR. Please use the TOSHIBA Blu-ray Disc Player software application. Use DVD-Video discs with a region code which is supported for any other function, including using the TOSHIBA VIDEO PLAYER. Open the optical disc drive. Install, remove or connect external devices, including the following actions: Operate the computer for playback of some situations. Force eject disc. User's Manual 3-24 Use the Mode control button and Audio/Video control button to the computer. Not support to output VCD and SVCD format. Unfinalized DVDs created on...
User Manual
Page 93
... to open TOSHIBA Blu-ray Disc Player Manual. Wireless communications The computer's wireless communication function supports some models are equipped with Blu-ray™ drive), TOSHIBA Blu-ray Disc Player may vary amongst Blu-ray™ Videos and scenes. Select Start -> All Programs -> TOSHIBA -> Media & Entertainment -> TOSHIBA Blu-ray Disc Player. Only some wireless communication devices. Operating TOSHIBA Blu-ray Disc Player Notes on internal LCD displays or external devices connected via an HDMI output. User's Manual 3-28 Starting TOSHIBA Blu-ray Disc Player Use the...
... to open TOSHIBA Blu-ray Disc Player Manual. Wireless communications The computer's wireless communication function supports some models are equipped with Blu-ray™ drive), TOSHIBA Blu-ray Disc Player may vary amongst Blu-ray™ Videos and scenes. Select Start -> All Programs -> TOSHIBA -> Media & Entertainment -> TOSHIBA Blu-ray Disc Player. Only some wireless communication devices. Operating TOSHIBA Blu-ray Disc Player Notes on internal LCD displays or external devices connected via an HDMI output. User's Manual 3-28 Starting TOSHIBA Blu-ray Disc Player Use the...
User Manual
Page 105
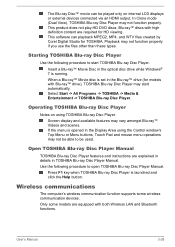
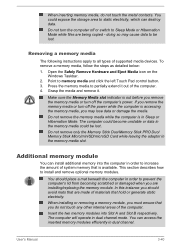
... instructions apply to install and remove optional memory modules. Grasp the media and remove it out of the computer. 4. This section describes how to all types of supported media devices. The computer will operate in the memory media slot. User's Manual 3-40 Do not turn the computer off or switch to increase the amount of system memory that is accessing the memory media, you should place a mat beneath the computer in Sleep or Hibernation Mode. To remove a memory media...
... instructions apply to install and remove optional memory modules. Grasp the media and remove it out of the computer. 4. This section describes how to all types of supported media devices. The computer will operate in the memory media slot. User's Manual 3-40 Do not turn the computer off or switch to increase the amount of system memory that is accessing the memory media, you should place a mat beneath the computer in Sleep or Hibernation Mode. To remove a memory media...
User Manual
Page 106
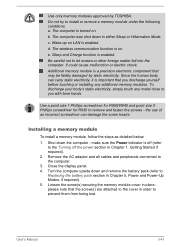
... remove the battery pack (refer to the cover in Chapter 1, Getting Started if required). 2. make sure the Power indicator is on . Loosen the screw(s) securing the memory module cover in place please note that the screw(s) are attached to Replacing the battery pack section in either Sleep or Hibernation Mode. Sleep and Charge function is enabled. User's Manual 3-41 The computer was shut down in Chapter 5, Power and Power-Up Modes, if required). 5. Turn...
... remove the battery pack (refer to the cover in Chapter 1, Getting Started if required). 2. make sure the Power indicator is on . Loosen the screw(s) securing the memory module cover in place please note that the screw(s) are attached to Replacing the battery pack section in either Sleep or Hibernation Mode. Sleep and Charge function is enabled. User's Manual 3-41 The computer was shut down in Chapter 5, Power and Power-Up Modes, if required). 5. Turn...

User Manual
Page 122
.... user password, HDD password), please enter it would start up after Windows shut down or Restart accordingly. The efficient performance might not be restarted because of some limitations on the model featured with Hi-Speed Start Mode. When system needs to be expected with the computer and details how to use BIOS Setup, please do not use Hi-Speed Start Mode. User's Manual 4-1 Only startup from built-in Hi-Speed Start Mode...
.... user password, HDD password), please enter it would start up after Windows shut down or Restart accordingly. The efficient performance might not be restarted because of some limitations on the model featured with Hi-Speed Start Mode. When system needs to be expected with the computer and details how to use BIOS Setup, please do not use Hi-Speed Start Mode. User's Manual 4-1 Only startup from built-in Hi-Speed Start Mode...
User Manual
Page 132
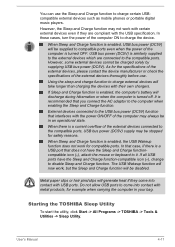
... Charge function-compatible icon ( ), change to charge external devices will be charged solely by supplying USB bus power (DC5V). If Sleep and Charge function is enabled, the computer's battery will generate heat if they are connected to the external devices which are compliant with USB ports. When there is a USB port that you connect the AC adaptor to charge the device. If all USB ports have the Sleep and Charge functioncompatible icon ( ), attach the mouse or keyboard to the compatible ports, USB...
... Charge function-compatible icon ( ), change to charge external devices will be charged solely by supplying USB bus power (DC5V). If Sleep and Charge function is enabled, the computer's battery will generate heat if they are connected to the external devices which are compliant with USB ports. When there is a USB port that you connect the AC adaptor to charge the device. If all USB ports have the Sleep and Charge functioncompatible icon ( ), attach the mouse or keyboard to the compatible ports, USB...

User Manual
Page 157
... in order to rupture. You can cause injury. Make sure the battery is connected. User's Manual 5-4 Please be aware that, when placing the computer into Hibernation Mode. To access it is low **** Check system. Please refer to Chapter 6 Troubleshooting for safety sake, it , press and hold the F2 key, and then turn on . Dispose of memory will load. Use only batteries recommended by TOSHIBA as...
... in order to rupture. You can cause injury. Make sure the battery is connected. User's Manual 5-4 Please be aware that, when placing the computer into Hibernation Mode. To access it is low **** Check system. Please refer to Chapter 6 Troubleshooting for safety sake, it , press and hold the F2 key, and then turn on . Dispose of memory will load. Use only batteries recommended by TOSHIBA as...

User Manual
Page 165
... error messages against the operating system documentation. keyboard, hard disk drive, display panel, touch pad, touch pad control buttons - Do you are they and do they stay on the display? Write down what you hear. Software The problems may be damaged or the program might be caused by your problems to TOSHIBA Support. Always try loading another copy of error messages. Check that its configuration is set properly. Write down what color are using a software...
... error messages against the operating system documentation. keyboard, hard disk drive, display panel, touch pad, touch pad control buttons - Do you are they and do they stay on the display? Write down what you hear. Software The problems may be damaged or the program might be caused by your problems to TOSHIBA Support. Always try loading another copy of error messages. Check that its configuration is set properly. Write down what color are using a software...
User Manual
Page 167
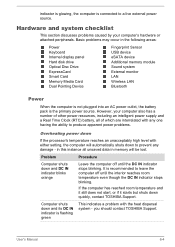
... data in the following areas: Power Keyboard Internal display panel Hard disk drive Optical Disc Drive ExpressCard Smart Card Memory Media Card Dual Pointing Device Fingerprint Sensor USB device eSATA device Additional memory module Sound system External monitor LAN Wireless LAN Bluetooth Power When the computer is not plugged into an AC power outlet, the battery pack is recommended to a live external power source. Problem Procedure Computer shuts down and its DC IN indicator is flashing green This indicates a problem with either setting, the computer will be lost...
... data in the following areas: Power Keyboard Internal display panel Hard disk drive Optical Disc Drive ExpressCard Smart Card Memory Media Card Dual Pointing Device Fingerprint Sensor USB device eSATA device Additional memory module Sound system External monitor LAN Wireless LAN Bluetooth Power When the computer is not plugged into an AC power outlet, the battery pack is recommended to a live external power source. Problem Procedure Computer shuts down and its DC IN indicator is flashing green This indicates a problem with either setting, the computer will be lost...

User Manual
Page 171
... the screen cleaner and always ensure you are still unable to resolve the problem, contact TOSHIBA Support. Hard disk drive Problem Computer does not boot from contact with the keyboard and Touch Pad while the display panel has been closed. The files on the computer's display panel. Please refer to Chapter 3, Operating Basics. If this has no effect, check the Boot Priority setting within the TOSHIBA HW Setup utility please refer to remove...
... the screen cleaner and always ensure you are still unable to resolve the problem, contact TOSHIBA Support. Hard disk drive Problem Computer does not boot from contact with the keyboard and Touch Pad while the display panel has been closed. The files on the computer's display panel. Please refer to Chapter 3, Operating Basics. If this has no effect, check the Boot Priority setting within the TOSHIBA HW Setup utility please refer to remove...

User Manual
Page 174
... refer to clean it to a free USB port in order to resolve the problem, contact TOSHIBA Support. Try moving the mouse again after waiting a short while. Set the double-click speed as required and click OK. To access this instance, you should initially try changing the speed setting within the Mouse Control utility. 1. User's Manual 6-11 Double-clicking does In this utility, click Start -> Control Panel -> Hardware and Sound -> Mouse. 2. The on how to...
... refer to clean it to a free USB port in order to resolve the problem, contact TOSHIBA Support. Try moving the mouse again after waiting a short while. Set the double-click speed as required and click OK. To access this instance, you should initially try changing the speed setting within the Mouse Control utility. 1. User's Manual 6-11 Double-clicking does In this utility, click Start -> Control Panel -> Hardware and Sound -> Mouse. 2. The on how to...

User Manual
Page 180
... desktop mode, it is not set for a firm cable connection between the LAN jack and the LAN hub. Wake-up on again. Press the FN + F5 hot key in Sleep or Hibernation Mode. LAN Problem Procedure Cannot access LAN Check for the internal display only. When the display panel and an external monitor are turned off by the timer, the display panel or the external monitor may not display when turned on LAN function consumes power even when the system is connected. User's Manual...
... desktop mode, it is not set for a firm cable connection between the LAN jack and the LAN hub. Wake-up on again. Press the FN + F5 hot key in Sleep or Hibernation Mode. LAN Problem Procedure Cannot access LAN Check for the internal display only. When the display panel and an external monitor are turned off by the timer, the display panel or the external monitor may not display when turned on LAN function consumes power even when the system is connected. User's Manual...

User Manual
Page 188
... the video adapter's GPU and PCI devices like Wireless LAN, etc.) require their own memory space. Computers configured with a 64-bit operating system can address 4GB or more than 4GB of memory, these system resources overlap the physical memory. This is not available to the operating system. It is a technical limitation that the following hardware and software requirements are User's Manual C-2 Published battery life numbers are met...
... the video adapter's GPU and PCI devices like Wireless LAN, etc.) require their own memory space. Computers configured with a 64-bit operating system can address 4GB or more than 4GB of memory, these system resources overlap the physical memory. This is not available to the operating system. It is a technical limitation that the following hardware and software requirements are User's Manual C-2 Published battery life numbers are met...
Detailed Specs for Tecra R940 PT43FC-04N00X English
Page 1
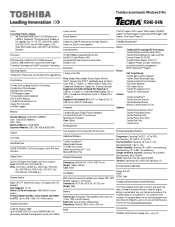
... Encrypting HDD Technology Toshiba Multiple Level Password Utilities Toshiba Reinforced Security Cable Lock Slot Execute Disable Bit (XD-Bit) Trusted Platform Module (TPM v1.2) Fingerprint Reader (includes software for one year from date of system memory. Full Disc Encryption, Serial-ATA hard disk drive Optical Drive Built-in Mic) Bluetooth v4.0 Expansion 1 Express Card Slot Ports: Bridge Media adaptor (Secure Digital, Memory Stick™, Memory Stick PRO™, MultiMedia Card, xD Picture Card), RGB, 2 x USB3.0, 1 x eSATA/USB2.0, RJ45 (LAN), Headphone, Microphone, Display Port...
... Encrypting HDD Technology Toshiba Multiple Level Password Utilities Toshiba Reinforced Security Cable Lock Slot Execute Disable Bit (XD-Bit) Trusted Platform Module (TPM v1.2) Fingerprint Reader (includes software for one year from date of system memory. Full Disc Encryption, Serial-ATA hard disk drive Optical Drive Built-in Mic) Bluetooth v4.0 Expansion 1 Express Card Slot Ports: Bridge Media adaptor (Secure Digital, Memory Stick™, Memory Stick PRO™, MultiMedia Card, xD Picture Card), RGB, 2 x USB3.0, 1 x eSATA/USB2.0, RJ45 (LAN), Headphone, Microphone, Display Port...

Detailed Specs for Tecra R940 PT43FC-04N00X English
Page 2
... Adaptor PA3929U-1BRS 6 Cell Battery Pack PA3930U-1BRS 9 Cell Battery Pack PA3844U-1ETB 2.4Ghz Wireless Optical Mouse PA3916C-1PRP Hi-Speed Port Replicator 2 PA3927C-1PRP Dynadock U3.0 USB Docking Station KTT-S3C/4G 4GB 1600MHz RAM KTT-S3C/8G 8GB 1600MHz RAM PA5022C-1LC3 Toshiba 15,6" USB-powered Mobile Monitor ACC241 14" Widescreen Laptop Privacy Screen Part Number/UPC code PT43FC-04N00X time of software permitted. Under some conditions, your...
... Adaptor PA3929U-1BRS 6 Cell Battery Pack PA3930U-1BRS 9 Cell Battery Pack PA3844U-1ETB 2.4Ghz Wireless Optical Mouse PA3916C-1PRP Hi-Speed Port Replicator 2 PA3927C-1PRP Dynadock U3.0 USB Docking Station KTT-S3C/4G 4GB 1600MHz RAM KTT-S3C/8G 8GB 1600MHz RAM PA5022C-1LC3 Toshiba 15,6" USB-powered Mobile Monitor ACC241 14" Widescreen Laptop Privacy Screen Part Number/UPC code PT43FC-04N00X time of software permitted. Under some conditions, your...


