User Manual
Page 5
... public utility commission, public service commission or corporation commission for any person to use a computer or other electronic device, including Fax machines, to send any changes necessary to the telephone network, the telephone company will notify the customer as soon as possible. In order to do this, it may request that you to make changes in their equipment, operations or...
... public utility commission, public service commission or corporation commission for any person to use a computer or other electronic device, including Fax machines, to send any changes necessary to the telephone network, the telephone company will notify the customer as soon as possible. In order to do this, it may request that you to make changes in their equipment, operations or...
User Manual
Page 27
...55 Removing a memory module 60 Hard Drive Recovery Utilities 63 Creating Recovery CDs/DVDs 64 Hard Disk Drive Recovery using the recovery partition 65 Hard Disk Drive Recovery using the Recovery media 71 Installing drivers and applications 74 Using the TouchPad 75 Scrolling with the TouchPad 75 Control buttons 76 Disabling or enabling the TouchPad 76 Using external display devices 78 Directing the display output when you turn on the computer 78 Adjusting the quality of the external display......80 Using an external keyboard 80 Using a mouse 80 Connecting a printer 81 Setting up...
...55 Removing a memory module 60 Hard Drive Recovery Utilities 63 Creating Recovery CDs/DVDs 64 Hard Disk Drive Recovery using the recovery partition 65 Hard Disk Drive Recovery using the Recovery media 71 Installing drivers and applications 74 Using the TouchPad 75 Scrolling with the TouchPad 75 Control buttons 76 Disabling or enabling the TouchPad 76 Using external display devices 78 Directing the display output when you turn on the computer 78 Adjusting the quality of the external display......80 Using an external keyboard 80 Using a mouse 80 Connecting a printer 81 Setting up...
User Manual
Page 56
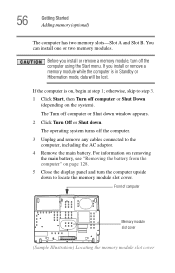
... remove any cables connected to the computer, including the AC adaptor. 4 Remove the main battery. If the computer is in Standby or Hibernation mode, data will be lost. The operating system turns off computer or Shut down window appears. 2 Click Turn Off or Shut down to step 3. 1 Click Start, then Turn off the computer using the Start menu. otherwise, skip to locate the memory module slot cover. 56 Getting Started Adding memory (optional...
... remove any cables connected to the computer, including the AC adaptor. 4 Remove the main battery. If the computer is in Standby or Hibernation mode, data will be lost. The operating system turns off computer or Shut down window appears. 2 Click Turn Off or Shut down to step 3. 1 Click Start, then Turn off the computer using the Start menu. otherwise, skip to locate the memory module slot cover. 56 Getting Started Adding memory (optional...
User Manual
Page 57
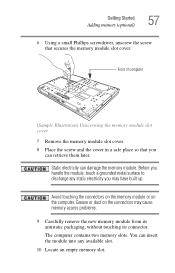
... built up. Getting Started Adding memory (optional) 57 6 Using a small Phillips screwdriver, unscrew the screw that you may cause memory access problems. 9 Carefully remove the new memory module from its antistatic packaging, without touching its connector. Before you handle the module, touch a grounded metal surface to discharge any available slot. 10 Locate an empty memory slot. You can damage the memory module. Static electricity can insert the module into any static...
... built up. Getting Started Adding memory (optional) 57 6 Using a small Phillips screwdriver, unscrew the screw that you may cause memory access problems. 9 Carefully remove the new memory module from its antistatic packaging, without touching its connector. Before you handle the module, touch a grounded metal surface to discharge any available slot. 10 Locate an empty memory slot. You can damage the memory module. Static electricity can insert the module into any static...
User Manual
Page 60
... has recognized it using the screw. 15 Re-insert the battery. When the operating system has loaded, you are adding an extra memory module after setting up the computer. 60 Getting Started Adding memory (optional) 14 Replace the memory module slot cover and secure it correctly as described in "Installing a memory module" on page 128. 16 Turn the computer right side up. 17 Reconnect the cables. 18 Restart the...
... has recognized it using the screw. 15 Re-insert the battery. When the operating system has loaded, you are adding an extra memory module after setting up the computer. 60 Getting Started Adding memory (optional) 14 Replace the memory module slot cover and secure it correctly as described in "Installing a memory module" on page 128. 16 Turn the computer right side up. 17 Reconnect the cables. 18 Restart the...
User Manual
Page 61
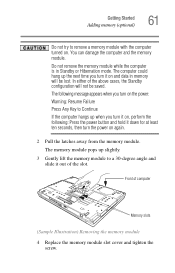
... the power button and hold it down for at least ten seconds, then turn it out of computer Memory slots (Sample Illustration) Removing the memory module 4 Replace the memory module slot cover and tighten the screw. In either of the above cases, the Standby configuration will be saved. Front of the slot. The following message appears when you turn on the power: Warning: Resume Failure Press Any Key...
... the power button and hold it down for at least ten seconds, then turn it out of computer Memory slots (Sample Illustration) Removing the memory module 4 Replace the memory module slot cover and tighten the screw. In either of the above cases, the Standby configuration will be saved. Front of the slot. The following message appears when you turn on the power: Warning: Resume Failure Press Any Key...
User Manual
Page 62
... does not recognize the memory configuration, turn off the computer, remove the memory slot cover, and check that the computer has recognized the change. Checking total memory When you add or remove a memory module, you can check that the module is inserted completely into the socket and lined up . 7 Reconnect the cables. 8 Restart the computer. 62 Getting Started Adding memory (optional) 5 Re-insert the battery. TECHNICAL NOTE: You...
... does not recognize the memory configuration, turn off the computer, remove the memory slot cover, and check that the computer has recognized the change. Checking total memory When you add or remove a memory module, you can check that the module is inserted completely into the socket and lined up . 7 Reconnect the cables. 8 Restart the computer. 62 Getting Started Adding memory (optional) 5 Re-insert the battery. TECHNICAL NOTE: You...
User Manual
Page 78
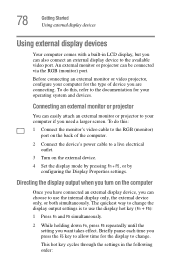
... display to change the display output settings is to the documentation for your computer for the type of the computer. 2 Connect the device's power cable to your computer if you can be connected via the RGB (monitor) port. Connecting an external monitor or projector You can also connect an external display device to change . The quickest way to the available video port. 78 Getting Started Using external display devices Using external display devices Your computer comes with a built-in the following order...
... display to change the display output settings is to the documentation for your computer for the type of the computer. 2 Connect the device's power cable to your computer if you can be connected via the RGB (monitor) port. Connecting an external monitor or projector You can also connect an external display device to change . The quickest way to the available video port. 78 Getting Started Using external display devices Using external display devices Your computer comes with a built-in the following order...
User Manual
Page 164
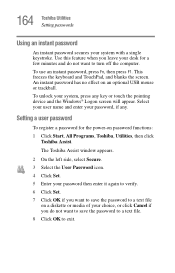
... optional USB mouse or trackball. An instant password has no effect on password functions: 1 Click Start, All Programs, Toshiba, Utilities, then click Toshiba Assist. Use this feature when you leave your system, press any . To use an instant password, press Fn, then press F1. Select your user name and enter your password, if any key or touch the pointing device and the Windows® Logon screen will appear. This freezes the keyboard...
... optional USB mouse or trackball. An instant password has no effect on password functions: 1 Click Start, All Programs, Toshiba, Utilities, then click Toshiba Assist. Use this feature when you leave your system, press any . To use an instant password, press Fn, then press F1. Select your user name and enter your password, if any key or touch the pointing device and the Windows® Logon screen will appear. This freezes the keyboard...
User Manual
Page 165
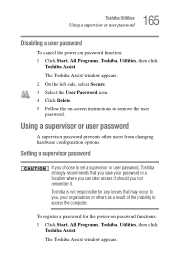
... on password function: 1 Click Start, All Programs, Toshiba, Utilities, then click Toshiba Assist. Using a supervisor or user password A supervisor password prevents other users from changing hardware configuration options. Setting a supervisor password If you choose to set a supervisor or user password, Toshiba strongly recommends that may occur to you, your password in a location where you can later access it . The Toshiba Assist window appears. 165 Toshiba Utilities Using a supervisor or user password Disabling a user password To cancel the power-on -screen instructions to access...
... on password function: 1 Click Start, All Programs, Toshiba, Utilities, then click Toshiba Assist. Using a supervisor or user password A supervisor password prevents other users from changing hardware configuration options. Setting a supervisor password If you choose to set a supervisor or user password, Toshiba strongly recommends that may occur to you, your password in a location where you can later access it . The Toshiba Assist window appears. 165 Toshiba Utilities Using a supervisor or user password Disabling a user password To cancel the power-on -screen instructions to access...
User Manual
Page 167
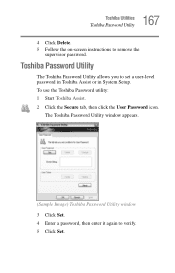
The Toshiba Password Utility window appears. (Sample Image) Toshiba Password Utility window 3 Click Set. 4 Enter a password, then enter it again to set a user-level password in Toshiba Assist or in System Setup. To use the Toshiba Password utility: 1 Start Toshiba Assist. 2 Click the Secure tab, then click the User Password icon. Toshiba Password Utility The Toshiba Password Utility allows you to verify. 5 Click Set. 167 Toshiba Utilities Toshiba Password Utility 4 Click Delete. 5 Follow the on-screen instructions to remove the supervisor password.
The Toshiba Password Utility window appears. (Sample Image) Toshiba Password Utility window 3 Click Set. 4 Enter a password, then enter it again to set a user-level password in Toshiba Assist or in System Setup. To use the Toshiba Password utility: 1 Start Toshiba Assist. 2 Click the Secure tab, then click the User Password icon. Toshiba Password Utility The Toshiba Password Utility allows you to verify. 5 Click Set. 167 Toshiba Utilities Toshiba Password Utility 4 Click Delete. 5 Follow the on-screen instructions to remove the supervisor password.
User Manual
Page 175
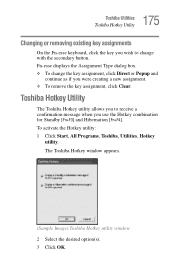
... creating a new assignment. ❖ To remove the key assignment, click Clear. The Toshiba Hotkey window appears. (Sample Image) Toshiba Hotkey utility window 2 Select the desired option(s). 3 Click OK. 175 Toshiba Utilities Toshiba Hotkey Utility Changing or removing existing key assignments On the Fn-esse keyboard, click the key you wish to receive a confirmation message when you use the Hotkey combination for Standby [Fn+F3] and Hibernation [Fn+F4]. To activate the Hotkey utility: 1 Click Start, All Programs, Toshiba, Utilities, Hotkey utility. Fn-esse displays...
... creating a new assignment. ❖ To remove the key assignment, click Clear. The Toshiba Hotkey window appears. (Sample Image) Toshiba Hotkey utility window 2 Select the desired option(s). 3 Click OK. 175 Toshiba Utilities Toshiba Hotkey Utility Changing or removing existing key assignments On the Fn-esse keyboard, click the key you wish to receive a confirmation message when you use the Hotkey combination for Standby [Fn+F3] and Hibernation [Fn+F4]. To activate the Hotkey utility: 1 Click Start, All Programs, Toshiba, Utilities, Hotkey utility. Fn-esse displays...
User Manual
Page 209
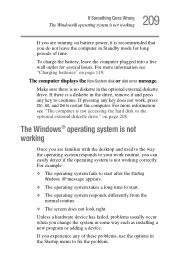
... the computer. on page 119. For more information see "The computer is a diskette in Standby mode for several hours. If there is not accessing the hard disk or the optional external diskette drive." Unless a hardware device has failed, problems usually occur when you change the system in some way such as installing a new program or adding a device. For more information see "Charging batteries" on page 208.
... the computer. on page 119. For more information see "The computer is a diskette in Standby mode for several hours. If there is not accessing the hard disk or the optional external diskette drive." Unless a hardware device has failed, problems usually occur when you change the system in some way such as installing a new program or adding a device. For more information see "Charging batteries" on page 208.
User Manual
Page 220
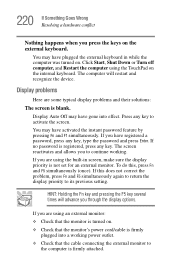
... computer will advance you are some typical display problems and their solutions: The screen is registered, press any key, type the password and press Enter. If you have plugged the external keyboard in screen, make sure the display priority is not set for an external monitor. HINT: Holding the Fn key and pressing the F5 key several times will restart and recognize the device. If you through the display options.
... computer will advance you are some typical display problems and their solutions: The screen is registered, press any key, type the password and press Enter. If you have plugged the external keyboard in screen, make sure the display priority is not set for an external monitor. HINT: Holding the Fn key and pressing the F5 key several times will restart and recognize the device. If you through the display options.
User Manual
Page 235
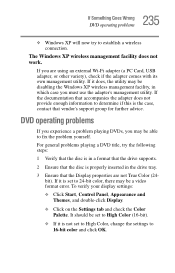
... Goes Wrong DVD operating problems ❖ Windows XP will now try the following steps: 1 Verify that the disc is in a format that the drive supports. 2 Ensure that the disc is set to 24-bit color, there may be a video format error. If you must use the adapter's management utility. DVD operating problems If you experience a problem playing DVDs, you may be disabling the Windows XP wireless management facility, in the drive tray. 3 Ensure that vendor's support group for...
... Goes Wrong DVD operating problems ❖ Windows XP will now try the following steps: 1 Verify that the disc is in a format that the drive supports. 2 Ensure that the disc is set to 24-bit color, there may be a video format error. If you must use the adapter's management utility. DVD operating problems If you experience a problem playing DVDs, you may be disabling the Windows XP wireless management facility, in the drive tray. 3 Ensure that vendor's support group for...
User Manual
Page 300
... adding memory 55 adjusting recording quality 149 Alt keys 98 audio .wav files 148 audio features 147 B backing up files 96 battery changing 128 charge indicator light 50, 121 charge not lasting 218 charging 47, 51 conserving power 125 disposal 133 300 low charge 123 monitoring power 50, 121 not charging 218 power usage hot key 127 power usage mode 253 real-time clock (RTC) 118 removing 128 BIOS Setup see Toshiba Hardware Setup button power 54, 64 start 137 C CD creating...
... adding memory 55 adjusting recording quality 149 Alt keys 98 audio .wav files 148 audio features 147 B backing up files 96 battery changing 128 charge indicator light 50, 121 charge not lasting 218 charging 47, 51 conserving power 125 disposal 133 300 low charge 123 monitoring power 50, 121 not charging 218 power usage hot key 127 power usage mode 253 real-time clock (RTC) 118 removing 128 BIOS Setup see Toshiba Hardware Setup button power 54, 64 start 137 C CD creating...
User Manual
Page 301
... connection set up 142 control buttons 76 critical applications 3 Ctrl keys 98 D desktop creating new icon 136 major features 136 desktop exploration 135 desktop icons 136 Device Manager 214 checking properties 215 disabling a device 215 devices keyboard 80 mouse 80 Disk Defragmenter 223 disk drive corrupted/damaged data files 224 missing files/trouble accessing a disk 222 running slow 223 diskette drive cannot insert a diskette 224 cannot read a diskette 224 connecting 83 external, connecting 83 display...
... connection set up 142 control buttons 76 critical applications 3 Ctrl keys 98 D desktop creating new icon 136 major features 136 desktop exploration 135 desktop icons 136 Device Manager 214 checking properties 215 disabling a device 215 devices keyboard 80 mouse 80 Disk Defragmenter 223 disk drive corrupted/damaged data files 224 missing files/trouble accessing a disk 222 running slow 223 diskette drive cannot insert a diskette 224 cannot read a diskette 224 connecting 83 external, connecting 83 display...
User Manual
Page 302
... change/remove key assignments 175 starting 171 Fn-esse program 171 assigning a key 171 using drag-and-drop 172 function keys 98 H hardware conflicts 212 resolving 214 headphones using 149 Help and Support Windows XP 211 Hibernation mode 85 configuring 89 starting again from 91 hot key display brightness 257 display modes 256 Hibernation mode 255 instant password security 251 keyboard 258 keyboard overlays 257, 259 password security 251 power usage mode 253 Standby mode 254 volume mute 250 hot key power usage mode...
... change/remove key assignments 175 starting 171 Fn-esse program 171 assigning a key 171 using drag-and-drop 172 function keys 98 H hardware conflicts 212 resolving 214 headphones using 149 Help and Support Windows XP 211 Hibernation mode 85 configuring 89 starting again from 91 hot key display brightness 257 display modes 256 Hibernation mode 255 instant password security 251 keyboard 258 keyboard overlays 257, 259 password security 251 power usage mode 253 Standby mode 254 volume mute 250 hot key power usage mode...
User Manual
Page 303
...99 troubleshooting 219 Windows special keys 99 keyboard, external 80 keyboard, PS/2-compatible 80 M main battery removing 128 memory adding 55 problem solving 216 removing expansion slot cover 57 memory module installation 55 installing inserting into socket 58 removing 61 microphone 148 modem determining COM port 139 problem solving 231 resetting port to default settings 139 upgrading 139 monitor 78 connecting 78 not working 220 mouse installing 80 serial 80 N network accessing 142 Dial-Up Networking Wizard 142 networking wireless 141 O opening the display panel 52 optical drive problems 225...
...99 troubleshooting 219 Windows special keys 99 keyboard, external 80 keyboard, PS/2-compatible 80 M main battery removing 128 memory adding 55 problem solving 216 removing expansion slot cover 57 memory module installation 55 installing inserting into socket 58 removing 61 microphone 148 modem determining COM port 139 problem solving 231 resetting port to default settings 139 upgrading 139 monitor 78 connecting 78 not working 220 mouse installing 80 serial 80 N network accessing 142 Dial-Up Networking Wizard 142 networking wireless 141 O opening the display panel 52 optical drive problems 225...
User Manual
Page 304
... Device Manager 214 disabling a device 215 disk drive is slow 223 display is blank 220 external display not working 222 external monitor 220 faulty memory 216 hardware conflict 212, 213 high-pitched noise 226 illegal operation 206 Internet bookmarked site not found 211 Internet connection is slow 211 keyboard not responding 208 missing files/trouble accessing a disk 222 modem not receiving or transmitting 231 no sound 226 non-system disk or disk error 209, 224 PC Card...
... Device Manager 214 disabling a device 215 disk drive is slow 223 display is blank 220 external display not working 222 external monitor 220 faulty memory 216 hardware conflict 212, 213 high-pitched noise 226 illegal operation 206 Internet bookmarked site not found 211 Internet connection is slow 211 keyboard not responding 208 missing files/trouble accessing a disk 222 modem not receiving or transmitting 231 no sound 226 non-system disk or disk error 209, 224 PC Card...


