User Manual
Page 45
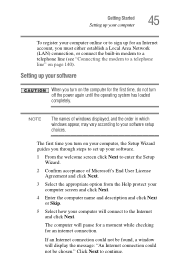
...choices. NOTE The names of Microsoft's End User License Agreement and click Next. 3 Select the appropriate option from the Help protect your computer screen and click Next. 4 Enter the computer name and description and click Next or Skip. 5 Select how your computer will connect to the Internet...not be chosen." Getting Started Setting up your computer 45 To register your computer online or to sign up your software. 1 From the welcome screen click Next to enter the Setup Wizard. 2 Confirm acceptance of windows displayed, and the order in modem to a telephone line (see "Connecting...
...choices. NOTE The names of Microsoft's End User License Agreement and click Next. 3 Select the appropriate option from the Help protect your computer screen and click Next. 4 Enter the computer name and description and click Next or Skip. 5 Select how your computer will connect to the Internet...not be chosen." Getting Started Setting up your computer 45 To register your computer online or to sign up your software. 1 From the welcome screen click Next to enter the Setup Wizard. 2 Confirm acceptance of windows displayed, and the order in modem to a telephone line (see "Connecting...
User Manual
Page 46
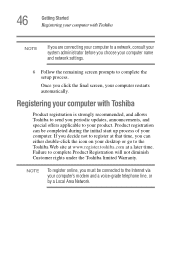
... computer name and network settings. 6 Follow the remaining screen prompts to complete the setup process. If you decide not to register at a later time. Failure to complete Product Registration will not diminish Customer rights under the Toshiba limited Warranty. Once you can be connected to the... computer. Product registration can either double-click the icon on your desktop or go to the Toshiba Web site at www.register.toshiba.com at that time, you click the final screen, your computer restarts automatically. NOTE To register online, you must be completed during the initial...
... computer name and network settings. 6 Follow the remaining screen prompts to complete the setup process. If you decide not to register at a later time. Failure to complete Product Registration will not diminish Customer rights under the Toshiba limited Warranty. Once you can be connected to the... computer. Product registration can either double-click the icon on your desktop or go to the Toshiba Web site at www.register.toshiba.com at that time, you click the final screen, your computer restarts automatically. NOTE To register online, you must be completed during the initial...
User Manual
Page 52
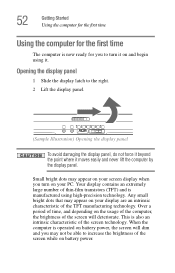
...not be able to increase the brightness of thin-film transistors (TFT) and is manufactured using it. Small bright dots may appear on your screen display when you turn it moves easily and never lift the computer by the display panel. Opening the display panel 1 Slide the display latch... force it beyond the point where it on and begin using high-precision technology. Your display contains an extremely large number of the screen while on battery power. When the computer is also an intrinsic characteristic of the TFT manufacturing technology. This is operated on battery power, ...
...not be able to increase the brightness of thin-film transistors (TFT) and is manufactured using it. Small bright dots may appear on your screen display when you turn it moves easily and never lift the computer by the display panel. Opening the display panel 1 Slide the display latch... force it beyond the point where it on and begin using high-precision technology. Your display contains an extremely large number of the screen while on battery power. When the computer is also an intrinsic characteristic of the TFT manufacturing technology. This is operated on battery power, ...
User Manual
Page 64
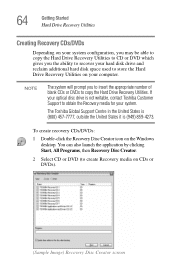
... hard disk space used to create Recovery media on CDs or DVDs). (Sample Image) Recovery Disc Creator screen To create recovery CDs/DVDs: 1 Double-click the Recovery Disc Creator icon on your system. The Toshiba Global Support Centre in the United States is (800) 457-7777, outside the United States it is... not writable, contact Toshiba Customer Support to obtain the Recovery media for your computer. You can also launch the application by clicking Start, All Programs, then Recovery Disc Creator. 2 ...
... hard disk space used to create Recovery media on CDs or DVDs). (Sample Image) Recovery Disc Creator screen To create recovery CDs/DVDs: 1 Double-click the Recovery Disc Creator icon on your system. The Toshiba Global Support Centre in the United States is (800) 457-7777, outside the United States it is... not writable, contact Toshiba Customer Support to obtain the Recovery media for your computer. You can also launch the application by clicking Start, All Programs, then Recovery Disc Creator. 2 ...
User Manual
Page 65
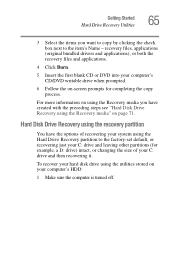
... leaving other partitions (for completing the copy process. For more information on page 71. To recover your hard disk drive using the utilities stored on -screen prompts for example, a D: drive) intact, or changing the size of recovering your system using the Recovery media" on using the Recovery media you want to...
... leaving other partitions (for completing the copy process. For more information on page 71. To recover your hard disk drive using the utilities stored on -screen prompts for example, a D: drive) intact, or changing the size of recovering your system using the Recovery media" on using the Recovery media you want to...
User Manual
Page 66
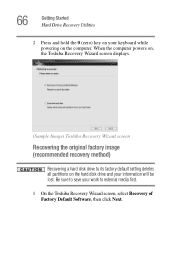
... sure to save your work to its factory default setting deletes all partitions on the hard disk drive and your keyboard while powering on , the Toshiba Recovery Wizard screen displays. (Sample Image) Toshiba Recovery Wizard screen Recovering the original factory image (recommended recovery method) Recovering a hard disk drive to external media first. 1 On the...
... sure to save your work to its factory default setting deletes all partitions on the hard disk drive and your keyboard while powering on , the Toshiba Recovery Wizard screen displays. (Sample Image) Toshiba Recovery Wizard screen Recovering the original factory image (recommended recovery method) Recovering a hard disk drive to external media first. 1 On the...
User Manual
Page 67
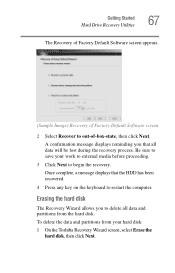
... The Recovery Wizard allows you that the HDD has been recovered. 4 Press any key on the keyboard to out-of Factory Default Software screen 2 Select Recover to restart the computer. To delete the data and partitions from the hard disk. A confirmation message displays reminding you to... that all data and partitions from your work to external media before proceeding. 3 Click Next to save your hard disk: 1 On the Toshiba Recovery Wizard screen, select Erase the hard disk, then click Next. Getting Started Hard Drive Recovery Utilities 67 The Recovery of Factory Default Software...
... The Recovery Wizard allows you that the HDD has been recovered. 4 Press any key on the keyboard to out-of Factory Default Software screen 2 Select Recover to restart the computer. To delete the data and partitions from the hard disk. A confirmation message displays reminding you to... that all data and partitions from your work to external media before proceeding. 3 Click Next to save your hard disk: 1 On the Toshiba Recovery Wizard screen, select Erase the hard disk, then click Next. Getting Started Hard Drive Recovery Utilities 67 The Recovery of Factory Default Software...

User Manual
Page 68
... keyboard to begin deleting the HDD. When the process is completed, a message displays informing you have saved your HDD. (Sample Image) Erase the hard disk screen 3 Select the desired method, then click Next. Be sure you that all data will be lost. 68 Getting Started Hard Drive Recovery Utilities 2 The next... screen lists the two methods you that the HDD has been deleted. 5 Press any key on the size of the data on the hard disk without ...
... keyboard to begin deleting the HDD. When the process is completed, a message displays informing you have saved your HDD. (Sample Image) Erase the hard disk screen 3 Select the desired method, then click Next. Be sure you that all data will be lost. 68 Getting Started Hard Drive Recovery Utilities 2 The next... screen lists the two methods you that the HDD has been deleted. 5 Press any key on the size of the data on the hard disk without ...
User Manual
Page 69
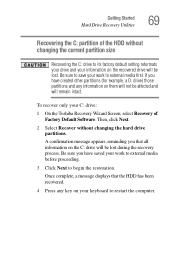
To recover only your work to external media before proceeding. 3 Click Next to begin the restoration. Be sure to save your C: drive: 1 On the Toshiba Recovery Wizard Screen, select Recovery of the HDD without changing the hard drive partitions. Then, click Next. 2 Select Recover without changing the current partition size Recovering the C: drive...
To recover only your work to external media before proceeding. 3 Click Next to begin the restoration. Be sure to save your C: drive: 1 On the Toshiba Recovery Wizard Screen, select Recovery of the HDD without changing the hard drive partitions. Then, click Next. 2 Select Recover without changing the current partition size Recovering the C: drive...
User Manual
Page 70
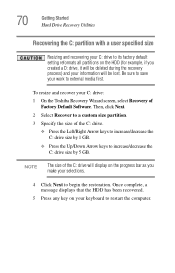
... Up/Down Arrow keys to its factory default setting reformats all partitions on the HDD (for example, if you make your C: drive: 1 On the Toshiba Recovery Wizard screen, select Recovery of the C: drive will be lost. 70 Getting Started Hard Drive Recovery Utilities Recovering the C: partition with a user specified size Resizing and...
... Up/Down Arrow keys to its factory default setting reformats all partitions on the HDD (for example, if you make your C: drive: 1 On the Toshiba Recovery Wizard screen, select Recovery of the C: drive will be lost. 70 Getting Started Hard Drive Recovery Utilities Recovering the C: partition with a user specified size Resizing and...
User Manual
Page 71
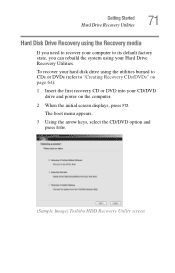
.... 3 Using the arrow keys, select the CD/DVD option and press Enter. (Sample Image) Toshiba HDD Recovery Utility screen To recover your hard disk drive using your CD/DVD drive and power on the computer. 2 When the initial screen displays, press F12. Getting Started Hard Drive Recovery Utilities 71 Hard Disk Drive Recovery...
.... 3 Using the arrow keys, select the CD/DVD option and press Enter. (Sample Image) Toshiba HDD Recovery Utility screen To recover your hard disk drive using your CD/DVD drive and power on the computer. 2 When the initial screen displays, press F12. Getting Started Hard Drive Recovery Utilities 71 Hard Disk Drive Recovery...

User Manual
Page 74
Installing drivers and applications The Toshiba Application Installer allows you to reinstall the drivers and applications that the HDD has been recovered. 4 Press any key on your keyboard to complete the ...-click the Administrative Tools icon. 3 Double-click the Computer Management icon. 4 Click Disk Management. 5 Highlight the hard disk drive in the lower portion of the screen. 74 Getting Started Hard Drive Recovery Utilities 3 Click Yes to display its status in the Volume list to begin the restoration. To reinstall drivers and...
Installing drivers and applications The Toshiba Application Installer allows you to reinstall the drivers and applications that the HDD has been recovered. 4 Press any key on your keyboard to complete the ...-click the Administrative Tools icon. 3 Double-click the Computer Management icon. 4 Click Disk Management. 5 Highlight the hard disk drive in the lower portion of the screen. 74 Getting Started Hard Drive Recovery Utilities 3 Click Yes to display its status in the Volume list to begin the restoration. To reinstall drivers and...
User Manual
Page 75
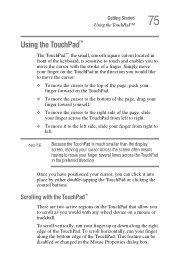
... TouchPad™ The TouchPad™, the small, smooth square cutout located in front of the keyboard, is much smaller than the display screen, moving your cursor across the screen often means having to move the cursor with the stroke of a finger. NOTE Because the TouchPad is sensitive to touch and enables you...
... TouchPad™ The TouchPad™, the small, smooth square cutout located in front of the keyboard, is much smaller than the display screen, moving your cursor across the screen often means having to move the cursor with the stroke of a finger. NOTE Because the TouchPad is sensitive to touch and enables you...
User Manual
Page 77
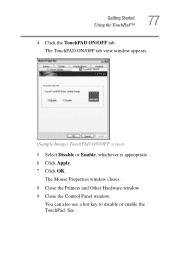
Getting Started Using the TouchPad™ 77 4 Click the TouchPAD ON/OFF tab. The Mouse Properties window closes. 8 Close the Printers and Other Hardware window. 9 Close the Control Panel window. The TouchPAD ON/OFF tab view window appears. (Sample Image) TouchPAD ON/OFF screen 5 Select Disable or Enable, whichever is appropriate. 6 Click Apply. 7 Click OK. You can also use a hot key to disable or enable the TouchPad. See .
Getting Started Using the TouchPad™ 77 4 Click the TouchPAD ON/OFF tab. The Mouse Properties window closes. 8 Close the Printers and Other Hardware window. 9 Close the Control Panel window. The TouchPAD ON/OFF tab view window appears. (Sample Image) TouchPAD ON/OFF screen 5 Select Disable or Enable, whichever is appropriate. 6 Click Apply. 7 Click OK. You can also use a hot key to disable or enable the TouchPad. See .
User Manual
Page 78
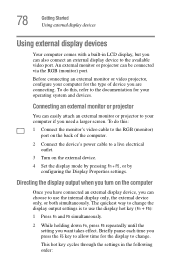
... use the display hot key (Fn + F5): 1 Press Fn and F5 simultaneously. 2 While holding down Fn, press F5 repeatedly until the setting you need a larger screen. Directing the display output when you are connecting. To do this : 1 Connect the monitor's video cable to the RGB (monitor) port on the back of...
... use the display hot key (Fn + F5): 1 Press Fn and F5 simultaneously. 2 While holding down Fn, press F5 repeatedly until the setting you need a larger screen. Directing the display output when you are connecting. To do this : 1 Connect the monitor's video cable to the RGB (monitor) port on the back of...
User Manual
Page 80
... of the external display To obtain the best picture quality from your system, the mouse cursor may move to the upper-right side of the screen. If this occurs, press the Esc or Windows key to return it to match the resolution of the external display device. The external display device...
... of the external display To obtain the best picture quality from your system, the mouse cursor may move to the upper-right side of the screen. If this occurs, press the Esc or Windows key to return it to match the resolution of the external display device. The external display device...

User Manual
Page 82
... a specific installation process. If your printer installation guide for the first time. The Add Printer Wizard appears. (Sample Image) Add Printer Wizard 3 Follow the on-screen instructions to your printer does not support Plug and Play, follow these steps to set up for instructions before completing the following procedure.
... a specific installation process. If your printer installation guide for the first time. The Add Printer Wizard appears. (Sample Image) Add Printer Wizard 3 Follow the on-screen instructions to your printer does not support Plug and Play, follow these steps to set up for instructions before completing the following procedure.
User Manual
Page 88
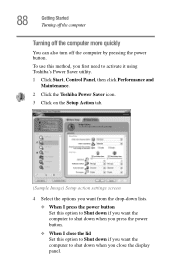
.... To use this method, you first need to activate it using Toshiba's Power Saver utility. 1 Click Start, Control Panel, then click Performance and Maintenance. 2 Click the Toshiba Power Saver icon. 3 Click on the Setup Action tab. (Sample Image) Setup action settings screen 4 Select the options you want from the drop-down lists. ❖...
.... To use this method, you first need to activate it using Toshiba's Power Saver utility. 1 Click Start, Control Panel, then click Performance and Maintenance. 2 Click the Toshiba Power Saver icon. 3 Click on the Setup Action tab. (Sample Image) Setup action settings screen 4 Select the options you want from the drop-down lists. ❖...
User Manual
Page 91
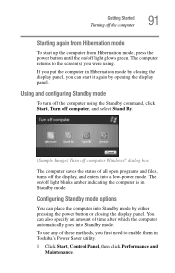
... a low-power mode. Using and configuring Standby mode To turn off the computer using . To use any of these methods, you first need to the screen(s) you put the computer in Toshiba's Power Saver utility. 1 Click Start, Control Panel, then click Performance and Maintenance.
... a low-power mode. Using and configuring Standby mode To turn off the computer using . To use any of these methods, you first need to the screen(s) you put the computer in Toshiba's Power Saver utility. 1 Click Start, Control Panel, then click Performance and Maintenance.
User Manual
Page 92
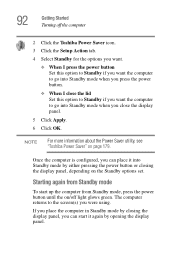
... you place the computer in Standby mode by opening the display panel. 92 Getting Started Turning off light glows green. The computer returns to the screen(s) you close the lid Set this option to Standby if you want the computer to go into Standby mode by either pressing the power button... closing the display panel, you can start up the computer from Standby mode, press the power button until the on/off the computer 2 Click the Toshiba Power Saver icon. 3 Click the Setup Action tab. 4 Select Standby for the options you want. ❖ When I press the power button Set this option to...
... you place the computer in Standby mode by opening the display panel. 92 Getting Started Turning off light glows green. The computer returns to the screen(s) you close the lid Set this option to Standby if you want the computer to go into Standby mode by either pressing the power button... closing the display panel, you can start up the computer from Standby mode, press the power button until the on/off the computer 2 Click the Toshiba Power Saver icon. 3 Click the Setup Action tab. 4 Select Standby for the options you want. ❖ When I press the power button Set this option to...


