

User Guide
Page 1
... Audio Menu 20 Image Menu 21 Controls Menu 24 Language Menu 26 Status Menu 26 Maintenance & Troubleshooting 29 Cleaning the Lens 29 Replacing the Projection Lamp 29 Replacing the Batteries in the Remote Control 32 Using the Security Lock 32 Troubleshooting 33 i
... Audio Menu 20 Image Menu 21 Controls Menu 24 Language Menu 26 Status Menu 26 Maintenance & Troubleshooting 29 Cleaning the Lens 29 Replacing the Projection Lamp 29 Replacing the Batteries in the Remote Control 32 Using the Security Lock 32 Troubleshooting 33 i

User Guide
Page 3
... touch. Safety Terms: • Warning: Don't look directly into the lens when the lamp is turned on the projector. To avoid burns, wait 30 minutes before opening the lamp door. Follow all safety instructions. iii SAFETY INSTRUCTIONS Please read and follow all service to the... lamp door on . •Warning: To replace the lamp, turn the projector off by equipment. Failure to comply with ...
... touch. Safety Terms: • Warning: Don't look directly into the lens when the lamp is turned on the projector. To avoid burns, wait 30 minutes before opening the lamp door. Follow all safety instructions. iii SAFETY INSTRUCTIONS Please read and follow all service to the... lamp door on . •Warning: To replace the lamp, turn the projector off by equipment. Failure to comply with ...

User Guide
Page 7
... your eyes. • Do not block the grills on . If this happens, you would any product with glass components. The bright light may harm your Toshiba dealer or projectors.toshiba.com for extended periods of projector Usage Guidelines • Do not look directly into the projection lens when the...
... your eyes. • Do not block the grills on . If this happens, you would any product with glass components. The bright light may harm your Toshiba dealer or projectors.toshiba.com for extended periods of projector Usage Guidelines • Do not look directly into the projection lens when the...

User Guide
Page 15
... Hardware Wizard may display a message stating that new hardware was found. Use the Wizard to the projector, the computer may appear. A green Lamp LED indicates that shipped with the projector. see page 18. For more information about the menus, see "Portable Computer Activation Chart" on the ...strip is activated; When initialization is very important. NOTE: Always use the power cord that you power up the equipment is complete, the Lamp LED lights green. Most computers should display on -screen menus. Refer to your computer's documentation to the image using the projector's on ...
... Hardware Wizard may display a message stating that new hardware was found. Use the Wizard to the projector, the computer may appear. A green Lamp LED indicates that shipped with the projector. see page 18. For more information about the menus, see "Portable Computer Activation Chart" on the ...strip is activated; When initialization is very important. NOTE: Always use the power cord that you power up the equipment is complete, the Lamp LED lights green. Most computers should display on -screen menus. Refer to your computer's documentation to the image using the projector's on ...

User Guide
Page 16
... button again. (It may take several seconds for fifteen minutes, but keeps the projector running ). Setting up the Projector NOTE: Lamp life will light green when the lamp has cooled. Turning Off the Projector If you must allow about a minute for a short period of time the projector stays in... standby mode; If you turn off , then wait 1 minute while the lamp cools before unplugging the projector. The Lamp LED will be extended if you want to turn the lamp off the projector for the lamp to reach full power and project the image again.) To completely power off the...
... button again. (It may take several seconds for fifteen minutes, but keeps the projector running ). Setting up the Projector NOTE: Lamp life will light green when the lamp has cooled. Turning Off the Projector If you must allow about a minute for a short period of time the projector stays in... standby mode; If you turn off , then wait 1 minute while the lamp cools before unplugging the projector. The Lamp LED will be extended if you want to turn the lamp off the projector for the lamp to reach full power and project the image again.) To completely power off the...

User Guide
Page 20
... computer or video button on . Source (keypad only) or Computer and Video (remote only) When you close the menus. Press menu again to turn the lamp on, or the lamp is currently on the remote. 16 See "Using the On-Screen Menus" on the keypad act as menu navigation buttons. The.../off button to close the menus, the projector saves any changes you can turn the lamp on -screen menus. An orange LED indicates the software is initializing or the lamp is orange. When you have more information about the on /off . Using the Projector Using the Keypad and Remote Buttons While the...
... computer or video button on . Source (keypad only) or Computer and Video (remote only) When you close the menus. Press menu again to turn the lamp on, or the lamp is currently on the remote. 16 See "Using the On-Screen Menus" on the keypad act as menu navigation buttons. The.../off button to close the menus, the projector saves any changes you can turn the lamp on -screen menus. An orange LED indicates the software is initializing or the lamp is orange. When you have more information about the on /off . Using the Projector Using the Keypad and Remote Buttons While the...

User Guide
Page 21
see "Standby Time" on . • If you don't press standby again, the lamp turns off and a blank screen is about a 60 second delay before the lamp turns back on page 24 for each source you have connected. 17 To decrease the vol- Volume (keypad only) To increase the volume, press volume + ...
see "Standby Time" on . • If you don't press standby again, the lamp turns off and a blank screen is about a 60 second delay before the lamp turns back on page 24 for each source you have connected. 17 To decrease the vol- Volume (keypad only) To increase the volume, press volume + ...

User Guide
Page 28
... 4.43, PAL, PAL-M, PAL-N, PAL-60, or SECAM) automatically based on the input signal it . Standby Time This option lets you select how long the lamp stays on , the projector reverses the image so you turn this happens, manually select a standard by clicking the left or right navigation button to detect...
... 4.43, PAL, PAL-M, PAL-N, PAL-60, or SECAM) automatically based on the input signal it . Standby Time This option lets you select how long the lamp stays on , the projector reverses the image so you turn this happens, manually select a standard by clicking the left or right navigation button to detect...

User Guide
Page 30
... the left or right navigation button. To remove the window, click the left or right navigation button. Display Audio Image Controls Language Status >Show status Lamp hours used Computer resolution Horizontal refresh rate Vertical refresh rate Mute status Source Software version Startup screen version Boot version 0039 1024x768 60.03 KHz...
... the left or right navigation button. To remove the window, click the left or right navigation button. Display Audio Image Controls Language Status >Show status Lamp hours used Computer resolution Horizontal refresh rate Vertical refresh rate Mute status Source Software version Startup screen version Boot version 0039 1024x768 60.03 KHz...

User Guide
Page 31
... page 29 for details. The counter starts at zero hours and counts each hour the lamp is displayed. Lamp hours used Indicates how many hours the current lamp has been in use . To change this, go to your computer's resolution setting. Vertical refresh rate The time period that one video frame is in...
... page 29 for details. The counter starts at zero hours and counts each hour the lamp is displayed. Lamp hours used Indicates how many hours the current lamp has been in use . To change this, go to your computer's resolution setting. Vertical refresh rate The time period that one video frame is in...

User Guide
Page 33
... the lens cap. Replace the lamp when the brightness is operating. 29 WARNING: To avoid burns, allow the projector to cool thoroughly. 3 Invert the projector on the lamp module door (Figure 20). You can order new lamp modules from your Toshiba dealer. MAINTENANCE & TROUBLESHOOTING This ...section describes how to: •clean the lens •replace the projection lamp •replace the batteries in the remote &#...
... the lens cap. Replace the lamp when the brightness is operating. 29 WARNING: To avoid burns, allow the projector to cool thoroughly. 3 Invert the projector on the lamp module door (Figure 20). You can order new lamp modules from your Toshiba dealer. MAINTENANCE & TROUBLESHOOTING This ...section describes how to: •clean the lens •replace the projection lamp •replace the batteries in the remote &#...

User Guide
Page 34
... and remove it. In the unlikely event that the bulb ruptures, small glass fragments may be generated. FIGURE 20 Removing the lamp door 5 Loosen the two non-removable screws on the lamp module 30 FIGURE 21 Loosening the screws on the outside of the module. M a i n t e n a n c e & Tro u b l e s h o o t i n g WARNING: Be extremely careful when removing...
... and remove it. In the unlikely event that the bulb ruptures, small glass fragments may be generated. FIGURE 20 Removing the lamp door 5 Loosen the two non-removable screws on the lamp module 30 FIGURE 21 Loosening the screws on the outside of the module. M a i n t e n a n c e & Tro u b l e s h o o t i n g WARNING: Be extremely careful when removing...

User Guide
Page 35
... the pull tab and lift the module out (Figure 22). Verify that the counter was reset by inserting the hooks on . 12 To reset the lamp hour counter in the Status window, press and hold the volume - The glass may shatter and cause injury. 31 Dispose of the... lamp door into the projector and pressing the lamp door into place. pull tab FIGURE 22 Removing the lamp module 7 Install the new lamp module, being sure to align the connectors properly. 8 Push the module in the power cord...
... the pull tab and lift the module out (Figure 22). Verify that the counter was reset by inserting the hooks on . 12 To reset the lamp hour counter in the Status window, press and hold the volume - The glass may shatter and cause injury. 31 Dispose of the... lamp door into the projector and pressing the lamp door into place. pull tab FIGURE 22 Removing the lamp module 7 Install the new lamp module, being sure to align the connectors properly. 8 Push the module in the power cord...

User Guide
Page 37
... is plugged into a power strip, make sure the power strip is properly connected to a fully functional AC electrical outlet. See "Replacing the Projection Lamp" on page 29. •Make sure that the power cord is turned on page 23. •Be sure the projector is visible. Make sure... that it is connected. Refer to adjust the brightness up screen displays •Verify that the proper input source is securely connected in the lamp module. Problem: Image isn't centered on the screen •Move the projector to "Horizontal position" on page 23 and "Vertical position" on . &#...
... is plugged into a power strip, make sure the power strip is properly connected to a fully functional AC electrical outlet. See "Replacing the Projection Lamp" on page 29. •Make sure that the power cord is turned on page 23. •Be sure the projector is visible. Make sure... that it is connected. Refer to adjust the brightness up screen displays •Verify that the proper input source is securely connected in the lamp module. Problem: Image isn't centered on the screen •Move the projector to "Horizontal position" on page 23 and "Vertical position" on . &#...

User Guide
Page 40
...lamp as there are differences in the displays of your dealer or Toshiba toll-free customer service and technical support for a long time. The most current troubleshooting information (including webbased and other electronic technical support, please visit Toshiba at support.toshiba.com. For web-based or other electronic technical support) is available at Toshiba...'s Service and Support website at support.toshiba.com. 36 See "Brightness" ...
...lamp as there are differences in the displays of your dealer or Toshiba toll-free customer service and technical support for a long time. The most current troubleshooting information (including webbased and other electronic technical support, please visit Toshiba at support.toshiba.com. For web-based or other electronic technical support) is available at Toshiba...'s Service and Support website at support.toshiba.com. 36 See "Brightness" ...

User Guide
Page 41
APPENDIX Specifications The TDP-P3 must be operated and stored within the temperature and humidity ranges specified. Temperature Operating Non-operating 50 to 104° F (10 to 40° C) -4 to ...) unpacked Altitude Operating Non-operating 0 to 10,000 feet (3,048 meters) 0 to 40,000 feet (12,192 meters) Optics Focus Range 4.9 - 16 feet (1.5-5 m) Lamp Type 120-watt VHP lamp Input Power Requirements 100-120VAC 6A;50/60Hz 200-240VAC 3A; 50Hz Audio Input Input Impedance Maximum Input Voltage Sensitivity Connector Type 10K...
APPENDIX Specifications The TDP-P3 must be operated and stored within the temperature and humidity ranges specified. Temperature Operating Non-operating 50 to 104° F (10 to 40° C) -4 to ...) unpacked Altitude Operating Non-operating 0 to 10,000 feet (3,048 meters) 0 to 40,000 feet (12,192 meters) Optics Focus Range 4.9 - 16 feet (1.5-5 m) Lamp Type 120-watt VHP lamp Input Power Requirements 100-120VAC 6A;50/60Hz 200-240VAC 3A; 50Hz Audio Input Input Impedance Maximum Input Voltage Sensitivity Connector Type 10K...
User Guide
Page 42
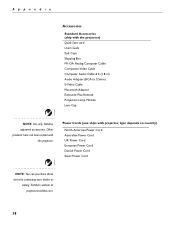
... UK Power Cord European Power Cord Danish Power Cord Swiss Power Cord NOTE: You can purchase these items by contacting your dealer or visiting Toshiba's website at projectors.toshiba.com. 38 Power Cords (one ships with the projector. Appendix Accessories Standard Accessories (ship with the projector) Quick Start card User's Guide Soft... M1-DA Analog Computer Cable Composite Video Cable Computer Audio Cable 6 ft (1.8 m) Audio Adapter (RCA to 3.5mm) S-Video Cable Macintosh Adaptor Executive Plus Remote Projection Lamp Module Lens Cap NOTE: Use only Toshibaapproved accessories.
... UK Power Cord European Power Cord Danish Power Cord Swiss Power Cord NOTE: You can purchase these items by contacting your dealer or visiting Toshiba's website at projectors.toshiba.com. 38 Power Cords (one ships with the projector. Appendix Accessories Standard Accessories (ship with the projector) Quick Start card User's Guide Soft... M1-DA Analog Computer Cable Composite Video Cable Computer Audio Cable 6 ft (1.8 m) Audio Adapter (RCA to 3.5mm) S-Video Cable Macintosh Adaptor Executive Plus Remote Projection Lamp Module Lens Cap NOTE: Use only Toshibaapproved accessories.

User Guide
Page 51
... Support audio cable, connecting 8 Audio menu 20 Audio menu options Volume 20 Auto Source Select 25 B Blank Screen 20 brightness, adjusting 19 buttons on keypad Lamp on/off 16 Menu 16 Source 16 Standby 17 Volume 17 C cables audio 8 composite video 9 M1-DA analog computer cable 2, 6, 7 ordering 38 power 38 S-video...
... Support audio cable, connecting 8 Audio menu 20 Audio menu options Volume 20 Auto Source Select 25 B Blank Screen 20 brightness, adjusting 19 buttons on keypad Lamp on/off 16 Menu 16 Source 16 Standby 17 Volume 17 C cables audio 8 composite video 9 M1-DA analog computer cable 2, 6, 7 ordering 38 power 38 S-video...

User Guide
Page 53
... replacing 29 turns off unexpectedly 36 lamp hour counter 27 Lamp on the screen 23 resetting adjustments 20 resizing video 21 resolution 1 S safety guidelines iii SECAM video 19, 24 security lock 32, 39 SimulScan, using with ... power up sequence 11, 34 project from behind the screen 24 R rear projection 24 remote control replacing the batteries 32 using 13, 16 replacing projection lamp module 29 re-positioning the image on /off button 16 Language menu 26 language, selecting for menus 26 lens cap 38 cleaning 29 M M1-DA...
... replacing 29 turns off unexpectedly 36 lamp hour counter 27 Lamp on the screen 23 resetting adjustments 20 resizing video 21 resolution 1 S safety guidelines iii SECAM video 19, 24 security lock 32, 39 SimulScan, using with ... power up sequence 11, 34 project from behind the screen 24 R rear projection 24 remote control replacing the batteries 32 using 13, 16 replacing projection lamp module 29 re-positioning the image on /off button 16 Language menu 26 language, selecting for menus 26 lens cap 38 cleaning 29 M M1-DA...

User Guide
Page 55
... MORE THAN ONE YEAR AFTER THE CAUSE OF ACTION HAS ACCRUED. The standard limited warranty excludes the lamps in projectors after 90 days and the accessories after one year. Toshiba's liability for the breach of the Product, at its authorized agents, causes other than from the ... YOU SPECIFIC LEGAL RIGHTS, AND YOU MAY ALSO HAVE OTHER RIGHTS WHICH VARY FROM STATE TO STATE. LIMITED WARRANTY Toshiba America Information Systems, Inc. ("Toshiba") warrants that each TDP-P3 ("the Product") sold hereunder will conform to properly use the Product in the application for which includes (i) proof ...
... MORE THAN ONE YEAR AFTER THE CAUSE OF ACTION HAS ACCRUED. The standard limited warranty excludes the lamps in projectors after 90 days and the accessories after one year. Toshiba's liability for the breach of the Product, at its authorized agents, causes other than from the ... YOU SPECIFIC LEGAL RIGHTS, AND YOU MAY ALSO HAVE OTHER RIGHTS WHICH VARY FROM STATE TO STATE. LIMITED WARRANTY Toshiba America Information Systems, Inc. ("Toshiba") warrants that each TDP-P3 ("the Product") sold hereunder will conform to properly use the Product in the application for which includes (i) proof ...

