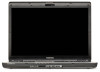

User Guide
Page 2
... available. Model: Satellite Pro® L300 Series Recordable and/or ReWritable Drive(s) and Associated Software Warranty The computer system you purchased may lose data or suffer other reproductive harm. Protection of Stored Data For your important data, please make periodic back-up copies of all set-up and usage instructions in the applicable user guides and/or manuals enclosed or provided electronically. TOSHIBA DISCLAIMS...
... available. Model: Satellite Pro® L300 Series Recordable and/or ReWritable Drive(s) and Associated Software Warranty The computer system you purchased may lose data or suffer other reproductive harm. Protection of Stored Data For your important data, please make periodic back-up copies of all set-up and usage instructions in the applicable user guides and/or manuals enclosed or provided electronically. TOSHIBA DISCLAIMS...
User Guide
Page 5
... transmission, refer to the fax software instructions installed on this , it can. Also, you will be a 900 number or any changes necessary to provide you with this change. If Problems Arise If this equipment causes harm to state tariffs. or an authorized representative of service may request that temporary discontinuance of Toshiba, or the Toshiba Support Centre within the United States...
... transmission, refer to the fax software instructions installed on this , it can. Also, you will be a 900 number or any changes necessary to provide you with this change. If Problems Arise If this equipment causes harm to state tariffs. or an authorized representative of service may request that temporary discontinuance of Toshiba, or the Toshiba Support Centre within the United States...
User Guide
Page 29
...52 Removing a memory module 57 Checking total memory 58 Hard Drive Recovery Utilities 59 Creating Recovery DVDs 59 Hard Disk Drive Recovery options 60 Hard Disk Drive Recovery using the Recovery media 65 Installing drivers and applications 66 Using the TouchPad 66 Scrolling with the TouchPad 67 Control buttons 67 Disabling or enabling the TouchPad 67 Using external display devices 67 Directing the display output when you turn on the computer 68 Adjusting the quality of the external display......69 Using an external keyboard 69 Using a mouse 70 Connecting a printer 70 Setting up...
...52 Removing a memory module 57 Checking total memory 58 Hard Drive Recovery Utilities 59 Creating Recovery DVDs 59 Hard Disk Drive Recovery options 60 Hard Disk Drive Recovery using the Recovery media 65 Installing drivers and applications 66 Using the TouchPad 66 Scrolling with the TouchPad 67 Control buttons 67 Disabling or enabling the TouchPad 67 Using external display devices 67 Directing the display output when you turn on the computer 68 Adjusting the quality of the external display......69 Using an external keyboard 69 Using a mouse 70 Connecting a printer 70 Setting up...

User Guide
Page 52
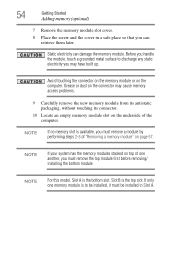
... is in Standby or Hibernation mode, data will need a small Phillips screwdriver for this model, Slot A is the top slot. Avoid touching the cover, the module, and the surrounding area before replacing it must be hot. If you install or remove a memory module, turn off computer or Shut Down window appears. 2 Click Turn Off or Shut Down. 52 Getting Started Adding memory (optional) Installing a memory module Memory modules can install one memory module is to the computer, including...
... is in Standby or Hibernation mode, data will need a small Phillips screwdriver for this model, Slot A is the top slot. Avoid touching the cover, the module, and the surrounding area before replacing it must be hot. If you install or remove a memory module, turn off computer or Shut Down window appears. 2 Click Turn Off or Shut Down. 52 Getting Started Adding memory (optional) Installing a memory module Memory modules can install one memory module is to the computer, including...
User Guide
Page 54
54 Getting Started Adding memory (optional) 7 Remove the memory module slot cover. 8 Place the screw and the cover in Slot A. Slot B is to discharge any static electricity you must remove the top module first before removing/ installing the bottom module. NOTE If no memory slot is the bottom slot. If only one another, you may cause memory access problems. 9 Carefully remove the new memory module from its antistatic packaging, without touching its connector. 10 Locate an empty memory module slot on page...
54 Getting Started Adding memory (optional) 7 Remove the memory module slot cover. 8 Place the screw and the cover in Slot A. Slot B is to discharge any static electricity you must remove the top module first before removing/ installing the bottom module. NOTE If no memory slot is the bottom slot. If only one another, you may cause memory access problems. 9 Carefully remove the new memory module from its antistatic packaging, without touching its connector. 10 Locate an empty memory module slot on page...
User Guide
Page 57
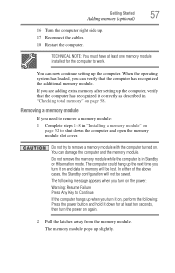
... correctly as described in Standby or Hibernation mode. The following : Press the power button and hold it on and data in "Installing a memory module" on page 52 to work. The computer could hang up . 17 Reconnect the cables. 18 Restart the computer. You can now continue setting up slightly. Getting Started 57 Adding memory (optional) 16 Turn the computer right side up the...
... correctly as described in Standby or Hibernation mode. The following : Press the power button and hold it on and data in "Installing a memory module" on page 52 to work. The computer could hang up . 17 Reconnect the cables. 18 Restart the computer. You can now continue setting up slightly. Getting Started 57 Adding memory (optional) 16 Turn the computer right side up the...
User Guide
Page 58
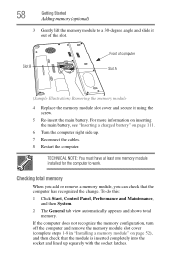
... it using the screw. 5 Re-insert the main battery. 58 Getting Started Adding memory (optional) 3 Gently lift the memory module to work. For more information on inserting the main battery, see "Inserting a charged battery" on page 52), and then check that the computer has recognized the change. If the computer does not recognize the memory configuration, turn off the computer and remove the memory module slot cover (complete steps 1-8 in "Installing a memory module...
... it using the screw. 5 Re-insert the main battery. 58 Getting Started Adding memory (optional) 3 Gently lift the memory module to work. For more information on inserting the main battery, see "Inserting a charged battery" on page 52), and then check that the computer has recognized the change. If the computer does not recognize the memory configuration, turn off the computer and remove the memory module slot cover (complete steps 1-8 in "Installing a memory module...
User Guide
Page 67
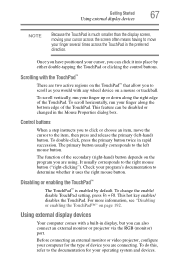
... and release the primary (left mouse button. Control buttons When a step instructs you can be disabled or changed in the Mouse Properties dialog box. To change the enable/ disable TouchPad setting, press Fn + F9. Before connecting an external monitor or video projector, configure your computer for your operating system and devices. Getting Started 67 Using external display devices NOTE Because the TouchPad is enabled by either double-tapping the TouchPad or clicking the control buttons. It usually corresponds to the...
... and release the primary (left mouse button. Control buttons When a step instructs you can be disabled or changed in the Mouse Properties dialog box. To change the enable/ disable TouchPad setting, press Fn + F9. Before connecting an external monitor or video projector, configure your computer for your operating system and devices. Getting Started 67 Using external display devices NOTE Because the TouchPad is enabled by either double-tapping the TouchPad or clicking the control buttons. It usually corresponds to the...
User Guide
Page 68
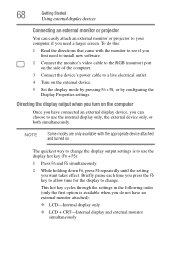
... an external monitor or projector to your computer if you have an external monitor attached): ❖ LCD-Internal display only ❖ LCD + CRT-Internal display and external monitor simultaneously To do not have connected an external display device, you first need a larger screen. Directing the display output when you turn on the computer Once you need to install new software. 2 Connect the monitor's video cable to the RGB (monitor) port on the side of the computer. 3 Connect the device's power cable to use the display hot key (Fn...
... an external monitor or projector to your computer if you have an external monitor attached): ❖ LCD-Internal display only ❖ LCD + CRT-Internal display and external monitor simultaneously To do not have connected an external display device, you first need a larger screen. Directing the display output when you turn on the computer Once you need to install new software. 2 Connect the monitor's video cable to the RGB (monitor) port on the side of the computer. 3 Connect the device's power cable to use the display hot key (Fn...
User Guide
Page 141
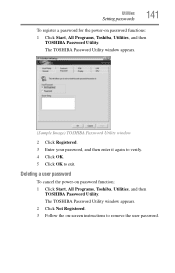
... the on-screen instructions to exit. Utilities Setting passwords 141 To register a password for the power-on password function: 1 Click Start, All Programs, Toshiba, Utilities, and then TOSHIBA Password Utility. Deleting a user password To cancel the power-on password functions: 1 Click Start, All Programs, Toshiba, Utilities, and then TOSHIBA Password Utility. The TOSHIBA Password Utility window appears. (Sample Image) TOSHIBA Password Utility window 2 Click Registered. 3 Enter your password, and then enter it again to verify. 4 Click OK. 5 Click OK to remove the user password.
... the on-screen instructions to exit. Utilities Setting passwords 141 To register a password for the power-on password function: 1 Click Start, All Programs, Toshiba, Utilities, and then TOSHIBA Password Utility. Deleting a user password To cancel the power-on password functions: 1 Click Start, All Programs, Toshiba, Utilities, and then TOSHIBA Password Utility. The TOSHIBA Password Utility window appears. (Sample Image) TOSHIBA Password Utility window 2 Click Registered. 3 Enter your password, and then enter it again to verify. 4 Click OK. 5 Click OK to remove the user password.
User Guide
Page 156
... operating system responds to your computer model. If you change the system in the Startup menu to fix the problem. The labels on the bottom of the AC adaptor must match exactly. Unless a hardware device has failed, problems usually occur when you experience any of these problems, use the options in some way such as installing a new program or adding a device. The Windows® operating system is not working...
... operating system responds to your computer model. If you change the system in the Startup menu to fix the problem. The labels on the bottom of the AC adaptor must match exactly. Unless a hardware device has failed, problems usually occur when you experience any of these problems, use the options in some way such as installing a new program or adding a device. The Windows® operating system is not working...
User Guide
Page 165
... using an external monitor: ❖ Check that the monitor is turned on. ❖ Check that the monitor's power cord/cable is firmly plugged into effect. If you to choose the colors for an external monitor. The Settings tab allows you to continue working power outlet. ❖ Check that the cable connecting the external monitor to the computer is firmly attached. ❖ Try adjusting the contrast and brightness controls on the external monitor...
... using an external monitor: ❖ Check that the monitor is turned on. ❖ Check that the monitor's power cord/cable is firmly plugged into effect. If you to choose the colors for an external monitor. The Settings tab allows you to continue working power outlet. ❖ Check that the cable connecting the external monitor to the computer is firmly attached. ❖ Try adjusting the contrast and brightness controls on the external monitor...
User Guide
Page 173
... check this. Make sure the cable from the modem to the program's documentation and the modem manual for information on certain models) This section lists common modem problems. The modem will be lit). ❖ Verify that the Wireless antenna ON/OFF switch is ON (the wireless indicator light will not receive or transmit properly. Wireless networking problems NOTE This section provides general troubleshooting tips for...
... check this. Make sure the cable from the modem to the program's documentation and the modem manual for information on certain models) This section lists common modem problems. The modem will be lit). ❖ Verify that the Wireless antenna ON/OFF switch is ON (the wireless indicator light will not receive or transmit properly. Wireless networking problems NOTE This section provides general troubleshooting tips for...
User Guide
Page 180
... backup of your important files to optical discs or hard drives. External optical disc writers are also widely available. This window will open for the blank CD. Connect the AC adaptor before continuing. 1 Put a blank CD-R (CD-recordable) disc into the CD window. 180 If Something Goes Wrong Develop good computing habits Backing up your data to CDs with either hardware or software...
... backup of your important files to optical discs or hard drives. External optical disc writers are also widely available. This window will open for the blank CD. Connect the AC adaptor before continuing. 1 Put a blank CD-R (CD-recordable) disc into the CD window. 180 If Something Goes Wrong Develop good computing habits Backing up your data to CDs with either hardware or software...

User Guide
Page 205
... changes to a pair of scissors. 2 Click to handle these networking environments. ConfigFree® profiles are useful for example, high or medium) Using ConfigFree® with the desired settings. Profile Settings The Profile Settings utility lets you enable or disable settings of wired and wireless network devices, infrared devices, and set up a profile to match that environment and connect to the selected device will occur automatically. Disconnecting from a Bluetooth® device...
... changes to a pair of scissors. 2 Click to handle these networking environments. ConfigFree® profiles are useful for example, high or medium) Using ConfigFree® with the desired settings. Profile Settings The Profile Settings utility lets you enable or disable settings of wired and wireless network devices, infrared devices, and set up a profile to match that environment and connect to the selected device will occur automatically. Disconnecting from a Bluetooth® device...

User Guide
Page 223
... and connected by a communications link that activates a memory resident program. The decentralized, world-wide network of computers or other services. L L1 (level one) cache - Memory cache installed on the motherboard to interact with the Fn key can set system options or control system parameters, such as a mouse. A group of computers that represents a function, file, or program. A small image displayed on the network. See also cache, CPU cache...
... and connected by a communications link that activates a memory resident program. The decentralized, world-wide network of computers or other services. L L1 (level one) cache - Memory cache installed on the motherboard to interact with the Fn key can set system options or control system parameters, such as a mouse. A group of computers that represents a function, file, or program. A small image displayed on the network. See also cache, CPU cache...
User Guide
Page 229
... changing 109 charge indicator light 48, 104 charge not lasting 163 charging 46, 48 conserving power 107 disposal 115 low charge 106 monitoring power 48, 104 not charging 163 power profile 189 power profile hot key 109 real-time clock (RTC) 101 removing 110 BIOS Setup see TOSHIBA Hardware Setup Bridge Media Adapter inserting memory media 130 removing memory media 130 button power 51, 60 start 119 C CD playing an audio 97 CD, using 94 channels DMA 159 IRQ 159 character keys 85 charging the battery...
... changing 109 charge indicator light 48, 104 charge not lasting 163 charging 46, 48 conserving power 107 disposal 115 low charge 106 monitoring power 48, 104 not charging 163 power profile 189 power profile hot key 109 real-time clock (RTC) 101 removing 110 BIOS Setup see TOSHIBA Hardware Setup Bridge Media Adapter inserting memory media 130 removing memory media 130 button power 51, 60 start 119 C CD playing an audio 97 CD, using 94 channels DMA 159 IRQ 159 character keys 85 charging the battery...
User Guide
Page 230
... a power source 46 connection set up 121 control buttons 67 Ctrl keys 86 D desktop creating new icon 118 major features 118 desktop exploration 117 desktop icons 118 Device Manager 160 checking properties 161 disabling a device 161 devices keyboard 69 mouse 70 Disk Defragmenter 167 disk drive corrupted/damaged data files 168 missing files/trouble accessing a disk 167 running slow 167 diskette drive cannot insert a diskette 168 cannot read a diskette 168 connecting 72 external, connecting 72 display...
... a power source 46 connection set up 121 control buttons 67 Ctrl keys 86 D desktop creating new icon 118 major features 118 desktop exploration 117 desktop icons 118 Device Manager 160 checking properties 161 disabling a device 161 devices keyboard 69 mouse 70 Disk Defragmenter 167 disk drive corrupted/damaged data files 168 missing files/trouble accessing a disk 167 running slow 167 diskette drive cannot insert a diskette 168 cannot read a diskette 168 connecting 72 external, connecting 72 display...
User Guide
Page 232
... cover 54 memory module inserting 55 installation 52 removing 58 memory module slot 54 microphone 126 modem connecting to telephone line 121 problem solving 173 monitor 67 connecting 68 not working 165 mouse installing 70 mouse utility 146 N network accessing 121 New Connection Wizard 121 networking wireless 120 O opening the display panel 49 optical discs inserting 95 optical drive problems 168 troubleshooting 168 using 94 optical media recording 97 other documentation 39 overlay keys 87 P password deleting a supervisor 140 disabling a user 141 setting a user 140 supervisor set up 139 types...
... cover 54 memory module inserting 55 installation 52 removing 58 memory module slot 54 microphone 126 modem connecting to telephone line 121 problem solving 173 monitor 67 connecting 68 not working 165 mouse installing 70 mouse utility 146 N network accessing 121 New Connection Wizard 121 networking wireless 120 O opening the display panel 49 optical discs inserting 95 optical drive problems 168 troubleshooting 168 using 94 optical media recording 97 other documentation 39 overlay keys 87 P password deleting a supervisor 140 disabling a user 141 setting a user 140 supervisor set up 139 types...
User Guide
Page 234
... telephone line connecting to modem 121 television adjusting display 69 Toshiba registering computer 45 worldwide offices 185 TOSHIBA Assist 133 TOSHIBA Hardware Setup 147 Toshiba online resources 99 traveling tips 116 troubleshooting DVD player general problems 175 external keyboard 164 keyboard 164 keypad overlay 164 optical drive 168 turning on the computer 50 turning on the power 50 U user password, disabling 141 user password, setting 140 using a file extension 92 Utilities 132 utilities Power Saver 144 V video projector adjusting display 69 W warranty...
... telephone line connecting to modem 121 television adjusting display 69 Toshiba registering computer 45 worldwide offices 185 TOSHIBA Assist 133 TOSHIBA Hardware Setup 147 Toshiba online resources 99 traveling tips 116 troubleshooting DVD player general problems 175 external keyboard 164 keyboard 164 keypad overlay 164 optical drive 168 turning on the computer 50 turning on the power 50 U user password, disabling 141 user password, setting 140 using a file extension 92 Utilities 132 utilities Power Saver 144 V video projector adjusting display 69 W warranty...


