
Users Manual Canada; English
Page 3
...by password 6-10 Power-up modes 6-10 Panel power on/off 6-11 User's Manual iii Right side 2-4 Back 2-5 Underside 2-6 Front with the display open 2-7 Indicators 2-9 Optical disc drives 2-10 AC adaptor 2-11 Chapter 3 Hardware, Utilities and Options Hardware 3-1 Special features 3-6 Utilities and Applications 3-8 Optional devices 3-11 Optional accessories 3-24 Chapter 4 Operating Basics Using the Touch Pad 4-1 Web Camera 4-2 Using the TOSHIBA Face Recognition 4-3 Using optical disc drives 4-6 Writing CD/DVDs 4-10 TOSHIBA VIDEO PLAYER 4-16 Media care 4-18 Sound System...
...by password 6-10 Power-up modes 6-10 Panel power on/off 6-11 User's Manual iii Right side 2-4 Back 2-5 Underside 2-6 Front with the display open 2-7 Indicators 2-9 Optical disc drives 2-10 AC adaptor 2-11 Chapter 3 Hardware, Utilities and Options Hardware 3-1 Special features 3-6 Utilities and Applications 3-8 Optional devices 3-11 Optional accessories 3-24 Chapter 4 Operating Basics Using the Touch Pad 4-1 Web Camera 4-2 Using the TOSHIBA Face Recognition 4-3 Using optical disc drives 4-6 Writing CD/DVDs 4-10 TOSHIBA VIDEO PLAYER 4-16 Media care 4-18 Sound System...
Users Manual Canada; English
Page 4
... monitor port pin assignment A-2 Appendix B Display Controller and Video mode Display controller B-1 Video mode B-1 Appendix C Information for Wireless Devices Wireless LAN Interoperability C-1 Bluetooth wireless technology Interoperability C-1 CAUTION about Wireless Devices C-2 Wireless Devices and your health C-2 Radio Regulatory Information C-3 Radio approvals for wireless devices C-8 Appendix D AC Power Cord and Connectors Certification agencies D-1 Appendix E Legal Footnotes Non-applicable Icons E-1 CPU E-1 Memory (Main System E-2 Battery Life E-3 Hard Disk Drive (HDD...
... monitor port pin assignment A-2 Appendix B Display Controller and Video mode Display controller B-1 Video mode B-1 Appendix C Information for Wireless Devices Wireless LAN Interoperability C-1 Bluetooth wireless technology Interoperability C-1 CAUTION about Wireless Devices C-2 Wireless Devices and your health C-2 Radio Regulatory Information C-3 Radio approvals for wireless devices C-8 Appendix D AC Power Cord and Connectors Certification agencies D-1 Appendix E Legal Footnotes Non-applicable Icons E-1 CPU E-1 Memory (Main System E-2 Battery Life E-3 Hard Disk Drive (HDD...

Users Manual Canada; English
Page 13
... accessory devices. Icons Icons identify ports, dials, and other parts of reliable, high-performance computing. The indicator panel also uses icons to describe, identify, and highlight terms and operating procedures. If you are also defined in Chapter 3, Hardware, Utilities and Options to learn how this manual is designed to provide years of your computer. Acronyms are a new user of this computer. Conventions This manual uses...
... accessory devices. Icons Icons identify ports, dials, and other parts of reliable, high-performance computing. The indicator panel also uses icons to describe, identify, and highlight terms and operating procedures. If you are also defined in Chapter 3, Hardware, Utilities and Options to learn how this manual is designed to provide years of your computer. Acronyms are a new user of this computer. Conventions This manual uses...
Users Manual Canada; English
Page 19
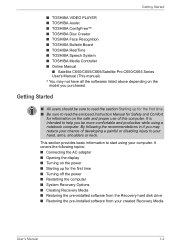
... the model you may not have all the softwares listed above depending on the safe and proper use of this computer. By following topics: ■ Connecting the AC adaptor ■ Opening the display ■ Turning on the power ■ Starting up for the first time ■ Turning off the power ■ Restarting the computer ■ System Recovery Options ■ Creating Recovery Media ■ Restoring the pre-installed software from the Recovery hard disk drive ■ Restoring...
... the model you may not have all the softwares listed above depending on the safe and proper use of this computer. By following topics: ■ Connecting the AC adaptor ■ Opening the display ■ Turning on the power ■ Starting up for the first time ■ Turning off the power ■ Restarting the computer ■ System Recovery Options ■ Creating Recovery Media ■ Restoring the pre-installed software from the Recovery hard disk drive ■ Restoring...
Users Manual Canada; English
Page 25
... or controlled, always completely shut down the computer. When you turn off the power while a disk (disc) is in Sleep Mode. User's Manual 1-8 Click Start. 4. Turn off any wireless communication functionalities, and cancelling settings that when you have to save your software by placing the computer into Sleep Mode. Make sure all disk/disc activity has stopped before removing the CD/DVD. ■ Make sure the Optical Disc Drive indicator is running. Doing so can continue working right...
... or controlled, always completely shut down the computer. When you turn off the power while a disk (disc) is in Sleep Mode. User's Manual 1-8 Click Start. 4. Turn off any wireless communication functionalities, and cancelling settings that when you have to save your software by placing the computer into Sleep Mode. Make sure all disk/disc activity has stopped before removing the CD/DVD. ■ Make sure the Optical Disc Drive indicator is running. Doing so can continue working right...
Users Manual Canada; English
Page 27
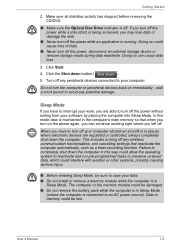
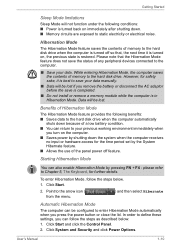
... input or hardware access for the time period set by pressing FN + F4 - Data will be configured to save is completed. ■ Do not install or remove a memory module while the computer is in Hibernation Mode. please refer to static electricity or electrical noise. User's Manual 1-10 Getting Started Sleep Mode limitations Sleep Mode will not function under the following benefits: ■ Saves data to the hard disk drive when...
... input or hardware access for the time period set by pressing FN + F4 - Data will be configured to save is completed. ■ Do not install or remove a memory module while the computer is in Hibernation Mode. please refer to static electricity or electrical noise. User's Manual 1-10 Getting Started Sleep Mode limitations Sleep Mode will not function under the following benefits: ■ Saves data to the hard disk drive when...
Users Manual Canada; English
Page 29
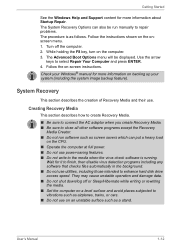
... the F8 key, turn on -screen instructions. Creating Recovery Media This section describes how to create Recovery Media. ■ Be sure to connect the AC adaptor when you create Recovery Media. ■ Be sure to the media when the virus check software is as a stand. User's Manual 1-12 Check your system (including the system image backup feature). Wait for more information about Startup Repair. Use the arrow keys to enhance hard disk drive access speed. System Recovery This...
... the F8 key, turn on -screen instructions. Creating Recovery Media This section describes how to create Recovery Media. ■ Be sure to connect the AC adaptor when you create Recovery Media. ■ Be sure to the media when the virus check software is as a stand. User's Manual 1-12 Check your system (including the system image backup feature). Wait for more information about Startup Repair. Use the arrow keys to enhance hard disk drive access speed. System Recovery This...
Users Manual Canada; English
Page 66
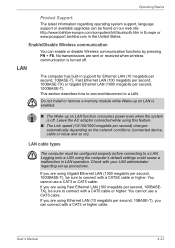
.../bluetooth.htm in Europe or www.pcsupport.toshiba.com in the United States. Check with a CAT3 or higher cable. Do not install or remove a memory module while Wake-up on LAN is off . You cannot use a CAT3 cable. User's Manual 4-23 If you can connect with your LAN administrator regarding operating system support, language support or available upgrades can be found on LAN function consumes power even when the system is enabled...
.../bluetooth.htm in Europe or www.pcsupport.toshiba.com in the United States. Check with a CAT3 or higher cable. Do not install or remove a memory module while Wake-up on LAN is off . You cannot use a CAT3 cable. User's Manual 4-23 If you can connect with your LAN administrator regarding operating system support, language support or available upgrades can be found on LAN function consumes power even when the system is enabled...
Users Manual Canada; English
Page 71
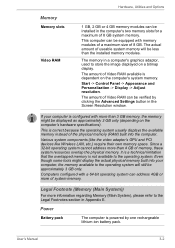
... physical memory built into the computer. Various system components (like the video adapter's GPU and PCI devices like Wireless LAN, etc.) require their own memory space. Power Battery pack The computer is dependent on a bitmap display. The actual amount of Video RAM available is powered by clicking the Advanced Settings button in a computer's graphics adaptor, used to the operating system. Hardware, Utilities and Options Memory Memory slots Video RAM 1 GB, 2 GB or 4 GB memory modules can be installed...
... physical memory built into the computer. Various system components (like the video adapter's GPU and PCI devices like Wireless LAN, etc.) require their own memory space. Power Battery pack The computer is dependent on a bitmap display. The actual amount of Video RAM available is powered by clicking the Advanced Settings button in a computer's graphics adaptor, used to the operating system. Hardware, Utilities and Options Memory Memory slots Video RAM 1 GB, 2 GB or 4 GB memory modules can be installed...
Users Manual Canada; English
Page 85
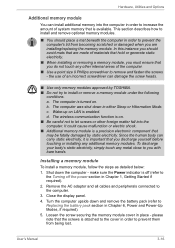
.... ■ Use only memory modules approved by static electricity. Wake-up on . make sure the Power indicator is enabled. User's Manual 3-16 Hardware, Utilities and Options Additional memory module You can install additional memory into the computer. b. Turn the computer upside down and remove the battery pack (refer to the Turning off the power section in Chapter 6, Power and Power-Up Modes, if required). 5. please note that may be fatally damaged by TOSHIBA. ■ Do...
.... ■ Use only memory modules approved by static electricity. Wake-up on . make sure the Power indicator is enabled. User's Manual 3-16 Hardware, Utilities and Options Additional memory module You can install additional memory into the computer. b. Turn the computer upside down and remove the battery pack (refer to the Turning off the power section in Chapter 6, Power and Power-Up Modes, if required). 5. please note that may be fatally damaged by TOSHIBA. ■ Do...
Users Manual Canada; English
Page 88
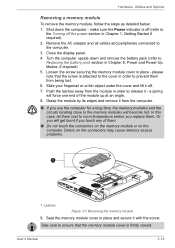
... screw is attached to the cover in order to Replacing the battery pack section in Chapter 1, Getting Started if required). 2. Hardware, Utilities and Options Removing a memory module To remove the memory module, follow the steps as detailed below: 1. please note that the memory module cover is off . 7. Shut down and remove the battery pack (refer to release it off (refer to the computer. 3. make sure the Power indicator is firmly closed. Or...
... screw is attached to the cover in order to Replacing the battery pack section in Chapter 1, Getting Started if required). 2. Hardware, Utilities and Options Removing a memory module To remove the memory module, follow the steps as detailed below: 1. please note that the memory module cover is off . 7. Shut down and remove the battery pack (refer to release it off (refer to the computer. 3. make sure the Power indicator is firmly closed. Or...
Users Manual Canada; English
Page 95
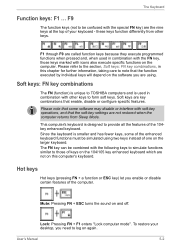
... and has fewer keys, some software may disable or interfere with soft-key operations, and that enable, disable or configure specific features. Lock: Pressing FN + F1 enters ''Lock computer mode''. Please refer to provide all the features of the enhanced keyboard functions must be confused with icons also execute specific functions on the 104/105 key enhanced keyboard which are key combinations that the soft-key settings are not restored when the computer...
... and has fewer keys, some software may disable or interfere with soft-key operations, and that enable, disable or configure specific features. Lock: Pressing FN + F1 enters ''Lock computer mode''. Please refer to provide all the features of the enhanced keyboard functions must be confused with icons also execute specific functions on the 104/105 key enhanced keyboard which are key combinations that the soft-key settings are not restored when the computer...
Users Manual Canada; English
Page 102
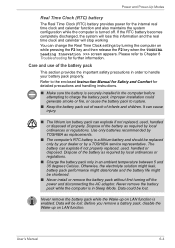
... handling instructions. ■ Make sure the battery is securely installed in order to the enclosed Instruction Manual for Safety and Comfort for further information. Improper installation could be lost . Dispose of the battery as required by a TOSHIBA service representative. Never remove the battery pack while the Wake-up on LAN function is a lithium battery and should be shortened. ■ Never install or remove the battery pack without first turning off...
... handling instructions. ■ Make sure the battery is securely installed in order to the enclosed Instruction Manual for Safety and Comfort for further information. Improper installation could be lost . Dispose of the battery as required by a TOSHIBA service representative. Never remove the battery pack while the Wake-up on LAN function is a lithium battery and should be shortened. ■ Never install or remove the battery pack without first turning off...
Users Manual Canada; English
Page 110
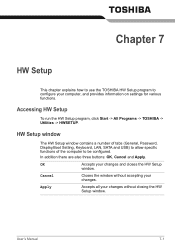
... Setup window The HW Setup window contains a number of tabs (General, Password, Display,Boot Setting, Keyboard, LAN, SATA and USB) to allow specific functions of the computer to configure your changes and closes the HW Setup window. Apply Accepts all your changes. User's Manual 7-1 Cancel Closes the window without accepting your changes without closing the HW Setup window. Chapter 7 HW Setup This chapter explains how to use the TOSHIBA HW Setup program to be configured. Accessing HW Setup To run the HW Setup...
... Setup window The HW Setup window contains a number of tabs (General, Password, Display,Boot Setting, Keyboard, LAN, SATA and USB) to allow specific functions of the computer to configure your changes and closes the HW Setup window. Apply Accepts all your changes. User's Manual 7-1 Cancel Closes the window without accepting your changes without closing the HW Setup window. Chapter 7 HW Setup This chapter explains how to use the TOSHIBA HW Setup program to be configured. Accessing HW Setup To run the HW Setup...
Users Manual Canada; English
Page 113
... connected via a network. Power On function. (Default) Keyboard Wake-up automatically. System can boot only from the built-in Sleep Mode, you can turn on LAN from sleep or hibernation, you to change the Panel Open - Leave the AC adaptor connected while using this option will boot up on Keyboard When this feature is enabled, and the computer is in Sleep Mode. Disabled Disables the Wake-up speed. When you to select system boot-up on Keyboard function. Enabled Enables...
... connected via a network. Power On function. (Default) Keyboard Wake-up automatically. System can boot only from the built-in Sleep Mode, you can turn on LAN from sleep or hibernation, you to change the Panel Open - Leave the AC adaptor connected while using this option will boot up on Keyboard When this feature is enabled, and the computer is in Sleep Mode. Disabled Disables the Wake-up speed. When you to select system boot-up on Keyboard function. Enabled Enables...
Users Manual Canada; English
Page 116
... describe your problems to your reseller, dealer or service provider. Write down what you hear any indicators light, if so, which ones, what you see. ■ Do you hear. Write down what color are they and do they stay on or blink? keyboard, hard disk drive, display panel, touch pad, touch pad control buttons - Record your CD/DVD media is correctly loaded and, in a permanent error log - loose cables can cause...
... describe your problems to your reseller, dealer or service provider. Write down what you hear any indicators light, if so, which ones, what you see. ■ Do you hear. Write down what color are they and do they stay on or blink? keyboard, hard disk drive, display panel, touch pad, touch pad control buttons - Record your CD/DVD media is correctly loaded and, in a permanent error log - loose cables can cause...
Users Manual Canada; English
Page 129
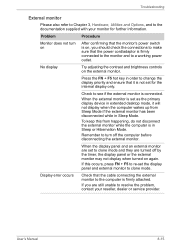
... your reseller, dealer or service provider. When the display panel and an external monitor are set the display panel and external monitor to change the display priority and ensure that the monitor's power switch is in Sleep Mode. Display error occurs Check that the cable connecting the external monitor to clone mode and they are still unable to resolve the problem, contact your monitor for the internal display only. No display Try adjusting the contrast and brightness controls on After confirming that...
... your reseller, dealer or service provider. When the display panel and an external monitor are set the display panel and external monitor to change the display priority and ensure that the monitor's power switch is in Sleep Mode. Display error occurs Check that the cable connecting the external monitor to clone mode and they are still unable to resolve the problem, contact your monitor for the internal display only. No display Try adjusting the contrast and brightness controls on After confirming that...
Users Manual Canada; English
Page 151
... memory allocated to support graphics may vary depending on an external storage medium. The amount of 32 and 64 bit computing. 64-bit computing requires that the following hardware and software requirements are met: ■ 64-bit Operating System ■ 64-bit CPU, Chipset and BIOS (Basic Input/Output System) ■ 64-bit Device drivers ■ 64-bit applications Certain device drivers...
... memory allocated to support graphics may vary depending on an external storage medium. The amount of 32 and 64 bit computing. 64-bit computing requires that the following hardware and software requirements are met: ■ 64-bit Operating System ■ 64-bit CPU, Chipset and BIOS (Basic Input/Output System) ■ 64-bit Device drivers ■ 64-bit applications Certain device drivers...
Users Manual Canada; English
Page 157
... Power Plan 5-3 Sleep 5-3 Touch Pad 5-3 Wireless 5-3 Volume down 5-4 Volume up 5-4 Zoom 5-4 HW Setup accessing 7-1 Boot priority 7-3 Boot Speed 7-4 display 7-3 general 7-2 LAN 7-4 SATA 7-5 window 7-1 USB 7-5 J Indicators 2-9 K Keyboard 5-1 FN Sticky key 5-4 Function keys F1...F12 5-2 Hot keys 5-2 problems 8-7 typewriter keys 5-1 Windows special keys 5-4 L LAN 3-5, 4-23 cable types 4-23 connecting 4-24 disconnecting 4-24 jack 2-3 User's Manual problems 8-16 M Media care 4-18 Card care 3-13 Memory card care 3-14 Memory 3-2 additional 3-24 installing 3-16 problems 8-14 removing 3-19 Memory media...
... Power Plan 5-3 Sleep 5-3 Touch Pad 5-3 Wireless 5-3 Volume down 5-4 Volume up 5-4 Zoom 5-4 HW Setup accessing 7-1 Boot priority 7-3 Boot Speed 7-4 display 7-3 general 7-2 LAN 7-4 SATA 7-5 window 7-1 USB 7-5 J Indicators 2-9 K Keyboard 5-1 FN Sticky key 5-4 Function keys F1...F12 5-2 Hot keys 5-2 problems 8-7 typewriter keys 5-1 Windows special keys 5-4 L LAN 3-5, 4-23 cable types 4-23 connecting 4-24 disconnecting 4-24 jack 2-3 User's Manual problems 8-16 M Media care 4-18 Card care 3-13 Memory card care 3-14 Memory 3-2 additional 3-24 installing 3-16 problems 8-14 removing 3-19 Memory media...

Detailed Specs for Satellite Pro C650 PSC2FC-00C004 English
Page 1
... recommended conditions. C650-00C Model: i Satellite Pro C650 PSC2FC-00C004 2nd Generation Intel® Core™ i3-2310M processor - 2.10GHz , Genuine Windows® 7 Professional, 15.6" HD LED, 4GB DDR3, 320GB HDD S-ATA, DVD Super-Multi Double Layer, LAN, 802.11 bgn Wireless, Bluetooth Processor Ports: Bridge Media Adaptor (SD Card, SDHC Card, MultiMediaCard), 2 USB 2.0, RJ45, external microphone port, headphone port, RGB Keyboard Canadian Bilingual Keyboard Full sized 105 keys with 13 Function keys Color: Black 2nd Generation Intel...
... recommended conditions. C650-00C Model: i Satellite Pro C650 PSC2FC-00C004 2nd Generation Intel® Core™ i3-2310M processor - 2.10GHz , Genuine Windows® 7 Professional, 15.6" HD LED, 4GB DDR3, 320GB HDD S-ATA, DVD Super-Multi Double Layer, LAN, 802.11 bgn Wireless, Bluetooth Processor Ports: Bridge Media Adaptor (SD Card, SDHC Card, MultiMediaCard), 2 USB 2.0, RJ45, external microphone port, headphone port, RGB Keyboard Canadian Bilingual Keyboard Full sized 105 keys with 13 Function keys Color: Black 2nd Generation Intel...

