
Users Manual Canada; English
Page 2
... by TOSHIBA Corporation. Trademarks IBM is assumed, with respect to copy the copyrighted works or perform other countries. Wide mode, Wide Zoom mode, etc.) of this product to the use the screen mode switching functions (e.g. If, beyond the limitation above, you copy (including to transform data formats) or modify these to observe the copyright laws when you use of this manual cannot...
... by TOSHIBA Corporation. Trademarks IBM is assumed, with respect to copy the copyrighted works or perform other countries. Wide mode, Wide Zoom mode, etc.) of this product to the use the screen mode switching functions (e.g. If, beyond the limitation above, you copy (including to transform data formats) or modify these to observe the copyright laws when you use of this manual cannot...

Users Manual Canada; English
Page 35
... ■ DVD Video Player ■ TOSHIBA Disc Creator ■ TOSHIBA Direct Disc Writer ■ TOSHIBA ConfigFree ■ TOSHIBA Assist ■ TOSHIBA SD Memory Card Format* ■ TOSHIBA Acoustic Silencer ■ TOSHIBA HW Setup ■ TOSHIBA Value Added Package Utility ■ TOSHIBA Supervisor Password Utility ■ Ulead DVD MovieFactory® ■ Online Manual ■ Product Recovery disc (provided with computers sold in ILW supported areas.) If any of this software is pre-installed on the model you use drivers that are...
... ■ DVD Video Player ■ TOSHIBA Disc Creator ■ TOSHIBA Direct Disc Writer ■ TOSHIBA ConfigFree ■ TOSHIBA Assist ■ TOSHIBA SD Memory Card Format* ■ TOSHIBA Acoustic Silencer ■ TOSHIBA HW Setup ■ TOSHIBA Value Added Package Utility ■ TOSHIBA Supervisor Password Utility ■ Ulead DVD MovieFactory® ■ Online Manual ■ Product Recovery disc (provided with computers sold in ILW supported areas.) If any of this software is pre-installed on the model you use drivers that are...

Users Manual Canada; English
Page 44
... from external devices such as jacks for the connection of external headphones or speakers. The 4-pin S-Video port is provided for an external microphone and headphones. The integrated Windows® compatible sound system provides support for devices such as Televisions and DVD Players. Infrared port for internal speakers as well as digital video cameras. Multimedia Web Camera Sound system Headphone jack Microphone jack Record/Send still or video images with the USB 2.0 standard, which enables data...
... from external devices such as jacks for the connection of external headphones or speakers. The 4-pin S-Video port is provided for an external microphone and headphones. The integrated Windows® compatible sound system provides support for devices such as Televisions and DVD Players. Infrared port for internal speakers as well as digital video cameras. Multimedia Web Camera Sound system Headphone jack Microphone jack Record/Send still or video images with the USB 2.0 standard, which enables data...
Users Manual Canada; English
Page 46
... the system into either System Sleep or System Hibernate in the Power Options. TOSHIBA Value Added Package Key combinations that let you save battery power. Power-on when the panel is opened. You can prevent unauthorized access to the internal display when there is input from the keyboard without running a system configuration program. Instant Security A specific hot key function locks the system providing data security. Display Automatic Power off This feature automatically...
... the system into either System Sleep or System Hibernate in the Power Options. TOSHIBA Value Added Package Key combinations that let you save battery power. Power-on when the panel is opened. You can prevent unauthorized access to the internal display when there is input from the keyboard without running a system configuration program. Instant Security A specific hot key function locks the system providing data security. Display Automatic Power off This feature automatically...

Users Manual Canada; English
Page 54
... Digital Media Card Slot Access LED* The Multiple Digital Media Card Slot Access LED lights up when the Multiple Digital Media Card is active or not. (The availability of this function depends on the model you purchased.) Infrared Reception Window* Receives infrared signals from the AC adapter. It lights blue (depending on the model you purchased) when the battery is being accessed. It lights amber while the battery is fully charged. Hard Disk Drive LED The Hard Disk Drive LED indicates that wireless networking is turned on...
... Digital Media Card Slot Access LED* The Multiple Digital Media Card Slot Access LED lights up when the Multiple Digital Media Card is active or not. (The availability of this function depends on the model you purchased.) Infrared Reception Window* Receives infrared signals from the AC adapter. It lights blue (depending on the model you purchased) when the battery is being accessed. It lights amber while the battery is fully charged. Hard Disk Drive LED The Hard Disk Drive LED indicates that wireless networking is turned on...

Users Manual Canada; English
Page 74
... Maintenance and then click the Power Options then select Choose what closing the lid does). Sleep Mode will be lost . 3-6 Satellite A210/Satellite Pro A210 please refer to Chapter 5, The Keyboard, for the Hard Disk Drive indicator to save is off into Hibernation Mode - Youu can lengthen the overall operating time by turning it , click Start followed by Control Panel followed by pressing Fn + F3 - Click Start then click the sleep button ( ) located...
... Maintenance and then click the Power Options then select Choose what closing the lid does). Sleep Mode will be lost . 3-6 Satellite A210/Satellite Pro A210 please refer to Chapter 5, The Keyboard, for the Hard Disk Drive indicator to save is off into Hibernation Mode - Youu can lengthen the overall operating time by turning it , click Start followed by Control Panel followed by pressing Fn + F3 - Click Start then click the sleep button ( ) located...
Users Manual Canada; English
Page 76
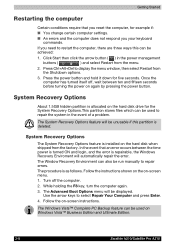
... power management buttons ( ) and select Restart from the Shutdown options. 3. Follow the instructions shown on the on -screen instructions. The Advanced Boot Options menu will automatically repair the error. Click Start then click the arrow button ( ) in the event of a problem. The Windows Vista™ Complete PC Backup feature can be unusable if this can be used on Windows Vista™ Business Edition and Ultimate Edition. 3-8 Satellite A210/Satellite Pro A210 System Recovery Options The System Recovery Options...
... power management buttons ( ) and select Restart from the Shutdown options. 3. Follow the instructions shown on the on -screen instructions. The Advanced Boot Options menu will automatically repair the error. Click Start then click the arrow button ( ) in the event of a problem. The Windows Vista™ Complete PC Backup feature can be unusable if this can be used on Windows Vista™ Business Edition and Ultimate Edition. 3-8 Satellite A210/Satellite Pro A210 System Recovery Options The System Recovery Options...

Users Manual Canada; English
Page 77
... key to display the Boot Menu. 3. When removing pre-installed drivers / utilities or when installing, you reinstall the Windows operating system, the hard disk will be reformatted and all preinstalled software, follow the steps below. Switch on -screen instructions. C: \TOSAPINS\*** When Installing TOSHIBA SD Memory Card Format or other SD utilities, select TOSHIBA SD Memory Utilities from the following folder. When you can not use the Product Recovery disc to select the CD-ROM/DVD drive in the drive and turn off the computer's power...
... key to display the Boot Menu. 3. When removing pre-installed drivers / utilities or when installing, you reinstall the Windows operating system, the hard disk will be reformatted and all preinstalled software, follow the steps below. Switch on -screen instructions. C: \TOSAPINS\*** When Installing TOSHIBA SD Memory Card Format or other SD utilities, select TOSHIBA SD Memory Utilities from the following folder. When you can not use the Product Recovery disc to select the CD-ROM/DVD drive in the drive and turn off the computer's power...

Users Manual Canada; English
Page 80
... setup the respective drivers / utilities from the following folder. A menu will be heard before starting the restore process. C: \TOSAPINS\*** When Installing TOSHIBA SD Memory Card Format or other SD utilities, select TOSHIBA SD Memory Utilities from the menu. Please refer to either use System Recovery Options if restoring the pre-installed software without System Recovery options. 1. Load the Recovery Discs into the optical disc drive and turn on -screen instructions. Getting Started Restoring the pre-installed software from your computer when the In Touch with Tomorrow TOSHIBA...
... setup the respective drivers / utilities from the following folder. A menu will be heard before starting the restore process. C: \TOSAPINS\*** When Installing TOSHIBA SD Memory Card Format or other SD utilities, select TOSHIBA SD Memory Utilities from the menu. Please refer to either use System Recovery Options if restoring the pre-installed software without System Recovery options. 1. Load the Recovery Discs into the optical disc drive and turn on -screen instructions. Getting Started Restoring the pre-installed software from your computer when the In Touch with Tomorrow TOSHIBA...

Users Manual Canada; English
Page 89
... of the screen. Operating Basics How to Enable FingerPrint Power-on Security Settings It is necessary to first enroll your FingerPrint with the Protector Suite QL application prior to replace the User/BIOS Password (and, if applicable, the HDD (Hard Disk Drive) Password) and Windows Logon Password. Swipe(*) your finger on Security. 4. You should check that the keyboard cursor keys (movement) and enter key (selection) or the directional pad be used when...
... of the screen. Operating Basics How to Enable FingerPrint Power-on Security Settings It is necessary to first enroll your FingerPrint with the Protector Suite QL application prior to replace the User/BIOS Password (and, if applicable, the HDD (Hard Disk Drive) Password) and Windows Logon Password. Swipe(*) your finger on Security. 4. You should check that the keyboard cursor keys (movement) and enter key (selection) or the directional pad be used when...

Users Manual Canada; English
Page 90
... completely secure or error-free or it will auto-run when Windows starts. 12 4-10 1. The Web Camera will be used when selecting and item from the Menu in the Replace the power-on Security. 4. At the Power Security screen, place a check mark in laptop or landscape modes. 3. WEN CAMERA LED 2. At the FingerPrint Software Management screen, click Settings and then click Power-on and hard disk drive passwords with the FingerPrint reader setting and then...
... completely secure or error-free or it will auto-run when Windows starts. 12 4-10 1. The Web Camera will be used when selecting and item from the Menu in the Replace the power-on Security. 4. At the Power Security screen, place a check mark in laptop or landscape modes. 3. WEN CAMERA LED 2. At the FingerPrint Software Management screen, click Settings and then click Power-on and hard disk drive passwords with the FingerPrint reader setting and then...

Users Manual Canada; English
Page 113
... external display or television, use an HDMI cable to connect the external device to the HDMI out port and change the screen resolution in "Resolution" on televisions connected to the S-Video output connector or external displays connected to the RGB connector. In addition, HD DVD Video cannot be displayed simultaneously (in clone or Dualview modes) on the "Monitor" tab in the "Display Settings". To open the Display Settings, click Start -> Control Panel -> Appearance and Personalization -> Personalization -> Display Settings. ■ If the HD DVD Video...
... external display or television, use an HDMI cable to connect the external device to the HDMI out port and change the screen resolution in "Resolution" on televisions connected to the S-Video output connector or external displays connected to the RGB connector. In addition, HD DVD Video cannot be displayed simultaneously (in clone or Dualview modes) on the "Monitor" tab in the "Display Settings". To open the Display Settings, click Start -> Control Panel -> Appearance and Personalization -> Personalization -> Display Settings. ■ If the HD DVD Video...

Users Manual Canada; English
Page 131
... computer. Open the DVD drive. - About recorded DVDs ■ Some DVD-ROM drives for a few seconds before you record to ensure you capture all Disc Drive activity has stopped. ■ When recording to a DV-Camcorder, to DVD disc, please use a brand new disc. Satellite A210/Satellite Pro A210 5-23 Install, remove or connect external devices, including the following actions: - Please use only discs recommended by HDV ■ HDV support to burn DVD-Video only ■ DVD-VR format not support to...
... computer. Open the DVD drive. - About recorded DVDs ■ Some DVD-ROM drives for a few seconds before you record to ensure you capture all Disc Drive activity has stopped. ■ When recording to a DV-Camcorder, to DVD disc, please use a brand new disc. Satellite A210/Satellite Pro A210 5-23 Install, remove or connect external devices, including the following actions: - Please use only discs recommended by HDV ■ HDV support to burn DVD-Video only ■ DVD-VR format not support to...

Users Manual Canada; English
Page 134
... keys are not restored by individual keys depends on the computer. Soft keys are called function keys because they execute programmed functions when pressed. or Press Fn + F10 or Fn + F11 to use keys that enable, disable or configure specific features. Soft-key settings are dark gray, but function differently from the other keys to TOSHIBA computers and is unique to form soft keys. Press Fn + F12 (ScrLock) to lock...
... keys are not restored by individual keys depends on the computer. Soft keys are called function keys because they execute programmed functions when pressed. or Press Fn + F10 or Fn + F11 to use keys that enable, disable or configure specific features. Soft-key settings are dark gray, but function differently from the other keys to TOSHIBA computers and is unique to form soft keys. Press Fn + F12 (ScrLock) to lock...

Users Manual Canada; English
Page 162
... Power switch. 2. Installing Memory on Bottom Side If you replace them. b. Remove all cables connected to boot mode and turn off . You can damage the computer and the module. Set the computer to the computer. 3. a. Fit the module's connectors into Slot A (Upper) and Slot B (Bottom) respectively. Loosen the two screws securing the memory module socket cover. 5. The computer will become hot. In this case, let the memory modules cool to ensure a firm connection. 9-6 Satellite...
... Power switch. 2. Installing Memory on Bottom Side If you replace them. b. Remove all cables connected to boot mode and turn off . You can damage the computer and the module. Set the computer to the computer. 3. a. Fit the module's connectors into Slot A (Upper) and Slot B (Bottom) respectively. Loosen the two screws securing the memory module socket cover. 5. The computer will become hot. In this case, let the memory modules cool to ensure a firm connection. 9-6 Satellite...

Users Manual Canada; English
Page 163
... outside to remove a memory module with screws. 9. A spring will become hot. Latches on . In this case, let the memory modules cool to secure the module. 1 2 Installing a module 8. You can damage the computer and the module. 2. Debris on Bottom Side If you replace them. Replace the battery pack as described in boot mode then: 1. Removing Memory on the connectors may cause memory access problems. Satellite A210/Satellite Pro A210 9-7 Be sure the power is off...
... outside to remove a memory module with screws. 9. A spring will become hot. Latches on . In this case, let the memory modules cool to secure the module. 1 2 Installing a module 8. You can damage the computer and the module. 2. Debris on Bottom Side If you replace them. Replace the battery pack as described in boot mode then: 1. Removing Memory on the connectors may cause memory access problems. Satellite A210/Satellite Pro A210 9-7 Be sure the power is off...

Users Manual Canada; English
Page 184
... minutes before turning on indicators and battery operation see if it reach room temperature. Unplug the AC adapter and remove the battery to make sure the (Battery indicator does outlet is attached. Plug in alcohol. If necessary wipe them with the battery, check the DC IN indicator as well as Power Options. Connect the AC adapter and replace the battery. Connect the AC the computer. If the Battery indicator glows after...
... minutes before turning on indicators and battery operation see if it reach room temperature. Unplug the AC adapter and remove the battery to make sure the (Battery indicator does outlet is attached. Plug in alcohol. If necessary wipe them with the battery, check the DC IN indicator as well as Power Options. Connect the AC adapter and replace the battery. Connect the AC the computer. If the Battery indicator glows after...

Users Manual Canada; English
Page 190
... on the external monitor. You cannot access a LAN using the computer's battery power. Sleep/Hibernation Problem Procedure The system will select either playing a selection or finished playing a selection. The system enter Sleep/Hibernation might not enter Sleep/Hibernation, if Windows Media Player is either the internal LCD or an external computer CRT as the display device the next time it is connected. Try adjusting the contrast and brightness controls on LAN feature does not work Check...
... on the external monitor. You cannot access a LAN using the computer's battery power. Sleep/Hibernation Problem Procedure The system will select either playing a selection or finished playing a selection. The system enter Sleep/Hibernation might not enter Sleep/Hibernation, if Windows Media Player is either the internal LCD or an external computer CRT as the display device the next time it is connected. Try adjusting the contrast and brightness controls on LAN feature does not work Check...

Users Manual Canada; English
Page 195
... not connect/ disconnect external devices or install/remove internal cards during writing. If problems persist, contact your software's needs. BIOS setup will boot up. 2. Satellite A210/Satellite Pro A210 10-17 Troubleshooting Problem Procedure Cannot write correctly If you have trouble writing, make sure you are observing the following steps: 1. Make sure the hardware not configuration match's your dealer. The RTC battery charge has become exhausted, you can access this disk, the disk drive original disk (not the disk drive) is displayed on disk...
... not connect/ disconnect external devices or install/remove internal cards during writing. If problems persist, contact your software's needs. BIOS setup will boot up. 2. Satellite A210/Satellite Pro A210 10-17 Troubleshooting Problem Procedure Cannot write correctly If you have trouble writing, make sure you are observing the following steps: 1. Make sure the hardware not configuration match's your dealer. The RTC battery charge has become exhausted, you can access this disk, the disk drive original disk (not the disk drive) is displayed on disk...

Detailed Specs for Satellite A210 PSAELC-JA308C English
Page 1
... 2GB DDR2 Hard Disk Drive 200.0 billion bytes, 9.5mm height, S-ATA, 5400rpm Optical Drive Built-in -1 Bridge Media Adaptor (SDHC Card, xD picture card, Memory Stick, Memory Stick Pro, Multi Media Card), 4 USB 2.0, RJ11, RJ45, IEEE 1394, external microphone port, headphone port, RGB, TV-Out (S-Video) Keyboard CANADIAN BILINGUAL KEYBOARD Full sized 87 keys with 13 Function keys Dedicated Windows Keys CD/DVD Control Function: Play/Pause, Stop, Previous track/Next track Color: Silver Pointing Device Temperature: Operating 5°to...
... 2GB DDR2 Hard Disk Drive 200.0 billion bytes, 9.5mm height, S-ATA, 5400rpm Optical Drive Built-in -1 Bridge Media Adaptor (SDHC Card, xD picture card, Memory Stick, Memory Stick Pro, Multi Media Card), 4 USB 2.0, RJ11, RJ45, IEEE 1394, external microphone port, headphone port, RGB, TV-Out (S-Video) Keyboard CANADIAN BILINGUAL KEYBOARD Full sized 87 keys with 13 Function keys Dedicated Windows Keys CD/DVD Control Function: Play/Pause, Stop, Previous track/Next track Color: Silver Pointing Device Temperature: Operating 5°to...


