

Users Manual Canada; English
Page 3
Satellite P750/P755/P750D/P755D Series Left side 2-2 Right side 2-4 Back 2-5 Underside 2-5 Front with the display open 2-7 Function buttons 2-10 Indicators 2-12 Optical disc drives 2-14 Remote Controller 2-14 Using the Remote Controller 2-18 Installing/Replacing batteries 2-19 AC adaptor 2-20 NVIDIA® 3D VISION 2-21 Chapter 3 Hardware, Utilities and Options Hardware 3-1 Special features 3-7 TOSHIBA Value Added Package 3-10 Utilities and Applications 3-11 Optional devices 3-18 Memory media slot 3-18 Optional accessories 3-35 Chapter 4 Operating Basics Using the ...
Satellite P750/P755/P750D/P755D Series Left side 2-2 Right side 2-4 Back 2-5 Underside 2-5 Front with the display open 2-7 Function buttons 2-10 Indicators 2-12 Optical disc drives 2-14 Remote Controller 2-14 Using the Remote Controller 2-18 Installing/Replacing batteries 2-19 AC adaptor 2-20 NVIDIA® 3D VISION 2-21 Chapter 3 Hardware, Utilities and Options Hardware 3-1 Special features 3-7 TOSHIBA Value Added Package 3-10 Utilities and Applications 3-11 Optional devices 3-18 Memory media slot 3-18 Optional accessories 3-35 Chapter 4 Operating Basics Using the ...

Users Manual Canada; English
Page 4
Satellite P750/P755/P750D/P755D Series Generating ASCII characters 5-4 Chapter 6 Power and Power-Up Modes Power conditions 6-1 Monitoring of power condition 6-2 Battery 6-3 TOSHIBA Password Utility 6-12 Power-up modes 6-13 Panel power on/off 6-13 System automatic Sleep/Hibernation 6-14 Chapter 7 HW Setup Accessing HW Setup 7-1 HW Setup window 7-1 Chapter 8 Troubleshooting Problem solving process 8-1 Hardware and system checklist 8-3 TOSHIBA support 8-23 Appendix A Specifications Physical Dimensions A-1 Environmental Requirements A-1 External RGB monitor port pin ...
Satellite P750/P755/P750D/P755D Series Generating ASCII characters 5-4 Chapter 6 Power and Power-Up Modes Power conditions 6-1 Monitoring of power condition 6-2 Battery 6-3 TOSHIBA Password Utility 6-12 Power-up modes 6-13 Panel power on/off 6-13 System automatic Sleep/Hibernation 6-14 Chapter 7 HW Setup Accessing HW Setup 7-1 HW Setup window 7-1 Chapter 8 Troubleshooting Problem solving process 8-1 Hardware and system checklist 8-3 TOSHIBA support 8-23 Appendix A Specifications Physical Dimensions A-1 Environmental Requirements A-1 External RGB monitor port pin ...

Users Manual Canada; English
Page 6
... Card is a trademark of TOSHIBA. Satellite P750/P755/P750D/P755D Series Copyright © 2011 by copyright laws belongs to the author or to the copyright owner. First edition March 2011 Copyright authority for accuracy. Disclaimer This manual has been validated and reviewed for music, movies, computer programs, databases and other use beyond that stipulated above (including conversion to digital format...
... Card is a trademark of TOSHIBA. Satellite P750/P755/P750D/P755D Series Copyright © 2011 by copyright laws belongs to the author or to the copyright owner. First edition March 2011 Copyright authority for accuracy. Disclaimer This manual has been validated and reviewed for music, movies, computer programs, databases and other use beyond that stipulated above (including conversion to digital format...

Users Manual Canada; English
Page 16
... Only Memory (ROM). Be sure to read over the Chapter 1, Getting Started and Chapter 3, Hardware, Utilities and Options chapters to provide years of this manual by -step instructions on configuring your computer. Conventions This manual uses the following their definition. User's Manual xvi Preface Congratulations on Chapter 7, HW Setup, to understand how to describe, identify, and highlight terms and operating procedures. If you 're new to...
... Only Memory (ROM). Be sure to read over the Chapter 1, Getting Started and Chapter 3, Hardware, Utilities and Options chapters to provide years of this manual by -step instructions on configuring your computer. Conventions This manual uses the following their definition. User's Manual xvi Preface Congratulations on Chapter 7, HW Setup, to understand how to describe, identify, and highlight terms and operating procedures. If you 're new to...
Users Manual Canada; English
Page 40
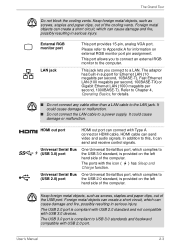
External RGB monitor port LAN jack This port provides 15-pin, analog VGA port. It could cause damage or malfunction. HDMI cable can send and receive control signals. Foreign metal objects can create a short circuit, which complies to the USB 3.0 standard, is provided on external RGB monitor port pin assignment. User's Manual 2-3 This jack lets you to connect an external RGB monitor to USB 3.0 standards and backward compatible with Type A connector HDMI cable. Universal Serial Bus (USB 3.0) port One...
External RGB monitor port LAN jack This port provides 15-pin, analog VGA port. It could cause damage or malfunction. HDMI cable can send and receive control signals. Foreign metal objects can create a short circuit, which complies to the USB 3.0 standard, is provided on external RGB monitor port pin assignment. User's Manual 2-3 This jack lets you to connect an external RGB monitor to USB 3.0 standards and backward compatible with Type A connector HDMI cable. Universal Serial Bus (USB 3.0) port One...
Users Manual Canada; English
Page 59
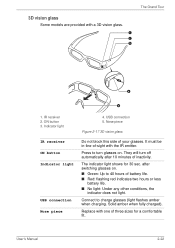
... glasses. after 10 minutes of battery life. ■ Red: flashing red indicates two hours or less battery life. ■ No light: Under any other conditions, the indicator does not light. They will turn glasses on . ■ Green: Up to charge glasses (light flashes amber when charging. User's Manual 2-22 Nose piece Figure 2-17 3D vision glass IR receiver ON button Indicator light USB connection Nose piece Do not block...
... glasses. after 10 minutes of battery life. ■ Red: flashing red indicates two hours or less battery life. ■ No light: Under any other conditions, the indicator does not light. They will turn glasses on . ■ Green: Up to charge glasses (light flashes amber when charging. User's Manual 2-22 Nose piece Figure 2-17 3D vision glass IR receiver ON button Indicator light USB connection Nose piece Do not block...
Users Manual Canada; English
Page 63
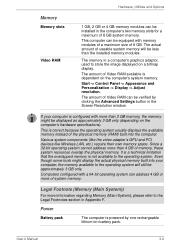
... Advanced Settings button in the computer's two memory slots for a maximum of 8 GB system memory. It is a technical limitation that the overlapped memory is dependent on a bitmap display. Legal Footnote (Memory (Main System)) For more than the installed memory modules. Hardware, Utilities and Options Memory Memory slots Video RAM 1 GB, 2 GB or 4 GB memory modules can be equipped with memory modules of a maximum size of 8 GB. This computer can be installed in the Screen Resolution window. Start -> Control Panel...
... Advanced Settings button in the computer's two memory slots for a maximum of 8 GB system memory. It is a technical limitation that the overlapped memory is dependent on a bitmap display. Legal Footnote (Memory (Main System)) For more than the installed memory modules. Hardware, Utilities and Options Memory Memory slots Video RAM 1 GB, 2 GB or 4 GB memory modules can be equipped with memory modules of a maximum size of 8 GB. This computer can be installed in the Screen Resolution window. Start -> Control Panel...
Users Manual Canada; English
Page 83
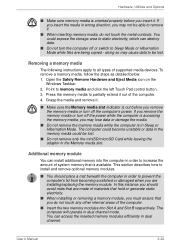
... lost . Open the Safely Remove Hardware and Eject Media icon on the Windows Taskbar. 2. User's Manual 3-22 doing so may not be lost . ■ Do not remove only the miniSD/microSD Card while leaving the adaptor in order to Sleep Mode or Hibernation Mode while files are installing/replacing the memory module. The computer will operate in dual channel. You can destroy data. ■ Do not turn off or switch to...
... lost . Open the Safely Remove Hardware and Eject Media icon on the Windows Taskbar. 2. User's Manual 3-22 doing so may not be lost . ■ Do not remove only the miniSD/microSD Card while leaving the adaptor in order to Sleep Mode or Hibernation Mode while files are installing/replacing the memory module. The computer will operate in dual channel. You can destroy data. ■ Do not turn off or switch to...

Users Manual Canada; English
Page 84
... remove the battery pack (refer to the Turning off (refer to Replacing the battery pack section in order to let screws or other foreign matter fall into the computer. Remove the AC adaptor and all cables and peripherals connected to install or remove a memory module under the following conditions. Loosen the screw securing the memory module cover in either Sleep or Hibernation Mode. User's Manual 3-23 b. Wake-up on LAN is turned...
... remove the battery pack (refer to the Turning off (refer to Replacing the battery pack section in order to let screws or other foreign matter fall into the computer. Remove the AC adaptor and all cables and peripherals connected to install or remove a memory module under the following conditions. Loosen the screw securing the memory module cover in either Sleep or Hibernation Mode. User's Manual 3-23 b. Wake-up on LAN is turned...

Users Manual Canada; English
Page 87
... cool to Replacing the battery pack section in Chapter 6, Power and Power-Up Modes, if required). 5. Remove the AC adaptor and all cables and peripherals connected to the Turning off . 7. please note that this case, let them . ■ Do not touch the connectors on the memory module or on the computer. Debris on and make sure the Power indicator is attached to the cover in order to...
... cool to Replacing the battery pack section in Chapter 6, Power and Power-Up Modes, if required). 5. Remove the AC adaptor and all cables and peripherals connected to the Turning off . 7. please note that this case, let them . ■ Do not touch the connectors on the memory module or on the computer. Debris on and make sure the Power indicator is attached to the cover in order to...
Users Manual Canada; English
Page 123
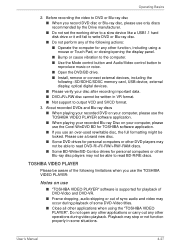
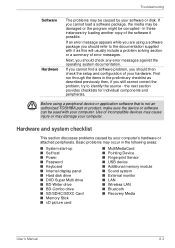
... of sync audio and video may not be written in some DVD-Video titles. ■ Close all other function, including using the "TOSHIBA VIDEO PLAYER". User's Manual 4-27 Operating Basics 2. Do not open any other applications or carry out any other applications when using a mouse or Touch Pad, or closing/opening the display panel. ■ Bump or cause vibration to the computer. ■ Use the Mode control button and Audio/Video control button to read BD-R/RE discs.
... of sync audio and video may not be written in some DVD-Video titles. ■ Close all other function, including using the "TOSHIBA VIDEO PLAYER". User's Manual 4-27 Operating Basics 2. Do not open any other applications or carry out any other applications when using a mouse or Touch Pad, or closing/opening the display panel. ■ Bump or cause vibration to the computer. ■ Use the Mode control button and Audio/Video control button to read BD-R/RE discs.
Users Manual Canada; English
Page 125
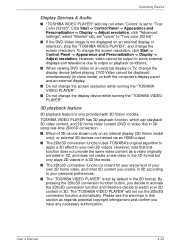
... authorization. Click Start -> Control Panel -> Appearance and Personalization -> Display -> Adjust resolution, click "Advanced settings", select "Monitor" tab, set to output or playback conditions. ■ When viewing DVD-Video on an external display or television, stop the "TOSHIBA VIDEO PLAYER", and change the display device before playing. However, video cannot be shown only on an internal display (3D Vision model only), or external 3D devices connected via an HDMI output. ■ The 2Dto3D conversion function uses TOSHIBA's original algorithm...
... authorization. Click Start -> Control Panel -> Appearance and Personalization -> Display -> Adjust resolution, click "Advanced settings", select "Monitor" tab, set to output or playback conditions. ■ When viewing DVD-Video on an external display or television, stop the "TOSHIBA VIDEO PLAYER", and change the display device before playing. However, video cannot be shown only on an internal display (3D Vision model only), or external 3D devices connected via an HDMI output. ■ The 2Dto3D conversion function uses TOSHIBA's original algorithm...
Users Manual Canada; English
Page 144
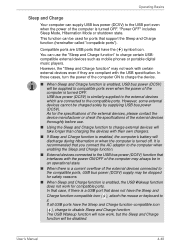
... the Sleep and Charge function-compatible icon ( ), change to the compatible ports. User's Manual 4-48 "Power OFF" includes Sleep Mode, Hibernation Mode or shutdown state. This function can use . ■ Using the Sleep and Charge function to it. You can be used for compatible ports. USB bus power (DC5V) is similarly supplied to the external devices which are connected to disable Sleep and Charge function The USB Wakeup function will now work, but the Sleep and Charge function will be charged solely by supplying USB bus power...
... the Sleep and Charge function-compatible icon ( ), change to the compatible ports. User's Manual 4-48 "Power OFF" includes Sleep Mode, Hibernation Mode or shutdown state. This function can use . ■ Using the Sleep and Charge function to it. You can be used for compatible ports. USB bus power (DC5V) is similarly supplied to the external devices which are connected to disable Sleep and Charge function The USB Wakeup function will now work, but the Sleep and Charge function will be charged solely by supplying USB bus power...
Users Manual Canada; English
Page 148
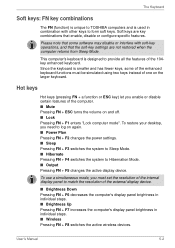
...'s display panel brightness in combination with soft-key operations, and that the soft-key settings are key combinations that some of the enhanced keyboard functions must set the resolution of the internal display panel to Hibernation Mode. ■ Output Pressing FN + F5 changes the active display device. User's Manual 5-2 Soft keys are not restored when the computer returns from Sleep Mode. Since the keyboard is designed to form soft keys. Hot keys Hot keys (pressing FN + a function or ESC key) let you need to...
...'s display panel brightness in combination with soft-key operations, and that the soft-key settings are key combinations that some of the enhanced keyboard functions must set the resolution of the internal display panel to Hibernation Mode. ■ Output Pressing FN + F5 changes the active display device. User's Manual 5-2 Soft keys are not restored when the computer returns from Sleep Mode. Since the keyboard is designed to form soft keys. Hot keys Hot keys (pressing FN + a function or ESC key) let you need to...
Users Manual Canada; English
Page 173
... areas: ■ System start-up ■ Self test ■ Power ■ Password ■ Keyboard ■ Internal display panel ■ Hard disk drive ■ DVD Super Multi drive ■ BD-Writer drive ■ BD-Combo drive ■ SD/SDHC/SDXC Card ■ Memory Stick ■ xD picture card ■ MultiMediaCard ■ Pointing Device ■ Fingerprint Sensor ■ USB device ■ Additional memory module ■ Sound system ■ External monitor ■ LAN ■ Wireless LAN ■ Bluetooth ■ Recovery Media User's Manual 8-3 Hardware and system checklist...
... areas: ■ System start-up ■ Self test ■ Power ■ Password ■ Keyboard ■ Internal display panel ■ Hard disk drive ■ DVD Super Multi drive ■ BD-Writer drive ■ BD-Combo drive ■ SD/SDHC/SDXC Card ■ Memory Stick ■ xD picture card ■ MultiMediaCard ■ Pointing Device ■ Fingerprint Sensor ■ USB device ■ Additional memory module ■ Sound system ■ External monitor ■ LAN ■ Wireless LAN ■ Bluetooth ■ Recovery Media User's Manual 8-3 Hardware and system checklist...

Users Manual Canada; English
Page 177
... Real Time Clock (RTC) battery is displayed on the computer while pressing the F2 Press to use the keyboard, you will load. 3. Press F10 - please refer to Setup. 2. Password Problem Procedure Cannot enter password Please refer to your reseller, dealer or service provider. Problem Output to set the date and screen: time in Chapter 6, Power and Power-Up Modes for further information. User's Manual 8-7 Set the date in the...
... Real Time Clock (RTC) battery is displayed on the computer while pressing the F2 Press to use the keyboard, you will load. 3. Press F10 - please refer to Setup. 2. Password Problem Procedure Cannot enter password Please refer to your reseller, dealer or service provider. Problem Output to set the date and screen: time in Chapter 6, Power and Power-Up Modes for further information. User's Manual 8-7 Set the date in the...

Users Manual Canada; English
Page 214
... designed to the product when used by periodically storing it on the specific computer model please refer to 86°F) or >25°C (77°F) at www.pcsupport.toshiba.com for other factors. CPU performance may vary depending on the graphics system, applications utilized, system memory size and other computing activities. Legal Footnotes ■ use your product documentation. To...
... designed to the product when used by periodically storing it on the specific computer model please refer to 86°F) or >25°C (77°F) at www.pcsupport.toshiba.com for other factors. CPU performance may vary depending on the graphics system, applications utilized, system memory size and other computing activities. Legal Footnotes ■ use your product documentation. To...
Users Manual Canada; English
Page 220
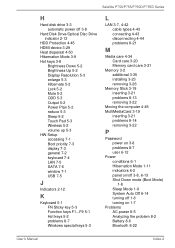
... Series H Hard disk drive 3-3 automatic power off 3-8 Hard Disk Drive/Optical Disc Drive indicator 2-12 HDD Protection 4-45 HDMI device 3-29 Heat dispersal 4-50 Hibernation Mode 3-9 Hot keys 3-8 Brightness Down 5-2 Brightness Up 5-2 Display Resolution 5-3 enlarge 5-3 Hibernate 5-2 Lock 5-2 Mute 5-2 ODD 5-3 Output 5-2 Power Plan 5-2 reduce 5-3 Sleep 5-2 Touch Pad 5-3 Wireless 5-2 volume up 5-3 HW Setup accessing 7-1 Boot priority 7-3 display 7-3 general 7-2 keyboard 7-4 LAN 7-5 SATA 7-6 window 7-1 USB 7-5 J Indicators 2-12 K Keyboard 5-1 FN Sticky key 5-3 Function keys F1...F9 5-1 Hot keys...
... Series H Hard disk drive 3-3 automatic power off 3-8 Hard Disk Drive/Optical Disc Drive indicator 2-12 HDD Protection 4-45 HDMI device 3-29 Heat dispersal 4-50 Hibernation Mode 3-9 Hot keys 3-8 Brightness Down 5-2 Brightness Up 5-2 Display Resolution 5-3 enlarge 5-3 Hibernate 5-2 Lock 5-2 Mute 5-2 ODD 5-3 Output 5-2 Power Plan 5-2 reduce 5-3 Sleep 5-2 Touch Pad 5-3 Wireless 5-2 volume up 5-3 HW Setup accessing 7-1 Boot priority 7-3 display 7-3 general 7-2 keyboard 7-4 LAN 7-5 SATA 7-6 window 7-1 USB 7-5 J Indicators 2-12 K Keyboard 5-1 FN Sticky key 5-3 Function keys F1...F9 5-1 Hot keys...
Users Manual Canada; English
Page 221
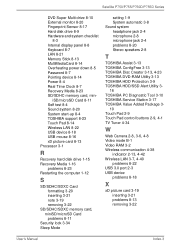
...Satellite P750/P755/P750D/P755D Series DVD Super Multi drive 8-10 External monitor 8-20 Fingerprint Sensor 8-17 Hard disk drive 8-9 Hardware and system checklist 8-3 Internal display panel 8-8 Keyboard 8-7 LAN 8-21 Memory Stick 8-13 MultiMediaCard 8-14 Overheating power down 8-5 Password 8-7 Pointing device 8-14 Power 8-4 Real Time Clock 8-7 Recovery Media 8-23 SD/SDHC memory card, min- iSD/microSD Card 8-11 Self test 8-4 Sound system 8-20 System start-up 8-4 TOSHIBA support 8-23 Touch Pad 8-14 Wireless LAN 8-22 USB device 8-18 USB mouse 8-16 xD picture card 8-13 Processor 3-1 R Recovery hard...
...Satellite P750/P755/P750D/P755D Series DVD Super Multi drive 8-10 External monitor 8-20 Fingerprint Sensor 8-17 Hard disk drive 8-9 Hardware and system checklist 8-3 Internal display panel 8-8 Keyboard 8-7 LAN 8-21 Memory Stick 8-13 MultiMediaCard 8-14 Overheating power down 8-5 Password 8-7 Pointing device 8-14 Power 8-4 Real Time Clock 8-7 Recovery Media 8-23 SD/SDHC memory card, min- iSD/microSD Card 8-11 Self test 8-4 Sound system 8-20 System start-up 8-4 TOSHIBA support 8-23 Touch Pad 8-14 Wireless LAN 8-22 USB device 8-18 USB mouse 8-16 xD picture card 8-13 Processor 3-1 R Recovery hard...
Detailed Specs for Satellite P750 PSAY1C-010001 English
Page 1
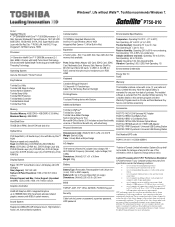
... use of battery power instead of AC power use of certain multimedia games or videos with advertising. Slot 2 has 4GB. Non-Operating: -60 to 80% non-condensing; Operating System Genuine Windows® 7 Home Premium Key Features Toshiba Eco Utility Toshiba USB Sleep & charge harman/kardon Speakers Toshiba Sleep Utility Toshiba HDD Protection Toshiba Media Controller Toshiba Bulletin Board Toshiba Reel Time Memory Standard Memory: 4GB DDR3 + 4GB DDR3 (1333 MHz) Maximum Memory: 8GB DDR3 Hard Disk Drive 750GB (5400 RPM); Zero free memory slots available...
... use of battery power instead of AC power use of certain multimedia games or videos with advertising. Slot 2 has 4GB. Non-Operating: -60 to 80% non-condensing; Operating System Genuine Windows® 7 Home Premium Key Features Toshiba Eco Utility Toshiba USB Sleep & charge harman/kardon Speakers Toshiba Sleep Utility Toshiba HDD Protection Toshiba Media Controller Toshiba Bulletin Board Toshiba Reel Time Memory Standard Memory: 4GB DDR3 + 4GB DDR3 (1333 MHz) Maximum Memory: 8GB DDR3 Hard Disk Drive 750GB (5400 RPM); Zero free memory slots available...


