User Manual
Page 26
Contents Introduction 34 This guide 35 Safety icons 36 Other icons used 37 Other documentation 37 Service options 38 Chapter 1: Getting Started 39 Selecting a place to work 39 Creating a computer-friendly environment........39 Keeping yourself comfortable 40 Precautions 40 Important information on your computer's cooling fan 42 Setting up your computer 43 Setting up your software 43 Registering your computer with Toshiba 44 Adding optional external devices 45 Connecting to a power source 46 Charging the main battery 49 26
Contents Introduction 34 This guide 35 Safety icons 36 Other icons used 37 Other documentation 37 Service options 38 Chapter 1: Getting Started 39 Selecting a place to work 39 Creating a computer-friendly environment........39 Keeping yourself comfortable 40 Precautions 40 Important information on your computer's cooling fan 42 Setting up your computer 43 Setting up your software 43 Registering your computer with Toshiba 44 Adding optional external devices 45 Connecting to a power source 46 Charging the main battery 49 26

User Manual
Page 29
... Computing 105 Toshiba's energy-saver design 105 Running the computer on battery power 105 Battery Notice 106 Power management 107 Using additional batteries 107 Charging batteries 108 Charging the main battery 108 Charging the RTC battery 109 Monitoring main battery power 110 Determining remaining battery power 112 What to do when the main battery runs low ...112 Setting battery alarms 113...
... Computing 105 Toshiba's energy-saver design 105 Running the computer on battery power 105 Battery Notice 106 Power management 107 Using additional batteries 107 Charging batteries 108 Charging the main battery 108 Charging the RTC battery 109 Monitoring main battery power 110 Determining remaining battery power 112 What to do when the main battery runs low ...112 Setting battery alarms 113...
User Manual
Page 32
...197 Resolving hardware conflicts on your own .....198 Fixing a problem with Device Manager ...........200 Memory problems 202 Power and the batteries 202 Keyboard problems 204 Display problems 205 Disk drive problems 208 Optical drive problems 210 Sound system problems 211 PC Card ...Data and system configuration backup in Windows XP 224 If you need further assistance 230 Before you contact Toshiba 230 Contacting Toshiba 231 Other Toshiba Internet Web sites 232 Toshiba's worldwide offices 232 Appendix A: Hot Keys 234 Volume Mute 234 Password security 235 Without a password 235...
...197 Resolving hardware conflicts on your own .....198 Fixing a problem with Device Manager ...........200 Memory problems 202 Power and the batteries 202 Keyboard problems 204 Display problems 205 Disk drive problems 208 Optical drive problems 210 Sound system problems 211 PC Card ...Data and system configuration backup in Windows XP 224 If you need further assistance 230 Before you contact Toshiba 230 Contacting Toshiba 231 Other Toshiba Internet Web sites 232 Toshiba's worldwide offices 232 Appendix A: Hot Keys 234 Volume Mute 234 Password security 235 Without a password 235...
User Manual
Page 33
33 Contents Maintaining security when the battery is not fully charged 236 Power profile 237 Standby mode 237 Hibernation mode 238 Display modes 239 Display brightness 239 Disabling or enabling wireless devices ... enabling the TouchPad 240 Zooming applications in/out 241 Keyboard hot keys 241 Appendix B: Power Cord/Cable Connectors 242 Appendix C: Using ConfigFree™ with your Toshiba Computer 243 Getting Started 244 Starting ConfigFree 244 ConfigFree Utilities 246 Connectivity Doctor 246 Search for Wireless Devices 249 Profile Settings 254 ConfigFree SUMMIT 257...
33 Contents Maintaining security when the battery is not fully charged 236 Power profile 237 Standby mode 237 Hibernation mode 238 Display modes 239 Display brightness 239 Disabling or enabling wireless devices ... enabling the TouchPad 240 Zooming applications in/out 241 Keyboard hot keys 241 Appendix B: Power Cord/Cable Connectors 242 Appendix C: Using ConfigFree™ with your Toshiba Computer 243 Getting Started 244 Starting ConfigFree 244 ConfigFree Utilities 246 Connectivity Doctor 246 Search for Wireless Devices 249 Profile Settings 254 ConfigFree SUMMIT 257...
User Manual
Page 40
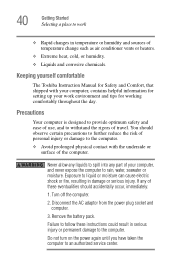
... electric shock or fire, resulting in serious injury or permanent damage to withstand the rigors of use, and to the computer. Keeping yourself comfortable The Toshiba Instruction Manual for setting up your computer, and never expose the computer to work environment and tips for working comfortably throughout the day. Precautions Your..., seawater or moisture. Never allow any liquids to spill into any of the computer. You should accidentally occur, immediately: 1. Turn off the computer. 2. Remove the battery pack.
... electric shock or fire, resulting in serious injury or permanent damage to withstand the rigors of use, and to the computer. Keeping yourself comfortable The Toshiba Instruction Manual for setting up your computer, and never expose the computer to work environment and tips for working comfortably throughout the day. Precautions Your..., seawater or moisture. Never allow any liquids to spill into any of the computer. You should accidentally occur, immediately: 1. Turn off the computer. 2. Remove the battery pack.

User Manual
Page 43
... screen click Next to be charged before adding external or internal components to , a mouse, keyboard, printer, memory, and PC Cards. See "Connecting to charge the battery you must attach the AC adaptor. To use it. Setting up your computer online or to sign up for the first time, do not turn... Network (LAN) connection, or connect the built-in which windows appear, may vary according to a telephone line" on page 130). Your computer contains a rechargeable main battery that needs to enter the Setup Wizard.
... screen click Next to be charged before adding external or internal components to , a mouse, keyboard, printer, memory, and PC Cards. See "Connecting to charge the battery you must attach the AC adaptor. To use it. Setting up your computer online or to sign up for the first time, do not turn... Network (LAN) connection, or connect the built-in which windows appear, may vary according to a telephone line" on page 130). Your computer contains a rechargeable main battery that needs to enter the Setup Wizard.
User Manual
Page 46
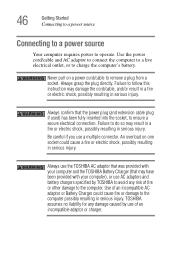
Always confirm that may have been provided with your computer), or use the TOSHIBA AC adaptor that was provided with your computer and the TOSHIBA Battery Charger (that the power plug (and extension cable plug if used) has been fully inserted into the socket, to remove a plug from a...to a power source Connecting to a power source Your computer requires power to the computer. Failure to charge the computer's battery. TOSHIBA assumes no liability for any damage caused by TOSHIBA to avoid any risk of fire or other damage to operate. An overload on a power cord/cable to ensure a ...
Always confirm that may have been provided with your computer), or use the TOSHIBA AC adaptor that was provided with your computer and the TOSHIBA Battery Charger (that the power plug (and extension cable plug if used) has been fully inserted into the socket, to remove a plug from a...to a power source Connecting to a power source Your computer requires power to the computer. Failure to charge the computer's battery. TOSHIBA assumes no liability for any damage caused by TOSHIBA to avoid any risk of fire or other damage to operate. An overload on a power cord/cable to ensure a ...

User Manual
Page 48
...Getting Started Connecting to a power source _ + 2 Plug the AC adaptor cord into the computer or AC outlet ❖ Flashes amber when the main battery charge is low and it is not plugged into the DC-IN on the indicator panel glow blue. Never attempt to follow this instruction could... result in an electric shock, possibly resulting in the AC adaptor The AC power and battery lights on the back of the main battery's current charge: ❖ Glows amber while the main battery is being charged (AC adaptor connected) ❖ Glows blue when the main...
...Getting Started Connecting to a power source _ + 2 Plug the AC adaptor cord into the computer or AC outlet ❖ Flashes amber when the main battery charge is low and it is not plugged into the DC-IN on the indicator panel glow blue. Never attempt to follow this instruction could... result in an electric shock, possibly resulting in the AC adaptor The AC power and battery lights on the back of the main battery's current charge: ❖ Glows amber while the main battery is being charged (AC adaptor connected) ❖ Glows blue when the main...
User Manual
Page 49
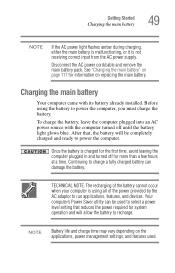
... the computer plugged into an AC power source with its battery already installed. Once the battery is not receiving correct input from the AC power supply. NOTE Battery life and charge time may vary depending on replacing the main battery. After that, the battery will be used . Disconnect the AC power cord/cable and ... to select a power level setting that reduces the power required for more than a few hours at a time. Your computer's Power Saver utility can damage the battery. Before using all of the power provided by the AC adaptor to power the computer, you must charge the...
... the computer plugged into an AC power source with its battery already installed. Once the battery is not receiving correct input from the AC power supply. NOTE Battery life and charge time may vary depending on replacing the main battery. After that, the battery will be used . Disconnect the AC power cord/cable and ... to select a power level setting that reduces the power required for more than a few hours at a time. Your computer's Power Saver utility can damage the battery. Before using all of the power provided by the AC adaptor to power the computer, you must charge the...
User Manual
Page 50
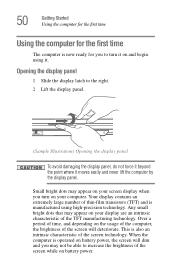
Opening the display panel 1 Slide the display latch to increase the brightness of the screen while on battery power. When the computer is operated on battery power, the screen will deteriorate. Over a period of time, and depending on the usage of the computer, the brightness of the screen technology. Your display ...
Opening the display panel 1 Slide the display latch to increase the brightness of the screen while on battery power. When the computer is operated on battery power, the screen will deteriorate. Over a period of time, and depending on the usage of the computer, the brightness of the screen technology. Your display ...
User Manual
Page 51
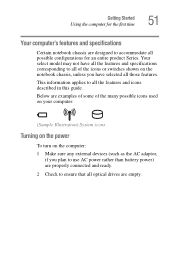
... your computer: (Sample Illustration) System icons Turning on the power To turn on the notebook chassis, unless you plan to use AC power rather than battery power) are properly connected and ready. 2 Check to ensure that all optical drives are designed to accommodate all the features and icons described in this...
... your computer: (Sample Illustration) System icons Turning on the power To turn on the notebook chassis, unless you plan to use AC power rather than battery power) are properly connected and ready. 2 Check to ensure that all optical drives are designed to accommodate all the features and icons described in this...
User Manual
Page 54
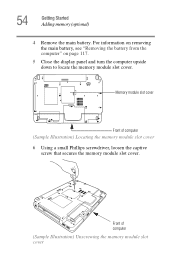
Front of computer (Sample Illustration) Locating the memory module slot cover 6 Using a small Phillips screwdriver, loosen the captive screw that secures the memory module slot cover. Memory module slot cover Front of computer (Sample Illustration) Unscrewing the memory module slot cover For information on removing the main battery, see "Removing the battery from the computer" on page 117. 5 Close the display panel and turn the computer upside down to locate the memory module slot cover. 54 Getting Started Adding memory (optional) 4 Remove the main battery.
Front of computer (Sample Illustration) Locating the memory module slot cover 6 Using a small Phillips screwdriver, loosen the captive screw that secures the memory module slot cover. Memory module slot cover Front of computer (Sample Illustration) Unscrewing the memory module slot cover For information on removing the main battery, see "Removing the battery from the computer" on page 117. 5 Close the display panel and turn the computer upside down to locate the memory module slot cover. 54 Getting Started Adding memory (optional) 4 Remove the main battery.
User Manual
Page 58
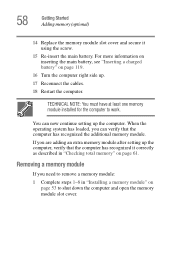
... . 17 Reconnect the cables. 18 Restart the computer. You can verify that the computer has recognized it using the screw. 15 Re-insert the main battery. For more information on inserting the main...
... . 17 Reconnect the cables. 18 Restart the computer. You can verify that the computer has recognized it using the screw. 15 Re-insert the main battery. For more information on inserting the main...
User Manual
Page 60
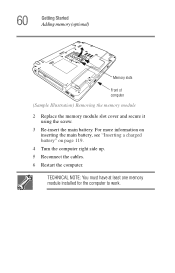
TECHNICAL NOTE: You must have at least one memory module installed for the computer to work. 60 Getting Started Adding memory (optional) Memory slots Front of computer (Sample Illustration) Removing the memory module 2 Replace the memory module slot cover and secure it using the screw. 3 Re-insert the main battery. For more information on inserting the main battery, see "Inserting a charged battery" on page 119. 4 Turn the computer right side up. 5 Reconnect the cables. 6 Restart the computer.
TECHNICAL NOTE: You must have at least one memory module installed for the computer to work. 60 Getting Started Adding memory (optional) Memory slots Front of computer (Sample Illustration) Removing the memory module 2 Replace the memory module slot cover and secure it using the screw. 3 Re-insert the main battery. For more information on inserting the main battery, see "Inserting a charged battery" on page 119. 4 Turn the computer right side up. 5 Reconnect the cables. 6 Restart the computer.
User Manual
Page 70
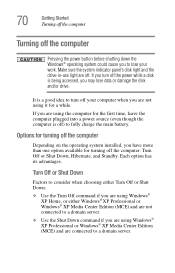
.... Options for turning off the computer Depending on the operating system installed, you turn off your work. It is off) to fully charge the main battery. Each option has its advantages. 70 Getting Started Turning off the computer Turning off the computer Pressing the power button before shutting down the Windows...
.... Options for turning off the computer Depending on the operating system installed, you turn off your work. It is off) to fully charge the main battery. Each option has its advantages. 70 Getting Started Turning off the computer Turning off the computer Pressing the power button before shutting down the Windows...
User Manual
Page 71
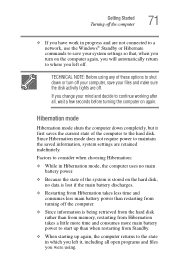
... information is being retrieved from the hard disk rather than from memory, restarting from Hibernation takes a little more time and consumes more main battery power to start up than when restarting from Standby. ❖ When starting up again, the computer returns to the state in progress and... mind and decide to the hard disk. Factors to consider when choosing Hibernation: ❖ While in Hibernation mode, the computer uses no main battery power. ❖ Because the state of the system is stored on again. TECHNICAL NOTE: Before using . Getting Started Turning off the computer 71...
... information is being retrieved from the hard disk rather than from memory, restarting from Hibernation takes a little more time and consumes more main battery power to start up than when restarting from Standby. ❖ When starting up again, the computer returns to the state in progress and... mind and decide to the hard disk. Factors to consider when choosing Hibernation: ❖ While in Hibernation mode, the computer uses no main battery power. ❖ Because the state of the system is stored on again. TECHNICAL NOTE: Before using . Getting Started Turning off the computer 71...
User Manual
Page 72
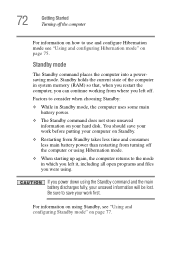
... computer on Standby. ❖ Restarting from Standby takes less time and consumes less main battery power than restarting from where you power down using the Standby command and the main battery discharges fully, your unsaved information will be lost. Be sure to use and configure Hibernation...work first. 72 Getting Started Turning off . Standby holds the current state of the computer in Standby mode, the computer uses some main battery power. ❖ The Standby command does not store unsaved information on page 75. For information on using . Standby mode The Standby command...
... computer on Standby. ❖ Restarting from Standby takes less time and consumes less main battery power than restarting from where you power down using the Standby command and the main battery discharges fully, your unsaved information will be lost. Be sure to use and configure Hibernation...work first. 72 Getting Started Turning off . Standby holds the current state of the computer in Standby mode, the computer uses some main battery power. ❖ The Standby command does not store unsaved information on page 75. For information on using . Standby mode The Standby command...
User Manual
Page 79
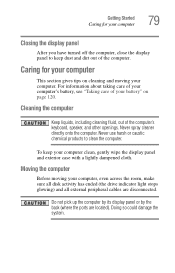
... all disk activity has ended (the drive indicator light stops glowing) and all external peripheral cables are located). For information about taking care of your battery" on cleaning and moving your computer. Never use harsh or caustic chemical products to keep your computer clean, gently wipe the display panel and exterior... the computer Keep liquids, including cleaning fluid, out of the computer's keyboard, speaker, and other openings. To keep dust and dirt out of your computer's battery, see "Taking care of the computer. Never spray cleaner directly onto the computer.
... all disk activity has ended (the drive indicator light stops glowing) and all external peripheral cables are located). For information about taking care of your battery" on cleaning and moving your computer. Never use harsh or caustic chemical products to keep your computer clean, gently wipe the display panel and exterior... the computer Keep liquids, including cleaning fluid, out of the computer's keyboard, speaker, and other openings. To keep dust and dirt out of your computer's battery, see "Taking care of the computer. Never spray cleaner directly onto the computer.
User Manual
Page 81
If the network you are using goes down and you must restart your computer to reconnect, or your battery runs out of charge while you are working, you will lose all work frequently. This feature saves your work since you save feature that can ...
If the network you are using goes down and you must restart your computer to reconnect, or your battery runs out of charge while you are working, you will lose all work frequently. This feature saves your work since you save feature that can ...
User Manual
Page 89
... list. For example, to work. Many programs offer a feature that saves documents at regular intervals. This is a good idea to get in case the main battery discharges before you return to access WordPad, type: c:\Program Files\Windows NT\Accessories\wordpad.exe, then click OK. ❖ If you do not know the...
... list. For example, to work. Many programs offer a feature that saves documents at regular intervals. This is a good idea to get in case the main battery discharges before you return to access WordPad, type: c:\Program Files\Windows NT\Accessories\wordpad.exe, then click OK. ❖ If you do not know the...


