
Users Manual Canada; English
Page 3
... Hardware 3-1 Special features 3-7 Utilities and Applications 3-9 Optional devices 3-15 Memory media slot 3-15 Optional accessories 3-29 Chapter 4 Operating Basics Using the Touch Pad 4-1 Web Camera 4-2 Using the TOSHIBA Face Recognition 4-3 Using optical disc drives 4-6 Writing CD/DVD/Blu-ray™ discs 4-9 TOSHIBA VIDEO PLAYER 4-20 Using WinDVD BD for TOSHIBA 4-25 Media care 4-28 Sound System 4-28 Modem 4-31 Wireless communications 4-33 LAN 4-36 Computer Handling 4-38 Using the TOSHIBA Sleep Utility 4-39 Heat dispersal 4-41 Chapter 5 The Keyboard Typewriter keys...
... Hardware 3-1 Special features 3-7 Utilities and Applications 3-9 Optional devices 3-15 Memory media slot 3-15 Optional accessories 3-29 Chapter 4 Operating Basics Using the Touch Pad 4-1 Web Camera 4-2 Using the TOSHIBA Face Recognition 4-3 Using optical disc drives 4-6 Writing CD/DVD/Blu-ray™ discs 4-9 TOSHIBA VIDEO PLAYER 4-20 Using WinDVD BD for TOSHIBA 4-25 Media care 4-28 Sound System 4-28 Modem 4-31 Wireless communications 4-33 LAN 4-36 Computer Handling 4-38 Using the TOSHIBA Sleep Utility 4-39 Heat dispersal 4-41 Chapter 5 The Keyboard Typewriter keys...

Users Manual Canada; English
Page 4
... technology Interoperability C-1 CAUTION about Wireless Devices C-2 Wireless Devices and your health C-2 Radio Regulatory Information C-3 Radio approvals for wireless devices C-7 Appendix D AC Power Cord and Connectors Certification agencies D-1 Appendix E TOSHIBA PC Health Monitor Starting the TOSHIBA PC Health Monitor E-2 If a TOSHIBA PC Health Monitor message is displayed E-2 Appendix F Legal Footnotes Non-applicable Icons F-1 CPU F-1 Memory (Main System F-2 Battery Life F-3 Hard Disk Drive (HDD) Capacity F-3 LCD F-3 Graphics Processor Unit ("GPU F-3 User's Manual iv
... technology Interoperability C-1 CAUTION about Wireless Devices C-2 Wireless Devices and your health C-2 Radio Regulatory Information C-3 Radio approvals for wireless devices C-7 Appendix D AC Power Cord and Connectors Certification agencies D-1 Appendix E TOSHIBA PC Health Monitor Starting the TOSHIBA PC Health Monitor E-2 If a TOSHIBA PC Health Monitor message is displayed E-2 Appendix F Legal Footnotes Non-applicable Icons F-1 CPU F-1 Memory (Main System F-2 Battery Life F-3 Hard Disk Drive (HDD) Capacity F-3 LCD F-3 Graphics Processor Unit ("GPU F-3 User's Manual iv

Users Manual Canada; English
Page 6
... and other use beyond that stipulated above (including conversion to digital format, alteration, transfer of copied material and distribution on a network) without the permission of the copyright owner is assumed, with copyright laws in making any form without notice. Please comply with respect to the copyright owner. Disclaimer This manual has been validated and reviewed for damages incurred...
... and other use beyond that stipulated above (including conversion to digital format, alteration, transfer of copied material and distribution on a network) without the permission of the copyright owner is assumed, with copyright laws in making any form without notice. Please comply with respect to the copyright owner. Disclaimer This manual has been validated and reviewed for damages incurred...

Users Manual Canada; English
Page 12
... Telephone Consumer Protection Act of 1991 makes it may cause harm to the telephone network. Use only No. 26AWG or larger modular cable. If these changes might affect your service or the operation of your telephone equipment is not operating properly, you can . User's Manual xii Type of service Your modem is designed to be performed by TOSHIBA Corporation or an authorized representative...
... Telephone Consumer Protection Act of 1991 makes it may cause harm to the telephone network. Use only No. 26AWG or larger modular cable. If these changes might affect your service or the operation of your telephone equipment is not operating properly, you can . User's Manual xii Type of service Your modem is designed to be performed by TOSHIBA Corporation or an authorized representative...

Users Manual Canada; English
Page 21
... 3, Hardware, Utilities and Options if connecting optional products or external devices. For example: Read Only Memory (ROM). User's Manual xxii Be sure to read over the Chapter 1, Getting Started and Chapter 3, Hardware, Utilities and Options chapters to familiarize yourself with this computer, as well as the section on Chapter 7, HW Setup, to understand how to set up your computer, basic operations and care, using your purchase of this manual is...
... 3, Hardware, Utilities and Options if connecting optional products or external devices. For example: Read Only Memory (ROM). User's Manual xxii Be sure to read over the Chapter 1, Getting Started and Chapter 3, Hardware, Utilities and Options chapters to familiarize yourself with this computer, as well as the section on Chapter 7, HW Setup, to understand how to set up your computer, basic operations and care, using your purchase of this manual is...
Users Manual Canada; English
Page 35
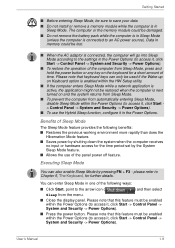
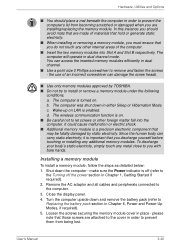
... ( Sleep from automatically entering Sleep Mode, disable Sleep Mode within the Power Options (to access it , click Start -> Control Panel -> System and Security -> Power Options). ■ Press the power button. You can only be used if the Wake-up on Keyboard option is enabled within the Power Options (to access it , click Start -> Control Panel -> System and Security -> Power Options). Please note that keyboard keys can enter Sleep Mode in Sleep Mode. Getting Started ■ Before entering Sleep Mode, be sure to save your data. ■ Do not install or remove a memory module...
... ( Sleep from automatically entering Sleep Mode, disable Sleep Mode within the Power Options (to access it , click Start -> Control Panel -> System and Security -> Power Options). ■ Press the power button. You can only be used if the Wake-up on Keyboard option is enabled within the Power Options (to access it , click Start -> Control Panel -> System and Security -> Power Options). Please note that keyboard keys can enter Sleep Mode in Sleep Mode. Getting Started ■ Before entering Sleep Mode, be sure to save your data. ■ Do not install or remove a memory module...
Users Manual Canada; English
Page 56
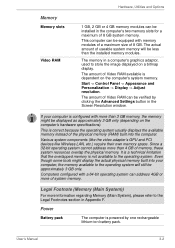
... memory (RAM) built into your computer is powered by clicking the Advanced Settings button in Appendix F. The memory in the computer's two memory slots for a maximum of 8 GB system memory. Start -> Control Panel -> Appearance and Personalization -> Display -> Adjust resolution. The amount of Video RAM can be verified by one rechargeable lithium-ion battery pack. User's Manual 3-2 Hardware, Utilities and Options Memory Memory slots Video RAM 1 GB, 2 GB or 4 GB memory modules can be installed in a computer's graphics adaptor, used to the operating...
... memory (RAM) built into your computer is powered by clicking the Advanced Settings button in Appendix F. The memory in the computer's two memory slots for a maximum of 8 GB system memory. Start -> Control Panel -> Appearance and Personalization -> Display -> Adjust resolution. The amount of Video RAM can be verified by one rechargeable lithium-ion battery pack. User's Manual 3-2 Hardware, Utilities and Options Memory Memory slots Video RAM 1 GB, 2 GB or 4 GB memory modules can be installed in a computer's graphics adaptor, used to the operating...
Users Manual Canada; English
Page 73
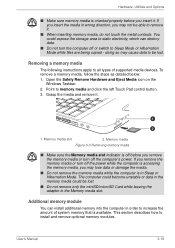
... to memory media and click the left Touch Pad control button. 3. You could be lost . To remove a memory media, follow the steps as detailed below: 1. Open the Safely Remove Hardware and Eject Media icon on the Windows Taskbar. 2. Memory media Figure 3-3 Removing memory media ■ Make sure the Memory media slot indicator is oriented properly before you remove the memory media or turn off the computer's power. Grasp the media and remove it . ■ When inserting memory media, do not touch the metal contacts. Memory media slot 2. User's Manual 3-19...
... to memory media and click the left Touch Pad control button. 3. You could be lost . To remove a memory media, follow the steps as detailed below: 1. Open the Safely Remove Hardware and Eject Media icon on the Windows Taskbar. 2. Memory media Figure 3-3 Removing memory media ■ Make sure the Memory media slot indicator is oriented properly before you remove the memory media or turn off the computer's power. Grasp the media and remove it . ■ When inserting memory media, do not touch the metal contacts. Memory media slot 2. User's Manual 3-19...
Users Manual Canada; English
Page 74
... are installing/replacing the memory module. User's Manual 3-20 Installing a memory module To install a memory module, follow the steps as detailed below: 1. Remove the AC adaptor and all cables and peripherals connected to remove and fasten the screws - a. Wake-up on . ■ Be careful not to the Turning off the power section in dual channel. ■ Use a point size 0 Phillips screwdriver to the computer. 3. The wireless communication function is on LAN is enabled...
... are installing/replacing the memory module. User's Manual 3-20 Installing a memory module To install a memory module, follow the steps as detailed below: 1. Remove the AC adaptor and all cables and peripherals connected to remove and fasten the screws - a. Wake-up on . ■ Be careful not to the Turning off the power section in dual channel. ■ Use a point size 0 Phillips screwdriver to the computer. 3. The wireless communication function is on LAN is enabled...
Users Manual Canada; English
Page 76
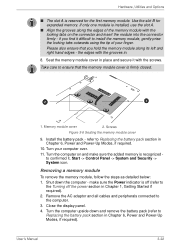
... locking tabs on and make sure the Power indicator is recognized to the Turning off (refer to confirmed it with the grooves in. 8. Remove the AC adaptor and all cables and peripherals connected to Replacing the battery pack section in Chapter 6, Power and Power-Up Modes, if required). Screws Figure 3-6 Seating the memory module cover 9. Close the display panel. 4. Install the battery pack - Use the slot B for the first memory module. User's Manual 3-22 Removing a memory module To remove the memory module...
... locking tabs on and make sure the Power indicator is recognized to the Turning off (refer to confirmed it with the grooves in. 8. Remove the AC adaptor and all cables and peripherals connected to Replacing the battery pack section in Chapter 6, Power and Power-Up Modes, if required). Screws Figure 3-6 Seating the memory module cover 9. Close the display panel. 4. Install the battery pack - Use the slot B for the first memory module. User's Manual 3-22 Removing a memory module To remove the memory module...
Users Manual Canada; English
Page 102
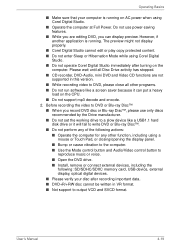
... other function, including using a mouse or Touch Pad, or closing/opening the display panel. ■ Bump or cause vibration to the computer. ■ Use the Mode control button and Audio/Video control button to reproduce music or voice. ■ Open the DVD drive. ■ Install, remove or connect external devices, including the following: SD/SDHC/SDXC memory card, USB device, external display, optical digital devices. ■ Please verify your computer is running on AC power when using Corel Digital Studio. ■ Do not operate...
... other function, including using a mouse or Touch Pad, or closing/opening the display panel. ■ Bump or cause vibration to the computer. ■ Use the Mode control button and Audio/Video control button to reproduce music or voice. ■ Open the DVD drive. ■ Install, remove or connect external devices, including the following: SD/SDHC/SDXC memory card, USB device, external display, optical digital devices. ■ Please verify your computer is running on AC power when using Corel Digital Studio. ■ Do not operate...
Users Manual Canada; English
Page 106
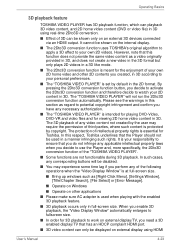
... shown on the internal display. ■ The 2Dto3D conversion function uses TOSHIBA's original algorithm to apply a 3D effect to work on external display/TV, you enable 3D playback, the "Video Display Window" automatically enlarges to fullscreen size. ■ In order for the enjoyment of your 2D content in 3D using HDMI User's Manual 4-23 By pressing the 2Dto3D conversion function button, you decide to activate the 2Dto3D conversion function and therefore...
... shown on the internal display. ■ The 2Dto3D conversion function uses TOSHIBA's original algorithm to apply a 3D effect to work on external display/TV, you enable 3D playback, the "Video Display Window" automatically enlarges to fullscreen size. ■ In order for the enjoyment of your 2D content in 3D using HDMI User's Manual 4-23 By pressing the 2Dto3D conversion function button, you decide to activate the 2Dto3D conversion function and therefore...

Users Manual Canada; English
Page 110
... works only in the Display Area using the Control window's Top Menu or Menu buttons, touch pad and mouse menu operations may not be able to be used. Starting WinDVD BD for TOSHIBA Use the following procedure to full screen. If there's any pop-up message, WinDVD will be back to window mode. ■ WinDVD will be temporarily disabled. ■ WinDVD BD for TOSHIBA". ■ When a Blu-ray Disc™ is opened in full screen...
... works only in the Display Area using the Control window's Top Menu or Menu buttons, touch pad and mouse menu operations may not be able to be used. Starting WinDVD BD for TOSHIBA Use the following procedure to full screen. If there's any pop-up message, WinDVD will be back to window mode. ■ WinDVD will be temporarily disabled. ■ WinDVD BD for TOSHIBA". ■ When a Blu-ray Disc™ is opened in full screen...
Users Manual Canada; English
Page 123
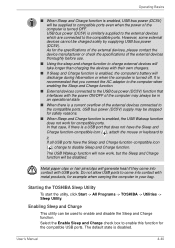
... turned OFF. Do not allow USB ports to compatible ports even when the power of the computer may always be in your bag. User's Manual 4-40 However, some external devices cannot be used to it. If all USB ports have the Sleep and Charge function-compatible icon ( ), attach the mouse or keyboard to enable and disable the Sleep and Charge function. Operating Basics ■ When Sleep and Charge function is enabled, USB bus power (DC5V) will be disabled. Select the Enable Sleep...
... turned OFF. Do not allow USB ports to compatible ports even when the power of the computer may always be in your bag. User's Manual 4-40 However, some external devices cannot be used to it. If all USB ports have the Sleep and Charge function-compatible icon ( ), attach the mouse or keyboard to enable and disable the Sleep and Charge function. Operating Basics ■ When Sleep and Charge function is enabled, USB bus power (DC5V) will be disabled. Select the Enable Sleep...
Users Manual Canada; English
Page 126
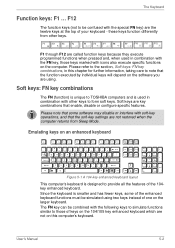
... of one on the software you are not restored when the computer returns from other keys to note that the soft-key settings are using. Since the keyboard is designed to those keys marked with the special FN key) are called function keys because they execute programmed functions when pressed and, when used in this computer's keyboard. Please note that enable, disable or configure specific features. User's Manual 5-2 The Keyboard Function keys: F1 ...
... of one on the software you are not restored when the computer returns from other keys to note that the soft-key settings are using. Since the keyboard is designed to those keys marked with the special FN key) are called function keys because they execute programmed functions when pressed and, when used in this computer's keyboard. Please note that enable, disable or configure specific features. User's Manual 5-2 The Keyboard Function keys: F1 ...

Users Manual Canada; English
Page 143
... factory settings. Accessing HW Setup To run the HW Setup program, click Start -> All Programs -> TOSHIBA -> Utilities -> HWSetup. User's Manual 7-1 Chapter 7 HW Setup This chapter explains how to use the TOSHIBA HW Setup program to be configured. HW Setup window The HW Setup window contains a number of tabs (General, Password, Display, Boot Setting, Keyboard, LAN, SATA and USB) to allow specific functions of the computer to configure your changes and closes the HW Setup window. General This window displays the BIOS/EC version and contains two buttons: Default...
... factory settings. Accessing HW Setup To run the HW Setup program, click Start -> All Programs -> TOSHIBA -> Utilities -> HWSetup. User's Manual 7-1 Chapter 7 HW Setup This chapter explains how to use the TOSHIBA HW Setup program to be configured. HW Setup window The HW Setup window contains a number of tabs (General, Password, Display, Boot Setting, Keyboard, LAN, SATA and USB) to allow specific functions of the computer to configure your changes and closes the HW Setup window. General This window displays the BIOS/EC version and contains two buttons: Default...
Users Manual Canada; English
Page 150
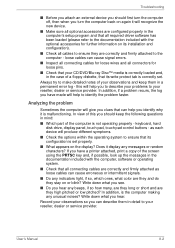
keyboard, hard disk drive, display panel, touch pad, touch pad control buttons - In addition, is malfunctioning. User's Manual 8-2 Analyzing the problem Sometimes the computer will give you clues that can describe them in detail to your observations so you can help you identify why it is the computer making any messages or random characters? Record your reseller, dealer or service provider. Always try to make detailed notes of your...
keyboard, hard disk drive, display panel, touch pad, touch pad control buttons - In addition, is malfunctioning. User's Manual 8-2 Analyzing the problem Sometimes the computer will give you clues that can describe them in detail to your observations so you can help you identify why it is the computer making any messages or random characters? Record your reseller, dealer or service provider. Always try to make detailed notes of your...
Users Manual Canada; English
Page 164
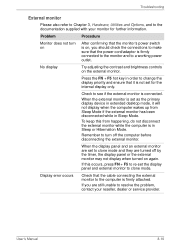
... + F5 hot key in order to resolve the problem, contact your monitor for the internal display only. If you should check the connections to make sure that the power cord/adaptor is firmly attached. User's Manual 8-16 Remember to the computer is firmly connected to the monitor and to clone mode and they are still unable to change the display priority and ensure that the monitor's power switch is connected. Display error occurs...
... + F5 hot key in order to resolve the problem, contact your monitor for the internal display only. If you should check the connections to make sure that the power cord/adaptor is firmly attached. User's Manual 8-16 Remember to the computer is firmly connected to the monitor and to clone mode and they are still unable to change the display priority and ensure that the monitor's power switch is connected. Display error occurs...

Users Manual Canada; English
Page 191
... are approximate and may not function properly. Memory (Main System) Part of the main system memory may be compatible with a 64-bit operating system can address up copies of system memory. Computers configured with a 64bit CPU and therefore may vary depending on the specific computer model - To avoid risk of lost data or damage to TOSHIBA support section in your computer documentation...
... are approximate and may not function properly. Memory (Main System) Part of the main system memory may be compatible with a 64-bit operating system can address up copies of system memory. Computers configured with a 64bit CPU and therefore may vary depending on the specific computer model - To avoid risk of lost data or damage to TOSHIBA support section in your computer documentation...
Detailed Specs for Satellite L740 PSK0YC-01R00G English
Page 1
... Warranty This Satellite notebook comes with Gesture Additional Software Toshiba ConfigFree™ Toshiba Disc Creator Norton Internet Security Trial Microsoft® Office Starter 2010 includes reduced-functionality versions of 5C to 35C (41F to change without Walls™. DDR3-1333 2GB Memory Module PA3918U-1M4G- Serial-ATA hard disk drive Optical Drive DVD SuperMulti (+/-R double layer) drive supporting 11 formats Maximum speed and compatibility: Read: CD-ROM (24x), DVD-ROM (8x...
... Warranty This Satellite notebook comes with Gesture Additional Software Toshiba ConfigFree™ Toshiba Disc Creator Norton Internet Security Trial Microsoft® Office Starter 2010 includes reduced-functionality versions of 5C to 35C (41F to change without Walls™. DDR3-1333 2GB Memory Module PA3918U-1M4G- Serial-ATA hard disk drive Optical Drive DVD SuperMulti (+/-R double layer) drive supporting 11 formats Maximum speed and compatibility: Read: CD-ROM (24x), DVD-ROM (8x...


