User Guide
Page 44
...you through steps to set up your background and then click Next. 5 Click the appropriate option from the Help Protect Windows Automatically screen. 6 Follow the remaining screen prompts to be associated with your user account, and then click Next. 4 Enter the computer name and choose your software When...first time, do not turn off the power again until the operating system has loaded completely. Setting up your software. 1 From the Welcome screen click Next to enter the Setup Wizard. 2 Confirm acceptance of windows displayed, and the order in which windows appear, may restart your ...
...you through steps to set up your background and then click Next. 5 Click the appropriate option from the Help Protect Windows Automatically screen. 6 Follow the remaining screen prompts to be associated with your user account, and then click Next. 4 Enter the computer name and choose your software When...first time, do not turn off the power again until the operating system has loaded completely. Setting up your software. 1 From the Welcome screen click Next to enter the Setup Wizard. 2 Confirm acceptance of windows displayed, and the order in which windows appear, may restart your ...
User Guide
Page 50
...rather than battery power) are properly connected and ready. 2 Check to accommodate all optical drives are an intrinsic characteristic of the screen technology. This is manufactured using highprecision technology. This information applies to all of the icons or switches shown on the computer chassis..., unless you turn on your screen display when you have all the features and specifications corresponding to all those features. Any small bright dots that all possible ...
...rather than battery power) are properly connected and ready. 2 Check to accommodate all optical drives are an intrinsic characteristic of the screen technology. This is manufactured using highprecision technology. This information applies to all of the icons or switches shown on the computer chassis..., unless you turn on your screen display when you have all the features and specifications corresponding to all those features. Any small bright dots that all possible ...
User Guide
Page 58
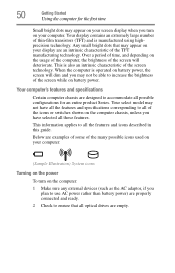
The memory module pops up normally. 58 Getting Started Adding memory (optional) NOTE The following screen may appear when you turn on the power: If "Start Windows® Normally" is suggested, this could be a sign that you must remove the top ...
The memory module pops up normally. 58 Getting Started Adding memory (optional) NOTE The following screen may appear when you turn on the power: If "Start Windows® Normally" is suggested, this could be a sign that you must remove the top ...
User Guide
Page 60
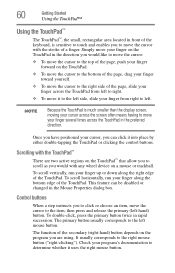
... the TouchPad™ The TouchPad™, the small, rectangular area located in front of the keyboard, is much smaller than the display screen, moving your cursor across the screen often means having to the right side of the page, slide your finger across the TouchPad in rapid succession. Control buttons When a step...
... the TouchPad™ The TouchPad™, the small, rectangular area located in front of the keyboard, is much smaller than the display screen, moving your cursor across the screen often means having to the right side of the page, slide your finger across the TouchPad in rapid succession. Control buttons When a step...
User Guide
Page 61
...use the display hot key (Fn + F5): 1 Press Fn and F5 simultaneously. Your computer will automatically detect the external display device and activate a screen with a built-in display, but you desire and click Apply. 6 Click OK. To change the display settings by pressing Fn+F5, or by default.... NOTE In the future you can easily attach an external monitor or projector to your computer if you first need a larger screen. Getting Started 61 Using external display devices Disabling or enabling the TouchPad™ The TouchPad™ is to use the internal display only,...
...use the display hot key (Fn + F5): 1 Press Fn and F5 simultaneously. Your computer will automatically detect the external display device and activate a screen with a built-in display, but you desire and click Apply. 6 Click OK. To change the display settings by pressing Fn+F5, or by default.... NOTE In the future you can easily attach an external monitor or projector to your computer if you first need a larger screen. Getting Started 61 Using external display devices Disabling or enabling the TouchPad™ The TouchPad™ is to use the internal display only,...
User Guide
Page 64
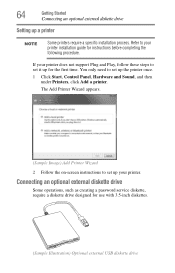
The Add Printer Wizard appears. (Sample Image) Add Printer Wizard 2 Follow the on-screen instructions to set up a printer NOTE Some printers require a specific installation process. 64 Getting Started Connecting an optional external diskette drive Setting up your printer. ...
The Add Printer Wizard appears. (Sample Image) Add Printer Wizard 2 Follow the on-screen instructions to set up a printer NOTE Some printers require a specific installation process. 64 Getting Started Connecting an optional external diskette drive Setting up your printer. ...
User Guide
Page 69
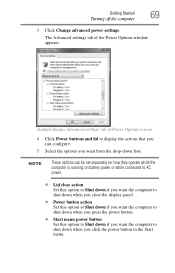
... the power button in the Start menu. The Advanced settings tab of the Power Options window appears. (Sample Image) Advanced settings tab of Power Options screen 4 Click Power buttons and lid to display the actions that you can be set separately for how they operate while the computer is running on...
... the power button in the Start menu. The Advanced settings tab of the Power Options window appears. (Sample Image) Advanced settings tab of Power Options screen 4 Click Power buttons and lid to display the actions that you can be set separately for how they operate while the computer is running on...
User Guide
Page 71
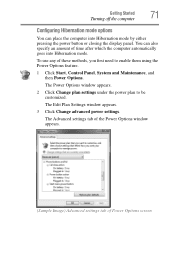
... the Power Options window appears. (Sample Image) Advanced settings tab of these methods, you first need to be customized. To use any of Power Options screen You can place the computer into Hibernation mode.
... the Power Options window appears. (Sample Image) Advanced settings tab of these methods, you first need to be customized. To use any of Power Options screen You can place the computer into Hibernation mode.

User Guide
Page 72
The computer returns to the screen(s) you want. Once the computer is running on battery power or while connected to AC power. ❖ Lid close action Set this option to Hibernate ...
The computer returns to the screen(s) you want. Once the computer is running on battery power or while connected to AC power. ❖ Lid close action Set this option to Hibernate ...

User Guide
Page 74
... entering Sleep mode, select Never. 4 Click Change advanced power settings. The Edit Plan Settings window appears. (Sample Image) Edit Plan Settings screen 3 To change the amount of Power Options screen The Advanced settings tab of the Power Options window appears. (Sample Image) Advanced settings tab of time after which the computer enters...
... entering Sleep mode, select Never. 4 Click Change advanced power settings. The Edit Plan Settings window appears. (Sample Image) Edit Plan Settings screen 3 To change the amount of Power Options screen The Advanced settings tab of the Power Options window appears. (Sample Image) Advanced settings tab of time after which the computer enters...
User Guide
Page 75
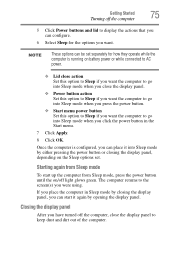
The computer returns to the screen(s) you have turned off the computer, close the display panel. ❖ Power button action Set this option to Sleep if you want the computer to ...
The computer returns to the screen(s) you have turned off the computer, close the display panel. ❖ Power button action Set this option to Sleep if you want the computer to ...

User Guide
Page 101
... at low temperatures Conserving battery power How long a fully charged battery pack lasts when you are using the computer depends on a number of Power Options screen 4 Click Battery to display the battery options. 5 Configure the alarm settings to be customized. The Edit Plan Settings window appears. 3 Click Change advanced power settings...
... at low temperatures Conserving battery power How long a fully charged battery pack lasts when you are using the computer depends on a number of Power Options screen 4 Click Battery to display the battery options. 5 Configure the alarm settings to be customized. The Edit Plan Settings window appears. 3 Click Change advanced power settings...

User Guide
Page 103
... expand each item. 6 Click Save Changes to access settings for battery notification levels, internal storage drive power save the plan changes you have performed. This screen allows you the shortest battery time, but the highest performance from your computer. By default the three power plans Balanced, Power Saver, and High Performance...
... expand each item. 6 Click Save Changes to access settings for battery notification levels, internal storage drive power save the plan changes you have performed. This screen allows you the shortest battery time, but the highest performance from your computer. By default the three power plans Balanced, Power Saver, and High Performance...
User Guide
Page 111
.... 111 HINT: The illustrated examples in the Windows® operating system. Chapter 4 Exploring Your Computer's Features In this guide may appear slightly different from the screens displayed by your system. The differences are not significant and do in this chapter, you can do not indicate any change in the functionality of...
.... 111 HINT: The illustrated examples in the Windows® operating system. Chapter 4 Exploring Your Computer's Features In this guide may appear slightly different from the screens displayed by your system. The differences are not significant and do in this chapter, you can do not indicate any change in the functionality of...

User Guide
Page 119
... products and services for the service. ❖ Internet chat rooms A chat room is a Web site that offers a place where people with others on their computer screens. ❖ Internet news groups A news group is termed uploading (transferring data from your computer to a site on the Web), or downloading (transferring data from one...
... products and services for the service. ❖ Internet chat rooms A chat room is a Web site that offers a place where people with others on their computer screens. ❖ Internet news groups A news group is termed uploading (transferring data from your computer to a site on the Web), or downloading (transferring data from one...
User Guide
Page 120
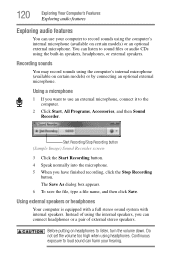
... high when using the computer's internal microphone (available on certain models) or an optional external microphone. Start Recording/Stop Recording button (Sample Image) Sound Recorder screen 3 Click the Start Recording button. 4 Speak normally into the microphone. 5 When you have finished recording, click the Stop Recording button. You can use an external...
... high when using the computer's internal microphone (available on certain models) or an optional external microphone. Start Recording/Stop Recording button (Sample Image) Sound Recorder screen 3 Click the Start Recording button. 4 Speak normally into the microphone. 5 When you have finished recording, click the Stop Recording button. You can use an external...
User Guide
Page 131
Use this feature when you leave your password, if any key or touch the pointing device and the Windows® Logon screen will appear. This is set up under the supervisor password. ❖ The supervisor password must be deleted and then re-entered... keystroke. To unlock your computer again. Using an instant password An instant password secures your open programs and files when leaving the computer temporarily. Toshiba supports several types of passwords on your system, press any . Utilities Setting passwords 131 Setting passwords Setting a password lets you walk away from...
Use this feature when you leave your password, if any key or touch the pointing device and the Windows® Logon screen will appear. This is set up under the supervisor password. ❖ The supervisor password must be deleted and then re-entered... keystroke. To unlock your computer again. Using an instant password An instant password secures your open programs and files when leaving the computer temporarily. Toshiba supports several types of passwords on your system, press any . Utilities Setting passwords 131 Setting passwords Setting a password lets you walk away from...
User Guide
Page 133
...choose to complete the process. Utilities Setting passwords 133 6 Click OK. The Supervisor Password tab of the inability to complete the process. The TOSHIBA Assist window appears. 2 On the left side, click the Secure tab. 3 Click the Supervisor Password icon. Setting a user password If ...you , your organization or others as a result of the TOSHIBA Password Utility window appears. 4 Click Not Registered. A pop-up screen appears asking for any losses that you not remember it should you save your computer.
...choose to complete the process. Utilities Setting passwords 133 6 Click OK. The Supervisor Password tab of the inability to complete the process. The TOSHIBA Assist window appears. 2 On the left side, click the Secure tab. 3 Click the Supervisor Password icon. Setting a user password If ...you , your organization or others as a result of the TOSHIBA Password Utility window appears. 4 Click Not Registered. A pop-up screen appears asking for any losses that you not remember it should you save your computer.
User Guide
Page 134
... Utility window appears. 2 Click Not Registered. 3 Follow the on-screen instructions to exit. Deleting a user password To cancel the power-on password functions: 1 Click Start, All Programs, Toshiba, Utilities, and then TOSHIBA Password Utility. The TOSHIBA Password Utility window appears. (Sample Image) TOSHIBA Password Utility window 2 Click Registered. 3 Enter your password, and then enter it...
... Utility window appears. 2 Click Not Registered. 3 Follow the on-screen instructions to exit. Deleting a user password To cancel the power-on password functions: 1 Click Start, All Programs, Toshiba, Utilities, and then TOSHIBA Password Utility. The TOSHIBA Password Utility window appears. (Sample Image) TOSHIBA Password Utility window 2 Click Registered. 3 Enter your password, and then enter it...

User Guide
Page 136
The Mouse Properties screen appears. (Sample Image) Mouse Properties screen The settings you to change are divided into these categories: ❖ Buttons ❖ Pointers ❖ Pointer Options ❖ Wheel ❖ Hardware ❖ Device Settings You ... access the Mouse utility: 1 Click Start, Control Panel, and then Mouse under Hardware and Sound, or click the Mouse icon in the Optimize tab of TOSHIBA Assist. 136 Utilities Mouse Utility Mouse Utility The Mouse utility allows you can change your particular pointing device. 2 Adjust the settings as desired, then click...
The Mouse Properties screen appears. (Sample Image) Mouse Properties screen The settings you to change are divided into these categories: ❖ Buttons ❖ Pointers ❖ Pointer Options ❖ Wheel ❖ Hardware ❖ Device Settings You ... access the Mouse utility: 1 Click Start, Control Panel, and then Mouse under Hardware and Sound, or click the Mouse icon in the Optimize tab of TOSHIBA Assist. 136 Utilities Mouse Utility Mouse Utility The Mouse utility allows you can change your particular pointing device. 2 Adjust the settings as desired, then click...


