User Guide
Page 20
...tips 72 Using the keyboard 73 Function keys 74 Special Windows® keys 75 Touch screen 75 Touch screen navigation 75 Mouse properties 76 Starting an app 77 Starting an app from the Start screen 77 Saving your work 78 Backing up your work 78 Using the optical disc drive... Playing optical media 81 Recording optical media 81 Removing a disc with the computer on 82 Removing a disc with the computer off 82 Toshiba's online resources 83 Chapter 3: Mobile Computing 84 Toshiba's energy-saver design 84 Running the computer on battery power 84 Battery Notice 85 Power management 86
...tips 72 Using the keyboard 73 Function keys 74 Special Windows® keys 75 Touch screen 75 Touch screen navigation 75 Mouse properties 76 Starting an app 77 Starting an app from the Start screen 77 Saving your work 78 Backing up your work 78 Using the optical disc drive... Playing optical media 81 Recording optical media 81 Removing a disc with the computer on 82 Removing a disc with the computer off 82 Toshiba's online resources 83 Chapter 3: Mobile Computing 84 Toshiba's energy-saver design 84 Running the computer on battery power 84 Battery Notice 85 Power management 86
User Guide
Page 21
... 97 Safety precautions 97 Maintaining your battery 97 Disposing of used batteries 98 Traveling tips 99 Chapter 4: Exploring Your Computer's Features 100 Exploring the Start screen 100 Charms 101 Tiles 102 Exploring the desktop 102 Finding your way around the desktop 102 Windows® Store 104 Setting up for communications 104...
... 97 Safety precautions 97 Maintaining your battery 97 Disposing of used batteries 98 Traveling tips 99 Chapter 4: Exploring Your Computer's Features 100 Exploring the Start screen 100 Charms 101 Tiles 102 Exploring the desktop 102 Finding your way around the desktop 102 Windows® Store 104 Setting up for communications 104...
User Guide
Page 30
...; Liquids and corrosive chemicals. However, if the notebook is on a work surface that is clear. The forearms can get close to your wrists on the screen is above your elbow height you can be supported by the chair arm supports or the desk surface. ❖ The notebook display should be flat...
...; Liquids and corrosive chemicals. However, if the notebook is on a work surface that is clear. The forearms can get close to your wrists on the screen is above your elbow height you can be supported by the chair arm supports or the desk surface. ❖ The notebook display should be flat...
User Guide
Page 31
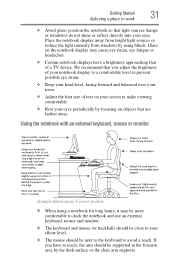
... comfortable to dock the notebook and use an external keyboard, mouse and monitor. ❖ The keyboard and mouse (or trackball) should be close to your screen to work ❖ Avoid glare: position the notebook so that of a TV device. Glare on your elbow level. ❖ The mouse should be next to...
... comfortable to dock the notebook and use an external keyboard, mouse and monitor. ❖ The keyboard and mouse (or trackball) should be close to your screen to work ❖ Avoid glare: position the notebook so that of a TV device. Glare on your elbow level. ❖ The mouse should be next to...
User Guide
Page 40
... 100. Before using it moves easily and never lift the computer by the user. NOTE Battery life and charge time may appear on your screen display when you must charge the battery. Your display contains an extremely large number of thin-film transistors (TFT) and is operated on battery... power, the screen will dim and you may appear on your computer. NOTE When opening or closing the display panel. Any small bright dots that , the battery ...
... 100. Before using it moves easily and never lift the computer by the user. NOTE Battery life and charge time may appear on your screen display when you must charge the battery. Your display contains an extremely large number of thin-film transistors (TFT) and is operated on battery... power, the screen will dim and you may appear on your computer. NOTE When opening or closing the display panel. Any small bright dots that , the battery ...
User Guide
Page 41
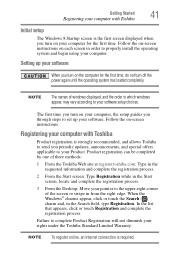
..., and the order in which windows appear, may vary according to your Product. Registering your computer with Toshiba Initial setup The Windows 8 Startup screen is the first screen displayed when you turn on the computer for the first time. When the Windows® charms appear, ...can be completed by one of three methods: 1 From the Toshiba Web site at register.toshiba.com: Type in the requested information and complete the registration process. 2 From the Start screen: Type Registration while in the Start screen, locate and complete the registration process. 3 From the Desktop: ...
..., and the order in which windows appear, may vary according to your Product. Registering your computer with Toshiba Initial setup The Windows 8 Startup screen is the first screen displayed when you turn on the computer for the first time. When the Windows® charms appear, ...can be completed by one of three methods: 1 From the Toshiba Web site at register.toshiba.com: Type in the requested information and complete the registration process. 2 From the Start screen: Type Registration while in the Start screen, locate and complete the registration process. 3 From the Desktop: ...
User Guide
Page 42
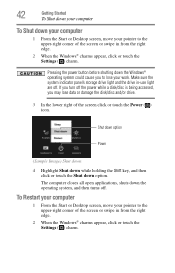
... the operating system, and then turns off. If you turn off . To Restart your computer 1 From the Start or Desktop screen, move your pointer to the upper-right corner of the screen or swipe in -use light are off the power while a disk/disc is being accessed, you to lose your work... the Windows® operating system could cause you may lose data or damage the disk/disc and/or drive. 3 In the lower right of the screen click or touch the Power ( ) icon. Pressing the power button before shutting down your computer 1 From the Start or Desktop...
... the operating system, and then turns off. If you turn off . To Restart your computer 1 From the Start or Desktop screen, move your pointer to the upper-right corner of the screen or swipe in -use light are off the power while a disk/disc is being accessed, you to lose your work... the Windows® operating system could cause you may lose data or damage the disk/disc and/or drive. 3 In the lower right of the screen click or touch the Power ( ) icon. Pressing the power button before shutting down your computer 1 From the Start or Desktop...
User Guide
Page 43
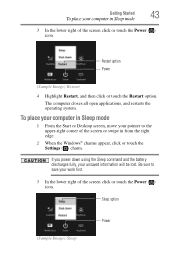
The computer closes all open applications, and restarts the operating system. To place your computer in Sleep mode 1 From the Start or Desktop screen, move your unsaved information will be lost. If you power down using the Sleep command and the battery discharges fully, your pointer to save your ...) Restart 4 Highlight Restart, and then click or touch the Restart option. Getting Started 43 To place your work first. 3 In the lower right of the screen click or touch the Power ( ) icon. Be sure to the upper-right corner of the...
The computer closes all open applications, and restarts the operating system. To place your computer in Sleep mode 1 From the Start or Desktop screen, move your unsaved information will be lost. If you power down using the Sleep command and the battery discharges fully, your pointer to save your ...) Restart 4 Highlight Restart, and then click or touch the Restart option. Getting Started 43 To place your work first. 3 In the lower right of the screen click or touch the Power ( ) icon. Be sure to the upper-right corner of the...
User Guide
Page 45
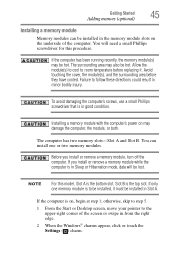
...a small Phillips screwdriver that is to room temperature before they have cooled. Installing a memory module with the computer's power on the underside of the screen or swipe in from the right edge. 2 When the Windows® charms appear, click or touch the Settings ( ) charm. otherwise, skip... to step 5. 1 From the Start or Desktop screen, move your pointer to follow these directions could result in minor bodily injury. Avoid touching the cover, the module(s), and the surrounding area before...
...a small Phillips screwdriver that is to room temperature before they have cooled. Installing a memory module with the computer's power on the underside of the screen or swipe in from the right edge. 2 When the Windows® charms appear, click or touch the Settings ( ) charm. otherwise, skip... to step 5. 1 From the Start or Desktop screen, move your pointer to follow these directions could result in minor bodily injury. Avoid touching the cover, the module(s), and the surrounding area before...
User Guide
Page 46
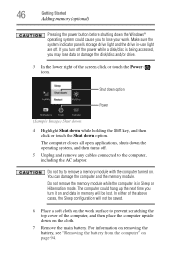
... upside down on the cloth. 7 Remove the main battery. The computer could cause you to the computer, including the AC adaptor. In either of the screen click or touch the Power ( ) icon. For information on removing the battery, see "Removing the battery from the computer" on . Shut down option Power (Sample...
... upside down on the cloth. 7 Remove the main battery. The computer could cause you to the computer, including the AC adaptor. In either of the screen click or touch the Power ( ) icon. For information on removing the battery, see "Removing the battery from the computer" on . Shut down option Power (Sample...
User Guide
Page 54
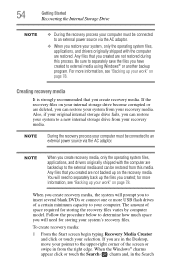
... corrupted or are in the Desktop, move your recovery media. Be sure to the upper-right corner of the screen or swipe in the Search To create recovery media: 1 From the Start screen begin typing Recovery Media Creator and click or touch your work " on the recovery media. For more information, see...
... corrupted or are in the Desktop, move your recovery media. Be sure to the upper-right corner of the screen or swipe in the Search To create recovery media: 1 From the Start screen begin typing Recovery Media Creator and click or touch your work " on the recovery media. For more information, see...
User Guide
Page 55
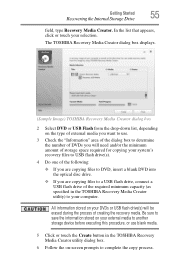
...copying files to a USB flash drive, connect a USB flash drive of the required minimum capacity (as specified in the TOSHIBA Recovery Media Creator utility dialog box. 6 Follow the on-screen prompts to your computer. Be sure to save the information stored on the type of external media you will be erased... during the process of DVDs you want to use blank media. 5 Click or touch the Create button in the TOSHIBA Recovery Media Creator utility) ...
...copying files to a USB flash drive, connect a USB flash drive of the required minimum capacity (as specified in the TOSHIBA Recovery Media Creator utility dialog box. 6 Follow the on-screen prompts to your computer. Be sure to save the information stored on the type of external media you will be erased... during the process of DVDs you want to use blank media. 5 Click or touch the Create button in the TOSHIBA Recovery Media Creator utility) ...
User Guide
Page 57
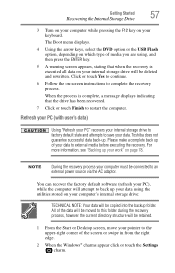
... the factory default software (refresh your keyboard. NOTE During the recovery process your computer must be retained. 1 From the Start or Desktop screen, move your pointer to continue. 6 Follow the on your PC), while the computer will be deleted and rewritten. Refresh your PC (with...your PC" recovers your data using , and then press the ENTER key. 5 A warning screen appears, stating that the drive has been recovered. 7 Click or touch Finish to back up . Toshiba does not guarantee successful data back-up your internal storage drive to factory default state and attempts...
... the factory default software (refresh your keyboard. NOTE During the recovery process your computer must be retained. 1 From the Start or Desktop screen, move your pointer to continue. 6 Follow the on your PC), while the computer will be deleted and rewritten. Refresh your PC (with...your PC" recovers your data using , and then press the ENTER key. 5 A warning screen appears, stating that the drive has been recovered. 7 Click or touch Finish to back up . Toshiba does not guarantee successful data back-up your internal storage drive to factory default state and attempts...
User Guide
Page 58
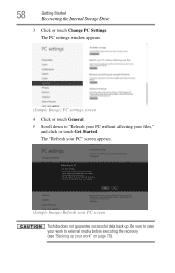
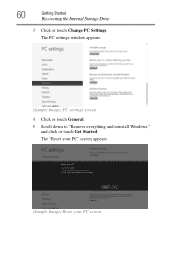
Be sure to external media before executing the recovery (see "Backing up . The "Refresh your PC" screen appears. (Sample Image) Refresh your PC screen Toshiba does not guarantee successful data back up your files," and click or touch Get Started. 58 Getting Started Recovering the Internal Storage Drive 3 Click or touch Change PC Settings. The PC settings window appears. (Sample Image) PC settings screen 4 Click or touch General. 5 Scroll down to "Refresh your PC without affecting your work to save your work " on page 78).
Be sure to external media before executing the recovery (see "Backing up . The "Refresh your PC" screen appears. (Sample Image) Refresh your PC screen Toshiba does not guarantee successful data back up your files," and click or touch Get Started. 58 Getting Started Recovering the Internal Storage Drive 3 Click or touch Change PC Settings. The PC settings window appears. (Sample Image) PC settings screen 4 Click or touch General. 5 Scroll down to "Refresh your PC without affecting your work to save your work " on page 78).
User Guide
Page 59
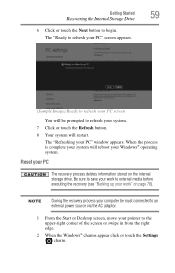
... will be must connected to an external power source via the AC adaptor. 1 From the Start or Desktop screen, move your pointer to refresh your system. 7 Click or touch the Refresh button. 8 Your system will reboot your Windows® operating system. Be sure to ... The recovery process deletes information stored on page 78). NOTE During the recovery process your computer be prompted to the upper-right corner of the screen or swipe in from the right edge. 2 When the Windows® charms appear click or touch the Settings ( ) charm. Getting Started 59 Recovering the Internal...
... will be must connected to an external power source via the AC adaptor. 1 From the Start or Desktop screen, move your pointer to refresh your system. 7 Click or touch the Refresh button. 8 Your system will reboot your Windows® operating system. Be sure to ... The recovery process deletes information stored on page 78). NOTE During the recovery process your computer be prompted to the upper-right corner of the screen or swipe in from the right edge. 2 When the Windows® charms appear click or touch the Settings ( ) charm. Getting Started 59 Recovering the Internal...
User Guide
Page 60
The PC settings window appears. (Sample Image) PC settings screen 4 Click or touch General. 5 Scroll down to "Remove everything and reinstall Windows," and click or touch Get Started. The "Reset your PC" screen appears. (Sample Image) Reset your PC screen 60 Getting Started Recovering the Internal Storage Drive 3 Click or touch Change PC Settings.
The PC settings window appears. (Sample Image) PC settings screen 4 Click or touch General. 5 Scroll down to "Remove everything and reinstall Windows," and click or touch Get Started. The "Reset your PC" screen appears. (Sample Image) Reset your PC screen 60 Getting Started Recovering the Internal Storage Drive 3 Click or touch Change PC Settings.
User Guide
Page 61
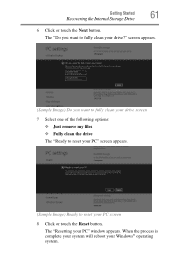
The "Resetting your Windows® operating system. When the process is complete your system will reboot your PC" window appears. screen appears. (Sample Image) Do you want to fully clean your drive screen 7 Select one of the following options: ❖ Just remove my files ❖ Fully clean the drive The "Ready to reset your PC" screen appears. (Sample Image) Ready to fully clean your PC screen 8 Click or touch the Reset button. Getting Started 61 Recovering the Internal Storage Drive 6 Click or touch the Next button. The "Do you want to reset your drive?"
The "Resetting your Windows® operating system. When the process is complete your system will reboot your PC" window appears. screen appears. (Sample Image) Do you want to fully clean your drive screen 7 Select one of the following options: ❖ Just remove my files ❖ Fully clean the drive The "Ready to reset your PC" screen appears. (Sample Image) Ready to fully clean your PC screen 8 Click or touch the Reset button. Getting Started 61 Recovering the Internal Storage Drive 6 Click or touch the Next button. The "Do you want to reset your drive?"
User Guide
Page 62
... with your selection. To reinstall drivers and applications: 1 From the Start screen begin typing TOSHIBA Application Installer and click or touch your pointer to complete the installation process, see "TOSHIBA Application Installer" on -screen prompts to the upper-right corner of the screen or swipe in from the right edge. When the Windows® charms.... 5 Follow the on page 124. If you to reinstall the drivers and applications that appears, click or touch your computer. Installing drivers and applications The TOSHIBA Application Installer allows you are in the Search field, type...
... with your selection. To reinstall drivers and applications: 1 From the Start screen begin typing TOSHIBA Application Installer and click or touch your pointer to complete the installation process, see "TOSHIBA Application Installer" on -screen prompts to the upper-right corner of the screen or swipe in from the right edge. When the Windows® charms.... 5 Follow the on page 124. If you to reinstall the drivers and applications that appears, click or touch your computer. Installing drivers and applications The TOSHIBA Application Installer allows you are in the Search field, type...
User Guide
Page 63
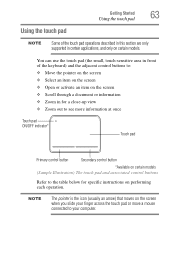
... Using the touch pad NOTE Some of the keyboard) and the adjacent control buttons to: ❖ Move the pointer on the screen ❖ Select an item on the screen ❖ Open or activate an item on the screen ❖ Scroll through a document or information ❖ Zoom in certain applications, and only on the... screen when you slide your finger across the touch pad or move a mouse connected to the table below for specific instructions on performing each operation. You ...
... Using the touch pad NOTE Some of the keyboard) and the adjacent control buttons to: ❖ Move the pointer on the screen ❖ Select an item on the screen ❖ Open or activate an item on the screen ❖ Scroll through a document or information ❖ Zoom in certain applications, and only on the... screen when you slide your finger across the touch pad or move a mouse connected to the table below for specific instructions on performing each operation. You ...
User Guide
Page 64
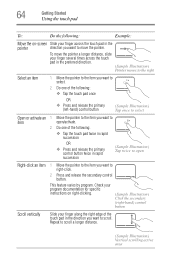
... Open or activate an 1 Move the pointer to the item you want to item open/activate. 2 Do one of the following : Example: Move the on-screen Slide your finger across the touch pad in the pointer direction you want to scroll. 64 Getting Started Using the touch pad To: Do the...
... Open or activate an 1 Move the pointer to the item you want to item open/activate. 2 Do one of the following : Example: Move the on-screen Slide your finger across the touch pad in the pointer direction you want to scroll. 64 Getting Started Using the touch pad To: Do the...


