
User Guide
Page 8
... de la classe B est conformé à la norme NMB-003 du Canada. This device complies with Canadian ICES-003. consult Safety Code 6, obtainable from windows to licensing.
... de la classe B est conformé à la norme NMB-003 du Canada. This device complies with Canadian ICES-003. consult Safety Code 6, obtainable from windows to licensing.
User Guide
Page 16
...Celeron, Centrino and Pentium are trademarks or registered trademarks of their respective companies. All other countries. Microsoft, Outlook, Windows, and Windows Media are either registered trademarks or trademarks of Microsoft Corporation in the United States and/or other brand and product...either registered trademarks or trademarks of Toshiba America Information Systems, Inc. Secure Digital and SD are trademarks of the Wi-Fi Alliance. Wi-Fi is a trademark of MultiMediaCard Association. and/or Toshiba Corporation. 16 Trademarks Satellite, Satellite Pro, and eco Utility are ...
...Celeron, Centrino and Pentium are trademarks or registered trademarks of their respective companies. All other countries. Microsoft, Outlook, Windows, and Windows Media are either registered trademarks or trademarks of Microsoft Corporation in the United States and/or other brand and product...either registered trademarks or trademarks of Toshiba America Information Systems, Inc. Secure Digital and SD are trademarks of the Wi-Fi Alliance. Wi-Fi is a trademark of MultiMediaCard Association. and/or Toshiba Corporation. 16 Trademarks Satellite, Satellite Pro, and eco Utility are ...
User Guide
Page 20
...the computer 70 Using a computer lock 70 Chapter 2: Learning the Basics 72 Computing tips 72 Using the keyboard 73 Function keys 74 Special Windows® keys 75 Touch screen 75 Touch screen navigation 75 Mouse properties 76 Starting an app 77 Starting an app from the Start screen... optical media 81 Recording optical media 81 Removing a disc with the computer on 82 Removing a disc with the computer off 82 Toshiba's online resources 83 Chapter 3: Mobile Computing 84 Toshiba's energy-saver design 84 Running the computer on battery power 84 Battery Notice 85 Power management 86
...the computer 70 Using a computer lock 70 Chapter 2: Learning the Basics 72 Computing tips 72 Using the keyboard 73 Function keys 74 Special Windows® keys 75 Touch screen 75 Touch screen navigation 75 Mouse properties 76 Starting an app 77 Starting an app from the Start screen... optical media 81 Recording optical media 81 Removing a disc with the computer on 82 Removing a disc with the computer off 82 Toshiba's online resources 83 Chapter 3: Mobile Computing 84 Toshiba's energy-saver design 84 Running the computer on battery power 84 Battery Notice 85 Power management 86
User Guide
Page 21
... 4: Exploring Your Computer's Features 100 Exploring the Start screen 100 Charms 101 Tiles 102 Exploring the desktop 102 Finding your way around the desktop 102 Windows® Store 104 Setting up for communications 104 Connecting your computer to a network .........105 Exploring audio features 106 Recording sounds 106 Using external speakers or...
... 4: Exploring Your Computer's Features 100 Exploring the Start screen 100 Charms 101 Tiles 102 Exploring the desktop 102 Finding your way around the desktop 102 Windows® Store 104 Setting up for communications 104 Connecting your computer to a network .........105 Exploring audio features 106 Recording sounds 106 Using external speakers or...
User Guide
Page 22
... 116 Using a user password 118 Deleting a user password 119 System Settings 120 Function Key 122 Recovery Media Creator 123 Service Station 123 TOSHIBA Application Installer 124 Chapter 6: If Something Goes Wrong 125 Problems that are easy to fix 125 Problems when you turn on the computer...............126 The Windows® operating system is not working 128 Using Startup options to fix problems 128 Internet problems 131 The Windows® operating system can help you 131 Fixing a problem with Device Manager ...
... 116 Using a user password 118 Deleting a user password 119 System Settings 120 Function Key 122 Recovery Media Creator 123 Service Station 123 TOSHIBA Application Installer 124 Chapter 6: If Something Goes Wrong 125 Problems that are easy to fix 125 Problems when you turn on the computer...............126 The Windows® operating system is not working 128 Using Startup options to fix problems 128 Internet problems 131 The Windows® operating system can help you 131 Fixing a problem with Device Manager ...
User Guide
Page 23
... operating problems 143 Develop good computing habits 144 Data and system configuration backup in the Windows® operating system 145 If you need further assistance 149 Contacting Toshiba 150 Other Toshiba Internet Web sites 150 Toshiba's worldwide offices 150 Appendix A: TOSHIBA Function Keys 152 Functions 152 Help file 153 Display brightness 153 Output (Display switch...
... operating problems 143 Develop good computing habits 144 Data and system configuration backup in the Windows® operating system 145 If you need further assistance 149 Contacting Toshiba 150 Other Toshiba Internet Web sites 150 Toshiba's worldwide offices 150 Appendix A: TOSHIBA Function Keys 152 Functions 152 Help file 153 Display brightness 153 Output (Display switch...
User Guide
Page 26
... well as some basic procedures needed to find specific information. For more detailed information about your particular model, please visit Toshiba's Web site at support.toshiba.com. You can: ❖ Read the entire guide from beginning to change without notice. Your particular model may not...to stay current with the various computer software or hardware options, visit Toshiba's Web site at the time of publication to ensure the accuracy of contents and the index to perform tasks in Windows 8. 26 Introduction This guide NOTE The product specifications and configuration information ...
... well as some basic procedures needed to find specific information. For more detailed information about your particular model, please visit Toshiba's Web site at support.toshiba.com. You can: ❖ Read the entire guide from beginning to change without notice. Your particular model may not...to stay current with the various computer software or hardware options, visit Toshiba's Web site at the time of publication to ensure the accuracy of contents and the index to perform tasks in Windows 8. 26 Introduction This guide NOTE The product specifications and configuration information ...
User Guide
Page 31
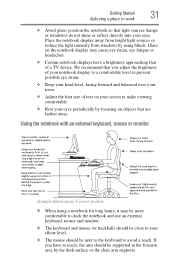
... so that of text on objects that are farther away. Place the notebook display away from bright light sources or reduce the light intensity from windows by focusing on your screen to prevent possible eye strain. ❖ Keep your head level, facing forward and balanced over your eyes. If you adjust... level. ❖ The mouse should be next to the keyboard to avoid a reach. We recommend that you have a brightness approaching that light sources (lamps or windows) do not shine or reflect directly into your torso. ❖ Adjust the font size of a TV device.
... so that of text on objects that are farther away. Place the notebook display away from bright light sources or reduce the light intensity from windows by focusing on your screen to prevent possible eye strain. ❖ Keep your head level, facing forward and balanced over your eyes. If you adjust... level. ❖ The mouse should be next to the keyboard to avoid a reach. We recommend that you have a brightness approaching that light sources (lamps or windows) do not shine or reflect directly into your torso. ❖ Adjust the font size of a TV device.
User Guide
Page 41
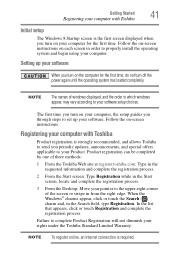
... guides you turn on your computer for the first time, do not turn on the computer for the first time. Registering your computer with Toshiba Initial setup The Windows 8 Startup screen is the first screen displayed when you turn off the power again until the operating system has loaded completely. When the...
... guides you turn on your computer for the first time, do not turn on the computer for the first time. Registering your computer with Toshiba Initial setup The Windows 8 Startup screen is the first screen displayed when you turn off the power again until the operating system has loaded completely. When the...
User Guide
Page 42
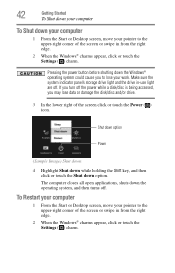
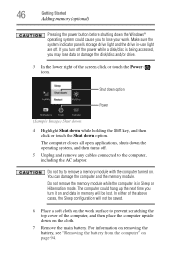
...operating system, and then turns off . Make sure the system indicator panel's storage drive light and the drive in from the right edge. 2 When the Windows® charms appear, click or touch the Settings ( ) charm. To Restart your computer 1 From the Start or Desktop screen, move your pointer to... the upper-right corner of the screen or swipe in from the right edge. 2 When the Windows® charms appear, click or touch the Settings ( ) charm. Pressing the power button before shutting down option. Shut down option Power (Sample Image...
...operating system, and then turns off . Make sure the system indicator panel's storage drive light and the drive in from the right edge. 2 When the Windows® charms appear, click or touch the Settings ( ) charm. To Restart your computer 1 From the Start or Desktop screen, move your pointer to... the upper-right corner of the screen or swipe in from the right edge. 2 When the Windows® charms appear, click or touch the Settings ( ) charm. Pressing the power button before shutting down option. Shut down option Power (Sample Image...
User Guide
Page 43
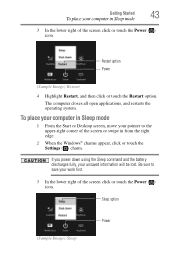
... click or touch the Restart option. Be sure to the upper-right corner of the screen or swipe in from the right edge. 2 When the Windows® charms appear, click or touch the Settings ( ) charm. The computer closes all open applications, and restarts the operating system. Getting Started 43 To place...
... click or touch the Restart option. Be sure to the upper-right corner of the screen or swipe in from the right edge. 2 When the Windows® charms appear, click or touch the Settings ( ) charm. The computer closes all open applications, and restarts the operating system. Getting Started 43 To place...
User Guide
Page 45
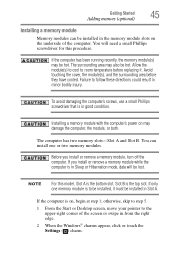
You can be installed in from the right edge. 2 When the Windows® charms appear, click or touch the Settings ( ) charm. If you install or remove a memory module, turn off the computer. If only one or two ...
You can be installed in from the right edge. 2 When the Windows® charms appear, click or touch the Settings ( ) charm. If you install or remove a memory module, turn off the computer. If only one or two ...
User Guide
Page 46
... touch the Shut down the operating system, and then turns off . 46 Getting Started Adding memory (optional) Pressing the power button before shutting down the Windows® operating system could hang up the next time you to lose your work surface to prevent scratching the top cover of the screen click...
... touch the Shut down the operating system, and then turns off . 46 Getting Started Adding memory (optional) Pressing the power button before shutting down the Windows® operating system could hang up the next time you to lose your work surface to prevent scratching the top cover of the screen click...
User Guide
Page 52
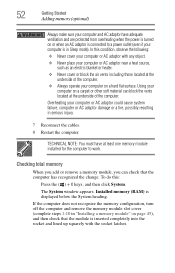
... heading. Using your computer or AC adaptor could cause system failure, computer or AC adaptor damage or a fire, possibly resulting in Sleep mode). The System window appears. Installed memory (RAM) is in serious injury. 7 Reconnect the cables. 8 Restart the computer. In this : Press the ( ) + X keys, and then click System...
... heading. Using your computer or AC adaptor could cause system failure, computer or AC adaptor damage or a fire, possibly resulting in Sleep mode). The System window appears. Installed memory (RAM) is in serious injury. 7 Reconnect the cables. 8 Restart the computer. In this : Press the ( ) + X keys, and then click System...
User Guide
Page 53
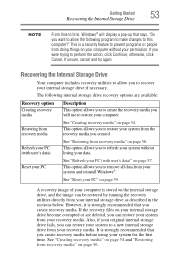
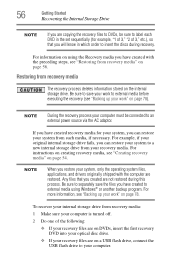
If you created. This option allows you to restore your system from your system and reinstall Windows®. This option allows you to remove all data from the recovery media you were trying to perform the action, click Continue; This option allows ... storage drive fails, you to recover your internal storage drive if necessary. Getting Started 53 Recovering the Internal Storage Drive NOTE From time to time, Windows® will use to restore your computer. A recovery image of your computer is a security feature to a new internal storage drive from your permission. This is...
If you created. This option allows you to restore your system from your system and reinstall Windows®. This option allows you to remove all data from the recovery media you were trying to perform the action, click Continue; This option allows ... storage drive fails, you to recover your internal storage drive if necessary. Getting Started 53 Recovering the Internal Storage Drive NOTE From time to time, Windows® will use to restore your computer. A recovery image of your computer is a security feature to a new internal storage drive from your permission. This is...
User Guide
Page 54
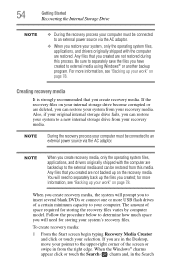
...operating system files, applications, and drivers originally shipped with the computer are restored. Any files that you have created to external media using Windows® or another backup program. for storing your system's recovery files. If the recovery files on page 78. The amount of a ...certain minimum capacity to your computer. When the Windows® charms appear click or touch the Search ( ) charm and, in from this process. 54 Getting Started Recovering the Internal Storage Drive...
...operating system files, applications, and drivers originally shipped with the computer are restored. Any files that you have created to external media using Windows® or another backup program. for storing your system's recovery files. If the recovery files on page 78. The amount of a ...certain minimum capacity to your computer. When the Windows® charms appear click or touch the Search ( ) charm and, in from this process. 54 Getting Started Recovering the Internal Storage Drive...
User Guide
Page 56
... your computer must be sure to label each DVD in the set sequentially (for your system, you can restore your system to external media using Windows® or another backup program. For instructions on creating recovery media, see "Backing up your recovery files are not restored during recovery. Be sure to...
... your computer must be sure to label each DVD in the set sequentially (for your system, you can restore your system to external media using Windows® or another backup program. For instructions on creating recovery media, see "Backing up your recovery files are not restored during recovery. Be sure to...
User Guide
Page 57
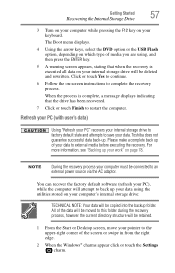
... 6 Follow the on-screen instructions to this folder during the recovery process, however the current directory structure will be copied into the backup folder. Toshiba does not guarantee successful data back-up your data using , and then press the ENTER key. 5 A warning screen appears, stating that when the... move your computer must be moved to complete the recovery process. All of the screen or swipe in from the right edge. 2 When the Windows® charms appear click or touch the Settings ( ) charm. You can recover the factory default software (refresh your PC), while the computer ...
... 6 Follow the on-screen instructions to this folder during the recovery process, however the current directory structure will be copied into the backup folder. Toshiba does not guarantee successful data back-up your data using , and then press the ENTER key. 5 A warning screen appears, stating that when the... move your computer must be moved to complete the recovery process. All of the screen or swipe in from the right edge. 2 When the Windows® charms appear click or touch the Settings ( ) charm. You can recover the factory default software (refresh your PC), while the computer ...
User Guide
Page 58
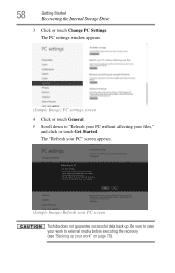
The "Refresh your PC" screen appears. (Sample Image) Refresh your work to external media before executing the recovery (see "Backing up your PC screen Toshiba does not guarantee successful data back up. Be sure to "Refresh your PC without affecting your files," and click or touch Get Started. The PC settings window appears. (Sample Image) PC settings screen 4 Click or touch General. 5 Scroll down to save your work " on page 78). 58 Getting Started Recovering the Internal Storage Drive 3 Click or touch Change PC Settings.
The "Refresh your PC" screen appears. (Sample Image) Refresh your work to external media before executing the recovery (see "Backing up your PC screen Toshiba does not guarantee successful data back up. Be sure to "Refresh your PC without affecting your files," and click or touch Get Started. The PC settings window appears. (Sample Image) PC settings screen 4 Click or touch General. 5 Scroll down to save your work " on page 78). 58 Getting Started Recovering the Internal Storage Drive 3 Click or touch Change PC Settings.
User Guide
Page 59
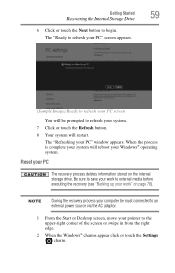
... your PC screen You will be must connected to the upper-right corner of the screen or swipe in from the right edge. 2 When the Windows® charms appear click or touch the Settings ( ) charm. NOTE During the recovery process your computer be prompted to begin. Getting Started 59 Recovering the... Internal Storage Drive 6 Click or touch the Next button to refresh your system. 7 Click or touch the Refresh button. 8 Your system will reboot your PC" window appears. The "Refreshing your Windows® operating system.
... your PC screen You will be must connected to the upper-right corner of the screen or swipe in from the right edge. 2 When the Windows® charms appear click or touch the Settings ( ) charm. NOTE During the recovery process your computer be prompted to begin. Getting Started 59 Recovering the... Internal Storage Drive 6 Click or touch the Next button to refresh your system. 7 Click or touch the Refresh button. 8 Your system will reboot your PC" window appears. The "Refreshing your Windows® operating system.


