

User Manual
Page 30
... without changing the internal storage drive partitions 68 Creating recovery DVDs/media 70 Restoring from recovery DVDs/media 73 Erasing the Internal Storage Drive 75 Checking the internal storage drive operating status 76 Installing drivers and applications 77 Using the TouchPad 77 Adjusting TouchPad™ settings 80 Disabling or enabling the TouchPad 81 Using external display devices 81 Selecting video cables 82 Connecting an HDMI™-compatible television or external display device............82 Connecting to a TV using HDMI™-CEC 82 Connecting an external monitor or...
... without changing the internal storage drive partitions 68 Creating recovery DVDs/media 70 Restoring from recovery DVDs/media 73 Erasing the Internal Storage Drive 75 Checking the internal storage drive operating status 76 Installing drivers and applications 77 Using the TouchPad 77 Adjusting TouchPad™ settings 80 Disabling or enabling the TouchPad 81 Using external display devices 81 Selecting video cables 82 Connecting an HDMI™-compatible television or external display device............82 Connecting to a TV using HDMI™-CEC 82 Connecting an external monitor or...
User Manual
Page 60
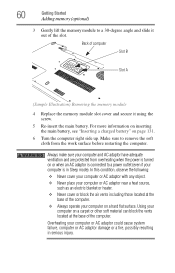
... on a hard flat surface. 60 Getting Started Adding memory (optional) 3 Gently lift the memory module to a 30-degree angle and slide it using the screw. 5 Re-insert the main battery. Always make sure your computer and AC adaptor have adequate ventilation and are protected from the work surface before restarting the computer. Back of computer Slot B Slot A (Sample Illustration) Removing the memory module 4 Replace the memory module slot cover and...
... on a hard flat surface. 60 Getting Started Adding memory (optional) 3 Gently lift the memory module to a 30-degree angle and slide it using the screw. 5 Re-insert the main battery. Always make sure your computer and AC adaptor have adequate ventilation and are protected from the work surface before restarting the computer. Back of computer Slot B Slot A (Sample Illustration) Removing the memory module 4 Replace the memory module slot cover and...
User Manual
Page 82
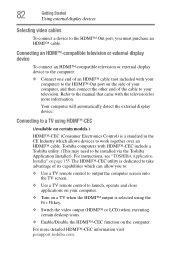
... to the manual that came with HDMI™-CEC include a Toshiba utility. (This may need to the HDMI™ Out port on the computer. Connecting to a TV using HDMI™-CEC (Available on certain models.) HDMI™-CEC (Consumer Electronics Control) is selected using the Fn + F5 key. ❖ Switch the video output (HDMI™ or LCD) when executing certain desktop icons. ❖ Enable/Disable the HDMI™-CEC function on the side...
... to the manual that came with HDMI™-CEC include a Toshiba utility. (This may need to the HDMI™ Out port on the computer. Connecting to a TV using HDMI™-CEC (Available on certain models.) HDMI™-CEC (Consumer Electronics Control) is selected using the Fn + F5 key. ❖ Switch the video output (HDMI™ or LCD) when executing certain desktop icons. ❖ Enable/Disable the HDMI™-CEC function on the side...
User Manual
Page 159
... on-screen instructions to exit. Utilities Setting passwords 159 To register a password for the power-on password function: 1 Click Start, All Programs, TOSHIBA, Utilities, and then TOSHIBA Assist. The TOSHIBA Assist window appears. 2 On the left side, click the Secure tab. 3 Click the User Password icon. 4 Click Registered. 5 Enter your password, and then enter it again to verify. 6 Click OK. 7 Click OK to remove the user password. Deleting a user password To cancel the power-on password functions: 1 Click Start...
... on-screen instructions to exit. Utilities Setting passwords 159 To register a password for the power-on password function: 1 Click Start, All Programs, TOSHIBA, Utilities, and then TOSHIBA Assist. The TOSHIBA Assist window appears. 2 On the left side, click the Secure tab. 3 Click the User Password icon. 4 Click Registered. 5 Enter your password, and then enter it again to verify. 6 Click OK. 7 Click OK to remove the user password. Deleting a user password To cancel the power-on password functions: 1 Click Start...
User Manual
Page 177
... and device usage (e.g.: power settings, battery temperature and recharging, CPU, memory, backlight illumination time, and temperatures for quality assurance analysis. The collected information includes device operation time and number of actuations or status changes (e.g.: number of power button and Fn key combination uses, and AC adaptor, battery, LCD, fan, HDD, sound volume, wireless communication switch, docking and USB information), date of initial system use restrictions above, the data logged on the internal storage drive may be used to...
... and device usage (e.g.: power settings, battery temperature and recharging, CPU, memory, backlight illumination time, and temperatures for quality assurance analysis. The collected information includes device operation time and number of actuations or status changes (e.g.: number of power button and Fn key combination uses, and AC adaptor, battery, LCD, fan, HDD, sound volume, wireless communication switch, docking and USB information), date of initial system use restrictions above, the data logged on the internal storage drive may be used to...
User Manual
Page 183
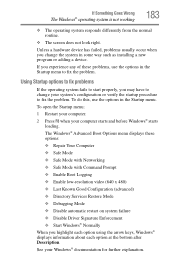
... options: ❖ Repair Your Computer ❖ Safe Mode ❖ Safe Mode with Networking ❖ Safe Mode with Command Prompt ❖ Enable Boot Logging ❖ Enable low-resolution video (640 x 480) ❖ Last Known Good Configuration (advanced) ❖ Directory Services Restore Mode ❖ Debugging Mode ❖ Disable automatic restart on system failure ❖ Disable Driver Signature Enforcement ❖ Start Windows® Normally When you may have to fix the problem. If Something Goes Wrong The Windows® operating...
... options: ❖ Repair Your Computer ❖ Safe Mode ❖ Safe Mode with Networking ❖ Safe Mode with Command Prompt ❖ Enable Boot Logging ❖ Enable low-resolution video (640 x 480) ❖ Last Known Good Configuration (advanced) ❖ Directory Services Restore Mode ❖ Debugging Mode ❖ Disable automatic restart on system failure ❖ Disable Driver Signature Enforcement ❖ Start Windows® Normally When you may have to fix the problem. If Something Goes Wrong The Windows® operating...
User Manual
Page 188
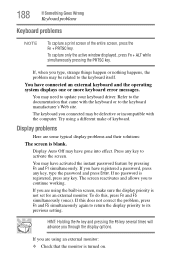
... some typical display problems and their solutions: The screen is not set for an external monitor. To capture only the active window displayed, press Fn + ALT while simultaneously pressing the PRTSC key. Try using an external monitor: ❖ Check that came with the computer. If you type, strange things happen or nothing happens, the problem may have connected an external keyboard and the operating system displays one or more keyboard error messages.
... some typical display problems and their solutions: The screen is not set for an external monitor. To capture only the active window displayed, press Fn + ALT while simultaneously pressing the PRTSC key. Try using an external monitor: ❖ Check that came with the computer. If you type, strange things happen or nothing happens, the problem may have connected an external keyboard and the operating system displays one or more keyboard error messages.

User Manual
Page 205
... 205 3 Install one or more information, see "USB Sleep and Charge Utility" on page 166. If this function cannot be used, change the setting to Disabled. ❖ Make sure that important devices are connected. ❖ Connect external devices after turning OFF the computer. If this case, please try one item of hardware or software. 4 Restart the Windows® operating system. 5 Use the new hardware or software for ports that does not have the "USB Sleep and Charge function"-compatible icon...
... 205 3 Install one or more information, see "USB Sleep and Charge Utility" on page 166. If this function cannot be used, change the setting to Disabled. ❖ Make sure that important devices are connected. ❖ Connect external devices after turning OFF the computer. If this case, please try one item of hardware or software. 4 Restart the Windows® operating system. 5 Use the new hardware or software for ports that does not have the "USB Sleep and Charge function"-compatible icon...

User Manual
Page 234
... screen that activates a memory resident program. See also cache, CPU cache, L1 cache. hot key - (1) A feature in which only every other services. The ability to create a complete screen image. interlaced - internal device - Memory cache built into the processor to help improve processing speed. A small image displayed on the motherboard to help improve processing speed. See device. A key or combination of keys that represents a function, file, or program. hot swapping - Internet - K keyboard...
... screen that activates a memory resident program. See also cache, CPU cache, L1 cache. hot key - (1) A feature in which only every other services. The ability to create a complete screen image. interlaced - internal device - Memory cache built into the processor to help improve processing speed. A small image displayed on the motherboard to help improve processing speed. See device. A key or combination of keys that represents a function, file, or program. hot swapping - Internet - K keyboard...
User Manual
Page 242
... removing 129 RTC memory 119 running computer on battery power 118 safety precautions 132 setting notifications 125 battery indicator light 123 BIOS Setup see TOSHIBA Hardware Setup Blu-ray Disc™ using 109 button eco Utility™ 128 Illumination ON/OFF button 112 mute button 112 play/pause button 112 power 50 Shut down 53, 89 start 138 volume increase/decrease buttons 112 Wireless antenna ON/OFF button 112 buttons eject, optical disc drive 111 manual eject hole, optical disc drive 111 media control buttons...
... removing 129 RTC memory 119 running computer on battery power 118 safety precautions 132 setting notifications 125 battery indicator light 123 BIOS Setup see TOSHIBA Hardware Setup Blu-ray Disc™ using 109 button eco Utility™ 128 Illumination ON/OFF button 112 mute button 112 play/pause button 112 power 50 Shut down 53, 89 start 138 volume increase/decrease buttons 112 Wireless antenna ON/OFF button 112 buttons eject, optical disc drive 111 manual eject hole, optical disc drive 111 media control buttons...
User Manual
Page 247
... found 184 USB Sleep and Charge cannot use 205 USB Wakeup function does not work 205 warning resume failure 181 Windows® operating system not working 182 program, starting 102 program, starting from Start menu 103 programs not running correctly 191 projector connecting 83 R real-time clock (RTC) battery 119 recording sounds 142 recovery checking internal storage drive operating status 76 creating recovery DVDs/media 70 erasing internal storage drive 75 installing drivers and applications 77 internal storage drive 61 out...
... found 184 USB Sleep and Charge cannot use 205 USB Wakeup function does not work 205 warning resume failure 181 Windows® operating system not working 182 program, starting 102 program, starting from Start menu 103 programs not running correctly 191 projector connecting 83 R real-time clock (RTC) battery 119 recording sounds 142 recovery checking internal storage drive operating status 76 creating recovery DVDs/media 70 erasing internal storage drive 75 installing drivers and applications 77 internal storage drive 61 out...
User Manual
Page 249
... quickly 89 options 87 turning on power 50 U USB Sleep and Charge cannot use 205 USB Sleep and Charge Utility 166 USB Wakeup function does not work 205 USB-compatible printer 85 user password, deleting 159 user password, setting 158 using a microphone 142 computer lock 98 DVDs 108 ExpressCard® 144 Hibernation mode 91 hot key to set a power plan 127 Memory card reader 145 optical disc drive 108 Shut down command 89 Sleep mode 94 TOSHIBA eco power plan 128 TouchPad™ 77 Web Camera 143 using the keyboard 100 Utilities 149 V video projector adjusting display...
... quickly 89 options 87 turning on power 50 U USB Sleep and Charge cannot use 205 USB Sleep and Charge Utility 166 USB Wakeup function does not work 205 USB-compatible printer 85 user password, deleting 159 user password, setting 158 using a microphone 142 computer lock 98 DVDs 108 ExpressCard® 144 Hibernation mode 91 hot key to set a power plan 127 Memory card reader 145 optical disc drive 108 Shut down command 89 Sleep mode 94 TOSHIBA eco power plan 128 TouchPad™ 77 Web Camera 143 using the keyboard 100 Utilities 149 V video projector adjusting display...
User Guide 1
Page 30
... without changing the internal storage drive partitions 68 Creating recovery DVDs/media 70 Restoring from recovery DVDs/media 73 Erasing the Internal Storage Drive 75 Checking the internal storage drive operating status 76 Installing drivers and applications 77 Using the TouchPad 77 Adjusting TouchPad™ settings 80 Disabling or enabling the TouchPad 81 Using external display devices 81 Selecting video cables 82 Connecting an HDMI™-compatible television or external display device............82 Connecting to a TV using HDMI™-CEC 82 Connecting an external monitor or...
... without changing the internal storage drive partitions 68 Creating recovery DVDs/media 70 Restoring from recovery DVDs/media 73 Erasing the Internal Storage Drive 75 Checking the internal storage drive operating status 76 Installing drivers and applications 77 Using the TouchPad 77 Adjusting TouchPad™ settings 80 Disabling or enabling the TouchPad 81 Using external display devices 81 Selecting video cables 82 Connecting an HDMI™-compatible television or external display device............82 Connecting to a TV using HDMI™-CEC 82 Connecting an external monitor or...

User Guide 1
Page 60
... the vents located at the base of the computer. Overheating your computer or AC adaptor could cause system failure, computer or AC adaptor damage or a fire, possibly resulting in Sleep mode). 60 Getting Started Adding memory (optional) 3 Gently lift the memory module to a power outlet (even if your computer is connected to a 30-degree angle and slide it using the screw...
... the vents located at the base of the computer. Overheating your computer or AC adaptor could cause system failure, computer or AC adaptor damage or a fire, possibly resulting in Sleep mode). 60 Getting Started Adding memory (optional) 3 Gently lift the memory module to a power outlet (even if your computer is connected to a 30-degree angle and slide it using the screw...

User Guide 1
Page 82
Connecting to a TV using the Fn + F5 key. ❖ Switch the video output (HDMI™ or LCD) when executing certain desktop icons. ❖ Enable/Disable the HDMI™-CEC function on the computer. Refer to be installed via the Toshiba Application Installer). For instructions, see "TOSHIBA Application Installer" on page 155. The HDMI™-CEC utility is a standard in the CE Industry which can allow you must purchase an HDMI™...
Connecting to a TV using the Fn + F5 key. ❖ Switch the video output (HDMI™ or LCD) when executing certain desktop icons. ❖ Enable/Disable the HDMI™-CEC function on the computer. Refer to be installed via the Toshiba Application Installer). For instructions, see "TOSHIBA Application Installer" on page 155. The HDMI™-CEC utility is a standard in the CE Industry which can allow you must purchase an HDMI™...

User Guide 1
Page 159
... on-screen instructions to exit. Deleting a user password To cancel the power-on password functions: 1 Click Start, All Programs, TOSHIBA, Utilities, and then TOSHIBA Assist. The TOSHIBA Assist window appears. 2 On the left side, click the Secure tab. 3 Click the User Password icon. 4 Click Registered. 5 Enter your password, and then enter it again to verify. 6 Click OK. 7 Click OK to remove the user password. Utilities Setting passwords 159 To register a password for the power-on password function: 1 Click Start...
... on-screen instructions to exit. Deleting a user password To cancel the power-on password functions: 1 Click Start, All Programs, TOSHIBA, Utilities, and then TOSHIBA Assist. The TOSHIBA Assist window appears. 2 On the left side, click the Secure tab. 3 Click the User Password icon. 4 Click Registered. 5 Enter your password, and then enter it again to verify. 6 Click OK. 7 Click OK to remove the user password. Utilities Setting passwords 159 To register a password for the power-on password function: 1 Click Start...
User Guide 1
Page 194
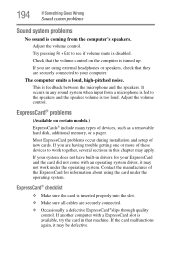
... have built-in drivers for information about using external headphones or speakers, check that the volume control on certain models.) ExpressCards® include many types of new cards. It occurs in this chapter may be defective. If your ExpressCard and the card did not come with a ExpressCard slot is disabled. Adjust the volume control. Most ExpressCard problems occur during installation and setup of devices, such as a removable hard disk, additional memory, or a pager...
... have built-in drivers for information about using external headphones or speakers, check that the volume control on certain models.) ExpressCards® include many types of new cards. It occurs in this chapter may be defective. If your ExpressCard and the card did not come with a ExpressCard slot is disabled. Adjust the volume control. Most ExpressCard problems occur during installation and setup of devices, such as a removable hard disk, additional memory, or a pager...
User Guide 1
Page 234
... use to the internal storage drive the current state of using this function, if connected with HDMI cables. The decentralized, world-wide network of pixels is running and have the operating system automatically recognize the change. Interlaced monitors take two passes to transmit high quality audio and video signal via a single cable in combination with the Fn key can control another while using a pointing device such as the battery save mode. (2) A key...
... use to the internal storage drive the current state of using this function, if connected with HDMI cables. The decentralized, world-wide network of pixels is running and have the operating system automatically recognize the change. Interlaced monitors take two passes to transmit high quality audio and video signal via a single cable in combination with the Fn key can control another while using a pointing device such as the battery save mode. (2) A key...

User Guide 1
Page 247
... found 184 USB Sleep and Charge cannot use 205 USB Wakeup function does not work 205 warning resume failure 181 Windows® operating system not working 182 program, starting 102 program, starting from Start menu 103 programs not running correctly 191 projector connecting 83 R real-time clock (RTC) battery 119 recording sounds 142 recovery checking internal storage drive operating status 76 creating recovery DVDs/media 70 erasing internal storage drive 75 installing drivers and applications 77 internal storage drive 61 out...
... found 184 USB Sleep and Charge cannot use 205 USB Wakeup function does not work 205 warning resume failure 181 Windows® operating system not working 182 program, starting 102 program, starting from Start menu 103 programs not running correctly 191 projector connecting 83 R real-time clock (RTC) battery 119 recording sounds 142 recovery checking internal storage drive operating status 76 creating recovery DVDs/media 70 erasing internal storage drive 75 installing drivers and applications 77 internal storage drive 61 out...

User Guide 1
Page 249
... quickly 89 options 87 turning on power 50 U USB Sleep and Charge cannot use 205 USB Sleep and Charge Utility 166 USB Wakeup function does not work 205 USB-compatible printer 85 user password, deleting 159 user password, setting 158 using a microphone 142 computer lock 98 DVDs 108 ExpressCard® 144 Hibernation mode 91 hot key to set a power plan 127 Memory card reader 145 optical disc drive 108 Shut down command 89 Sleep mode 94 TOSHIBA eco power plan 128 TouchPad™ 77 Web Camera 143 using the keyboard 100 Utilities 149 V video projector adjusting display...
... quickly 89 options 87 turning on power 50 U USB Sleep and Charge cannot use 205 USB Sleep and Charge Utility 166 USB Wakeup function does not work 205 USB-compatible printer 85 user password, deleting 159 user password, setting 158 using a microphone 142 computer lock 98 DVDs 108 ExpressCard® 144 Hibernation mode 91 hot key to set a power plan 127 Memory card reader 145 optical disc drive 108 Shut down command 89 Sleep mode 94 TOSHIBA eco power plan 128 TouchPad™ 77 Web Camera 143 using the keyboard 100 Utilities 149 V video projector adjusting display...


