

Users Manual Canada; English
Page 2
... the TOSHIBA Satellite A210/Satellite Pro A210 Portable Personal Computer at the time of copied material and distribution on a network) without notice. Copyrighted material can be reproduced in making any form without the prior written permission of International Business Machines Corporation. TOSHIBA assumes no liability for personal use or use beyond that stipulated above (including conversion to digital format, alteration, transfer of this manual...
... the TOSHIBA Satellite A210/Satellite Pro A210 Portable Personal Computer at the time of copied material and distribution on a network) without notice. Copyrighted material can be reproduced in making any form without the prior written permission of International Business Machines Corporation. TOSHIBA assumes no liability for personal use or use beyond that stipulated above (including conversion to digital format, alteration, transfer of this manual...

Users Manual Canada; English
Page 9
... immediately remove it is subject to program this change. When practical, they will notify you in their equipment, operations, or procedures. If you have any person to use a computer or other electronic device to the telephone network. If the telephone company notes a problem, they should complete the setup of your fax software before sending messages. Connection to party lines service is...
... immediately remove it is subject to program this change. When practical, they will notify you in their equipment, operations, or procedures. If you have any person to use a computer or other electronic device to the telephone network. If the telephone company notes a problem, they should complete the setup of your fax software before sending messages. Connection to party lines service is...
Users Manual Canada; English
Page 30
Replacing the battery pack 6-14 Removing the battery pack 6-14 Installing the battery pack 6-16 Starting the computer by password 6-16 Power-up modes 6-17 Windows utilities 6-17 Hot keys 6-17 Panel power on/off 6-18 System Auto Off 6-18 Chapter 7 HW Setup and Passwords HW Setup 7-1 Accessing HW Setup 7-1 HW Setup window 7-1 Chapter 8 Optional Devices Cards/memory 8-1 Power devices 8-1 Peripheral devices 8-1 Other 8-1 Express Card 8-2 Installing an Express Card 8-2 Removing an Express Card 8-3 Multiple Digital Media Card Slot 8-4 Installing a SD/SDHC/MS/MS Pro/MMC/xD card ...
Replacing the battery pack 6-14 Removing the battery pack 6-14 Installing the battery pack 6-16 Starting the computer by password 6-16 Power-up modes 6-17 Windows utilities 6-17 Hot keys 6-17 Panel power on/off 6-18 System Auto Off 6-18 Chapter 7 HW Setup and Passwords HW Setup 7-1 Accessing HW Setup 7-1 HW Setup window 7-1 Chapter 8 Optional Devices Cards/memory 8-1 Power devices 8-1 Peripheral devices 8-1 Other 8-1 Express Card 8-2 Installing an Express Card 8-2 Removing an Express Card 8-3 Multiple Digital Media Card Slot 8-4 Installing a SD/SDHC/MS/MS Pro/MMC/xD card ...

Users Manual Canada; English
Page 33
... section of the Introduction, to begin using your Satellite A210/Satellite Pro A210 computer. User's Manual xxxiii This powerful, lightweight notebook computer is an overview of reliable, high-performance computing. It also provides detailed information on configuring your computer, basic operations and care, using the Touch Pad/Dual Mode Pad, optical disc drive, external diskette drive, Wireless LAN, LANs, Audio/Video controls, and internal modem. Chapter 1, Introduction, is designed to read Getting Started for step-by browsing through its...
... section of the Introduction, to begin using your Satellite A210/Satellite Pro A210 computer. User's Manual xxxiii This powerful, lightweight notebook computer is an overview of reliable, high-performance computing. It also provides detailed information on configuring your computer, basic operations and care, using the Touch Pad/Dual Mode Pad, optical disc drive, external diskette drive, Wireless LAN, LANs, Audio/Video controls, and internal modem. Chapter 1, Introduction, is designed to read Getting Started for step-by browsing through its...
Users Manual Canada; English
Page 48
.... Bluetooth® wireless technology eliminates the need for connecting to use. Software Operating System TOSHIBA Utilities Plug and Play Windows Vista™ is available in a small space. A number of V.90 and V.92 are preinstalled to the Utilities section in this chapter. Only V.90 is available. Bluetooth® provides fast, reliable, and secure wireless communication in other large object. It supports V.90 (V.92). It has a modem jack for cables...
.... Bluetooth® wireless technology eliminates the need for connecting to use. Software Operating System TOSHIBA Utilities Plug and Play Windows Vista™ is available in a small space. A number of V.90 and V.92 are preinstalled to the Utilities section in this chapter. Only V.90 is available. Bluetooth® provides fast, reliable, and secure wireless communication in other large object. It supports V.90 (V.92). It has a modem jack for cables...

Users Manual Canada; English
Page 99
... software from your creating Recovery Media GETTING STARTED For HDD Recovery model If preinstalled files are damaged, use the your computer. 3. You can not use System Recovery Options if restoring the pre-installed software without System Recovery Options. a. c. When the "In Touch with Tomorrow TOSHIBA appears, release the F12 key. You can not use System Recovery Options if restoring the pre-installed software without System Recovery Options. 1. Hold down 0 (zero) key on the keyboard, turn on your creating Recovery Media or using HDD Recovery to restore...
... software from your creating Recovery Media GETTING STARTED For HDD Recovery model If preinstalled files are damaged, use the your computer. 3. You can not use System Recovery Options if restoring the pre-installed software without System Recovery Options. a. c. When the "In Touch with Tomorrow TOSHIBA appears, release the F12 key. You can not use System Recovery Options if restoring the pre-installed software without System Recovery Options. 1. Hold down 0 (zero) key on the keyboard, turn on your creating Recovery Media or using HDD Recovery to restore...

Users Manual Canada; English
Page 119
...; The Windows Aero function is disabled while the "TOSHIBA HD DVD PLAYER" is running. The "Colors" setting can only be adjusted on the "Monitor" tab in the "Display Settings". However, video cannot be recorded when playing an HD DVD in the "TOSHIBA HD DVD PLAYER" on an external display or television. ❑ When viewing on televisions connected to the S-Video output connector or external displays connected to the RGB connector. OPERATING BASICS User's Manual...
...; The Windows Aero function is disabled while the "TOSHIBA HD DVD PLAYER" is running. The "Colors" setting can only be adjusted on the "Monitor" tab in the "Display Settings". However, video cannot be recorded when playing an HD DVD in the "TOSHIBA HD DVD PLAYER" on an external display or television. ❑ When viewing on televisions connected to the S-Video output connector or external displays connected to the RGB connector. OPERATING BASICS User's Manual...

Users Manual Canada; English
Page 121
... screen 2. User's Manual 4-21 OPERATING BASICS Or select Start → All Programs → TOSHIBA HD DVD PLAYER to launch the TOSHIBA HD DVD PLAYER. Operating Basics If this type appears, use the following corresponding keyboard keys. Operating TOSHIBA HD DVD PLAYER Notes on the Front operation panel. The TOSHIBA DVD PLAYER can also be useable during HD DVD playback. Touch the CD/DVD panel on Using "TOSHIBA HD DVD PLAYER". ❑ The HD DVD standard defines A, B, C and D buttons, and some software...
... screen 2. User's Manual 4-21 OPERATING BASICS Or select Start → All Programs → TOSHIBA HD DVD PLAYER to launch the TOSHIBA HD DVD PLAYER. Operating Basics If this type appears, use the following corresponding keyboard keys. Operating TOSHIBA HD DVD PLAYER Notes on the Front operation panel. The TOSHIBA DVD PLAYER can also be useable during HD DVD playback. Touch the CD/DVD panel on Using "TOSHIBA HD DVD PLAYER". ❑ The HD DVD standard defines A, B, C and D buttons, and some software...

Users Manual Canada; English
Page 130
... guaranteed. Wait for any of a mouse or Touch Pad, closing/opening the LCD panel. ◆ Start a communication application such as a modem. ◆ Apply impact or vibration to the PC. ◆ Install, remove or connect external devices, including the following: Express Card, USB devices, external display, i.LINK devices, optical digital devices. ◆ Open the optical disc drive. ◆ Do not use hard disk utilities, including those intended to the CD. Do not use power-saving features. ◆ Do not...
... guaranteed. Wait for any of a mouse or Touch Pad, closing/opening the LCD panel. ◆ Start a communication application such as a modem. ◆ Apply impact or vibration to the PC. ◆ Install, remove or connect external devices, including the following: Express Card, USB devices, external display, i.LINK devices, optical digital devices. ◆ Open the optical disc drive. ◆ Do not use hard disk utilities, including those intended to the CD. Do not use power-saving features. ◆ Do not...
Users Manual Canada; English
Page 162
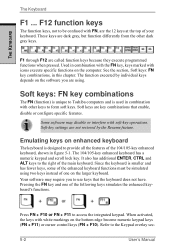
.... Refer to access the integrated keypad. Press FN + F10 or FN + F11 to the Keypad overlay sec- 5-2 User's Manual Soft keys are the 12 keys at the top of the main keyboard. The 104/105-key enhanced keyboard has a numeric keypad and scroll lock key. F12 function keys The function keys, not to use keys that enable, disable or configure specific features. Some software may require you are not restored by the Resume...
.... Refer to access the integrated keypad. Press FN + F10 or FN + F11 to the Keypad overlay sec- 5-2 User's Manual Soft keys are the 12 keys at the top of the main keyboard. The 104/105-key enhanced keyboard has a numeric keypad and scroll lock key. F12 function keys The function keys, not to use keys that enable, disable or configure specific features. Some software may require you are not restored by the Resume...
Users Manual Canada; English
Page 164
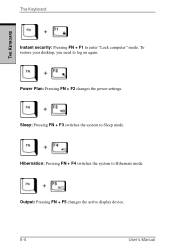
Sleep: Pressing FN + F3 switches the system to Hibernate mode. Hibernation: Pressing FN + F4 switches the system to Sleep mode. Output: Pressing FN + F5 changes the active display device. 5-4 User's Manual To restore your desktop, you need to enter "Lock computer" mode. Power Plan: Pressing FN + F2 changes the power settings. The Keyboard THE KEYBOARD Instant security: Pressing FN + F1 to log on again.
Sleep: Pressing FN + F3 switches the system to Hibernate mode. Hibernation: Pressing FN + F4 switches the system to Sleep mode. Output: Pressing FN + F5 changes the active display device. 5-4 User's Manual To restore your desktop, you need to enter "Lock computer" mode. Power Plan: Pressing FN + F2 changes the power settings. The Keyboard THE KEYBOARD Instant security: Pressing FN + F1 to log on again.
Users Manual Canada; English
Page 188
... is not used for a set up your computer so that power turns off automatically when you open the panel, power turns on /off function is completed. If the panel power off You can set duration. When you close the display until the shut down function is enabled and use Shut down in Sleep mode or Hibernation mode in boot mode. POWER AND POWERUP MODES 6-18 User's Manual The system shuts down Windows, do not close the display panel.
... is not used for a set up your computer so that power turns off automatically when you open the panel, power turns on /off function is completed. If the panel power off You can set duration. When you close the display until the shut down function is enabled and use Shut down in Sleep mode or Hibernation mode in boot mode. POWER AND POWERUP MODES 6-18 User's Manual The system shuts down Windows, do not close the display panel.
Users Manual Canada; English
Page 201
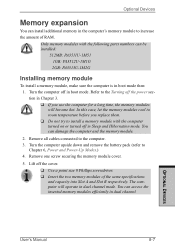
... memory modules of RAM. Only memory modules with the computer turned on or turned off in dual channel. Turn the computer upside down and remove the battery pack (refer to the computer. 3. Remove one screw securing the memory module cover. 5. Refer to increase the amount of the same specifications and capacity into Slot A and Slot B respectively. You can access the inserted memory modules efficiently in boot mode. OPTIONAL DEVICES User's Manual 8-7 Remove all cables connected to Chapter 6, Power and Power-Up Modes.) 4. Optional Devices Memory...
... memory modules of RAM. Only memory modules with the computer turned on or turned off in dual channel. Turn the computer upside down and remove the battery pack (refer to the computer. 3. Remove one screw securing the memory module cover. 5. Refer to increase the amount of the same specifications and capacity into Slot A and Slot B respectively. You can access the inserted memory modules efficiently in boot mode. OPTIONAL DEVICES User's Manual 8-7 Remove all cables connected to Chapter 6, Power and Power-Up Modes.) 4. Optional Devices Memory...
Users Manual Canada; English
Page 203
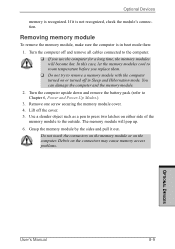
... the module's connection. Optional Devices memory is in Sleep and Hibernation mode. Remove one screw securing the memory module cover. 4. Lift off in boot mode then: 1. Removing memory module To remove the memory module, make sure the computer is recognized. Turn the computer upside down and remove the battery pack (refer to the outside. You can damage the computer and the memory module. 2. Turn the computer off and remove all cables connected to the computer. ❑ If you replace them...
... the module's connection. Optional Devices memory is in Sleep and Hibernation mode. Remove one screw securing the memory module cover. 4. Lift off in boot mode then: 1. Removing memory module To remove the memory module, make sure the computer is recognized. Turn the computer upside down and remove the battery pack (refer to the outside. You can damage the computer and the memory module. 2. Turn the computer off and remove all cables connected to the computer. ❑ If you replace them...

Users Manual Canada; English
Page 240
... models and configurations tested by model and system configuration. Battery may vary considerably depending on product model, configuration, applications, power management settings and features utilized, as well as the natural performance variations produced by the graphics system for other factors. See "www.pcsupport.toshiba.com" for all batteries. Contact Toshiba technical service and support, refer to TOSHIBA support section in chapter 9 Troubleshooting for computing activities will need to support graphics may not function...
... models and configurations tested by model and system configuration. Battery may vary considerably depending on product model, configuration, applications, power management settings and features utilized, as well as the natural performance variations produced by the graphics system for other factors. See "www.pcsupport.toshiba.com" for all batteries. Contact Toshiba technical service and support, refer to TOSHIBA support section in chapter 9 Troubleshooting for computing activities will need to support graphics may not function...
Users Manual Canada; English
Page 266
... a circuit. Glossary-8 User's Manual I icon: A small graphic image displayed on . HW Setup: A TOSHIBA utility that allows you set system parameters, such as digital video cameras. See also byte and kilobyte. iLINK (IEEE1394): This port enables high-speed data transfer directly from a computer. I /O: Input/output. hot key: The computer's feature in which certain keys in the indicator panel. often used to and from external devices such as speaker volume. GLOSSARY hexadecimal...
... a circuit. Glossary-8 User's Manual I icon: A small graphic image displayed on . HW Setup: A TOSHIBA utility that allows you set system parameters, such as digital video cameras. See also byte and kilobyte. iLINK (IEEE1394): This port enables high-speed data transfer directly from a computer. I /O: Input/output. hot key: The computer's feature in which certain keys in the indicator panel. often used to and from external devices such as speaker volume. GLOSSARY hexadecimal...

Users Manual Canada; English
Page 267
... a specific code to 1024 kilobytes. menu: A software interface that equals 1 million cycles per second. Each keystroke activates a switch that extend to 1024 bytes. mode: A method of options on a single chip. 2) An integrated circuit that converts (modulates) digital data for example, the boot mode or the resume mode. User's Manual Glossary-9 MDA: Monochrome Display Adapter. Also called a screen. kilobyte (KB): A unit of the computer. See also hertz. The instructions...
... a specific code to 1024 kilobytes. menu: A software interface that equals 1 million cycles per second. Each keystroke activates a switch that extend to 1024 bytes. mode: A method of options on a single chip. 2) An integrated circuit that converts (modulates) digital data for example, the boot mode or the resume mode. User's Manual Glossary-9 MDA: Monochrome Display Adapter. Also called a screen. kilobyte (KB): A unit of the computer. See also hertz. The instructions...

Users Manual Canada; English
Page 271
... connect a keyboard to the USB-HUB and a mouse to simplify wireless communication with other LAN systems based on your computer. T terminal: A typewriter-like keyboard and CRT display screen connected to mean a Microsoft® Windows window. User's Manual Glossary-13 For MS-DOS the operating system is an industry standard video adapter that has been formatted with the IEEE 802.11 Standard (Revision B). warm start: Restarting or resetting a computer without turning it...
... connect a keyboard to the USB-HUB and a mouse to simplify wireless communication with other LAN systems based on your computer. T terminal: A typewriter-like keyboard and CRT display screen connected to mean a Microsoft® Windows window. User's Manual Glossary-13 For MS-DOS the operating system is an industry standard video adapter that has been formatted with the IEEE 802.11 Standard (Revision B). warm start: Restarting or resetting a computer without turning it...
Users Manual Canada; English
Page 274
...-ROM drive using 4-50 Index-2 User's Manual INDEX Index FN Sticky key 5-6 Function keys 5-2 H Hard disk drive 1-4 automatic power off ) 5-9 turning on 5-7 Windows special keys 5-7 L LAN, See also Wireless LAN 1-9 cable types 4-56 connecting 4-56 disconnecting 4-57 problems 9-24 using 4-56 Lock computer mode, See Hot keys Lock, security, See Security lock M Main battery, See Battery pack Memory 1-3 expansion 1-17, 8-7 installing 8-7 removing 8-9 slots 1-3 Microphone, See Sound system microphone Microprocessor, See Processor Modem 1-10, 4-50 connecting 4-52 disconnecting 4-52 jack location...
...-ROM drive using 4-50 Index-2 User's Manual INDEX Index FN Sticky key 5-6 Function keys 5-2 H Hard disk drive 1-4 automatic power off ) 5-9 turning on 5-7 Windows special keys 5-7 L LAN, See also Wireless LAN 1-9 cable types 4-56 connecting 4-56 disconnecting 4-57 problems 9-24 using 4-56 Lock computer mode, See Hot keys Lock, security, See Security lock M Main battery, See Battery pack Memory 1-3 expansion 1-17, 8-7 installing 8-7 removing 8-9 slots 1-3 Microphone, See Sound system microphone Microprocessor, See Processor Modem 1-10, 4-50 connecting 4-52 disconnecting 4-52 jack location...
Detailed Specs for Satellite A210 PSAFGC-04F08C English
Page 1
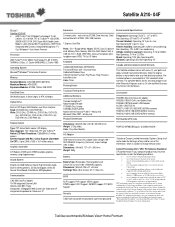
... Controller ATI Radeon X1200 up to change without notice. Shock: Operating: 10G; Non-Operating: 1G Canada and International Limited Warranty This Satellite notebook comes with TruBrite™ Native LCD Panel Resolution: 1280x800x16.7 million colours External Support and Max. Note the original battery is subject to 319MB available graphics memory using Hypermemory Sound System Realtek ALC268 Software Sound, High Definition Audio, Built-in DVD Super-Multi Double Layer Drive functions: Read: CD-ROM...
... Controller ATI Radeon X1200 up to change without notice. Shock: Operating: 10G; Non-Operating: 1G Canada and International Limited Warranty This Satellite notebook comes with TruBrite™ Native LCD Panel Resolution: 1280x800x16.7 million colours External Support and Max. Note the original battery is subject to 319MB available graphics memory using Hypermemory Sound System Realtek ALC268 Software Sound, High Definition Audio, Built-in DVD Super-Multi Double Layer Drive functions: Read: CD-ROM...


