
User Manual
Page 14
... a computer-friendly environment....... 41 Keeping yourself comfortable 42 Precautions 45 Setting up your computer 46 Setting up your software 47 Registering your computer with Toshiba ......... 48 Installing additional memory (optional 49 Connecting a mouse 53 Connecting a printer 53 Connecting a USB printer 53 Using external display devices 54 Connecting an external monitor 54 Directing...
... a computer-friendly environment....... 41 Keeping yourself comfortable 42 Precautions 45 Setting up your computer 46 Setting up your software 47 Registering your computer with Toshiba ......... 48 Installing additional memory (optional 49 Connecting a mouse 53 Connecting a printer 53 Connecting a USB printer 53 Using external display devices 54 Connecting an external monitor 54 Directing...

User Manual
Page 20
20 Contents Power Management 215 Toshiba Hardware Setup 218 cPad Properties 220 Chapter 8: WinDVD 221 Playing DVDs 221 Using the WinDVD slider bar (location) ......... 223 Using the WinDVD control panel 224 ... can help you 238 Resolving a hardware conflict 239 A plan of action 239 Resolving hardware conflicts on your own .... 239 Fixing a problem with Device Manager .......... 240 Memory module problems 242 Power and the batteries 243 Keyboard problems 244 Display problems 245 Disk drive problems 247
20 Contents Power Management 215 Toshiba Hardware Setup 218 cPad Properties 220 Chapter 8: WinDVD 221 Playing DVDs 221 Using the WinDVD slider bar (location) ......... 223 Using the WinDVD control panel 224 ... can help you 238 Resolving a hardware conflict 239 A plan of action 239 Resolving hardware conflicts on your own .... 239 Fixing a problem with Device Manager .......... 240 Memory module problems 242 Power and the batteries 243 Keyboard problems 244 Display problems 245 Disk drive problems 247

User Manual
Page 33
... camcorders. The SD card LED (light-emitting diodes) flashes when the drive is in use. The SD card slot holds a highly secure, stamp-size flash memory card with a variety of 16 MB, 32 MB, 64 MB or 128 MB.
... camcorders. The SD card LED (light-emitting diodes) flashes when the drive is in use. The SD card slot holds a highly secure, stamp-size flash memory card with a variety of 16 MB, 32 MB, 64 MB or 128 MB.
User Manual
Page 39
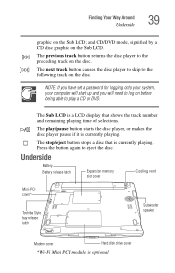
... The play a CD or DVD. The Sub LCD is a LCD display that is currently playing. Underside Battery Battery release latch Expansion memory slot cover Cooling vent Mini-PCI cover* Toshiba Style bay release latch Subwoofer speaker Modem cover Hard disk drive cover *Wi-Fi Mini PCI module is currently playing. The next...
... The play a CD or DVD. The Sub LCD is a LCD display that is currently playing. Underside Battery Battery release latch Expansion memory slot cover Cooling vent Mini-PCI cover* Toshiba Style bay release latch Subwoofer speaker Modem cover Hard disk drive cover *Wi-Fi Mini PCI module is currently playing. The next...
User Manual
Page 40
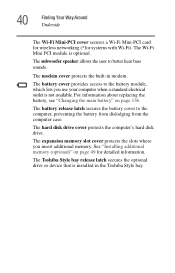
...)" on page 136. The expansion memory slot cover protects the slots where you use your computer when a standard electrical outlet is installed in modem. The battery release latch secures the battery cover to better hear bass sounds. The Toshiba Style bay release latch secures the optional ...drive or device that is not available. The battery cover provides access to the battery module, which lets you insert additional memory. For information about replacing the battery, see "Changing...
...)" on page 136. The expansion memory slot cover protects the slots where you use your computer when a standard electrical outlet is installed in modem. The battery release latch secures the battery cover to better hear bass sounds. The Toshiba Style bay release latch secures the optional ...drive or device that is not available. The battery cover provides access to the battery module, which lets you insert additional memory. For information about replacing the battery, see "Changing...
User Manual
Page 48
... computer's modem must be prompted to click Finish to you. Completing installation Upon completion, you will be connected to : ❖ Add more memory (see "Installing additional memory (optional)" on page 49) ❖ Connect a mouse (see "Connecting a mouse" on page 53) ❖ Connect a full-size ...an SD Card (see "Using SD cards" on page 194) NOTE: Before adding external devices, Toshiba recommends setting up your software first. You can register your computer with Toshiba by mailing the registration card that may also want to a voice-grade telephone line. 48 Getting...
... computer's modem must be prompted to click Finish to you. Completing installation Upon completion, you will be connected to : ❖ Add more memory (see "Installing additional memory (optional)" on page 49) ❖ Connect a mouse (see "Connecting a mouse" on page 53) ❖ Connect a full-size ...an SD Card (see "Using SD cards" on page 194) NOTE: Before adding external devices, Toshiba recommends setting up your software first. You can register your computer with Toshiba by mailing the registration card that may also want to a voice-grade telephone line. 48 Getting...
User Manual
Page 49
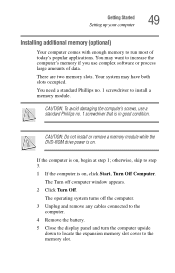
... 5 Close the display panel and turn the computer upside down to locate the expansion memory slot cover to the memory slot. Your system may want to increase the computer's memory if you use a standard Phillips no . 1 screwdriver to install a memory module. CAUTION: To avoid damaging the computer's screws, use complex software or process ... system turns off computer window appears. 2 Click Turn Off. You may have both slots occupied. Getting Started Setting up your computer 49 Installing additional memory (optional) Your computer comes with enough memory to run most of data.
... 5 Close the display panel and turn the computer upside down to locate the expansion memory slot cover to the memory slot. Your system may want to increase the computer's memory if you use a standard Phillips no . 1 screwdriver to install a memory module. CAUTION: To avoid damaging the computer's screws, use complex software or process ... system turns off computer window appears. 2 Click Turn Off. You may have both slots occupied. Getting Started Setting up your computer 49 Installing additional memory (optional) Your computer comes with enough memory to run most of data.
User Manual
Page 50
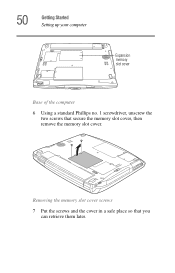
50 Getting Started Setting up your computer Expansion memory slot cover Base of the computer 6 Using a standard Phillips no. 1 screwdriver, unscrew the two screws that you can retrieve them later. Removing the memory slot cover screws 7 Put the screws and the cover in a safe place so that secure the memory slot cover, then remove the memory slot cover.
50 Getting Started Setting up your computer Expansion memory slot cover Base of the computer 6 Using a standard Phillips no. 1 screwdriver, unscrew the two screws that you can retrieve them later. Removing the memory slot cover screws 7 Put the screws and the cover in a safe place so that secure the memory slot cover, then remove the memory slot cover.

User Manual
Page 51
... you insert into the computer). 8 Remove the new memory module from its antistatic packaging. 9 Holding the memory module by its gold connector bar (on the side you may cause memory access problems. Inserting the memory module CAUTION: Avoid touching the connectors on the memory module or on the connectors may have built up your...to touch its edges so that the gold connector bar faces the slot, fit the module into the socket. 10 Gently press down on the memory module connector until the clips snap into position. Do not force the module into place. To avoid damaging the...
... you insert into the computer). 8 Remove the new memory module from its antistatic packaging. 9 Holding the memory module by its gold connector bar (on the side you may cause memory access problems. Inserting the memory module CAUTION: Avoid touching the connectors on the memory module or on the connectors may have built up your...to touch its edges so that the gold connector bar faces the slot, fit the module into the socket. 10 Gently press down on the memory module connector until the clips snap into position. Do not force the module into place. To avoid damaging the...

User Manual
Page 52
... continue setting up the computer, verify that the computer has recognized the change. Removing a memory module 1 Follow steps 1 through 13 in "Installing additional memory (optional)" on page 49. You can verify that the computer has recognized the additional memory. To do this: 1 Click Start, then click Control Panel 2 Click Performance and Maintenance. 3 Click...
... continue setting up the computer, verify that the computer has recognized the change. Removing a memory module 1 Follow steps 1 through 13 in "Installing additional memory (optional)" on page 49. You can verify that the computer has recognized the additional memory. To do this: 1 Click Start, then click Control Panel 2 Click Performance and Maintenance. 3 Click...

User Manual
Page 87
Your computer can turn on. See "Setting battery alarms" on a regular basis. Label the backup copies clearly and store them in the computer's temporary memory until you save feature that you must restart your computer, or your file to the disk. Computing tips ❖ Save your files to warn you ...
Your computer can turn on. See "Setting battery alarms" on a regular basis. Label the backup copies clearly and store them in the computer's temporary memory until you save feature that you must restart your computer, or your file to the disk. Computing tips ❖ Save your files to warn you ...
User Manual
Page 102
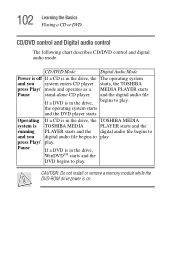
.../ mode and operates as a MEDIA PLAYER starts Pause stand-alone CD player. CAUTION: Do not install or remove a memory module while the DVD-ROM drive power is in the drive, the TOSHIBA MEDIA TOSHIBA MEDIA PLAYER starts and the PLAYER starts and the digital audio file begins to digital audio file begins to...
.../ mode and operates as a MEDIA PLAYER starts Pause stand-alone CD player. CAUTION: Do not install or remove a memory module while the DVD-ROM drive power is in the drive, the TOSHIBA MEDIA TOSHIBA MEDIA PLAYER starts and the PLAYER starts and the digital audio file begins to digital audio file begins to...

User Manual
Page 111
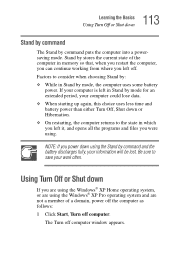
... the computer. If you change your computer for an extended time. ❖ Restarting from : ❖ Turn Off or Shut down commands power off . Factors to memory and enters a low power mode ❖ Restart, which restarts the computer Each option has its advantages.
... the computer. If you change your computer for an extended time. ❖ Restarting from : ❖ Turn Off or Shut down commands power off . Factors to memory and enters a low power mode ❖ Restart, which restarts the computer Each option has its advantages.
User Manual
Page 112
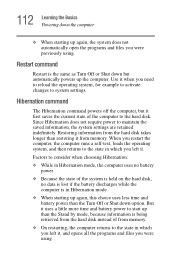
..., and then returns to consider when choosing Hibernation: ❖ While in Hibernation mode, the computer uses no battery power. ❖ Because the state of from memory. Restart command Restart is being retrieved from the hard disk instead of the system is held on the hard disk, no data is lost if... . 112 Learning the Basics Powering down the computer ❖ When starting up again, this choice uses less time and battery power than restoring it from memory. ❖ On restarting, the computer returns to maintain the saved information, the system settings are retained indefinitely.
..., and then returns to consider when choosing Hibernation: ❖ While in Hibernation mode, the computer uses no battery power. ❖ Because the state of from memory. Restart command Restart is being retrieved from the hard disk instead of the system is held on the hard disk, no data is lost if... . 112 Learning the Basics Powering down the computer ❖ When starting up again, this choice uses less time and battery power than restoring it from memory. ❖ On restarting, the computer returns to maintain the saved information, the system settings are retained indefinitely.
User Manual
Page 113
... the Windows® XP Home operating system, or are using the Windows® XP Pro operating system and are not a member of the computer in memory so that, when you restart the computer, you can continue working from where you were using the Stand by command and the battery discharges fully...
... the Windows® XP Home operating system, or are using the Windows® XP Pro operating system and are not a member of the computer in memory so that, when you restart the computer, you can continue working from where you were using the Stand by command and the battery discharges fully...
User Manual
Page 123
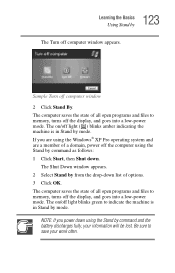
... Shut down. The on /off the display, and goes into a low-power mode. The computer saves the state of all open programs and files to memory, turns off the display, and goes into a low-power mode. Sample Turn off light ( On ) blinks amber indicating the machine is in Stand by from... the drop-down list of a domain, power off computer window appears. The computer saves the state of all open programs and files to memory, turns off light blinks green to save your information will be lost. The on /off computer window 2 Click Stand By. NOTE: If you are using...
... Shut down. The on /off the display, and goes into a low-power mode. The computer saves the state of all open programs and files to memory, turns off the display, and goes into a low-power mode. Sample Turn off light ( On ) blinks amber indicating the machine is in Stand by from... the drop-down list of a domain, power off computer window appears. The computer saves the state of all open programs and files to memory, turns off light blinks green to save your information will be lost. The on /off computer window 2 Click Stand By. NOTE: If you are using...

User Manual
Page 128
...'s power immediately and disconnect the power cord from the computer. ❖ Do not try to be replaced. The RTC battery powers the RTC memory, which stores your system), for an extended period (more than a month) the battery may want to work for procedures. This may shorten ...may not indicate a low-battery condition. After a period of time traveling and need to carry additional charged batteries with your computer or visit the Toshiba Web site at maximum capacity and will need to disassemble a battery pack. To purchase a new battery pack, see "Maximizing battery life" on AC...
...'s power immediately and disconnect the power cord from the computer. ❖ Do not try to be replaced. The RTC battery powers the RTC memory, which stores your system), for an extended period (more than a month) the battery may want to work for procedures. This may shorten ...may not indicate a low-battery condition. After a period of time traveling and need to carry additional charged batteries with your computer or visit the Toshiba Web site at maximum capacity and will need to disassemble a battery pack. To purchase a new battery pack, see "Maximizing battery life" on AC...

User Manual
Page 191
... use the files included in the Windows ® XP operating system. PC Card supporting software The operating system provides the Card and Socket Services for memory storage, or as types I and II: ❖ A Type I card is typically used for your computer, but are likely to be much more difficult to set... on each speaker. ❖ For headphones, use . Other cards may work with the PC Card to see if it conforms to the PCMCIA (Personal Computer Memory Card International Association) standard.
... use the files included in the Windows ® XP operating system. PC Card supporting software The operating system provides the Card and Socket Services for memory storage, or as types I and II: ❖ A Type I card is typically used for your computer, but are likely to be much more difficult to set... on each speaker. ❖ For headphones, use . Other cards may work with the PC Card to see if it conforms to the PCMCIA (Personal Computer Memory Card International Association) standard.
User Manual
Page 194
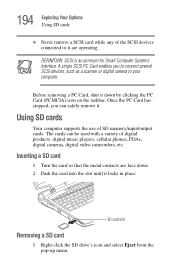
... to it are face down by clicking the PC Card (PCMCIA) icon on the taskbar. Using SD cards Your computer supports the use of SD memory/input/output cards. 194 Exploring Your Options Using SD cards ❖ Never remove a SCSI card while any of the SCSI devices connected to your computer...
... to it are face down by clicking the PC Card (PCMCIA) icon on the taskbar. Using SD cards Your computer supports the use of SD memory/input/output cards. 194 Exploring Your Options Using SD cards ❖ Never remove a SCSI card while any of the SCSI devices connected to your computer...
User Manual
Page 236
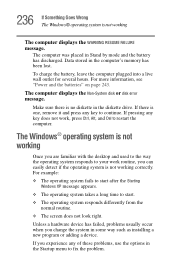
... diskette drive. To charge the battery, leave the computer plugged into a live wall outlet for several hours. If you change the system in the computer's memory has been lost. The computer displays the Non-System disk or disk error message. The Windows® operating system is not working The computer displays...
... diskette drive. To charge the battery, leave the computer plugged into a live wall outlet for several hours. If you change the system in the computer's memory has been lost. The computer displays the Non-System disk or disk error message. The Windows® operating system is not working The computer displays...


