
User Guide
Page 23
... (recommended recovery method 56 Recovering of factory default software with user's data 58 Recovering without changing the internal storage drive partitions 61 Recovering to a custom size partition 64 Creating recovery media 66 Restoring from recovery media 68 Erasing the Internal Storage Drive 70 Checking status of the internal storage drive ..........72 Installing drivers and applications 72 Using the touch pad 73 Adjusting touch pad settings 76 Disabling or enabling the touch pad 77 Connecting an external device 77 Using external display devices 78 Selecting video cables 78
... (recommended recovery method 56 Recovering of factory default software with user's data 58 Recovering without changing the internal storage drive partitions 61 Recovering to a custom size partition 64 Creating recovery media 66 Restoring from recovery media 68 Erasing the Internal Storage Drive 70 Checking status of the internal storage drive ..........72 Installing drivers and applications 72 Using the touch pad 73 Adjusting touch pad settings 76 Disabling or enabling the touch pad 77 Connecting an external device 77 Using external display devices 78 Selecting video cables 78

User Guide
Page 26
... 122 Connect 123 Secure 124 Protect & Fix 125 Optimize 126 TOSHIBA Recovery Media Creator 127 TOSHIBA Application Installer 127 Setting passwords 128 Using a supervisor password 129 Using a user password 130 Deleting a user password 131 TOSHIBA Face Recognition Utility 131 TOSHIBA PC Diagnostic Tool Utility 132 Mouse Utility 133 TOSHIBA Hardware Setup 134 TOSHIBA Sleep Utility 135 Starting the TOSHIBA Sleep Utility 135 USB Sleep and Charge 135 Enabling/Disabling USB Sleep and Charge .......137 Power supply mode settings 137 USB Sleep and Music 138 TOSHIBA Accessibility 139...
... 122 Connect 123 Secure 124 Protect & Fix 125 Optimize 126 TOSHIBA Recovery Media Creator 127 TOSHIBA Application Installer 127 Setting passwords 128 Using a supervisor password 129 Using a user password 130 Deleting a user password 131 TOSHIBA Face Recognition Utility 131 TOSHIBA PC Diagnostic Tool Utility 132 Mouse Utility 133 TOSHIBA Hardware Setup 134 TOSHIBA Sleep Utility 135 Starting the TOSHIBA Sleep Utility 135 USB Sleep and Charge 135 Enabling/Disabling USB Sleep and Charge .......137 Power supply mode settings 137 USB Sleep and Music 138 TOSHIBA Accessibility 139...

User Guide
Page 30
... you. ❖ Use the table of the information provided herein, product specifications, configurations, prices, system/component/options availability are designed for a product Series. 30 Introduction This guide NOTE The product specifications and configuration information are all the features and specifications listed or illustrated. For more detailed information about your particular model, please visit Toshiba's Web site at support.toshiba.com. Your particular model may not...
... you. ❖ Use the table of the information provided herein, product specifications, configurations, prices, system/component/options availability are designed for a product Series. 30 Introduction This guide NOTE The product specifications and configuration information are all the features and specifications listed or illustrated. For more detailed information about your particular model, please visit Toshiba's Web site at support.toshiba.com. Your particular model may not...
User Guide
Page 46
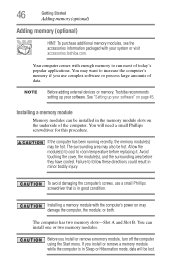
... replacing it. To avoid damaging the computer's screws, use complex software or process large amounts of data. You can be hot. The surrounding area may be installed in good condition. 46 Getting Started Adding memory (optional) Adding memory (optional) HINT: To purchase additional memory modules, see the accessories information packaged with the computer's power on the underside of the computer. If you install or remove a memory module, turn...
... replacing it. To avoid damaging the computer's screws, use complex software or process large amounts of data. You can be hot. The surrounding area may be installed in good condition. 46 Getting Started Adding memory (optional) Adding memory (optional) HINT: To purchase additional memory modules, see the accessories information packaged with the computer's power on the underside of the computer. If you install or remove a memory module, turn...
User Guide
Page 53
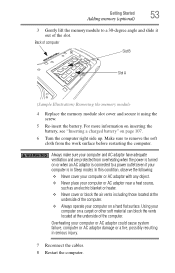
... protected from the work surface before restarting the computer. Getting Started 53 Adding memory (optional) 3 Gently lift the memory module to a 30-degree angle and slide it out of computer Slot B Slot A (Sample Illustration) Removing the memory module 4 Replace the memory module slot cover and secure it using the screw. 5 Re-insert the battery. Make sure to remove the soft cloth from overheating when the power is turned on a hard flat surface. In...
... protected from the work surface before restarting the computer. Getting Started 53 Adding memory (optional) 3 Gently lift the memory module to a 30-degree angle and slide it out of computer Slot B Slot A (Sample Illustration) Removing the memory module 4 Replace the memory module slot cover and secure it using the screw. 5 Re-insert the battery. Make sure to remove the soft cloth from overheating when the power is turned on a hard flat surface. In...
User Guide
Page 54
... program to make changes to back up squarely with user's data" on page 58. To do this computer?" If the computer does not recognize the memory configuration, turn off the computer and remove the memory module slot cover (complete steps 1-8 in "Installing a memory module" on page 46), and then check that says, "Do you want to allow you to work. 54 Getting Started Recovering the Internal Storage Drive TECHNICAL...
... program to make changes to back up squarely with user's data" on page 58. To do this computer?" If the computer does not recognize the memory configuration, turn off the computer and remove the memory module slot cover (complete steps 1-8 in "Installing a memory module" on page 46), and then check that says, "Do you want to allow you to work. 54 Getting Started Recovering the Internal Storage Drive TECHNICAL...
User Guide
Page 79
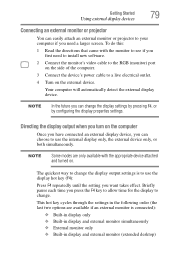
... settings is connected): ❖ Built-in display only ❖ Built-in display and external monitor simultaneously ❖ External monitor only ❖ Built-in the following order (the last two options are only available with the monitor to see if you first need a larger screen. Getting Started 79 Using external display devices Connecting an external monitor or projector You can easily attach an external monitor or projector to your computer if you need to install new software. 2 Connect the monitor's video cable...
... settings is connected): ❖ Built-in display only ❖ Built-in display and external monitor simultaneously ❖ External monitor only ❖ Built-in the following order (the last two options are only available with the monitor to see if you first need a larger screen. Getting Started 79 Using external display devices Connecting an external monitor or projector You can easily attach an external monitor or projector to your computer if you need to install new software. 2 Connect the monitor's video cable...
User Guide
Page 85
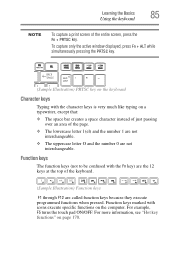
... letter l (el) and the number 1 are not interchangeable. ❖ The uppercase letter O and the number 0 are the 12 keys at the top of the entire screen, press the Fn + PRTSC key. To capture only the active window displayed, press Fn + ALT while simultaneously pressing the PRTSC key. (Sample Illustration) PRTSC key on the keyboard Character keys Typing with icons execute specific functions on page 170.
... letter l (el) and the number 1 are not interchangeable. ❖ The uppercase letter O and the number 0 are the 12 keys at the top of the entire screen, press the Fn + PRTSC key. To capture only the active window displayed, press Fn + ALT while simultaneously pressing the PRTSC key. (Sample Illustration) PRTSC key on the keyboard Character keys Typing with icons execute specific functions on page 170.
User Guide
Page 131
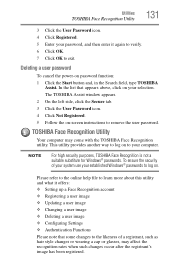
... a user image ❖ Configuring Settings ❖ Authentication Functions Please note that appears above, click on your password, and then enter it again to verify. 6 Click OK. 7 Click OK to log on password function: 1 Click the Start button and, in the Search field, type TOSHIBA Assist. Utilities TOSHIBA Face Recognition Utility 131 3 Click the User Password icon. 4 Click Registered. 5 Enter your selection. In the list that some changes to remove the user password. NOTE...
... a user image ❖ Configuring Settings ❖ Authentication Functions Please note that appears above, click on your password, and then enter it again to verify. 6 Click OK. 7 Click OK to log on password function: 1 Click the Start button and, in the Search field, type TOSHIBA Assist. Utilities TOSHIBA Face Recognition Utility 131 3 Click the User Password icon. 4 Click Registered. 5 Enter your selection. In the list that some changes to remove the user password. NOTE...

User Guide
Page 134
... BIOS to initialize, using either the Fast or Normal settings. ❖ Panel open/Power on-Allows you to change the sequence in which your selection. NOTE Since the system is the TOSHIBA configuration management tool available through the Windows® operating system. The TOSHIBA HWSetup screen appears. (Sample Image) TOSHIBA HWSetup screen - To access it: ❖ Click the Start button and, in the Optimize tab of TOSHIBA Assist. 134 Utilities TOSHIBA Hardware Setup TOSHIBA Hardware Setup TOSHIBA Hardware Setup is a quick-booting...
... BIOS to initialize, using either the Fast or Normal settings. ❖ Panel open/Power on-Allows you to change the sequence in which your selection. NOTE Since the system is the TOSHIBA configuration management tool available through the Windows® operating system. The TOSHIBA HWSetup screen appears. (Sample Image) TOSHIBA HWSetup screen - To access it: ❖ Click the Start button and, in the Optimize tab of TOSHIBA Assist. 134 Utilities TOSHIBA Hardware Setup TOSHIBA Hardware Setup TOSHIBA Hardware Setup is a quick-booting...
User Guide
Page 136
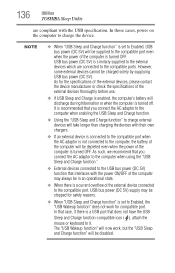
... AC adaptor is not connected to the computer, the battery of the computer will be depleted even when the power of the computer is turned OFF. As for compatible port. NOTE ❖ When "USB Sleep and Charge function" is set to Enabled, the "USB Wakeup function" does not work , but the "USB Sleep and Charge function" will take longer than charging the devices with the USB specification. 136 Utilities TOSHIBA Sleep Utility are connected to the compatible...
... AC adaptor is not connected to the computer, the battery of the computer will be depleted even when the power of the computer is turned OFF. As for compatible port. NOTE ❖ When "USB Sleep and Charge function" is set to Enabled, the "USB Wakeup function" does not work , but the "USB Sleep and Charge function" will take longer than charging the devices with the USB specification. 136 Utilities TOSHIBA Sleep Utility are connected to the compatible...
User Guide
Page 139
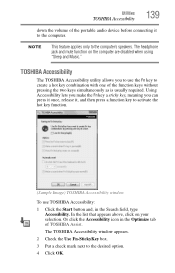
... you make the Fn key a sticky key, meaning you to use TOSHIBA Accessibility: 1 Click the Start button and, in the Optimize tab of the function keys without pressing the two keys simultaneously as is usually required. Utilities TOSHIBA Accessibility 139 down the volume of the portable audio device before connecting it , and then press a function key to activate the hot key function. (Sample Image) TOSHIBA Accessibility window To use the Fn key to create a hot key combination with one of TOSHIBA Assist. TOSHIBA Accessibility The TOSHIBA Accessibility utility...
... you make the Fn key a sticky key, meaning you to use TOSHIBA Accessibility: 1 Click the Start button and, in the Optimize tab of the function keys without pressing the two keys simultaneously as is usually required. Utilities TOSHIBA Accessibility 139 down the volume of the portable audio device before connecting it , and then press a function key to activate the hot key function. (Sample Image) TOSHIBA Accessibility window To use the Fn key to create a hot key combination with one of TOSHIBA Assist. TOSHIBA Accessibility The TOSHIBA Accessibility utility...

User Guide
Page 141
...'s internal storage drive. Subject to the use this information for various devices). The TOSHIBA PC Health Monitor software does not extend or modify TOSHIBA's obligations under its standard limited warranty in any time by TOSHIBA or TOSHIBA's authorized service providers. The collected information includes device operation time and number of actuations or status changes (e.g.: number of power button and Fn key combination uses, and AC adaptor, battery, LCD, fan, HDD, sound volume, wireless communication switch, docking and USB information...
...'s internal storage drive. Subject to the use this information for various devices). The TOSHIBA PC Health Monitor software does not extend or modify TOSHIBA's obligations under its standard limited warranty in any time by TOSHIBA or TOSHIBA's authorized service providers. The collected information includes device operation time and number of actuations or status changes (e.g.: number of power button and Fn key combination uses, and AC adaptor, battery, LCD, fan, HDD, sound volume, wireless communication switch, docking and USB information...

User Guide
Page 146
..., use the options in the Startup menu to fix the problem. Unless a hardware device has failed, problems usually occur when you may have to fix the problem. Using Startup options to fix problems If the operating system fails to start properly, you change your system's configuration or verify the startup procedure to change the system in the Startup menu. The Windows® Advanced Boot Options menu displays these problems, use the options in some way such as installing a new program or adding a device. To open the Startup menu...
..., use the options in the Startup menu to fix the problem. Unless a hardware device has failed, problems usually occur when you may have to fix the problem. Using Startup options to fix problems If the operating system fails to start properly, you change your system's configuration or verify the startup procedure to change the system in the Startup menu. The Windows® Advanced Boot Options menu displays these problems, use the options in some way such as installing a new program or adding a device. To open the Startup menu...
User Guide
Page 151
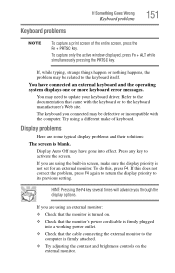
To capture only the active window displayed, press Fn + ALT while simultaneously pressing the PRTSC key. The keyboard you are using the built-in screen, make of the entire screen, press the Fn + PRTSC key. Display problems Here are some typical display problems and their solutions: The screen is firmly attached. ❖ Try adjusting the contrast and brightness controls on . ❖ Check that the monitor's power cord/cable is firmly plugged into...
To capture only the active window displayed, press Fn + ALT while simultaneously pressing the PRTSC key. The keyboard you are using the built-in screen, make of the entire screen, press the Fn + PRTSC key. Display problems Here are some typical display problems and their solutions: The screen is firmly attached. ❖ Try adjusting the contrast and brightness controls on . ❖ Check that the monitor's power cord/cable is firmly plugged into...
User Guide
Page 160
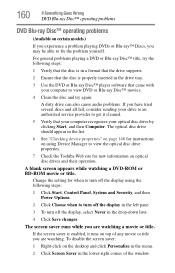
... following steps: 1 Click Start, Control Panel, System and Security, and then Power Options. 2 Click Choose when to turn off the display in the left pane. 3 To turn off the display, select Never in the drop-down lists. 4 Click Save changes. Change the setting for new information on optical disc drives and their operation. A blank screen appears while watching a DVD-ROM or BD-ROM movie or title. The screen saver runs while you...
... following steps: 1 Click Start, Control Panel, System and Security, and then Power Options. 2 Click Choose when to turn off the display in the left pane. 3 To turn off the display, select Never in the drop-down lists. 4 Click Save changes. Change the setting for new information on optical disc drives and their operation. A blank screen appears while watching a DVD-ROM or BD-ROM movie or title. The screen saver runs while you...
User Guide
Page 185
... two) cache-Memory cache installed on the screen that you use to perform a task instead of using this function, if connected with the Fn key can control another while using a pointing device such as the battery save mode. (2) A key or combination of your work , including all open files and programs, when you turn the computer off . HDMI-CEC (HDMI Consumer Electronics Control)-One A/V component can set system options or control system parameters, such...
... two) cache-Memory cache installed on the screen that you use to perform a task instead of using this function, if connected with the Fn key can control another while using a pointing device such as the battery save mode. (2) A key or combination of your work , including all open files and programs, when you turn the computer off . HDMI-CEC (HDMI Consumer Electronics Control)-One A/V component can set system options or control system parameters, such...

User Guide
Page 193
... computer to a network 116 external device 77 HDMI®-compatible TV or display device 78 monitor 79 power cord/cable 43 power source 42 cooling fan adequate ventilation 40 customize computer settings 80 D data/entire system backup troubleshooting 163 desktop creating new icon 113 exploring the 112 icons 113 recycle bin 113 standard features 113 Windows® operating system 112 Device Manager fixing a problem 148 directing display output 79 disabling touch pad 77, 172 display troubleshooting 152 display devices external 78 display, external
... computer to a network 116 external device 77 HDMI®-compatible TV or display device 78 monitor 79 power cord/cable 43 power source 42 cooling fan adequate ventilation 40 customize computer settings 80 D data/entire system backup troubleshooting 163 desktop creating new icon 113 exploring the 112 icons 113 recycle bin 113 standard features 113 Windows® operating system 112 Device Manager fixing a problem 148 directing display output 79 disabling touch pad 77, 172 display troubleshooting 152 display devices external 78 display, external
User Guide
Page 194
... function keys 85 H headphones using 117 Help and Support troubleshooting 147 hot key disabling or enabling wireless devices 174 display brightness 170 keyboard overlays 173 Lock (Instant security) 170 Output (Display switch) 171 Zoom (Display resolution) 175 zooming in 173 zooming out 173 Hot Key Cards 169 Hot key functions 170 I icon desktop 113 moving to desktop 113 recycle bin 113 safety 31 installation memory module 46 installing a charged battery 107 battery 105 memory modules 46 internal storage drive recovery 54 K keyboard backlit 86 character keys 85 function keys 85 hot keys...
... function keys 85 H headphones using 117 Help and Support troubleshooting 147 hot key disabling or enabling wireless devices 174 display brightness 170 keyboard overlays 173 Lock (Instant security) 170 Output (Display switch) 171 Zoom (Display resolution) 175 zooming in 173 zooming out 173 Hot Key Cards 169 Hot key functions 170 I icon desktop 113 moving to desktop 113 recycle bin 113 safety 31 installation memory module 46 installing a charged battery 107 battery 105 memory modules 46 internal storage drive recovery 54 K keyboard backlit 86 character keys 85 function keys 85 hot keys...

User Guide
Page 197
... from Start 87 Startup menu problem solving 146 supervisor password, deleting 130 supervisor password, set up 129 system indicator lights AC power 41 drive in-use indicator 91 LEDs 43, 44, 100, 101, 118 T taking care of battery 108 taskbar 115 television adjusting display 80 tips for computing 83 Toshiba online resources 95 registering computer Toshiba Web site 45 worldwide offices 167 TOSHIBA Accessibility 139 Toshiba accessories memory 46 TOSHIBA Application Installer 127 TOSHIBA Assist 122 Connect...
... from Start 87 Startup menu problem solving 146 supervisor password, deleting 130 supervisor password, set up 129 system indicator lights AC power 41 drive in-use indicator 91 LEDs 43, 44, 100, 101, 118 T taking care of battery 108 taskbar 115 television adjusting display 80 tips for computing 83 Toshiba online resources 95 registering computer Toshiba Web site 45 worldwide offices 167 TOSHIBA Accessibility 139 Toshiba accessories memory 46 TOSHIBA Application Installer 127 TOSHIBA Assist 122 Connect...


