
Users Manual Canada; English
Page 3
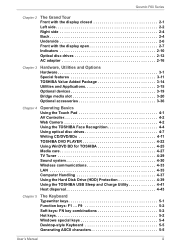
... Using the Touch Pad 4-1 AV Controller 4-2 Web Camera 4-2 Using the TOSHIBA Face Recognition 4-4 Using optical disc drives 4-7 Writing CD/DVD/BDs 4-11 TOSHIBA DVD PLAYER 4-22 Using WinDVD BD for TOSHIBA 4-25 Media care 4-27 TV Tuner 4-29 Sound system 4-30 Wireless communications 4-33 LAN 4-35 Computer Handling 4-37 Using the Hard Disk Drive (HDD) Protection 4-39 Using the TOSHIBA USB Sleep and Charge Utility 4-41 Heat dispersal 4-43 Chapter 5 The Keyboard Typewriter keys 5-1 Function keys: F1 ... F9 5-2 Soft keys: FN key combinations 5-2 Hot keys 5-2 Windows special keys...
... Using the Touch Pad 4-1 AV Controller 4-2 Web Camera 4-2 Using the TOSHIBA Face Recognition 4-4 Using optical disc drives 4-7 Writing CD/DVD/BDs 4-11 TOSHIBA DVD PLAYER 4-22 Using WinDVD BD for TOSHIBA 4-25 Media care 4-27 TV Tuner 4-29 Sound system 4-30 Wireless communications 4-33 LAN 4-35 Computer Handling 4-37 Using the Hard Disk Drive (HDD) Protection 4-39 Using the TOSHIBA USB Sleep and Charge Utility 4-41 Heat dispersal 4-43 Chapter 5 The Keyboard Typewriter keys 5-1 Function keys: F1 ... F9 5-2 Soft keys: FN key combinations 5-2 Hot keys 5-2 Windows special keys...
Users Manual Canada; English
Page 4
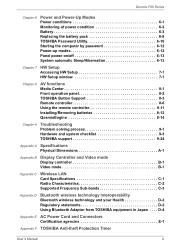
... Sleep/Hibernation 6-13 Chapter 7 HW Setup Accessing HW Setup 7-1 HW Setup window 7-1 Chapter 8 AV functions Media Center 8-1 Front operation panel 8-2 TOSHIBA Button Support 8-3 Remote controller 8-6 Using the remote controller 8-11 Installing/Removing batteries 8-12 QosmioEngine 8-14 Chapter 9 Troubleshooting Problem solving process 9-1 Hardware and system checklist 9-3 TOSHIBA support 9-24 Appendix A Specifications Physical Dimensions A-1 Appendix B Display Controller and Video mode Display controller B-1 Video mode B-1 Appendix C Wireless LAN Card Specifications...
... Sleep/Hibernation 6-13 Chapter 7 HW Setup Accessing HW Setup 7-1 HW Setup window 7-1 Chapter 8 AV functions Media Center 8-1 Front operation panel 8-2 TOSHIBA Button Support 8-3 Remote controller 8-6 Using the remote controller 8-11 Installing/Removing batteries 8-12 QosmioEngine 8-14 Chapter 9 Troubleshooting Problem solving process 9-1 Hardware and system checklist 9-3 TOSHIBA support 9-24 Appendix A Specifications Physical Dimensions A-1 Appendix B Display Controller and Video mode Display controller B-1 Video mode B-1 Appendix C Wireless LAN Card Specifications...
Users Manual Canada; English
Page 6
... reviewed for personal use or use the screen mode switching functions (e.g. Under the copyright laws, this manual's production. However, succeeding computers and manuals are accurate for the TOSHIBA Qosmio F60 Series Portable Personal Computer at coffee shops or hotels for music, movies, computer programs, databases and other use beyond that you may infringe the owner's rights protected by TOSHIBA Corporation. No patent liability is subject to change...
... reviewed for personal use or use the screen mode switching functions (e.g. Under the copyright laws, this manual's production. However, succeeding computers and manuals are accurate for the TOSHIBA Qosmio F60 Series Portable Personal Computer at coffee shops or hotels for music, movies, computer programs, databases and other use beyond that you may infringe the owner's rights protected by TOSHIBA Corporation. No patent liability is subject to change...
Users Manual Canada; English
Page 16
... CD/DVD panel on the computer (or the same buttons on setting up and begin using your computer, basic operations and care, using the My TV feature of computers or if you are a new user of Media Center or the Full size remote controller. If you are uncommon or unique to setup and configure these features. Read Chapter 3, Hardware, Utilities and Options if connecting optional products or external devices. This series...
... CD/DVD panel on the computer (or the same buttons on setting up and begin using your computer, basic operations and care, using the My TV feature of computers or if you are a new user of Media Center or the Full size remote controller. If you are uncommon or unique to setup and configure these features. Read Chapter 3, Hardware, Utilities and Options if connecting optional products or external devices. This series...
Users Manual Canada; English
Page 31
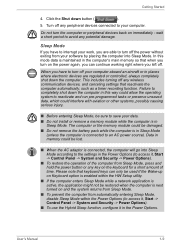
... automatically, such as a timer recording function. Turn off your computer. The computer or the memory module could be restored when the computer is connected, the computer will go into Sleep Mode. Getting Started 4. Sleep Mode If you can only be used if the Wake-up on Keyboard option is enabled within the HW Setup utility. ■ If the computer enters Sleep Mode while a network application is active, the application might not be...
... automatically, such as a timer recording function. Turn off your computer. The computer or the memory module could be restored when the computer is connected, the computer will go into Sleep Mode. Getting Started 4. Sleep Mode If you can only be used if the Wake-up on Keyboard option is enabled within the HW Setup utility. ■ If the computer enters Sleep Mode while a network application is active, the application might not be...
Users Manual Canada; English
Page 55
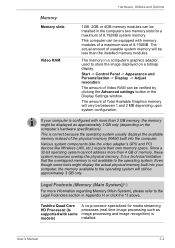
... system configuration. User's Manual 3-2 Hardware, Utilities and Options Memory Memory slots Video RAM 1GB, 2GB or 4GB memory modules can be verified by clicking the Advanced settings button in the Display Settings window. Start -> Control Panel -> Appearance and Personalization -> Display -> Adjust resolution. Since a 32-bit operating system cannot address more than 3 GB memory, the memory might display the actual physical memory built into the computer. The amount of Video RAM can be less than the installed memory modules. Various system components (like the video adapter...
... system configuration. User's Manual 3-2 Hardware, Utilities and Options Memory Memory slots Video RAM 1GB, 2GB or 4GB memory modules can be verified by clicking the Advanced settings button in the Display Settings window. Start -> Control Panel -> Appearance and Personalization -> Display -> Adjust resolution. Since a 32-bit operating system cannot address more than 3 GB memory, the memory might display the actual physical memory built into the computer. The amount of Video RAM can be less than the installed memory modules. Various system components (like the video adapter...
Users Manual Canada; English
Page 77
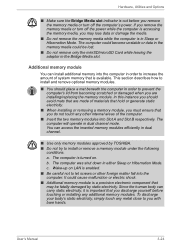
... removing a memory module, you must ensure that you do not touch any other foreign matter fall into Slot A and Slot B respectively. Hardware, Utilities and Options ■ Make sure the Bridge Media slot indicator is out before touching or installing any metal close to you should place a mat beneath the computer in dual channel. ■ Use only memory modules approved by static electricity. The computer was shut down in order...
... removing a memory module, you must ensure that you do not touch any other foreign matter fall into Slot A and Slot B respectively. Hardware, Utilities and Options ■ Make sure the Bridge Media slot indicator is out before touching or installing any metal close to you should place a mat beneath the computer in dual channel. ■ Use only memory modules approved by static electricity. The computer was shut down in order...
Users Manual Canada; English
Page 80
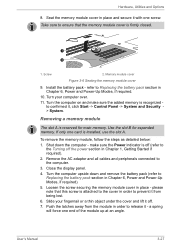
... the memory module cover in order to prevent it with one screw. Removing a memory module The slot A is attached to Replacing the battery pack section in Chapter 6, Power and Power-Up Modes, if required). 5. Remove the AC adaptor and all cables and peripherals connected to release it , click Start -> Control Panel -> System and Security > System. please note that the memory module cover is installed, use the slot A. Slide your computer over. 11. Memory module cover Figure 3-6 Seating the memory module cover...
... the memory module cover in order to prevent it with one screw. Removing a memory module The slot A is attached to Replacing the battery pack section in Chapter 6, Power and Power-Up Modes, if required). 5. Remove the AC adaptor and all cables and peripherals connected to release it , click Start -> Control Panel -> System and Security > System. please note that the memory module cover is installed, use the slot A. Slide your computer over. 11. Memory module cover Figure 3-6 Seating the memory module cover...
Users Manual Canada; English
Page 111
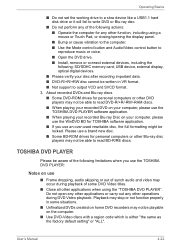
... using a mouse or Touch Pad, or closing/opening the display panel. ■ Bump or cause vibration to the computer. ■ Use the Mode control button and Audio/Video control button to reproduce music or voice. ■ Open the DVD drive. ■ Install, remove or connect external devices, including the following: SD/SDHC memory card, USB device, external display, optical digital devices. ■ Please verify your computer, please use the WinDVD BD for TOSHIBA software application. ■ If you use an over-used rewritable disc, the full formatting...
... using a mouse or Touch Pad, or closing/opening the display panel. ■ Bump or cause vibration to the computer. ■ Use the Mode control button and Audio/Video control button to reproduce music or voice. ■ Open the DVD drive. ■ Install, remove or connect external devices, including the following: SD/SDHC memory card, USB device, external display, optical digital devices. ■ Please verify your computer, please use the WinDVD BD for TOSHIBA software application. ■ If you use an over-used rewritable disc, the full formatting...
Users Manual Canada; English
Page 131
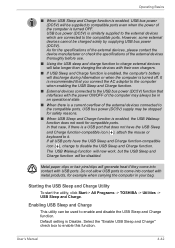
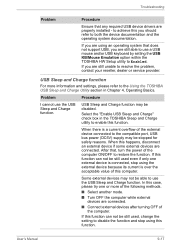
... is turned off. Select the "Enable USB Sleep and Charge" check box to enable and disable the USB Sleep and Charge function. The USB Wakeup function will now work for safety reasons. ■ When USB Sleep and Charge function is enabled, the USB Wakeup function does not work , but the USB Sleep and Charge function will be supplied to come into contact with the power ON/OFF of the external devices thoroughly before use. ■ Using the USB sleep and charge function to the compatible ports. Default setting...
... is turned off. Select the "Enable USB Sleep and Charge" check box to enable and disable the USB Sleep and Charge function. The USB Wakeup function will now work for safety reasons. ■ When USB Sleep and Charge function is enabled, the USB Wakeup function does not work , but the USB Sleep and Charge function will be supplied to come into contact with the power ON/OFF of the external devices thoroughly before use. ■ Using the USB sleep and charge function to the compatible ports. Default setting...
Users Manual Canada; English
Page 134
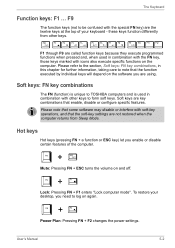
... key combinations that enable, disable or configure specific features. Power Plan: Pressing FN + F2 changes the power settings. Hot keys Hot keys (pressing FN + a function or ESC key) let you need to be confused with other keys. User's Manual 5-2 these keys function differently from Sleep Mode. Please note that some software may disable or interfere with icons also execute specific functions on the software you are using. Mute: Pressing FN + ESC turns the volume on again. F1 through F9 are not restored...
... key combinations that enable, disable or configure specific features. Power Plan: Pressing FN + F2 changes the power settings. Hot keys Hot keys (pressing FN + a function or ESC key) let you need to be confused with other keys. User's Manual 5-2 these keys function differently from Sleep Mode. Please note that some software may disable or interfere with icons also execute specific functions on the software you are using. Mute: Pressing FN + ESC turns the volume on again. F1 through F9 are not restored...
Users Manual Canada; English
Page 141
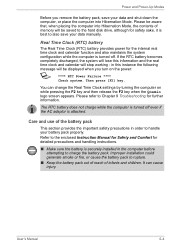
... enclosed Instruction Manual for Safety and Comfort for further information. User's Manual 6-4 The RTC battery does not charge while the computer is turned off . It can change the Real Time Clock settings by turning the computer on the power: S **** RTC Power Failure **** Check system. Power and Power-Up Modes Before you turn on while pressing the F2 key and then release the F2 key when the Qosmio logo screen appears...
... enclosed Instruction Manual for Safety and Comfort for further information. User's Manual 6-4 The RTC battery does not charge while the computer is turned off . It can change the Real Time Clock settings by turning the computer on the power: S **** RTC Power Failure **** Check system. Power and Power-Up Modes Before you turn on while pressing the F2 key and then release the F2 key when the Qosmio logo screen appears...

Users Manual Canada; English
Page 173
.... ■ Do any indicators light, if so, which ones, what color are easy to identify the problem faster. Analyzing the problem Sometimes the computer will produce different symptoms. ■ Check the options within the operating system to your floppy diskette, CD or DVD media is correctly set properly. ■ What appears on the computer - keyboard, hard disk drive, optical disc drive, display panel, touch pad, touch pad control buttons - loose cables can help you...
.... ■ Do any indicators light, if so, which ones, what color are easy to identify the problem faster. Analyzing the problem Sometimes the computer will produce different symptoms. ■ Check the options within the operating system to your floppy diskette, CD or DVD media is correctly set properly. ■ What appears on the computer - keyboard, hard disk drive, optical disc drive, display panel, touch pad, touch pad control buttons - loose cables can help you...
Users Manual Canada; English
Page 178
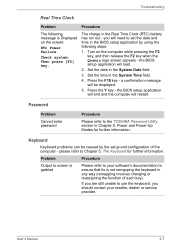
... or service provider. Then press [F2] key. Turn on the screen: RTC Power Failure. Press the F10 key - you will be caused by using the following message is not remapping the keyboard in the BIOS setup application by the setup and configuration of each key). the BIOS setup application will end and the computer will load. 2. User's Manual 9-7 Troubleshooting Real Time Clock Problem Procedure The following steps: 1. Check system. Set...
... or service provider. Then press [F2] key. Turn on the screen: RTC Power Failure. Press the F10 key - you will be caused by using the following message is not remapping the keyboard in the BIOS setup application by the setup and configuration of each key). the BIOS setup application will end and the computer will load. 2. User's Manual 9-7 Troubleshooting Real Time Clock Problem Procedure The following steps: 1. Check system. Set...
Users Manual Canada; English
Page 188
... another mode. ■ Turn OFF the computer while external devices are connected. If this function. User's Manual 9-17 If you are still able to use a USB mouse and/or USB keyboard by setting the USB KB/Mouse Emulation option within the TOSHIBA HW Setup utility to the Using the TOSHIBA USB Sleep and Charge Utility section in the TOSHIBA Sleep and Charge utility to enable this case, please try one external device is connected, stop using an operating system that does not support USB, you are using this function can...
... another mode. ■ Turn OFF the computer while external devices are connected. If this function. User's Manual 9-17 If you are still able to use a USB mouse and/or USB keyboard by setting the USB KB/Mouse Emulation option within the TOSHIBA HW Setup utility to the Using the TOSHIBA USB Sleep and Charge Utility section in the TOSHIBA Sleep and Charge utility to enable this case, please try one external device is connected, stop using an operating system that does not support USB, you are using this function can...
Users Manual Canada; English
Page 226
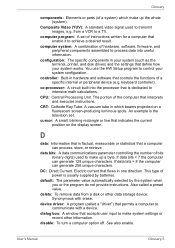
... 256 unique characters. This type of power is the television set of instructions written for a computer that controls the functions of a specific internal or peripheral device (e.g. default: The parameter value automatically selected by batteries. device driver: A program (called a preset value. disable: To turn a computer option off. computer program: A set . DC: Direct Current. controller: Built-in which make up a byte. See also enable. Composite Video (YUV): A standard video signal used to a TV. An example...
... 256 unique characters. This type of power is the television set of instructions written for a computer that controls the functions of a specific internal or peripheral device (e.g. default: The parameter value automatically selected by batteries. device driver: A program (called a preset value. disable: To turn a computer option off. computer program: A set . DC: Direct Current. controller: Built-in which make up a byte. See also enable. Composite Video (YUV): A standard video signal used to a TV. An example...
Users Manual Canada; English
Page 229
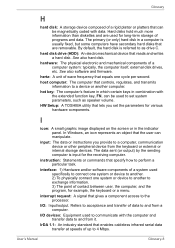
... function key, FN, can be magnetically coded with data. input: The data or instructions you set system parameters, such as drive C. interrupt request: A signal that gives a component access to perform a particular task. interface: 1) Hardware and/or software components of a system used for various hardware components. User's Manual Glossary-8 The primary (or only) hard disk in a computer is input for example, the keyboard or a menu. See also software and firmware...
... function key, FN, can be magnetically coded with data. input: The data or instructions you set system parameters, such as drive C. interrupt request: A signal that gives a component access to perform a particular task. interface: 1) Hardware and/or software components of a system used for various hardware components. User's Manual Glossary-8 The primary (or only) hard disk in a computer is input for example, the keyboard or a menu. See also software and firmware...
Users Manual Canada; English
Page 230
... 1024, or 2 raised to the 10th power. keyboard: An input device containing switches that displays a list of glass coated with any other devices dispersed over a relatively limited area and connected by manually pressing marked keys. Liquid Crystal Display (LCD): Liquid crystal sealed between the glass sheets alters the brightness of the glass. memory: Typically refers to 1024 bytes. menu: A software interface that are run and data...
... 1024, or 2 raised to the 10th power. keyboard: An input device containing switches that displays a list of glass coated with any other devices dispersed over a relatively limited area and connected by manually pressing marked keys. Liquid Crystal Display (LCD): Liquid crystal sealed between the glass sheets alters the brightness of the glass. memory: Typically refers to 1024 bytes. menu: A software interface that are run and data...

Users Manual Canada; English
Page 232
... can be set of external devices and make the necessary configurations in Europe. PCI: Peripheral Component Interconnect. Péritel: Péritel is a 21-pin connecting cable/port system that enables the system to be sent from devices or other computers. TOSHIBA portable computers comply with Windows that allows images and high-quality stereo sound (including Dolby Pro-Logic sound formats) to automatically recognize connections of instructions a computer can...
... can be set of external devices and make the necessary configurations in Europe. PCI: Peripheral Component Interconnect. Péritel: Péritel is a 21-pin connecting cable/port system that enables the system to be sent from devices or other computers. TOSHIBA portable computers comply with Windows that allows images and high-quality stereo sound (including Dolby Pro-Logic sound formats) to automatically recognize connections of instructions a computer can...

Detailed Specs for Qosmio F60 PQF65C-00M02D English
Page 1
... Toshiba ConfigFree™ Toshiba Eco Utility Toshiba Disc Creator Toshiba DVD Player Norton Internet Security Trial Microsoft Office 2007 Trial Microsoft Works 9.0 Physical Dimension Display System Type: 16:9 TFT Active Matrix colour LCD with LED backlight Size (diagonal): 15.6" HD LED TFT with Sleep and Charge, RJ45, external microphone port, headphone port, RGB, HDMI-CEC Operating System Keyboard Genuine Windows® 7 Home Premium Memory Standard Memory: 4GB + 2GB DDR3 (1066 MHz) Maximum Memory: 8GB DDR3 Expansion Modules: 4GB DDR3 Hard Disk Drive...
... Toshiba ConfigFree™ Toshiba Eco Utility Toshiba Disc Creator Toshiba DVD Player Norton Internet Security Trial Microsoft Office 2007 Trial Microsoft Works 9.0 Physical Dimension Display System Type: 16:9 TFT Active Matrix colour LCD with LED backlight Size (diagonal): 15.6" HD LED TFT with Sleep and Charge, RJ45, external microphone port, headphone port, RGB, HDMI-CEC Operating System Keyboard Genuine Windows® 7 Home Premium Memory Standard Memory: 4GB + 2GB DDR3 (1066 MHz) Maximum Memory: 8GB DDR3 Expansion Modules: 4GB DDR3 Hard Disk Drive...


