User Guide
Page 9
... of this product to be operated indoors and away from Health Canada's Web site www.hc-sc.gc.ca/rpb. consult Safety Code 6, obtainable from windows to licensing. The installer of this radio equipment must accept any other transmitter that operate with this device. Operation is located or pointed such that...
... of this product to be operated indoors and away from Health Canada's Web site www.hc-sc.gc.ca/rpb. consult Safety Code 6, obtainable from windows to licensing. The installer of this radio equipment must accept any other transmitter that operate with this device. Operation is located or pointed such that...

User Guide
Page 28
... obtained from a video provider licensed to any other use. Computer Disposal Information As part of Toshiba's commitment to (i) encode video in compliance with this product in the United States and/or other countries. Microsoft, Outlook, Windows, and Windows Media are trademarks or registered trademarks of their respective owners. Wi-Fi is under the...
... obtained from a video provider licensed to any other use. Computer Disposal Information As part of Toshiba's commitment to (i) encode video in compliance with this product in the United States and/or other countries. Microsoft, Outlook, Windows, and Windows Media are trademarks or registered trademarks of their respective owners. Wi-Fi is under the...
User Guide
Page 31
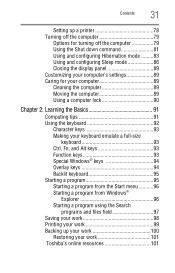
...the keyboard 92 Character keys 93 Making your keyboard emulate a full-size keyboard 93 Ctrl, Fn, and Alt keys 93 Function keys 93 Special Windows® keys 94 Overlay keys 94 Backlit keyboard 95 Starting a program 95 Starting a program from the Start menu...........96 Starting a program from... Windows® Explorer 96 Starting a program using the Search programs and files field 97 Saving your work 98 Printing your work 99 Backing up ...
...the keyboard 92 Character keys 93 Making your keyboard emulate a full-size keyboard 93 Ctrl, Fn, and Alt keys 93 Function keys 93 Special Windows® keys 94 Overlay keys 94 Backlit keyboard 95 Starting a program 95 Starting a program from the Start menu...........96 Starting a program from... Windows® Explorer 96 Starting a program using the Search programs and files field 97 Saving your work 98 Printing your work 99 Backing up ...
User Guide
Page 34
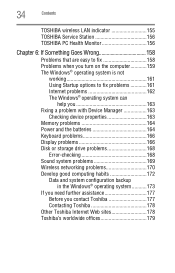
... problems 168 Error-checking 168 Sound system problems 169 Wireless networking problems 170 Develop good computing habits 172 Data and system configuration backup in the Windows® operating system ...........173 If you need further assistance 177 Before you contact Toshiba 177 Contacting Toshiba 178 Other Toshiba Internet Web sites 178 Toshiba's worldwide offices 179
... problems 168 Error-checking 168 Sound system problems 169 Wireless networking problems 170 Develop good computing habits 172 Data and system configuration backup in the Windows® operating system ...........173 If you need further assistance 177 Before you contact Toshiba 177 Contacting Toshiba 178 Other Toshiba Internet Web sites 178 Toshiba's worldwide offices 179
User Guide
Page 38
...options availability are designed for a product Series. While Toshiba has made every effort at support.toshiba.com. This guide This guide introduces the computer's features as well as some basic procedures needed to perform tasks in Windows® 7. For more detailed information about your ...particular model, please visit Toshiba's Web site at support.toshiba.com. 38 Introduction This guide NOTE The product specifications and configuration information ...
...options availability are designed for a product Series. While Toshiba has made every effort at support.toshiba.com. This guide This guide introduces the computer's features as well as some basic procedures needed to perform tasks in Windows® 7. For more detailed information about your ...particular model, please visit Toshiba's Web site at support.toshiba.com. 38 Introduction This guide NOTE The product specifications and configuration information ...
User Guide
Page 47
... AC outlet ❖ Flashes amber when the main battery charge is low and it is time to recharge the main battery or plug in the TOSHIBA eco Utility™ window." Disconnect the AC power cord/cable and remove the main battery. NOTE Battery life and charge time may vary depending on the... TOSHIBA eco power plan, see the Help file in the AC adaptor NOTE If the AC power light flashes amber during charging, either the main battery ...
... AC outlet ❖ Flashes amber when the main battery charge is low and it is time to recharge the main battery or plug in the TOSHIBA eco Utility™ window." Disconnect the AC power cord/cable and remove the main battery. NOTE Battery life and charge time may vary depending on the... TOSHIBA eco power plan, see the Help file in the AC adaptor NOTE If the AC power light flashes amber during charging, either the main battery ...
User Guide
Page 49
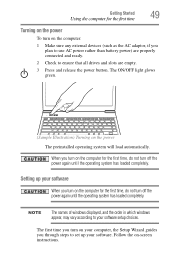
Setting up your software. Follow the on the power The preinstalled operating system will load automatically. NOTE The names of windows displayed, and the order in which windows appear, may vary according to set up your software When you turn on the computer for the first time, do not turn off the power...
Setting up your software. Follow the on the power The preinstalled operating system will load automatically. NOTE The names of windows displayed, and the order in which windows appear, may vary according to set up your software When you turn on the computer for the first time, do not turn off the power...
User Guide
Page 52
... the recovery process it is strongly recommended that your computer be connected to an external power source via the AC adaptor. ❖ The Toshiba Recovery Wizard also provides the option of erasing your internal storage drive, without restoring the information on the drive. Recovering to out-of-box...computer to its out-of -box state) using recovery media, if you have created such media. To recover the original factory image using Windows® Backup or another backup program. The Boot menu appears. Be sure to save the files you have created to external media using the...
... the recovery process it is strongly recommended that your computer be connected to an external power source via the AC adaptor. ❖ The Toshiba Recovery Wizard also provides the option of erasing your internal storage drive, without restoring the information on the drive. Recovering to out-of-box...computer to its out-of -box state) using recovery media, if you have created such media. To recover the original factory image using Windows® Backup or another backup program. The Boot menu appears. Be sure to save the files you have created to external media using the...
User Guide
Page 53
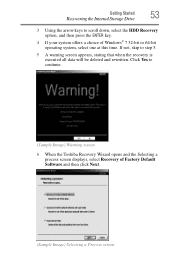
Click Yes to continue. (Sample Image) Warning screen 6 When the Toshiba Recovery Wizard opens and the Selecting a process screen displays, select Recovery of Windows® 7 32-bit or 64-bit operating system, select one at this time. Getting Started 53 Recovering the Internal Storage Drive 3 Using the arrow keys ...
Click Yes to continue. (Sample Image) Warning screen 6 When the Toshiba Recovery Wizard opens and the Selecting a process screen displays, select Recovery of Windows® 7 32-bit or 64-bit operating system, select one at this time. Getting Started 53 Recovering the Internal Storage Drive 3 Using the arrow keys ...
User Guide
Page 55
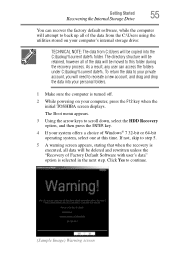
... Yes to scroll down, select the HDD Recovery option, and then press the ENTER key. 4 If your computer, press the F12 key when the initial TOSHIBA screen displays. The directory structure will be retained, however all of the data will be moved to recreate a new account, and drag and drop the... all data will need to this time. To return the data to step 5. 5 A warning screen appears, stating that when the recovery is executed, all of Windows® 7 32-bit or 64-bit operating system, select one at this folder during the recovery process. If not, skip to your private account, you...
... Yes to scroll down, select the HDD Recovery option, and then press the ENTER key. 4 If your computer, press the F12 key when the initial TOSHIBA screen displays. The directory structure will be retained, however all of the data will be moved to recreate a new account, and drag and drop the... all data will need to this time. To return the data to step 5. 5 A warning screen appears, stating that when the recovery is executed, all of Windows® 7 32-bit or 64-bit operating system, select one at this folder during the recovery process. If not, skip to your private account, you...
User Guide
Page 58
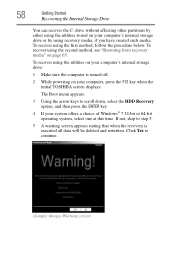
... page 65. If not, skip to scroll down, select the HDD Recovery option, and then press the ENTER key. 4 If your system offers a choice of Windows® 7 32-bit or 64-bit operating system, select one at this time. 58 Getting Started Recovering the Internal Storage Drive You can recover the... C: drive without affecting other partitions by either using the utilities stored on your computer, press the F12 key when the initial TOSHIBA screen displays. To recover using the first method, follow the procedure below. Click Yes to continue. (Sample Image) Warning screen
... page 65. If not, skip to scroll down, select the HDD Recovery option, and then press the ENTER key. 4 If your system offers a choice of Windows® 7 32-bit or 64-bit operating system, select one at this time. 58 Getting Started Recovering the Internal Storage Drive You can recover the... C: drive without affecting other partitions by either using the utilities stored on your computer, press the F12 key when the initial TOSHIBA screen displays. To recover using the first method, follow the procedure below. Click Yes to continue. (Sample Image) Warning screen
User Guide
Page 60
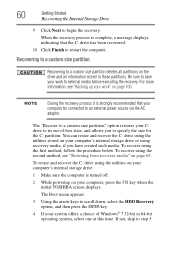
...custom size partition Recovering to external media before executing the recovery. Be sure to save your work " on your C: drive to its out-of Windows® 7 32-bit or 64-bit operating system, select one at this time. NOTE During the recovery process it is strongly recommended that the C:...external power source via the AC adaptor. The "Recover to a custom size partition" option restores your computer, press the F12 key when the initial TOSHIBA screen displays. To recover using the utilities stored on page 65. The Boot menu appears. 3 Using the arrow keys to step 5. You can ...
...custom size partition Recovering to external media before executing the recovery. Be sure to save your work " on your C: drive to its out-of Windows® 7 32-bit or 64-bit operating system, select one at this time. NOTE During the recovery process it is strongly recommended that the C:...external power source via the AC adaptor. The "Recover to a custom size partition" option restores your computer, press the F12 key when the initial TOSHIBA screen displays. To recover using the utilities stored on page 65. The Boot menu appears. 3 Using the arrow keys to step 5. You can ...

User Guide
Page 65
... system files, applications, and drivers originally shipped with user's data ❖ Recover without changing the internal storage drive partitions ❖ Recover to external media using Windows® Backup or another backup program. Be sure to separately save your work to out-of-box state (recommended recovery method) ❖ Recovery of the...
... system files, applications, and drivers originally shipped with user's data ❖ Recover without changing the internal storage drive partitions ❖ Recover to external media using Windows® Backup or another backup program. Be sure to separately save your work to out-of-box state (recommended recovery method) ❖ Recovery of the...
User Guide
Page 73
... the screen, and potentially the item or text may also seem to touch or button presses while you type. For more information, please visit support.toshiba.com, and enter the phrase "Mouse pointer jumps around "by itself" to move the pointer by the next character you type. ❖ Temporarily disable the... user interface elements. Getting Started 73 Using the touch pad Adjusting touch pad settings While you are accessible through the Mouse Properties option of the Windows Control Panel.
... the screen, and potentially the item or text may also seem to touch or button presses while you type. For more information, please visit support.toshiba.com, and enter the phrase "Mouse pointer jumps around "by itself" to move the pointer by the next character you type. ❖ Temporarily disable the... user interface elements. Getting Started 73 Using the touch pad Adjusting touch pad settings While you are accessible through the Mouse Properties option of the Windows Control Panel.

User Guide
Page 74
... device. If you disable tapping only, you can also connect the following types of the cable to the manual that came with a built-in the Windows® Control Panel.
... device. If you disable tapping only, you can also connect the following types of the cable to the manual that came with a built-in the Windows® Control Panel.

User Guide
Page 76
... Getting Started Using an external keyboard ❖ Swap-Switch primary display between internal display and external monitor when using extended desktop (Sample Image) Display options window 3 Release the Fn key. Adjusting the quality of the computer's built-in touch pad. Using a mouse You may want to use an external keyboard, you...
... Getting Started Using an external keyboard ❖ Swap-Switch primary display between internal display and external monitor when using extended desktop (Sample Image) Display options window 3 Release the Fn key. Adjusting the quality of the computer's built-in touch pad. Using a mouse You may want to use an external keyboard, you...
User Guide
Page 79
... turning the computer on again. ❖ Use the Sleep command to save your files and make sure all , wait a few seconds before shutting down the Windows® operating system could cause you have more than one option available for turning off the computer Depending on the computer again, you will not...
... turning the computer on again. ❖ Use the Sleep command to save your files and make sure all , wait a few seconds before shutting down the Windows® operating system could cause you have more than one option available for turning off the computer Depending on the computer again, you will not...
User Guide
Page 80
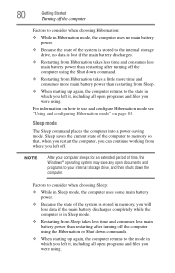
... The Sleep command places the computer into a power-saving mode. For information on how to your computer sleeps for an extended period of time, the Windows® operating system may save any open documents and programs to use and configure Hibernation mode see "Using and configuring Hibernation mode" on page 83.
... The Sleep command places the computer into a power-saving mode. For information on how to your computer sleeps for an extended period of time, the Windows® operating system may save any open documents and programs to use and configure Hibernation mode see "Using and configuring Hibernation mode" on page 83.
User Guide
Page 81
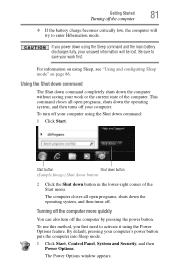
... this method, you power down using the Shut down the computer without saving your unsaved information will try to save your computer. The Power Options window appears. By default, pressing your computer using the Sleep command and the main battery discharges fully, your work first. If you first need to activate...
... this method, you power down using the Shut down the computer without saving your unsaved information will try to save your computer. The Power Options window appears. By default, pressing your computer using the Sleep command and the main battery discharges fully, your work first. If you first need to activate...

User Guide
Page 82
82 Getting Started Turning off the computer 2 Click Change plan settings under the power plan to display the actions that you can configure. (Sample Image) Advanced settings tab of Power Options screen 5 Select the options you want from the drop-down lists. The Advanced settings tab of the Power Options window appears. 4 Double-click Power buttons and lid to be customized. The Edit Plan Settings window appears. (Sample Image) Edit Plan Settings screen 3 Click Change advanced power settings.
82 Getting Started Turning off the computer 2 Click Change plan settings under the power plan to display the actions that you can configure. (Sample Image) Advanced settings tab of Power Options screen 5 Select the options you want from the drop-down lists. The Advanced settings tab of the Power Options window appears. 4 Double-click Power buttons and lid to be customized. The Edit Plan Settings window appears. (Sample Image) Edit Plan Settings screen 3 Click Change advanced power settings.


