User Manual
Page 29
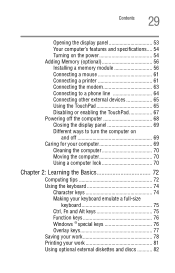
29 Contents Opening the display panel 53 Your computer's features and specifications.... 54 Turning on the power 54 Adding Memory (optional 56 Installing a memory module 56 Connecting a mouse 61 Connecting a printer 61 Connecting the modem 63 Connecting to a phone line 64 Connecting other external devices 65 Using the TouchPad ...
29 Contents Opening the display panel 53 Your computer's features and specifications.... 54 Turning on the power 54 Adding Memory (optional 56 Installing a memory module 56 Connecting a mouse 61 Connecting a printer 61 Connecting the modem 63 Connecting to a phone line 64 Connecting other external devices 65 Using the TouchPad ...

User Manual
Page 34
... conflict 179 A plan of action 180 Resolving hardware conflicts on your own .... 180 Fixing a problem with Device Manager .......... 182 Memory module problems 184 Power and the batteries 185 Keyboard problems 186 Display problems 187 Disk drive problems 189 Sound system problems 191 PC... Modem problems 196 Develop good computing habits 196 If you need further assistance 197 Before you call 198 Contacting Toshiba 198 Other Toshiba Internet Web sites 199 Toshiba's worldwide offices 200 Appendix A: Hot Keys 202 Volume Mute 202 Volume Control 202 Password security 203 Without a...
... conflict 179 A plan of action 180 Resolving hardware conflicts on your own .... 180 Fixing a problem with Device Manager .......... 182 Memory module problems 184 Power and the batteries 185 Keyboard problems 186 Display problems 187 Disk drive problems 189 Sound system problems 191 PC... Modem problems 196 Develop good computing habits 196 If you need further assistance 197 Before you call 198 Contacting Toshiba 198 Other Toshiba Internet Web sites 199 Toshiba's worldwide offices 200 Appendix A: Hot Keys 202 Volume Mute 202 Volume Control 202 Password security 203 Without a...
User Manual
Page 47
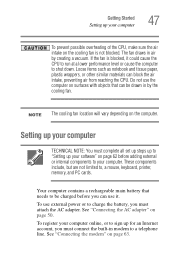
... shut down. Loose items such as notebook and tissue paper, plastic wrappers, or other similar materials can use external power or to , a mouse, keyboard, printer, memory, and PC cards. See "Connecting the AC adapter" on page 62 before you can block the air intake, preventing air from reaching the CPU.
... shut down. Loose items such as notebook and tissue paper, plastic wrappers, or other similar materials can use external power or to , a mouse, keyboard, printer, memory, and PC cards. See "Connecting the AC adapter" on page 62 before you can block the air intake, preventing air from reaching the CPU.
User Manual
Page 49
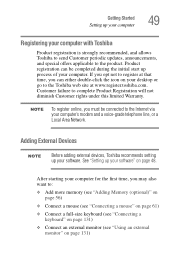
If you can be connected to register at www.register.toshiba.com. Customer failure to : ❖ Add more memory (see "Adding Memory (optional)" on page 56) ❖ Connect a mouse (see "Connecting a mouse" on page 61) ❖ Connect a full-size keyboard (see "... Devices NOTE Before adding external devices, Toshiba recommends setting up your computer 49 Registering your computer with Toshiba Product registration is strongly recommended, and allows Toshiba to send Customer periodic updates, announcements, and special offers applicable to the Toshiba web site at that time, you ...
If you can be connected to register at www.register.toshiba.com. Customer failure to : ❖ Add more memory (see "Adding Memory (optional)" on page 56) ❖ Connect a mouse (see "Connecting a mouse" on page 61) ❖ Connect a full-size keyboard (see "... Devices NOTE Before adding external devices, Toshiba recommends setting up your computer 49 Registering your computer with Toshiba Product registration is strongly recommended, and allows Toshiba to send Customer periodic updates, announcements, and special offers applicable to the Toshiba web site at that time, you ...
User Manual
Page 54
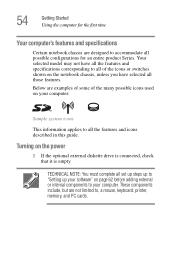
... chassis, unless you have selected all the features and icons described in this guide. These components include, but are not limited to, a mouse, keyboard, printer, memory, and PC cards. 54 Getting Started Using the computer for the first time Your computer's features and specifications Certain notebook chassis are designed to accommodate...
... chassis, unless you have selected all the features and icons described in this guide. These components include, but are not limited to, a mouse, keyboard, printer, memory, and PC cards. 54 Getting Started Using the computer for the first time Your computer's features and specifications Certain notebook chassis are designed to accommodate...
User Manual
Page 56
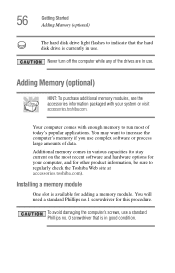
...to stay current on the most of data. Additional memory comes in use. To avoid damaging the computer's screws, use a standard Phillips no .1 screwdriver for your system or visit accessories.toshiba.com. 56 Getting Started Adding Memory (optional) The hard disk drive light flashes to indicate...software and hardware options for this procedure. Your computer comes with your computer, and for adding a memory module. You may want to regularly check the Toshiba Web site at accessories.toshiba.com). You will need a standard Phillips no . 0 screwdriver that the hard disk drive is ...
...to stay current on the most of data. Additional memory comes in use. To avoid damaging the computer's screws, use a standard Phillips no .1 screwdriver for your system or visit accessories.toshiba.com. 56 Getting Started Adding Memory (optional) The hard disk drive light flashes to indicate...software and hardware options for this procedure. Your computer comes with your computer, and for adding a memory module. You may want to regularly check the Toshiba Web site at accessories.toshiba.com). You will need a standard Phillips no . 0 screwdriver that the hard disk drive is ...

User Manual
Page 57
... and remove the incompatible module.If the computer is on page 120). 5 Close the display panel and turn off the computer using the Start menu. A memory module must be a long beep followed by a short beep. do not try to step 3. 1 If the computer is installed in slot A, thee will be a ...long beep followed by two short beeps. In this case, turn the computer upside down to locate the expansion memory slot cover to the computer. 4 Remove the battery (see "Removing the battery from the computer" on , begin at step 1; If you install or remove...
... and remove the incompatible module.If the computer is on page 120). 5 Close the display panel and turn off the computer using the Start menu. A memory module must be a long beep followed by a short beep. do not try to step 3. 1 If the computer is installed in slot A, thee will be a ...long beep followed by two short beeps. In this case, turn the computer upside down to locate the expansion memory slot cover to the computer. 4 Remove the battery (see "Removing the battery from the computer" on , begin at step 1; If you install or remove...

User Manual
Page 58
Removing the memory slot cover screw 7 Place the screw and the cover in a safe place so that secures the memory slot cover, then remove the memory slot cover. 58 Getting Started Adding Memory (optional) Expansion memory slot cover Base of the computer 6 Using a standard Phillips no. 0 screwdriver, unscrew the screw that you can retrieve them later.
Removing the memory slot cover screw 7 Place the screw and the cover in a safe place so that secures the memory slot cover, then remove the memory slot cover. 58 Getting Started Adding Memory (optional) Expansion memory slot cover Base of the computer 6 Using a standard Phillips no. 0 screwdriver, unscrew the screw that you can retrieve them later.

User Manual
Page 59
... not recognized, check the module's connection. If it with the screw. 11 When you insert into the computer. 8 Remove the new memory module from its pin connector on the side you turn the computer on either side of the module will click to discharge any static electricity ...you may have built up. Inserting the memory module 10 Seat the memory slot cover and secure it is recognized. The clips on , it down into place. Use System Properties to touch its antistatic packaging. 9 Insert...
... not recognized, check the module's connection. If it with the screw. 11 When you insert into the computer. 8 Remove the new memory module from its pin connector on the side you turn the computer on either side of the module will click to discharge any static electricity ...you may have built up. Inserting the memory module 10 Seat the memory slot cover and secure it is recognized. The clips on , it down into place. Use System Properties to touch its antistatic packaging. 9 Insert...
User Manual
Page 60
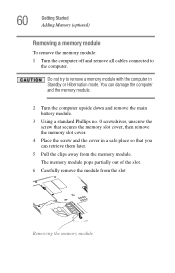
...computer in a safe place so that you can retrieve them later. 5 Pull the clips away from the slot Removing the memory module You can damage the computer and the memory module. 2 Turn the computer upside down and remove the main battery module. 3 Using a standard Phillips no. 0 screwdriver,... unscrew the screw that secures the memory slot cover, then remove the memory slot cover. 4 Place the screw and the cover in Standby or Hibernation mode. The memory module pops partially out of the slot. 6 Carefully remove the module from the...
...computer in a safe place so that you can retrieve them later. 5 Pull the clips away from the slot Removing the memory module You can damage the computer and the memory module. 2 Turn the computer upside down and remove the main battery module. 3 Using a standard Phillips no. 0 screwdriver,... unscrew the screw that secures the memory slot cover, then remove the memory slot cover. 4 Place the screw and the cover in Standby or Hibernation mode. The memory module pops partially out of the slot. 6 Carefully remove the module from the...

User Manual
Page 61
... documentation. To connect the mouse to your printer. Otherwise, you need a suitable USB cable, which may come with the screw. Connecting a mouse You may cause memory access problems. 7 Seat the cover and secure it while the computer is on the computer. To make the connection, you can connect it with your.... To determine if the printer is USB-compatible, check its cable into one from a computer or electronics store. Refer to your computer. Getting Started Adding Memory (optional) 61 Do not touch the connectors on the...
... documentation. To connect the mouse to your printer. Otherwise, you need a suitable USB cable, which may come with the screw. Connecting a mouse You may cause memory access problems. 7 Seat the cover and secure it while the computer is on the computer. To make the connection, you can connect it with your.... To determine if the printer is USB-compatible, check its cable into one from a computer or electronics store. Refer to your computer. Getting Started Adding Memory (optional) 61 Do not touch the connectors on the...
User Manual
Page 62
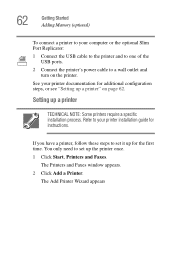
62 Getting Started Adding Memory (optional) To connect a printer to your computer or the optional Slim Port Replicator: 1 Connect the USB cable to the printer and to one of the ...
62 Getting Started Adding Memory (optional) To connect a printer to your computer or the optional Slim Port Replicator: 1 Connect the USB cable to the printer and to one of the ...

User Manual
Page 63
Getting Started Adding Memory (optional) 63 Sample Add Printer Wizard 3 Follow the on the back of your printer. Connecting the modem Your computer comes with an integrated modem, which you can connect as follows: 1 Locate the modem port on -screen instructions to set up your computer. 2 Plug one end of a telephone cable (purchased separately) into the modem port. Connecting the internal modem
Getting Started Adding Memory (optional) 63 Sample Add Printer Wizard 3 Follow the on the back of your printer. Connecting the modem Your computer comes with an integrated modem, which you can connect as follows: 1 Locate the modem port on -screen instructions to set up your computer. 2 Plug one end of a telephone cable (purchased separately) into the modem port. Connecting the internal modem

User Manual
Page 64
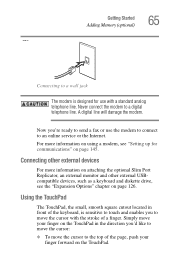
... other end of the telephone cable to the RJ11 wall jack. For more detailed information regarding your system's modem, visit the Toshiba web site at pcsupport.toshiba.com. 64 Getting Started Adding Memory (optional) 3 Connect the other end to the jack of a standard voice-grade telephone line. Connecting to a phone line Before you...
... other end of the telephone cable to the RJ11 wall jack. For more detailed information regarding your system's modem, visit the Toshiba web site at pcsupport.toshiba.com. 64 Getting Started Adding Memory (optional) 3 Connect the other end to the jack of a standard voice-grade telephone line. Connecting to a phone line Before you...
User Manual
Page 65
Getting Started Adding Memory (optional) 65 Connecting to a wall jack The modem is sensitive to touch and enables you to move the cursor with a standard analog telephone line. A digital ...
Getting Started Adding Memory (optional) 65 Connecting to a wall jack The modem is sensitive to touch and enables you to move the cursor with a standard analog telephone line. A digital ...

User Manual
Page 66
... to get information about an icon. NOTE Because the TouchPad is the left one and corresponds to the left mouse button. 66 Getting Started Adding Memory (optional) ❖ To move the cursor to the bottom of the page, drag your finger toward yourself. ❖ To move the cursor to the right...
... to get information about an icon. NOTE Because the TouchPad is the left one and corresponds to the left mouse button. 66 Getting Started Adding Memory (optional) ❖ To move the cursor to the bottom of the page, drag your finger toward yourself. ❖ To move the cursor to the right...

User Manual
Page 67
... the TouchPAD ON/OFF tab. The TouchPAD ON/OFF tab view window appears. 5 Select Disable or Enable, whichever is enabled by default. Getting Started Adding Memory (optional) 67 Disabling or enabling the TouchPad The TouchPad is appropriate. 6 Click Apply. 7 Click OK. The Control Panel window appears. 2 Click Printers and Other Hardware...
... the TouchPAD ON/OFF tab. The TouchPAD ON/OFF tab view window appears. 5 Select Disable or Enable, whichever is enabled by default. Getting Started Adding Memory (optional) 67 Disabling or enabling the TouchPad The TouchPad is appropriate. 6 Click Apply. 7 Click OK. The Control Panel window appears. 2 Click Printers and Other Hardware...
User Manual
Page 72
... . HINT: Some programs have an automatic save feature which you save it to the disk. This feature saves your work stays in the computer's temporary memory until you can turn on page 78 for details. 72 See "Saving your file to reconnect, or your software documentation for further information. See your...
... . HINT: Some programs have an automatic save feature which you save it to the disk. This feature saves your work stays in the computer's temporary memory until you can turn on page 78 for details. 72 See "Saving your file to reconnect, or your software documentation for further information. See your...
User Manual
Page 92
... disk activity lights are off the computer ❖ Standby, which restarts the computer Each option has its advantages. If you will only be able to memory and enters a low power mode ❖ Restart, which saves the current operating state to play them on again. 92 Learning the Basics Powering down the...
... disk activity lights are off the computer ❖ Standby, which restarts the computer Each option has its advantages. If you will only be able to memory and enters a low power mode ❖ Restart, which saves the current operating state to play them on again. 92 Learning the Basics Powering down the...

User Manual
Page 93
Restoring information from memory. Use it from the hard disk takes longer than restoring it when you are retained indefinitely. It uses Shut down if you need to reload ...
Restoring information from memory. Use it from the hard disk takes longer than restoring it when you are retained indefinitely. It uses Shut down if you need to reload ...


