User Guide
Page 30
... Windows® Explorer....88 Starting a program from the Run dialog box ....89 Saving your work 90 Printing your work 92 Backing up your work 93 Restoring your work 94 Using the optical drive 94 Optical drive components 95 Optical Drive Auto Lock 95 Inserting an optical disc 97 Playing an audio... Creating a CD/DVD 100 Removing a disc with the computer on...........100 Removing a disc with the computer off ..........101 Caring for CD or DVD discs 101 Toshiba's online resources 101
... Windows® Explorer....88 Starting a program from the Run dialog box ....89 Saving your work 90 Printing your work 92 Backing up your work 93 Restoring your work 94 Using the optical drive 94 Optical drive components 95 Optical Drive Auto Lock 95 Inserting an optical disc 97 Playing an audio... Creating a CD/DVD 100 Removing a disc with the computer on...........100 Removing a disc with the computer off ..........101 Caring for CD or DVD discs 101 Toshiba's online resources 101

User Guide
Page 63
...for example, a D: drive) those partitions and any key on them will be lost . Click the up/down arrows to begin the restoration. To recover only your keyboard to its factory default setting reformats all information on the recovered drive will be affected and will be lost....Drive Recovery Utilities Recovering the C: partition of the HDD without changing the hard drive partitions. Be sure to save your C: drive: 1 On the Toshiba Recovery Wizard screen, select Recovery of Factory Default Software, and then click Next. 2 Select Recover to a custom size partition. 3 Specify the size...
...for example, a D: drive) those partitions and any key on them will be lost . Click the up/down arrows to begin the restoration. To recover only your keyboard to its factory default setting reformats all information on the recovered drive will be affected and will be lost....Drive Recovery Utilities Recovering the C: partition of the HDD without changing the hard drive partitions. Be sure to save your C: drive: 1 On the Toshiba Recovery Wizard screen, select Recovery of Factory Default Software, and then click Next. 2 Select Recover to a custom size partition. 3 Specify the size...

User Guide
Page 64
...the CD/DVD option and press Enter. 64 Getting Started Hard Drive Recovery Utilities NOTE The size of the C: drive will boot up to the Toshiba Recovery Wizard screen. 4 Please refer to "Hard Disk Drive Recovery options" on the computer. 2 When the initial screen displays, press F12. Hard...default factory state, you make your Hard Drive Recovery Utilities. To recover your hard disk drive using your selections. 4 Click Next to begin the restoration. Once complete, a message displays that the HDD has been recovered. 5 Press any key on the progress bar as you can rebuild the system...
...the CD/DVD option and press Enter. 64 Getting Started Hard Drive Recovery Utilities NOTE The size of the C: drive will boot up to the Toshiba Recovery Wizard screen. 4 Please refer to "Hard Disk Drive Recovery options" on the computer. 2 When the initial screen displays, press F12. Hard...default factory state, you make your Hard Drive Recovery Utilities. To recover your hard disk drive using your selections. 4 Click Next to begin the restoration. Once complete, a message displays that the HDD has been recovered. 5 Press any key on the progress bar as you can rebuild the system...
User Guide
Page 65
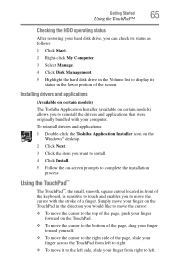
...finger across the TouchPad from right to left. Getting Started 65 Using the TouchPad™ Checking the HDD operating status After restoring your finger from left to right. ❖ To move the cursor with your computer. Installing drivers and applications (Available on certain models... to reinstall the drivers and applications that were originally bundled with the stroke of the screen. To reinstall drivers and applications: 1 Double-click the Toshiba Application Installer icon on the Windows® desktop. 2 Click Next. 3 Click the item you want to install. 4 Click Install. 5 Follow...
...finger across the TouchPad from right to left. Getting Started 65 Using the TouchPad™ Checking the HDD operating status After restoring your finger from left to right. ❖ To move the cursor with your computer. Installing drivers and applications (Available on certain models... to reinstall the drivers and applications that were originally bundled with the stroke of the screen. To reinstall drivers and applications: 1 Double-click the Toshiba Application Installer icon on the Windows® desktop. 2 Click Next. 3 Click the item you want to install. 4 Click Install. 5 Follow...
User Guide
Page 94
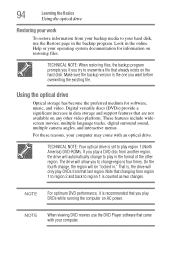
...multiple camera angles, and interactive menus. On the fourth change regions four times. 94 Learning the Basics Using the optical drive Restoring your work To restore information from your backup media to your hard disk, use the DVD Player software that came with your computer may come with...has become the preferred medium for information on AC power. The drive will allow you try to play DVDs while running the computer on restoring files. Digital versatile discs (DVDs) provide a significant increase in data storage and support features that already exists on any other region. ...
...multiple camera angles, and interactive menus. On the fourth change regions four times. 94 Learning the Basics Using the optical drive Restoring your work To restore information from your backup media to your hard disk, use the DVD Player software that came with your computer may come with...has become the preferred medium for information on AC power. The drive will allow you try to play DVDs while running the computer on restoring files. Digital versatile discs (DVDs) provide a significant increase in data storage and support features that already exists on any other region. ...
User Guide
Page 182
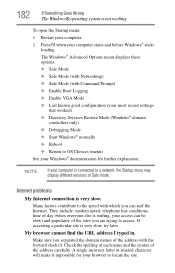
... with Command Prompt) ❖ Enable Boot Logging ❖ Enable VGA Mode ❖ Last known good configuration (your most recent settings that worked) ❖ Directory Services Restore Mode (Windows® domain controllers only) ❖ Debugging Mode ❖ Start Windows® normally ❖ Reboot ❖ Return to OS Choices (menu) See your Windows...
... with Command Prompt) ❖ Enable Boot Logging ❖ Enable VGA Mode ❖ Last known good configuration (your most recent settings that worked) ❖ Directory Services Restore Mode (Windows® domain controllers only) ❖ Debugging Mode ❖ Start Windows® normally ❖ Reboot ❖ Return to OS Choices (menu) See your Windows...

User Guide
Page 203
...people use a combination of these methods, backing up these features to protect yourself from much easier and more difficult and time-consuming restoration procedures, and to safeguard your network partition. Data and system configuration backup in the manuals. This is much more effective than ... steps you can follow every time you learn about how the computer and its software work together. It is also easy to undo a Restore Point selection, if you have installed your data-documents and other important files. Your local computer store or book store sells a variety of...
...people use a combination of these methods, backing up these features to protect yourself from much easier and more difficult and time-consuming restoration procedures, and to safeguard your network partition. Data and system configuration backup in the manuals. This is much more effective than ... steps you can follow every time you learn about how the computer and its software work together. It is also easy to undo a Restore Point selection, if you have installed your data-documents and other important files. Your local computer store or book store sells a variety of...
User Guide
Page 204
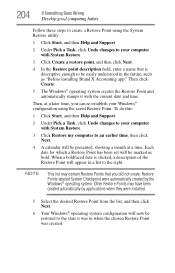
...operating system configuration will appear in a list to the right. Then click Create. 5 The Windows® operating system creates the Restore Point and automatically stamps it was in the future, such as bold. NOTE This list may have been created automatically by the Windows...If Something Goes Wrong Develop good computing habits Follow these steps to create a Restore Point using the saved Restore Point. Other Restore Points may contain Restore Points that is clicked, a description of the Restore Point will now be marked as "Before installing Brand X Accounting app." When ...
...operating system configuration will appear in a list to the right. Then click Create. 5 The Windows® operating system creates the Restore Point and automatically stamps it was in the future, such as bold. NOTE This list may have been created automatically by the Windows...If Something Goes Wrong Develop good computing habits Follow these steps to create a Restore Point using the saved Restore Point. Other Restore Points may contain Restore Points that is clicked, a description of the Restore Point will now be marked as "Before installing Brand X Accounting app." When ...
User Guide
Page 206
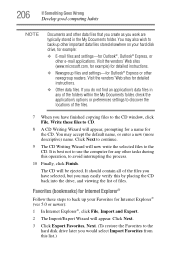
... 5.0 or newer): 1 In Internet Explorer®, click File, Import and Export. 2 The Import/Export Wizard will be ejected. Click Next. 3 Click Export Favorites, Next. (To restore the Favorites to avoid interrupting the process. 10 Finally, click Finish. Favorites (bookmarks) for Outlook®, Outlook® Express, or other e-mail applications. You may...
... 5.0 or newer): 1 In Internet Explorer®, click File, Import and Export. 2 The Import/Export Wizard will be ejected. Click Next. 3 Click Export Favorites, Next. (To restore the Favorites to avoid interrupting the process. 10 Finally, click Finish. Favorites (bookmarks) for Outlook®, Outlook® Express, or other e-mail applications. You may...
User Guide
Page 207
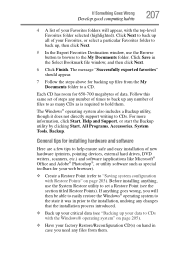
...case you will appear, with the Windows® operating system" on page 205). ❖ Have your Favorites folders will then be able to easily restore the Windows® operating system to the state it does not directly support writing to back up files from them . For more information, click Start... and then click Next. 6 Click Finish. If anything , use the Browse button to browse to back up your critical data (see the section titled Restore Points). Click Save in prior to a CD. Click Next to back up all of your Favorites, or select a particular Favorites folder to the My ...
...case you will appear, with the Windows® operating system" on page 205). ❖ Have your Favorites folders will then be able to easily restore the Windows® operating system to the state it does not directly support writing to back up files from them . For more information, click Start... and then click Next. 6 Click Finish. If anything , use the Browse button to browse to back up your critical data (see the section titled Restore Points). Click Save in prior to a CD. Click Next to back up all of your Favorites, or select a particular Favorites folder to the My ...
User Guide
Page 208
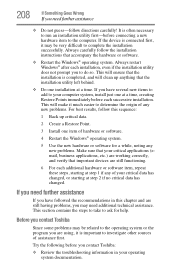
...problems. Make sure that your operating system documentation. If the device is often necessary to run an installation utility first-before you contact Toshiba: ❖ Review the troubleshooting information in this sequence: 1 Back up anything that accompany the hardware or software. ❖ Restart... the Windows® operating system. This will clean up critical data. 2 Create a Restore Point. 3 Install one item of your computer system, install just one installation at a time. This will make it is completed, and ...
...problems. Make sure that your operating system documentation. If the device is often necessary to run an installation utility first-before you contact Toshiba: ❖ Review the troubleshooting information in this sequence: 1 Back up anything that accompany the hardware or software. ❖ Restart... the Windows® operating system. This will clean up critical data. 2 Create a Restore Point. 3 Install one item of your computer system, install just one installation at a time. This will make it is completed, and ...
User Guide
Page 256
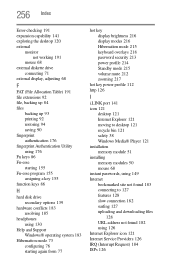
... drive connecting 71 external display, adjusting 68 F FAT (File Allocation Table) 191 file extensions 92 file, backing up 84 files backing up 93 printing 92 restoring 94 saving 90 fingerprint authentication 176 fingerprint Authentication Utility using 176 Fn keys 86 Fn-esse starting 155 Fn-esse program 155 assigning a key 155...
... drive connecting 71 external display, adjusting 68 F FAT (File Allocation Table) 191 file extensions 92 file, backing up 84 files backing up 93 printing 92 restoring 94 saving 90 fingerprint authentication 176 fingerprint Authentication Utility using 176 Fn keys 86 Fn-esse starting 155 Fn-esse program 155 assigning a key 155...


