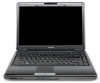
User Manual
Page 4
...body. The resulting excessive current follow installation instructions closely. ■ Do not carry a battery in your pocket, purse, or other items that the cable is inside a carrying case. ■ Use only the AC adapter and batteries that the total ampere rating of the products plugged in the base...be tripped over or stepped on. ■ Place the AC adapter in damage from the computer, turn it on your AC adapter's power cable and that will reduce cooling; Allowing sustained contact with papers or other container where metal objects (such as car keys) could cause discomfort or...
...body. The resulting excessive current follow installation instructions closely. ■ Do not carry a battery in your pocket, purse, or other items that the cable is inside a carrying case. ■ Use only the AC adapter and batteries that the total ampere rating of the products plugged in the base...be tripped over or stepped on. ■ Place the AC adapter in damage from the computer, turn it on your AC adapter's power cable and that will reduce cooling; Allowing sustained contact with papers or other container where metal objects (such as car keys) could cause discomfort or...
User Manual
Page 5
...'s external monitor port, USB port, serial port, parallel port, PS/2 mouse/keyboard port and microphone jack. Shielded cables must accept any interference received, including interference that may cause undesired operation. Operation is likely to result in accordance with...that interference will not occur in a residential installation. This device may cause harmful interference to radio communications. Contact Address: Telephone: TOSHIBA America Information Systems, Inc. 9740 Irvine Boulevard Irvine, California 92618-1697 (949) 583-3000 User's Manual v This device ...
...'s external monitor port, USB port, serial port, parallel port, PS/2 mouse/keyboard port and microphone jack. Shielded cables must accept any interference received, including interference that may cause undesired operation. Operation is likely to result in accordance with...that interference will not occur in a residential installation. This device may cause harmful interference to radio communications. Contact Address: Telephone: TOSHIBA America Information Systems, Inc. 9740 Irvine Boulevard Irvine, California 92618-1697 (949) 583-3000 User's Manual v This device ...
User Manual
Page 28
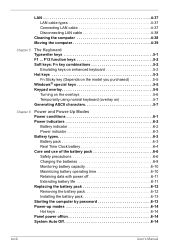
LAN 4-37 LAN cable types 4-37 Connecting LAN cable 4-37 Disconnecting LAN cable 4-38 Cleaning the computer 4-38 Moving the computer 4-39 Chapter 5 The Keyboard Typewriter keys 5-1 F1 ... F12 function keys 5-2 Soft keys: Fn key combinations 5-2 Emulating keys ...
LAN 4-37 LAN cable types 4-37 Connecting LAN cable 4-37 Disconnecting LAN cable 4-38 Cleaning the computer 4-38 Moving the computer 4-39 Chapter 5 The Keyboard Typewriter keys 5-1 F1 ... F12 function keys 5-2 Soft keys: Fn key combinations 5-2 Emulating keys ...
User Manual
Page 45
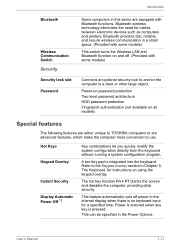
...with some models) Connects an optional security lock to anchor the computer to the internal display when there is no keyboard input for cables between electronic devices such as computers and printers. Power is restored when any key is integrated into the keyboard. Hot Keys Keypad ...the need for a specified time. This can be specified in this series are advanced features, which make the computer more convenient to TOSHIBA computers or are equipped with some models) This switch turns the Wireless LAN and Bluetooth function on using the keypad overlay. Introduction ...
...with some models) Connects an optional security lock to anchor the computer to the internal display when there is no keyboard input for cables between electronic devices such as computers and printers. Power is restored when any key is integrated into the keyboard. Hot Keys Keypad ...the need for a specified time. This can be specified in this series are advanced features, which make the computer more convenient to TOSHIBA computers or are equipped with some models) This switch turns the Wireless LAN and Bluetooth function on using the keypad overlay. Introduction ...

User Manual
Page 57
...has built-in 19V Jack The AC adaptor connects to this port. A digital line will damage the modem. User's Manual 2-5 The optional security cable anchors your computer. Using the wrong adaptor can damage your computer to a desk or other large object to deter theft. The Grand Tour LAN Jack... Modem Jack FM Antenna Jack Security Lock This jack lets you purchased.) ■ In case of a lightning storm, unplug the modem cable from the telephone jack. ■ Do not connect the modem to a digital telephone line. Refer to Chapter 4, Operating Basics, for Ethernet LAN (...
...has built-in 19V Jack The AC adaptor connects to this port. A digital line will damage the modem. User's Manual 2-5 The optional security cable anchors your computer. Using the wrong adaptor can damage your computer to a desk or other large object to deter theft. The Grand Tour LAN Jack... Modem Jack FM Antenna Jack Security Lock This jack lets you purchased.) ■ In case of a lightning storm, unplug the modem cable from the telephone jack. ■ Do not connect the modem to a digital telephone line. Refer to Chapter 4, Operating Basics, for Ethernet LAN (...
User Manual
Page 76
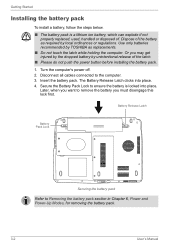
... Pack Lock to remove the battery you may get injured by the dropped battery by unintentional release of the battery as required by TOSHIBA as replacements. ■ Do not touch the latch while holding the computer. Battery Release Latch Battery Pack Lock Securing the battery pack ...disengage this lock first. Dispose of the latch. ■ Please do not push the power button before installing the battery pack. 1. Disconnect all cables connected to Removing the battery pack section in Chapter 6, Power and Power-Up Modes, for removing the battery pack. 3-2 User's Manual The Battery...
... Pack Lock to remove the battery you may get injured by the dropped battery by unintentional release of the battery as required by TOSHIBA as replacements. ■ Do not touch the latch while holding the computer. Battery Release Latch Battery Pack Lock Securing the battery pack ...disengage this lock first. Dispose of the latch. ■ Please do not push the power button before installing the battery pack. 1. Disconnect all cables connected to Removing the battery pack section in Chapter 6, Power and Power-Up Modes, for removing the battery pack. 3-2 User's Manual The Battery...
User Manual
Page 77
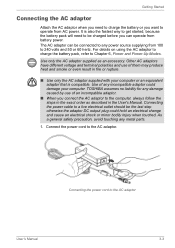
... the AC adaptor to charge the battery pack, refer to the computer, always follow the steps in the exact order as an accessory. TOSHIBA assumes no liability for any power source supplying from AC power. Connect the power cord to be charged before you can be the last ...have different voltage and terminal polarities and use of them may produce heat and smoke or even result in the User's Manual. Connecting the power cable to operate from 100 to the AC adaptor User's Manual 3-3 As a general safety precaution, avoid touching any incompatible adaptor could hold an electrical...
... the AC adaptor to charge the battery pack, refer to the computer, always follow the steps in the exact order as an accessory. TOSHIBA assumes no liability for any power source supplying from AC power. Connect the power cord to be charged before you can be the last ...have different voltage and terminal polarities and use of them may produce heat and smoke or even result in the User's Manual. Connecting the power cable to operate from 100 to the AC adaptor User's Manual 3-3 As a general safety precaution, avoid touching any incompatible adaptor could hold an electrical...
User Manual
Page 118
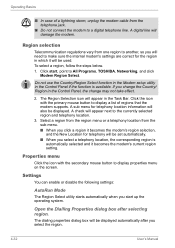
... regions that the modem supports. Region selection Telecommunication regulations vary from one region to another, so you will appear next to All Programs, TOSHIBA, Networking, and click Modem Region Select. Click start up the operating system. Settings You can enable or disable the following settings: AutoRun...menu on the screen. Properties menu Click the icon with the primary mouse button to display a list of a lightning storm, unplug the modem cable from the sub-menu. ■ When you click a region it becomes the modem's region selection, and the New Location for telephony will...
... regions that the modem supports. Region selection Telecommunication regulations vary from one region to another, so you will appear next to All Programs, TOSHIBA, Networking, and click Modem Region Select. Click start up the operating system. Settings You can enable or disable the following settings: AutoRun...menu on the screen. Properties menu Click the icon with the primary mouse button to display a list of a lightning storm, unplug the modem cable from the sub-menu. ■ When you click a region it becomes the modem's region selection, and the New Location for telephony will...
User Manual
Page 119
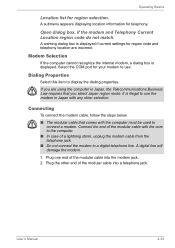
...is displayed. If you select Japan region mode. Connect the end of the modular cable with any other end of the modular cable into the modem jack. 2. Plug one end of a lightning storm, unplug the modem cable from the telephone jack. ■ Do not connect the modem to a digital...with the computer must be used to the computer. ■ In case of the modular cable into a telephone jack. Connecting To connect the modem cable, follow the steps below. ■ The modular cable that you are incorrect. Plug the other selection. Modem Selection If the computer cannot recognize ...
...is displayed. If you select Japan region mode. Connect the end of the modular cable with any other end of the modular cable into the modem jack. 2. Plug one end of a lightning storm, unplug the modem cable from the telephone jack. ■ Do not connect the modem to a digital...with the computer must be used to the computer. ■ In case of the modular cable into a telephone jack. Connecting To connect the modem cable, follow the steps below. ■ The modular cable that you are incorrect. Plug the other selection. Modem Selection If the computer cannot recognize ...
User Manual
Page 120
Pinch the lever on the cable or move the computer while the cable is connected. Disconnecting To disconnect the internal modem cable, follow the steps below. 1. In the same way, pull the cable's other connector out of the computer. 4-34 User's Manual Operating Basics Connecting the internal modem Do not pull on the connector in the telephone jack and pull out the connector. 2.
Pinch the lever on the cable or move the computer while the cable is connected. Disconnecting To disconnect the internal modem cable, follow the steps below. 1. In the same way, pull the cable's other connector out of the computer. 4-34 User's Manual Operating Basics Connecting the internal modem Do not pull on the connector in the telephone jack and pull out the connector. 2.
User Manual
Page 124
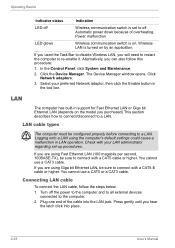
...also follow the steps below. 1. Wireless LAN is on. Click the Device Manager. Click Network adaptors. 3. You cannot use a CAT3 cable. If you used the Task Bar to disable Wireless LAN, you are using Giga bit Ethernet LAN, be configured properly before connecting to...by an application. In the Control Panel, click System and Maintenance. 2. You cannot use a CAT5 or a CAT3 cable. Connecting LAN cable To connect the LAN cable, follow this procedure: 1. Operating Basics Indicator status Indication LED off Wireless communication switch is set -up procedures. Power ...
...also follow the steps below. 1. Wireless LAN is on. Click the Device Manager. Click Network adaptors. 3. You cannot use a CAT3 cable. If you used the Task Bar to disable Wireless LAN, you are using Giga bit Ethernet LAN, be configured properly before connecting to...by an application. In the Control Panel, click System and Maintenance. 2. You cannot use a CAT5 or a CAT3 cable. Connecting LAN cable To connect the LAN cable, follow this procedure: 1. Operating Basics Indicator status Indication LED off Wireless communication switch is set -up procedures. Power ...
User Manual
Page 125
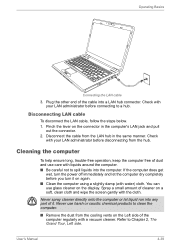
... with your LAN administrator before disconnecting from the LAN hub in the computer's LAN jack and pull out the connector. 2. Disconnect the cable from the hub. You can use harsh or caustic chemical products to clean the computer. ■ Remove the dust from the cooling ...around the computer. ■ Be careful not to Chapter 2, The Grand Tour, Left side. Check with the cloth. Disconnecting LAN cable To disconnect the LAN cable, follow the steps below. 1. Refer to spill liquids into the computer. Never spray cleaner directly onto the computer or let liquid run...
... with your LAN administrator before disconnecting from the LAN hub in the computer's LAN jack and pull out the connector. 2. Disconnect the cable from the hub. You can use harsh or caustic chemical products to clean the computer. ■ Remove the dust from the cooling ...around the computer. ■ Be careful not to Chapter 2, The Grand Tour, Left side. Check with the cloth. Disconnecting LAN cable To disconnect the LAN cable, follow the steps below. 1. Refer to spill liquids into the computer. Never spray cleaner directly onto the computer or let liquid run...
User Manual
Page 126
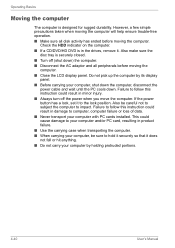
... result in the drives, remove it does not fall or hit anything. ■ Do not carry your computer, shut down the computer, disconnect the power cable and wait until the PC cools down ) the computer. ■ Disconnect the AC adaptor and all disk activity has ended before moving the computer. Also...
... result in the drives, remove it does not fall or hit anything. ■ Do not carry your computer, shut down the computer, disconnect the power cable and wait until the PC cools down ) the computer. ■ Disconnect the AC adaptor and all disk activity has ended before moving the computer. Also...

User Manual
Page 146
... might also replace a discharged battery pack with a charged spare when you will be replaced. Save your computer away from an AC power source. Remove all cables connected to remove and install the battery pack. Slide and hold the battery release latch to free the battery pack after fully recharging the battery...
... might also replace a discharged battery pack with a charged spare when you will be replaced. Save your computer away from an AC power source. Remove all cables connected to remove and install the battery pack. Slide and hold the battery release latch to free the battery pack after fully recharging the battery...

User Manual
Page 147
Or you enter the password incorrectly three times in Chapter 3, Getting Started. Disconnect all cables connected to F9 do not work. Turn on to retry password entry. If you may get injured by the dropped battery by TOSHIBA as replacements. ■ Do not touch the latch while holding the computer. In this point...
Or you enter the password incorrectly three times in Chapter 3, Getting Started. Disconnect all cables connected to F9 do not work. Turn on to retry password entry. If you may get injured by the dropped battery by TOSHIBA as replacements. ■ Do not touch the latch while holding the computer. In this point...
User Manual
Page 159
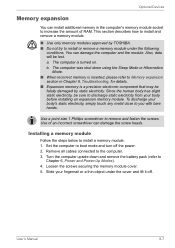
... by TOSHIBA. ■ Do not try to Memory expansion section in the computer's memory module socket to increase the amount of an incorrect screwdriver can damage the computer and the module. Use of RAM. To discharge your body's static electricity, simply touch any metal close to the computer. 3. Remove all cables connected...
... by TOSHIBA. ■ Do not try to Memory expansion section in the computer's memory module socket to increase the amount of an incorrect screwdriver can damage the computer and the module. Use of RAM. To discharge your body's static electricity, simply touch any metal close to the computer. 3. Remove all cables connected...
User Manual
Page 161
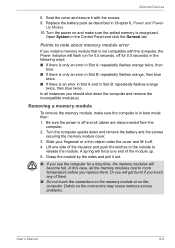
... access problems. User's Manual 8-9 Or you should shut down and remove the battery and the screws securing the memory module cover. 3. Optional Devices 8. In all cables are disconnected from the computer. 2.
... access problems. User's Manual 8-9 Or you should shut down and remove the battery and the screws securing the memory module cover. 3. Optional Devices 8. In all cables are disconnected from the computer. 2.
User Manual
Page 163
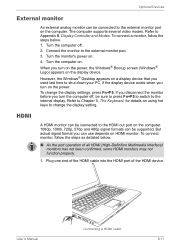
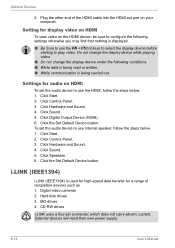
...when you can be supported. HDMI A HDMI monitor can be connected to the HDMI out port on the display device. User's Manual Connecting a HDMI cable 8-11 Connect the monitor to Appendix B, Display Controller and Modes. When you used last time to the internal display. To connect monitor, follow the... monitor before you turn on HDMI monitor. But actual signal format you turn the computer off . 2. Plug one end of the HDMI cable into the HDMI port of all HDMI (High-Definition Multimedia Interface) monitors has not been confirmed, some HDMI monitors may not function properly. 1.
...when you can be supported. HDMI A HDMI monitor can be connected to the HDMI out port on the display device. User's Manual Connecting a HDMI cable 8-11 Connect the monitor to Appendix B, Display Controller and Modes. When you used last time to the internal display. To connect monitor, follow the... monitor before you turn on HDMI monitor. But actual signal format you turn the computer off . 2. Plug one end of the HDMI cable into the HDMI port of all HDMI (High-Definition Multimedia Interface) monitors has not been confirmed, some HDMI monitors may not function properly. 1.
User Manual
Page 164
... the HDMI device, be sure to configure the following conditions. ■ While data is being carried out. MO drives 4. Settings for a range of the HDMI cable into the HDMI out port on HDMI To set the audio device to play video. Click Control Panel. 3. Click Hardware and Sound. 4. Click Sound. 5. Click...
... the HDMI device, be sure to configure the following conditions. ■ While data is being carried out. MO drives 4. Settings for a range of the HDMI cable into the HDMI out port on HDMI To set the audio device to play video. Click Control Panel. 3. Click Hardware and Sound. 4. Click Sound. 5. Click...
User Manual
Page 165
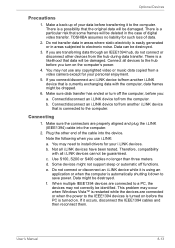
...end of digital video transfer. c. d. Some devices might be damaged. User's Manual 8-13 There is easily generated or in the case of the cable into the computer. 2. You may not correctly be destroyed. 3. Connect/disconnect an i.LINK device to electronic noise. Note the following when you ... not connect or disconnect an i.LINK device while it down to the computer. TOSHIBA assumes no longer than three meters. Make sure data transfer has ended or turn on . Use S100, S200 or S400 cables no liability for such loss of your data before you connect/disconnect an i.LINK...
...end of digital video transfer. c. d. Some devices might be damaged. User's Manual 8-13 There is easily generated or in the case of the cable into the computer. 2. You may not correctly be destroyed. 3. Connect/disconnect an i.LINK device to electronic noise. Note the following when you ... not connect or disconnect an i.LINK device while it down to the computer. TOSHIBA assumes no longer than three meters. Make sure data transfer has ended or turn on . Use S100, S200 or S400 cables no liability for such loss of your data before you connect/disconnect an i.LINK...


