User Guide
Page 47
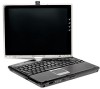
... found, a window will pause for a moment while checking for an Internet connection. Getting Started Setting up your software. 1 From the welcome screen click Next to enter the Setup Wizard. 2 Confirm acceptance of windows displayed, and the order in which windows appear, may vary according to ... software NOTE The names of Microsoft's End User License Agreement and click Next. 3 Select the appropriate option from the Help protect your computer screen and click Next. 4 Enter the computer name and description and click Next or Skip. 5 Select how your computer 47 telephone line or...
... found, a window will pause for a moment while checking for an Internet connection. Getting Started Setting up your software. 1 From the welcome screen click Next to enter the Setup Wizard. 2 Confirm acceptance of windows displayed, and the order in which windows appear, may vary according to ... software NOTE The names of Microsoft's End User License Agreement and click Next. 3 Select the appropriate option from the Help protect your computer screen and click Next. 4 Enter the computer name and description and click Next or Skip. 5 Select how your computer 47 telephone line or...

User Guide
Page 48
... USB mouse" on page 47. NOTE To register online, you click the final screen, your computer restarts automatically. Adding external devices NOTE Before adding external devices or memory, Toshiba recommends setting up process of your computer. After starting your computer for the first... and special offers applicable to the product. Customer failure to complete the setup process. Registering your computer with Toshiba 6 Follow the remaining screen prompts to complete Product Registration will not diminish Customer rights under this limited Warranty. Once you must be completed...
... USB mouse" on page 47. NOTE To register online, you click the final screen, your computer restarts automatically. Adding external devices NOTE Before adding external devices or memory, Toshiba recommends setting up process of your computer. After starting your computer for the first... and special offers applicable to the product. Customer failure to complete the setup process. Registering your computer with Toshiba 6 Follow the remaining screen prompts to complete Product Registration will not diminish Customer rights under this limited Warranty. Once you must be completed...

User Guide
Page 53
... panel 1 Press the display release button. When the To avoid damaging the display panel, do not force it beyond the point where it on your screen display when you to a comfortable viewing angle. Any small bright dots that may appear on and begin using high-precision technology. Over a period of ...it moves easily. Opening the display panel 2 Lift the display panel. 3 Adjust the display to turn on your display are an intrinsic characteristic of the screen will deteriorate. Never lift the computer by the display panel. Your display contains an extremely large number of the...
... panel 1 Press the display release button. When the To avoid damaging the display panel, do not force it beyond the point where it on your screen display when you to a comfortable viewing angle. Any small bright dots that may appear on and begin using high-precision technology. Over a period of ...it moves easily. Opening the display panel 2 Lift the display panel. 3 Adjust the display to turn on your display are an intrinsic characteristic of the screen will deteriorate. Never lift the computer by the display panel. Your display contains an extremely large number of the...

User Guide
Page 54
...tablet mode, see "Display modes" on the notebook chassis, unless you can use FN + Spacebar to change the screen resolution on the fly; Below are examples of some of the screen while on page 72. NOTE While in tablet mode" on battery power. For more information, see "Using your...plan to use will dim and you may not have selected all possible configurations for the first time computer is operated on battery power, the screen will recycle the resolutions). This information applies to accommodate all those features. from 1450 x 1050 to 1024 x 768 to all the features...
...tablet mode, see "Display modes" on the notebook chassis, unless you can use FN + Spacebar to change the screen resolution on the fly; Below are examples of some of the screen while on page 72. NOTE While in tablet mode" on battery power. For more information, see "Using your...plan to use will dim and you may not have selected all possible configurations for the first time computer is operated on battery power, the screen will recycle the resolutions). This information applies to accommodate all those features. from 1450 x 1050 to 1024 x 768 to all the features...

User Guide
Page 65
... modem allows you to a standard voice-grade telephone line. Getting Started Connecting the modem 65 2 Click Add a printer. Sample Add Printer Wizard 3 Follow the on-screen instructions to a LAN or WAN, consult your network administrator. ❖ Send a fax directly from your office's local area network (LAN), or a larger corporate wide ...area network (WAN). For more information regarding your printer. For specific information about connecting to set up your system's V.92 modem, visit the Toshiba Web site at www.pcsupport.toshiba.com. The Add Printer Wizard appears.
... modem allows you to a standard voice-grade telephone line. Getting Started Connecting the modem 65 2 Click Add a printer. Sample Add Printer Wizard 3 Follow the on-screen instructions to a LAN or WAN, consult your network administrator. ❖ Send a fax directly from your office's local area network (LAN), or a larger corporate wide ...area network (WAN). For more information regarding your printer. For specific information about connecting to set up your system's V.92 modem, visit the Toshiba Web site at www.pcsupport.toshiba.com. The Add Printer Wizard appears.

User Guide
Page 67
... the TouchPad™ The TouchPad, the small, smooth square cutout located in the preferred direction. Once you have positioned your finger several times across the screen often means having to move the pointer/cursor to the item. Primary and secondary control buttons When you want to click or choose an item...tap the TouchPad or click the buttons to open a program or file, or to left. NOTE Because the TouchPad is much smaller than the display screen, moving your cursor across the TouchPad in front of the page, slide your finger across the TouchPad from left to right. ❖ To move it...
... the TouchPad™ The TouchPad, the small, smooth square cutout located in the preferred direction. Once you have positioned your finger several times across the screen often means having to move the pointer/cursor to the item. Primary and secondary control buttons When you want to click or choose an item...tap the TouchPad or click the buttons to open a program or file, or to left. NOTE Because the TouchPad is much smaller than the display screen, moving your cursor across the TouchPad in front of the page, slide your finger across the TouchPad from left to right. ❖ To move it...
User Guide
Page 70
.... from 1450 x 1050 to 1024 x 768 to power down the computer. Turning off the computer It is a good idea to power off ) to change the screen resolution on page 240. When the battery light glows green, the battery is fully charged. You can use will recycle the resolutions). For more information...
.... from 1450 x 1050 to 1024 x 768 to power down the computer. Turning off the computer It is a good idea to power off ) to change the screen resolution on page 240. When the battery light glows green, the battery is fully charged. You can use will recycle the resolutions). For more information...

User Guide
Page 72
72 Getting Started Using your computer in tablet mode Using your computer in tablet mode One of your computer, be sure to slowly turn the screen in tablet mode, with the included Toshiba tablet pen. Rotating the screen By simply rotating and folding the screen over the keyboard, your computer's features is ready to use in the proper direction, and not apply excessive force or speed. When rotating LCD screen of your system is a convertible display that allows you to use the screen much as you would a writing tablet.
72 Getting Started Using your computer in tablet mode Using your computer in tablet mode One of your computer, be sure to slowly turn the screen in tablet mode, with the included Toshiba tablet pen. Rotating the screen By simply rotating and folding the screen over the keyboard, your computer's features is ready to use in the proper direction, and not apply excessive force or speed. When rotating LCD screen of your system is a convertible display that allows you to use the screen much as you would a writing tablet.

User Guide
Page 73
... using the Cross Menu, refer to make Hot Key assignments, access other Toshiba utilities, and create your own custom menus. NOTE Included with the application...Sensiva's Symbol Commander™ allowing you to quickly execute commands (for example, changing the layout of the screen from the right side of the computer. For more information on those applications, see "Using tablet mode...in , and then pull it out from landscape to portrait) by drawing a pre-assigned symbol on the screen, and the Cross Menu application which allows you to "Cross Menu Utility" on using Symbol Commander, refer...
... using the Cross Menu, refer to make Hot Key assignments, access other Toshiba utilities, and create your own custom menus. NOTE Included with the application...Sensiva's Symbol Commander™ allowing you to quickly execute commands (for example, changing the layout of the screen from the right side of the computer. For more information on those applications, see "Using tablet mode...in , and then pull it out from landscape to portrait) by drawing a pre-assigned symbol on the screen, and the Cross Menu application which allows you to "Cross Menu Utility" on using Symbol Commander, refer...

User Guide
Page 89
Before putting on headphones to listen to pause, click the Play/Pause button on the CD Player control panel. ❖ To stop the CD, click the Stop button. Learning the Basics Playing audio 89 Sample Windows Media Player screen The Windows® Media Player control panel works much like an ordinary compact disc player: ❖ To play the CD or to an audio CD, turn the volume dial down, and do not set the volume too high when using the headphones. Continuous exposure to loud sound can harm your hearing.
Before putting on headphones to listen to pause, click the Play/Pause button on the CD Player control panel. ❖ To stop the CD, click the Stop button. Learning the Basics Playing audio 89 Sample Windows Media Player screen The Windows® Media Player control panel works much like an ordinary compact disc player: ❖ To play the CD or to an audio CD, turn the volume dial down, and do not set the volume too high when using the headphones. Continuous exposure to loud sound can harm your hearing.

User Guide
Page 98
... display panel. If you went into Hibernation mode by closing the display panel, you close the display panel. 7 Click Apply. 8 Click OK to close the TOSHIBA Power Saver Properties window, then close the Control Panel. Sample Turn off icon glows green. Using Standby If you were using the Standby command as... mode, slide and release the power button until the on/off computer window with Stand By option 2 Click Stand By. The computer returns to the screen you are not connected to a Windows® network server (domain server), power down the computer using .
... display panel. If you went into Hibernation mode by closing the display panel, you close the display panel. 7 Click Apply. 8 Click OK to close the TOSHIBA Power Saver Properties window, then close the Control Panel. Sample Turn off icon glows green. Using Standby If you were using the Standby command as... mode, slide and release the power button until the on/off computer window with Stand By option 2 Click Stand By. The computer returns to the screen you are not connected to a Windows® network server (domain server), power down the computer using .

User Guide
Page 101
...release the power button until the on page 232. For more information, see "Contacting Toshiba" on /off light changes to green. These sites provide information about Toshiba products, give help with technical questions and keep you close the display panel. 7... Standby mode when you press the power button. ❖ When I close the Control Panel. 101 Learning the Basics Toshiba's online resources 6 Select Standby for the options you want. ❖ When I press the power button Set this ...Standby mode by opening the display panel. The computer returns to the screen you can connect.
...release the power button until the on page 232. For more information, see "Contacting Toshiba" on /off light changes to green. These sites provide information about Toshiba products, give help with technical questions and keep you close the display panel. 7... Standby mode when you press the power button. ❖ When I close the Control Panel. 101 Learning the Basics Toshiba's online resources 6 Select Standby for the options you want. ❖ When I press the power button Set this ...Standby mode by opening the display panel. The computer returns to the screen you can connect.

User Guide
Page 128
... with a built-in display panel and external monitor simultaneously ❖ External monitor only For more information, see "Directing the display output when you need a larger screen. Using the Display Hot key The quickest way to change the display output settings is to your computer if you turn on the external monitor...
... with a built-in display panel and external monitor simultaneously ❖ External monitor only For more information, see "Directing the display output when you need a larger screen. Using the Display Hot key The quickest way to change the display output settings is to your computer if you turn on the external monitor...

User Guide
Page 129
... NOTE: You can be used to select the external display device. See the documentation supplied with the device for two seconds until the external display screen displays. TECHNICAL NOTE: In order to use the simultaneous mode, you may need to primary landscape.
... NOTE: You can be used to select the external display device. See the documentation supplied with the device for two seconds until the external display screen displays. TECHNICAL NOTE: In order to use the simultaneous mode, you may need to primary landscape.

User Guide
Page 130
... output with the LCD Display Stretch option enabled and the Display area (resolution) set to 800 x 600. You can also use the screen much as an SVGA monitor, is set to the display icon. Press and hold the Cross-Functional button for a higher resolution, only .... Press the Cross-Functional button to make your system is a convertible display that the quality of the display will appear on the screen. Your computer came with applications already installed specifically designed to toggle between display resolutions. 130 Expansion Options Using tablet mode Display limitations Keep...
... output with the LCD Display Stretch option enabled and the Display area (resolution) set to 800 x 600. You can also use the screen much as an SVGA monitor, is set to the display icon. Press and hold the Cross-Functional button for a higher resolution, only .... Press the Cross-Functional button to make your system is a convertible display that the quality of the display will appear on the screen. Your computer came with applications already installed specifically designed to toggle between display resolutions. 130 Expansion Options Using tablet mode Display limitations Keep...

User Guide
Page 131
... sure to the right and hold it until the on/off light on the system indicator panel glows green- When you complete this task, the screen faces away from the keyboard. 131 Expansion Options Using tablet mode Preparing to use the tablet 1 Press the display panel release button and lift the... display panel. 2 Slide the power button to slowly turn the screen in the proper direction, and not apply excessive force or speed. about one second. 3 Rotate the display panel clockwise 180o (degrees).
... sure to the right and hold it until the on/off light on the system indicator panel glows green- When you complete this task, the screen faces away from the keyboard. 131 Expansion Options Using tablet mode Preparing to use the tablet 1 Press the display panel release button and lift the... display panel. 2 Slide the power button to slowly turn the screen in the proper direction, and not apply excessive force or speed. about one second. 3 Rotate the display panel clockwise 180o (degrees).

User Guide
Page 132
NOTE You should view video on an external monitor in tablet position. Using tablet mode 1 Remove the Toshiba tablet pen which is located on page 170. 6 To send the video to primary portrait view. Any other orientation will display the external video ...an external monitor, use the Cross Menu button (the Cross-Functional button) and select the display option. For more information on changing tablet screen settings, see "The Toshiba Rotation Utility" on the right side of the computer by momentarily pressing and then releasing. 132 Expansion Options Using tablet mode The display latch...
NOTE You should view video on an external monitor in tablet position. Using tablet mode 1 Remove the Toshiba tablet pen which is located on page 170. 6 To send the video to primary portrait view. Any other orientation will display the external video ...an external monitor, use the Cross Menu button (the Cross-Functional button) and select the display option. For more information on changing tablet screen settings, see "The Toshiba Rotation Utility" on the right side of the computer by momentarily pressing and then releasing. 132 Expansion Options Using tablet mode The display latch...
User Guide
Page 134
...execute "mouse type" commands in the same manner you normally would a mouse, or other pointing device. For details on the screen. Using the Toshiba tablet pen Use the Toshiba tablet pen as you to press it (one click). ❖ To launch an application from the desktop, press the... Sensiva's Symbol Commander™ allowing you to quickly execute commands (for example, changing the layout of the screen from portrait to landscape, see "The Toshiba Rotation Utility" on the screen's Title Bar, and then hold it while you drag it to its original configuration, with the application.
...execute "mouse type" commands in the same manner you normally would a mouse, or other pointing device. For details on the screen. Using the Toshiba tablet pen Use the Toshiba tablet pen as you to press it (one click). ❖ To launch an application from the desktop, press the... Sensiva's Symbol Commander™ allowing you to quickly execute commands (for example, changing the layout of the screen from portrait to landscape, see "The Toshiba Rotation Utility" on the screen's Title Bar, and then hold it while you drag it to its original configuration, with the application.
User Guide
Page 135
PC Cards are finished using the tablet, follow the steps below to return the computer to its original configuration: 1 Return the Toshiba tablet pen to its slot on the right side of the computer. 2 Press the display latch release button. 3 Lift the display panel to its ...capabilities of your PC Card slot. Some PC Cards combine several functions. When you complete this task, the screen returns to its normal position facing the keyboard. 5 Flip the display latch toward the LCD screen. As with USB ports, the i.LINK® port supports both Plugand-Play (automatic configuration) and hot ...
PC Cards are finished using the tablet, follow the steps below to return the computer to its original configuration: 1 Return the Toshiba tablet pen to its slot on the right side of the computer. 2 Press the display latch release button. 3 Lift the display panel to its ...capabilities of your PC Card slot. Some PC Cards combine several functions. When you complete this task, the screen returns to its normal position facing the keyboard. 5 Flip the display latch toward the LCD screen. As with USB ports, the i.LINK® port supports both Plugand-Play (automatic configuration) and hot ...

User Guide
Page 154
.... ❖ Internet email To send and receive email of your company's Web site home page. If you have an account with others on their computer screens. ❖ Internet news groups A news group is similar to a chat room, but instead of using the Internet Surfing the Internet Once connected to the Internet...
.... ❖ Internet email To send and receive email of your company's Web site home page. If you have an account with others on their computer screens. ❖ Internet news groups A news group is similar to a chat room, but instead of using the Internet Surfing the Internet Once connected to the Internet...


