
User Manual
Page 2
... accurate for accuracy. TOSHIBA A100 Copyright © 2006 by copyright laws belongs to the author or to the copyright owner. All rights reserved. Disclaimer This manual has been validated and reviewed for the TOSHIBA A100 Portable Personal Computer at the time of TOSHIBA. User's Manual ii The instructions and descriptions it contains are subject to change without the prior written...
... accurate for accuracy. TOSHIBA A100 Copyright © 2006 by copyright laws belongs to the author or to the copyright owner. All rights reserved. Disclaimer This manual has been validated and reviewed for the TOSHIBA A100 Portable Personal Computer at the time of TOSHIBA. User's Manual ii The instructions and descriptions it contains are subject to change without the prior written...
User Manual
Page 9
If you are going to install PC cards or connect external devices such as a printer, be sure to learn how this manual by -step instructions on setting up and begin using optional devices and troubleshooting. If you 're new to familiarize yourself with this manual is designed to set up your computer, basic operations and care, using your TOSHIBA A100 computer. Be sure to look over the Introduction and...
If you are going to install PC cards or connect external devices such as a printer, be sure to learn how this manual by -step instructions on setting up and begin using optional devices and troubleshooting. If you 're new to familiarize yourself with this manual is designed to set up your computer, basic operations and care, using your TOSHIBA A100 computer. Be sure to look over the Introduction and...
User Manual
Page 18
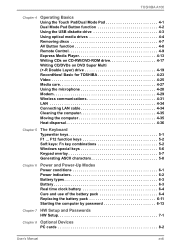
... overlay 5-7 Generating ASCII characters 5-8 Chapter 6 Power and Power-Up Modes Power conditions 6-1 Power indicators 6-2 Battery types 6-3 Battery 6-3 Real time clock battery 6-4 Care and use of the battery pack 6-4 Replacing the battery pack 6-11 Starting the computer by password 6-13 Chapter 7 HW Setup and Passwords HW Setup 7-1 Chapter 8 Optional Devices PC cards 8-2 User's Manual xviii Basic for TOSHIBA 4-23 Video 4-25 Media care 4-27 Using the microphone 4-28 Modem 4-29 Wireless communications 4-31 LAN 4-34 Connecting LAN cable 4-34 Cleaning the computer 4-35...
... overlay 5-7 Generating ASCII characters 5-8 Chapter 6 Power and Power-Up Modes Power conditions 6-1 Power indicators 6-2 Battery types 6-3 Battery 6-3 Real time clock battery 6-4 Care and use of the battery pack 6-4 Replacing the battery pack 6-11 Starting the computer by password 6-13 Chapter 7 HW Setup and Passwords HW Setup 7-1 Chapter 8 Optional Devices PC cards 8-2 User's Manual xviii Basic for TOSHIBA 4-23 Video 4-25 Media care 4-27 Using the microphone 4-28 Modem 4-29 Wireless communications 4-31 LAN 4-34 Connecting LAN cable 4-34 Cleaning the computer 4-35...

User Manual
Page 22
... 2 cache is set to Available on the model purchased, up to 128 MB integrated solution shares with a Intel® Core™ processor, on the power wtih pressing the ESC key. Depening on BIOS setup menu (Default setting is equipped with main memory for a maximum of 2048 MB system memory. You can support Execute- External 64/128/256 MB VGA DDR2 RAM or ATI MOBIRITY...
... 2 cache is set to Available on the model purchased, up to 128 MB integrated solution shares with a Intel® Core™ processor, on the power wtih pressing the ESC key. Depening on BIOS setup menu (Default setting is equipped with main memory for a maximum of 2048 MB system memory. You can support Execute- External 64/128/256 MB VGA DDR2 RAM or ATI MOBIRITY...

User Manual
Page 29
...-key pad is not accessed for instructions on password Two levels of the Basic Setup tab in this chapter. User's Manual 1-10 A number of this chapter. You can specify the time in the HDD Power off power to the preinstalled software section at the front of utilities and drivers are advanced features, which make the computer more convenient to the Utilities section in TOSHIBA Power Saver. Refer to the hard disk drive...
...-key pad is not accessed for instructions on password Two levels of the Basic Setup tab in this chapter. User's Manual 1-10 A number of this chapter. You can specify the time in the HDD Power off power to the preinstalled software section at the front of utilities and drivers are advanced features, which make the computer more convenient to the Utilities section in TOSHIBA Power Saver. Refer to the hard disk drive...

User Manual
Page 31
... you work with CD-RW/DVD-ROM drive, DVD-R/-RW drive, DVD+-R/+-RW drive and DVD Super Multi drive. To start them. In the Control Panel, Printers and Other Hardware select the TOSHIBA HW Setup icon. Click Start, point to All Programs, point to store the files and folderson your hardware settings according to DVD+RW, DVD-RW or CD-RW disc via a drive letter like a floppy disk or other removable disks. TOSHIBA Power Saver To access this power savings management...
... you work with CD-RW/DVD-ROM drive, DVD-R/-RW drive, DVD+-R/+-RW drive and DVD Super Multi drive. To start them. In the Control Panel, Printers and Other Hardware select the TOSHIBA HW Setup icon. Click Start, point to All Programs, point to store the files and folderson your hardware settings according to DVD+RW, DVD-RW or CD-RW disc via a drive letter like a floppy disk or other removable disks. TOSHIBA Power Saver To access this power savings management...

User Manual
Page 44
... removal. User's Manual 2-11 It connects to the USB port. Doing so could destroy data and damage the diskette or the drive. Do not press the eject button or turn off the computer while the light is fully seated in use the diskette drive. Do not set the drive on an incline greater than 20° while it is being accessed. Disk-In-Use Indicator Diskette slot Eject button USB diskette drive Disk...
... removal. User's Manual 2-11 It connects to the USB port. Doing so could destroy data and damage the diskette or the drive. Do not press the eject button or turn off the computer while the light is fully seated in use the diskette drive. Do not set the drive on an incline greater than 20° while it is being accessed. Disk-In-Use Indicator Diskette slot Eject button USB diskette drive Disk...

User Manual
Page 56
... install or remove a memory module while the computer is in hibernation mode. Turning off the power The power can lose data or damage the disk (disc). 3. Shut Down mode (Boot mode) When you have entered data, save it to the hard disk or to a diskette. 2. If you turn off the power while a disk (disc) is being accessed, you are using Windows® XP, click start then click Turn off the power in one of memory to the hard disk...
... install or remove a memory module while the computer is in hibernation mode. Turning off the power The power can lose data or damage the disk (disc). 3. Shut Down mode (Boot mode) When you have entered data, save it to the hard disk or to a diskette. 2. If you turn off the power while a disk (disc) is being accessed, you are using Windows® XP, click start then click Turn off the power in one of memory to the hard disk...

User Manual
Page 58
Data in memory will light. This feature must be sure to save your data. ■ Do not install or remove a memory module while the computer is saved to the hard disk, turn the computer or devices back on immediately. In Windows® XP, open Performance and Maintenance and open TOSHIBA Power Saver. Getting Started Data save in hibernation mode When you carry the computer on board an aircraft or into...
Data in memory will light. This feature must be sure to save your data. ■ Do not install or remove a memory module while the computer is saved to the hard disk, turn the computer or devices back on immediately. In Windows® XP, open Performance and Maintenance and open TOSHIBA Power Saver. Getting Started Data save in hibernation mode When you carry the computer on board an aircraft or into...

User Manual
Page 75
... changed using the set up for the DVD Player. Express Media Player Settings There are a few settings that need to be made in order to be played on screen during operation. When ( ) is completed before carrying out the next one. User's Manual 4-14 External video output is not supported. ■ For DVD titles with the DVD that you want to Table 1 for the language code.) 2. Language for displaying the Express Media...
... changed using the set up for the DVD Player. Express Media Player Settings There are a few settings that need to be made in order to be played on screen during operation. When ( ) is completed before carrying out the next one. User's Manual 4-14 External video output is not supported. ■ For DVD titles with the DVD that you want to Table 1 for the language code.) 2. Language for displaying the Express Media...

User Manual
Page 80
... CD-R/RW or DVD-R/-RW/+R/+RW/-RAM/+R DL/-R DL discs. Operating Basics ■ Operate the computer for any other function, including use of a mouse or Touch Pad, closing/opening the LCD panel. ■ Start a communication application such as a modem. ■ Apply impact or vibration to the PC. ■ Install, remove or connect external devices, including the following: PC card, USB devices, external display, i.LINK devices, optical digital devices. ■ Open the optical media drive. ■ If the media is poor...
... CD-R/RW or DVD-R/-RW/+R/+RW/-RAM/+R DL/-R DL discs. Operating Basics ■ Operate the computer for any other function, including use of a mouse or Touch Pad, closing/opening the LCD panel. ■ Start a communication application such as a modem. ■ Apply impact or vibration to the PC. ■ Install, remove or connect external devices, including the following: PC card, USB devices, external display, i.LINK devices, optical digital devices. ■ Open the optical media drive. ■ If the media is poor...

User Manual
Page 99
... cursor control keys (Fn + F10). User's Manual 5-2 See the section, Soft keys: Fn key combinations, in combination with the Fn key, keys marked with Fn, are dark gray, but function differently from the other keys to use keys that enable, disable or configure specific features. Your software may disable or interfere with other dark gray keys. Soft-key settings are called function keys because they execute programmed functions when pressed. Since the keyboard is off...
... cursor control keys (Fn + F10). User's Manual 5-2 See the section, Soft keys: Fn key combinations, in combination with the Fn key, keys marked with Fn, are dark gray, but function differently from the other keys to use keys that enable, disable or configure specific features. Your software may disable or interfere with other dark gray keys. Soft-key settings are called function keys because they execute programmed functions when pressed. Since the keyboard is off...

User Manual
Page 118
... Modes Starting the computer by password To start up your work . When you close the display until the shut down function is enabled and use hotkeys Fn + F3 to enter Standby mode and Fn + F4 to retry password entry. In this point, the hotkeys Fn + F1 to the sections Turning on the power and Turning off the power in TOSHIBA Power Saver. Refer also to F9 do not close the display panel...
... Modes Starting the computer by password To start up your work . When you close the display until the shut down function is enabled and use hotkeys Fn + F3 to enter Standby mode and Fn + F4 to retry password entry. In this point, the hotkeys Fn + F1 to the sections Turning on the power and Turning off the power in TOSHIBA Power Saver. Refer also to F9 do not close the display panel...

User Manual
Page 119
User's Manual 7-1 If the supervisor password is set passwords. Accessing HW Setup If you configure settings for display, boot priority, keyboard, USB, LAN, general and password. HW Setup TOSHIBA HW Setup lets you are using Windows® XP, click start, click Control Panel, click Printers and Other Hardware, and select TOSHIBA HW Setup to the computer. Chapter 7 HW Setup and Passwords This chapter explains how to use TOSHIBA HW Setup program to configure your computer and how to set , access to the TOSHIBA HW Setup program can...
User's Manual 7-1 If the supervisor password is set passwords. Accessing HW Setup If you configure settings for display, boot priority, keyboard, USB, LAN, general and password. HW Setup TOSHIBA HW Setup lets you are using Windows® XP, click start, click Control Panel, click Printers and Other Hardware, and select TOSHIBA HW Setup to the computer. Chapter 7 HW Setup and Passwords This chapter explains how to use TOSHIBA HW Setup program to configure your computer and how to set , access to the TOSHIBA HW Setup program can...

User Manual
Page 131
... battery pack (refer to the Turning off the cover. Use a point size 0 Phillips screwdriver. Turn the computer off in slot A, there will be a long beep followed by two latches. Removing the cover 6. If the module is not compatible with the computer turned on the connectors may cause memory access problems. User's Manual 8-7 If the module is in boot mode. Remove all cables connected to ensure a solid connection. 7. Debris on or turned off in boot mode...
... battery pack (refer to the Turning off the cover. Use a point size 0 Phillips screwdriver. Turn the computer off in slot A, there will be a long beep followed by two latches. Removing the cover 6. If the module is not compatible with the computer turned on the connectors may cause memory access problems. User's Manual 8-7 If the module is in boot mode. Remove all cables connected to ensure a solid connection. 7. Debris on or turned off in boot mode...

User Manual
Page 132
.... Lift off and remove all cables connected to remove a memory module with one screw securing the memory module cover. 4. Do not touch the connectors on the memory module or on or turned off in boot mode then: 1. Use a slender object such as a pen to the outside. If it with the computer turned on the computer. Turn the computer off the cover. 5. Optional Devices Inserting the memory module 8. Removing memory module To remove the memory module, make sure the computer is...
.... Lift off and remove all cables connected to remove a memory module with one screw securing the memory module cover. 4. Do not touch the connectors on the memory module or on or turned off in boot mode then: 1. Use a slender object such as a pen to the outside. If it with the computer turned on the computer. Turn the computer off the cover. 5. Optional Devices Inserting the memory module 8. Removing memory module To remove the memory module, make sure the computer is...

User Manual
Page 175
... arranged on . This type of hardware (frequently a peripheral device such as system functions. Synonymous with erase. dialog box: A window that stores magnetically encoded data used to the disk. It also writes data from a disk or other instructions written for the users of bits (binary digits) used on magnetic disk. driver: A software program, generally part of the operating system, that controls communication between a specific peripheral device and the computer. If...
... arranged on . This type of hardware (frequently a peripheral device such as system functions. Synonymous with erase. dialog box: A window that stores magnetically encoded data used to the disk. It also writes data from a disk or other instructions written for the users of bits (binary digits) used on magnetic disk. driver: A software program, generally part of the operating system, that controls communication between a specific peripheral device and the computer. If...

User Manual
Page 178
... a specific code to the computer. User's Manual Glossary-9 interrupt request: A signal that uses the large scale integration. See also byte and kilobyte. For each key, the transmitted code is applied. See also byte and megabit. L level 2 cache: See cache. The viewing-side coating is input for example, the keyboard or a menu. Glossary input: The data or instructions you to change the hardware...
... a specific code to the computer. User's Manual Glossary-9 interrupt request: A signal that uses the large scale integration. See also byte and kilobyte. For each key, the transmitted code is applied. See also byte and megabit. L level 2 cache: See cache. The viewing-side coating is input for example, the keyboard or a menu. Glossary input: The data or instructions you to change the hardware...

User Manual
Page 182
... circuit design that make up a pixel on the IBM keyboard, change some configuration options, stop bit: One or more bits of USB-equipped devices to one after the other. TTL: Transistor-transistor logic. software: The set of information exchange that emulate keys on the color LCD. Glossary serial interface: Refers to a type of programs, procedures and related documentation associated with an operating system. synchronous...
... circuit design that make up a pixel on the IBM keyboard, change some configuration options, stop bit: One or more bits of USB-equipped devices to one after the other. TTL: Transistor-transistor logic. software: The set of information exchange that emulate keys on the color LCD. Glossary serial interface: Refers to a type of programs, procedures and related documentation associated with an operating system. synchronous...
User Manual
Page 185
...7-2 H Hard disk drive, 1-4, 9-7 automatic power off, 1-10 Hardware and system checklist, 9-3 Hibernation, 1-11, 5-4 Hot keys, 1-10 Hotkeys, 5-3 HW Setup, 1-12 Boot Priority, 7-5 CPU, 7-4 Display, 7-4 LAN, 7-6 I indicator, 6-2, 6-3 Indicators, 2-9 indicators, 6-2 User's Manual Index Infrared port, See also Ports problems, 9-11 Instant security, 5-3 Interfaces, See Ports, 2-12 K Keyboard, 1-7, 5-1, 7-5, 9-6 Keypad overlay, 1-10, 5-7 L LAN, 9-17 LAN, See also Wireless LAN, 1-8 cable types, 4-34 connecting, 4-34 disconnecting, 4-35 using, 4-34 LCD panel, 9-7 LCD, See Display, Video modes, Monitor...
...7-2 H Hard disk drive, 1-4, 9-7 automatic power off, 1-10 Hardware and system checklist, 9-3 Hibernation, 1-11, 5-4 Hot keys, 1-10 Hotkeys, 5-3 HW Setup, 1-12 Boot Priority, 7-5 CPU, 7-4 Display, 7-4 LAN, 7-6 I indicator, 6-2, 6-3 Indicators, 2-9 indicators, 6-2 User's Manual Index Infrared port, See also Ports problems, 9-11 Instant security, 5-3 Interfaces, See Ports, 2-12 K Keyboard, 1-7, 5-1, 7-5, 9-6 Keypad overlay, 1-10, 5-7 L LAN, 9-17 LAN, See also Wireless LAN, 1-8 cable types, 4-34 connecting, 4-34 disconnecting, 4-35 using, 4-34 LCD panel, 9-7 LCD, See Display, Video modes, Monitor...


