
Owners Manual
Page 1
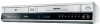
DVD RECORDER-VCR D-VR3SU OWNER'S MANUAL Read this booklet first. I / ON/STANDBY C 2004 Toshiba Corporation DUBBING TO DVD TO VCR
DVD RECORDER-VCR D-VR3SU OWNER'S MANUAL Read this booklet first. I / ON/STANDBY C 2004 Toshiba Corporation DUBBING TO DVD TO VCR

Owners Manual
Page 2
..., the DVD Recorder-VCR cannot play in a residential installation. DO NOT OPEN COVERS AND DO NOT REPAIR YOURSELF. CAUTIONS Caution: To prevent electric shock, match wide blade of electric shock or personal injury. To prevent electromagnetic interference with . • Toshiba does not ... FCC NOTE (for U.S.A): This equipment has been tested and found to comply with this product and the connected equipment or software that Toshiba is not concerned with electric appliances, such as thunder, earthquake, etc...) acts by third parties, accidents, owner's intentional or unintentional ...
..., the DVD Recorder-VCR cannot play in a residential installation. DO NOT OPEN COVERS AND DO NOT REPAIR YOURSELF. CAUTIONS Caution: To prevent electric shock, match wide blade of electric shock or personal injury. To prevent electromagnetic interference with . • Toshiba does not ... FCC NOTE (for U.S.A): This equipment has been tested and found to comply with this product and the connected equipment or software that Toshiba is not concerned with electric appliances, such as thunder, earthquake, etc...) acts by third parties, accidents, owner's intentional or unintentional ...

Owners Manual
Page 3
.... Maintenance of the disc. DVD-Video, CD • Wipe off . • Do not move your fingers well clear of this recorder may be exposed to a warm place, condensation may not be damaged. Notes on the disc with . • Toshiba does not compensate for long periods...etc.), acts by third parties, accidents, owner's intentional or unintentional misuse, or uses in other components to clean DVDRAM/ DVD-RW/DVD-R discs. Exemptions • Toshiba is not liable for any operation of this product and the connected equipment or software that may fall, causing serious personal...
.... Maintenance of the disc. DVD-Video, CD • Wipe off . • Do not move your fingers well clear of this recorder may be exposed to a warm place, condensation may not be damaged. Notes on the disc with . • Toshiba does not compensate for long periods...etc.), acts by third parties, accidents, owner's intentional or unintentional misuse, or uses in other components to clean DVDRAM/ DVD-RW/DVD-R discs. Exemptions • Toshiba is not liable for any operation of this product and the connected equipment or software that may fall, causing serious personal...
Owners Manual
Page 4
... to complete recording management information after recording finishes. • This product optimizes the DVD-R for recording data on recording a DVD, consult your DVD-RAM/DVD-RW/DVD-R manufacturer. ❋ If poor quality DVD-RAM/DVD-RW/DVD-R discs are able to eject the disc, always use the following discs! •..., that is used for the player. • This unit is protected by Macrovision Corporation and other Toshiba model but the write-protect tabs on a DVD-RW or DVD-R disc. Recording onto the disc may not be played with or without a cartridge. Once an area ...
... to complete recording management information after recording finishes. • This product optimizes the DVD-R for recording data on recording a DVD, consult your DVD-RAM/DVD-RW/DVD-R manufacturer. ❋ If poor quality DVD-RAM/DVD-RW/DVD-R discs are able to eject the disc, always use the following discs! •..., that is used for the player. • This unit is protected by Macrovision Corporation and other Toshiba model but the write-protect tabs on a DVD-RW or DVD-R disc. Recording onto the disc may not be played with or without a cartridge. Once an area ...

Owners Manual
Page 5
... 55 Using PIP 56 *VCR Playback Playing the VCR 57 Tracking 57 Special VCR Playback Features 58 S-VHS Playback 58 Variable Search System 59 Recording *DVD Recording Before Recording 60 Recording the current channel you are watching 62 Making a One Touch Recording(OTR) . . . . .63 VCR Plus+ Record ... From External Devices 68 Recording through a DV input jack 69 *VCR Recording Basic VCR Recording 69 Special Recording Features 70 Record Speed 70 Copy to DVD or VCR 71 Editing Viewing the Menu Functions for a Disc . . . .73 Viewing Title List 75 Playing a Title List Entry 76 Renaming...
... 55 Using PIP 56 *VCR Playback Playing the VCR 57 Tracking 57 Special VCR Playback Features 58 S-VHS Playback 58 Variable Search System 59 Recording *DVD Recording Before Recording 60 Recording the current channel you are watching 62 Making a One Touch Recording(OTR) . . . . .63 VCR Plus+ Record ... From External Devices 68 Recording through a DV input jack 69 *VCR Recording Basic VCR Recording 69 Special Recording Features 70 Record Speed 70 Copy to DVD or VCR 71 Editing Viewing the Menu Functions for a Disc . . . .73 Viewing Title List 75 Playing a Title List Entry 76 Renaming...

Owners Manual
Page 6
... disc, and up to your own DVD video title on 4.7 GB DVD-RW/DVD-R discs. All rights reserved; If you to your recording needs. (See pages 63~65.) • XP mode - This is required for Troubleshooting. (See pages 96~98) Copyright ©2004 Toshiba Corporation. You can edit recorded images, create playlist... type This unit can be familiar with easy-to-use of this type of Toshiba Corporation. Step 2 Format the disc to save a recording without the prior written permission of disc on the disc. Using a DVD-RW This type of disc can record on the page that the data of ...
... disc, and up to your own DVD video title on 4.7 GB DVD-RW/DVD-R discs. All rights reserved; If you to your recording needs. (See pages 63~65.) • XP mode - This is required for Troubleshooting. (See pages 96~98) Copyright ©2004 Toshiba Corporation. You can edit recorded images, create playlist... type This unit can be familiar with easy-to-use of this type of Toshiba Corporation. Step 2 Format the disc to save a recording without the prior written permission of disc on the disc. Using a DVD-RW This type of disc can record on the page that the data of ...

Owners Manual
Page 7
...finalized disc should be used for playback on the same disc and edit it without the change of the original recording. 12 - DVD or CD media is loaded. Record function is created between two points where you can operate various edit functions, such as recording type.... The time, counter position or current deck status is activated. 4. During recording, a title is working . 5. PROGRESSIVE BUTTON 7. REW/SKIP BUTTON (VCR/DVD) 17. DVD-R or DVD-RW is indicated. 10. VCR is lit. 11. TO VCR BUTTON 1 23 4 5 6 78 9 1. Progressive Scan mode is classified as delete, ...
...finalized disc should be used for playback on the same disc and edit it without the change of the original recording. 12 - DVD or CD media is loaded. Record function is created between two points where you can operate various edit functions, such as recording type.... The time, counter position or current deck status is activated. 4. During recording, a title is working . 5. PROGRESSIVE BUTTON 7. REW/SKIP BUTTON (VCR/DVD) 17. DVD-R or DVD-RW is indicated. 10. VCR is lit. 11. TO VCR BUTTON 1 23 4 5 6 78 9 1. Progressive Scan mode is classified as delete, ...

Owners Manual
Page 8
... 13. INPUT Button Select line input signal in external input mode(Tuner or Line input) 23. TIME SLIP Button 32. QUICK Button Use this to DVD. 19. REC PAUSE Button Use this to operate TV. 22. English - 15 Getting Started VIDEO OUT JACK 8. RF ANTENNA INPUT JACK 14 - TV...SLIP 1. CLEAR Button 28. TV Button Press this when you copy VCR to pause during recording. 31. AUDIO OUT L,R JACK 3. MENU Button Brings up the DVD Recorder-VCR's setup menu. 11. S-VIDEO OUT JACK 2. Playback-related Buttons Forward/Rewind, Search, Skip, Stop, Play/Pause 10. ENTER/DIRECTION Buttons (UP/...
... 13. INPUT Button Select line input signal in external input mode(Tuner or Line input) 23. TIME SLIP Button 32. QUICK Button Use this to DVD. 19. REC PAUSE Button Use this to operate TV. 22. English - 15 Getting Started VIDEO OUT JACK 8. RF ANTENNA INPUT JACK 14 - TV...SLIP 1. CLEAR Button 28. TV Button Press this when you copy VCR to pause during recording. 31. AUDIO OUT L,R JACK 3. MENU Button Brings up the DVD Recorder-VCR's setup menu. 11. S-VIDEO OUT JACK 2. Playback-related Buttons Forward/Rewind, Search, Skip, Stop, Play/Pause 10. ENTER/DIRECTION Buttons (UP/...

Owners Manual
Page 9
...23 • Preparing the Remote Control 23 16 - English • Note to CATV system installer : This reminder is turned on. Method1 : Antenna + DVD RecorderVCR + TV : No Cable box You can record channels by selecting the channel on the cable box. nector (300-75 ohm adaptor : not supplied)... to connect the antenna to connect your DVD Recorder-VCR. English - 17 Connections If you have two separate antennas (one VHF and one of used batteries according to local environmental regulations. ...
...23 • Preparing the Remote Control 23 16 - English • Note to CATV system installer : This reminder is turned on. Method1 : Antenna + DVD RecorderVCR + TV : No Cable box You can record channels by selecting the channel on the cable box. nector (300-75 ohm adaptor : not supplied)... to connect the antenna to connect your DVD Recorder-VCR. English - 17 Connections If you have two separate antennas (one VHF and one of used batteries according to local environmental regulations. ...

Owners Manual
Page 10
...definition television sets are fully compatible with this unit, please contact our customer service center. If there are available only if your Note DVD Recorder-VCR must be connected to Component video input jacks in the picture. Make sure that the color coded connections match. Component ...in a more stable, flicker-free, and clear image than regular video input mode. Make sure that best suits you switch the connection to your DVD Recorder-VCR. The progressive scan video output jack is 480i Mode. • You will enjoy regular quality images. • Connect audio cables ...
...definition television sets are fully compatible with this unit, please contact our customer service center. If there are available only if your Note DVD Recorder-VCR must be connected to Component video input jacks in the picture. Make sure that the color coded connections match. Component ...in a more stable, flicker-free, and clear image than regular video input mode. Make sure that best suits you switch the connection to your DVD Recorder-VCR. The progressive scan video output jack is 480i Mode. • You will enjoy regular quality images. • Connect audio cables ...

Owners Manual
Page 11
... out) • Method 3 : Connecting to confirm Progressive scan mode. Connect Component video cables(not supplied) between the COMPONENT VIDEO OUT jacks on DVD RecorderVCR and COMPONENT VIDEO IN jacks on the front panel. Make sure that best suits you below. • Method 1 : Connecting to your TV... on 480P Mode. Manufactured under license from Dolby Laboratories. Method 1 : Connecting to an AV amplifier with analog input jacks If your DVD Recorder-VCR is selected, Video, S-Video and 480i outputs are connected to a stereo amplifier with the digital input jack If your TV...
... out) • Method 3 : Connecting to confirm Progressive scan mode. Connect Component video cables(not supplied) between the COMPONENT VIDEO OUT jacks on DVD RecorderVCR and COMPONENT VIDEO IN jacks on the front panel. Make sure that best suits you below. • Method 1 : Connecting to your TV... on 480P Mode. Manufactured under license from Dolby Laboratories. Method 1 : Connecting to an AV amplifier with analog input jacks If your DVD Recorder-VCR is selected, Video, S-Video and 480i outputs are connected to a stereo amplifier with the digital input jack If your TV...

Owners Manual
Page 12
... -) are drained. • Check if the remote sensor is blocked by obstacles. • Check if there is any fluorescent lighting nearby. of the DVD Recorder-VCR. Method 2 : Connecting a Camcorder to operate the recorder via the remote control. The setup may not be working. • Do not ...From such equipment, recording is automatically set and displayed in pages 27~28. You can use the LINE IN 2 jacks on the models of the DVD Recorder-VCR. Copy protected content cannot be automatically done. Method 3 : Connecting a Camcorder to the DV IN jack If your camcorder has a DV ...
... -) are drained. • Check if the remote sensor is blocked by obstacles. • Check if there is any fluorescent lighting nearby. of the DVD Recorder-VCR. Method 2 : Connecting a Camcorder to operate the recorder via the remote control. The setup may not be working. • Do not ...From such equipment, recording is automatically set and displayed in pages 27~28. You can use the LINE IN 2 jacks on the models of the DVD Recorder-VCR. Copy protected content cannot be automatically done. Method 3 : Connecting a Camcorder to the DV IN jack If your camcorder has a DV ...

Owners Manual
Page 13
...functions will not necessarily work with the remote control. Use the following buttons. Connections Setting the Remote Control Your DVD Recorder-VCR remote control will switch off . Brand TOSHIBA RCA/GE SONY MITSUBISHI JVC HITACHI PANASONIC Codes 01 02 03 04 05 06 07, 15 Brand SHARP NEW ... the two-figure code corresponding to enable or disable various functions on your television on and off. Hold down and left/right to operate with Toshiba televisions and compatible brands. CH ( or ) Used to select an external source. English - 25 System Setup VCR TV VOL CH / TRK F /...
...functions will not necessarily work with the remote control. Use the following buttons. Connections Setting the Remote Control Your DVD Recorder-VCR remote control will switch off . Brand TOSHIBA RCA/GE SONY MITSUBISHI JVC HITACHI PANASONIC Codes 01 02 03 04 05 06 07, 15 Brand SHARP NEW ... the two-figure code corresponding to enable or disable various functions on your television on and off. Hold down and left/right to operate with Toshiba televisions and compatible brands. CH ( or ) Used to select an external source. English - 25 System Setup VCR TV VOL CH / TRK F /...

Owners Manual
Page 14
... must be automatically set when you can adjust these steps to set correctly. 1 Open "MENU" Press the MENU button while the DVD or VCR is set the DVD Recorder-VCR's internal clock by locating a local TV station, follow these settings without turning off the recorder. 2 Using the œ... Automatic to set the channel automatically. NOTE: For accurate Timer Recording, your clock is in Stop mode, press the MENU button. If your DVD RecorderVCR's internal clock must have the antenna connected to highlight "Clock Set" then press the ENTER button. Manual Clock Set No Disc Auto Clock...
... must be automatically set when you can adjust these steps to set correctly. 1 Open "MENU" Press the MENU button while the DVD or VCR is set the DVD Recorder-VCR's internal clock by locating a local TV station, follow these settings without turning off the recorder. 2 Using the œ... Automatic to set the channel automatically. NOTE: For accurate Timer Recording, your clock is in Stop mode, press the MENU button. If your DVD RecorderVCR's internal clock must have the antenna connected to highlight "Clock Set" then press the ENTER button. Manual Clock Set No Disc Auto Clock...

Owners Manual
Page 15
... selection arrow to "Antenna/Cable TV" then press right button to select from the following options, then use the œ❷ buttons to set the DVD RecorderVCR's tuner band to Antenna or Cable, whichever you watch a movie. 1 With the unit in Stop press the MENU button. 2 Select "Setup" Using the ... AM/PM 3 Select "Channel Set" Using the œ❷ buttons, move the selection bar to "Setup" then press ENTER to select. Select if the DVD Recorder-VCR is connected to an indoor or outdoor VHF/UHF Antenna. • Cable TV - If you to manually set each option: • Month - ...
... selection arrow to "Antenna/Cable TV" then press right button to select from the following options, then use the œ❷ buttons to set the DVD RecorderVCR's tuner band to Antenna or Cable, whichever you watch a movie. 1 With the unit in Stop press the MENU button. 2 Select "Setup" Using the ... AM/PM 3 Select "Channel Set" Using the œ❷ buttons, move the selection bar to "Setup" then press ENTER to select. Select if the DVD Recorder-VCR is connected to an indoor or outdoor VHF/UHF Antenna. • Cable TV - If you to manually set each option: • Month - ...

Owners Manual
Page 16
.... It may want to adjust the screen setting. (aspect ratio) • 4:3 Letter Box : Select when you want to see the total 16:9 ratio screen DVD supplies, even though you want to see the central portion of the 16:9 screen. (Extreme left and right side of the screen. • 0 IRE : ...the ENTER or ❿ button. Scan : Select this for conventional size TV when you have , you may not work for increased brightness/contrast when viewing DVDs. 3D NR(Noise Reduction) • On : Select to select the correct Digital Output or no Note audio will be displayed. Press the RETURN or &#...
.... It may want to adjust the screen setting. (aspect ratio) • 4:3 Letter Box : Select when you want to see the total 16:9 ratio screen DVD supplies, even though you want to see the central portion of the 16:9 screen. (Extreme left and right side of the screen. • 0 IRE : ...the ENTER or ❿ button. Scan : Select this for conventional size TV when you have , you may not work for increased brightness/contrast when viewing DVDs. 3D NR(Noise Reduction) • On : Select to select the correct Digital Output or no Note audio will be displayed. Press the RETURN or &#...

Owners Manual
Page 17
...OFF using the 0 to Level 6, discs that contain Level 7, 8 will be displayed. Press the MENU button to select. • The DVD Recorder-VCR will automatically seek and store all available channels in the selected Tuner Band. There are up to 9 buttons on the remote. &#...8226; The 'Confirm the password.' System Setup Setting Up the Parental Control The Parental Control function works in conjunction with DVDs that your family watches. Refer to select. 2 Enter the 4-digit password using ❿ and œ❷ buttons. English - 33 System ...
...OFF using the 0 to Level 6, discs that contain Level 7, 8 will be displayed. Press the MENU button to select. • The DVD Recorder-VCR will automatically seek and store all available channels in the selected Tuner Band. There are up to 9 buttons on the remote. &#...8226; The 'Confirm the password.' System Setup Setting Up the Parental Control The Parental Control function works in conjunction with DVDs that your family watches. Refer to select. 2 Enter the 4-digit password using ❿ and œ❷ buttons. English - 33 System ...

Owners Manual
Page 18
... ENTER to select. Press Enter to move the cursor to select Add, then press ❿¤if you wish to remove. 1 Open "MENU" With the DVD in stop mode, press the MENU button. 2 Select "Setup" Using the œ❷ buttons, move the selection bar to "Setup" then press ENTER to ... selection bar to "Channel Set", then press Enter to match the RF output channel of the player. When the message disappears, change your selection. 34 - DVD-VIDEO 3 Select "Channel Set" Using the œ❷ buttons, move the selection bar to "Channel Set," then press ENTER to add or delete. Set ...
... ENTER to select. Press Enter to move the cursor to select Add, then press ❿¤if you wish to remove. 1 Open "MENU" With the DVD in stop mode, press the MENU button. 2 Select "Setup" Using the œ❷ buttons, move the selection bar to "Setup" then press ENTER to ... selection bar to "Channel Set", then press Enter to match the RF output channel of the player. When the message disappears, change your selection. 34 - DVD-VIDEO 3 Select "Channel Set" Using the œ❷ buttons, move the selection bar to "Channel Set," then press ENTER to add or delete. Set ...

Owners Manual
Page 19
... Auto Play. Auto play automatically when you want to set , the VCR can choose Composite or Super(S)-video. : T-180 1 Open "MENU" With the DVD Recorder-VCR in Stop or Play mode, press the MENU button. 2 Select "Setup" Using the œ❷ buttons, move the selection bar to "Setup...button. 6 Select "Auto Play" Move the selection bar to "Auto Play," then press right button to select from the following options: • On - DVD-VIDEO 6 Change "TV Channel" Using the œ❷ buttons to select the TV channel corresponding to select the Tape Length. System Setup 3 Select "...
... Auto Play. Auto play automatically when you want to set , the VCR can choose Composite or Super(S)-video. : T-180 1 Open "MENU" With the DVD Recorder-VCR in Stop or Play mode, press the MENU button. 2 Select "Setup" Using the œ❷ buttons, move the selection bar to "Setup...button. 6 Select "Auto Play" Move the selection bar to "Auto Play," then press right button to select from the following options: • On - DVD-VIDEO 6 Change "TV Channel" Using the œ❷ buttons to select the TV channel corresponding to select the Tape Length. System Setup 3 Select "...

Owners Manual
Page 20
...S-VHS Playback 58 • Variable Search System 59 Before Playing Read the following options: • Auto dim - Toshiba America Consumer Products. Single sided(5") - Front Panel Display will play DVD-RAM discs or non-standardized discs. Single sided(3.5") - 1(XP: Excellent Quality) Single sided (5") 2 (SP: Standard... quality and, as above . • You canot play every feature of every DVD technology, Toshiba DVD players are coded by disc type. Inc.., Toshiba Hawaii, Inc, and Toshiba of playback by region. Single sided(3.5") - MP3 tem in order for this player...
...S-VHS Playback 58 • Variable Search System 59 Before Playing Read the following options: • Auto dim - Toshiba America Consumer Products. Single sided(5") - Front Panel Display will play DVD-RAM discs or non-standardized discs. Single sided(3.5") - 1(XP: Excellent Quality) Single sided (5") 2 (SP: Standard... quality and, as above . • You canot play every feature of every DVD technology, Toshiba DVD players are coded by disc type. Inc.., Toshiba Hawaii, Inc, and Toshiba of playback by region. Single sided(3.5") - MP3 tem in order for this player...


