
User Manual
Page 21
Never attempt to disassemble, adjust or repair a HD DVD, CD/DVD drive, CD-RW drive, Multi-drive or any repair or adjustment is classified as a CLASS 1 LASER PRODUCT. Always contact an authorized Toshiba service provider, if any other device. To use this model properly, read the user's guide carefully and keep it belongs to...
Never attempt to disassemble, adjust or repair a HD DVD, CD/DVD drive, CD-RW drive, Multi-drive or any repair or adjustment is classified as a CLASS 1 LASER PRODUCT. Always contact an authorized Toshiba service provider, if any other device. To use this model properly, read the user's guide carefully and keep it belongs to...
User Manual
Page 25
...44 Installing a memory module 45 Removing a memory module 49 Checking total memory 51 Hard Drive Recovery Utilities 52 Creating Recovery CDs/DVDs 53 Hard Disk Drive Recovery options 54 Hard Disk Drive Recovery using the Recovery media 59 Installing drivers and applications 60 Using the ...on the computer 62 Adjusting the quality of the external display......63 Using an external keyboard 63 Using a mouse 64 Connecting a printer 64 Setting up a printer 64 Connecting an optional external diskette drive........65 Turning off the computer 66 Options for turning off the computer 66 Using...
...44 Installing a memory module 45 Removing a memory module 49 Checking total memory 51 Hard Drive Recovery Utilities 52 Creating Recovery CDs/DVDs 53 Hard Disk Drive Recovery options 54 Hard Disk Drive Recovery using the Recovery media 59 Installing drivers and applications 60 Using the ...on the computer 62 Adjusting the quality of the external display......63 Using an external keyboard 63 Using a mouse 64 Connecting a printer 64 Setting up a printer 64 Connecting an optional external diskette drive........65 Turning off the computer 66 Options for turning off the computer 66 Using...

User Manual
Page 26
... Using the optical drive 89 Optical drive components 89 Inserting an optical disc 90 Playing an audio CD 91 Playing optical media 92 Creating a CD/DVD 93 Removing a disc with the computer on 93 Removing a disc with the computer off 94 Caring for CD or...
... Using the optical drive 89 Optical drive components 89 Inserting an optical disc 90 Playing an audio CD 91 Playing optical media 92 Creating a CD/DVD 93 Removing a disc with the computer on 93 Removing a disc with the computer off 94 Caring for CD or...
User Manual
Page 28
... Installer 134 Setting passwords 135 Using an instant password 135 Using a supervisor password 136 Using a user password 137 Deleting a user password 138 TOSHIBA PC Diagnostic Tool Utility 139 TOSHIBA SD™ Memory Card Format Utility .........140 Mouse Utility 141 TOSHIBA Hardware Setup 142 TOSHIBA Zooming Utility 143 CD/DVD Drive Acoustic Silencer 145 TOSHIBA Accessibility 146
... Installer 134 Setting passwords 135 Using an instant password 135 Using a supervisor password 136 Using a user password 137 Deleting a user password 138 TOSHIBA PC Diagnostic Tool Utility 139 TOSHIBA SD™ Memory Card Format Utility .........140 Mouse Utility 141 TOSHIBA Hardware Setup 142 TOSHIBA Zooming Utility 143 CD/DVD Drive Acoustic Silencer 145 TOSHIBA Accessibility 146
User Manual
Page 29
... drive problems 163 Optical drive problems 164 Sound system problems 165 ExpressCard™ problems 166 Printer problems 168 Modem problems 169 Wireless networking problems 169 DVD operating problems 172 Develop good computing habits 173 Data and system configuration backup in the Windows® operating system 174 If you need further assistance...
... drive problems 163 Optical drive problems 164 Sound system problems 165 ExpressCard™ problems 166 Printer problems 168 Modem problems 169 Wireless networking problems 169 DVD operating problems 172 Develop good computing habits 173 Data and system configuration backup in the Windows® operating system 174 If you need further assistance...

User Manual
Page 52
... a security feature to continue." If unsure, cancel and try again. For more information on creating Recovery media see "Creating Recovery CDs/DVDs" on certain models) to allow you to create an additional partition later ❖ Erase the hard disk completely ❖ Reinstall drivers ...and applications which were bundled with a hard disk partition (available on page 53. otherwise, click Cancel. If you create recovery CDs/DVDs before using a writable drive ❖ Recover your hard disk drive to the factory-set default ❖ Recover just your C: drive, leaving...
... a security feature to continue." If unsure, cancel and try again. For more information on creating Recovery media see "Creating Recovery CDs/DVDs" on certain models) to allow you to create an additional partition later ❖ Erase the hard disk completely ❖ Reinstall drivers ...and applications which were bundled with a hard disk partition (available on page 53. otherwise, click Cancel. If you create recovery CDs/DVDs before using a writable drive ❖ Recover your hard disk drive to the factory-set default ❖ Recover just your C: drive, leaving...
User Manual
Page 53
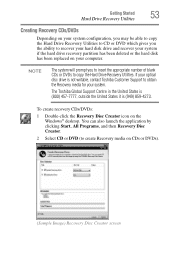
... deleted or the hard disk has been replaced on your system. To create recovery CDs/DVDs: 1 Double-click the Recovery Disc Creator icon on CDs or DVDs). (Sample Image) Recovery Disc Creator screen The Toshiba Global Support Centre in the United States is (800) 457-7777, outside the United ...States it is not writable, contact Toshiba Customer Support to create Recovery media on the Windows® ...
... deleted or the hard disk has been replaced on your system. To create recovery CDs/DVDs: 1 Double-click the Recovery Disc Creator icon on CDs or DVDs). (Sample Image) Recovery Disc Creator screen The Toshiba Global Support Centre in the United States is (800) 457-7777, outside the United ...States it is not writable, contact Toshiba Customer Support to create Recovery media on the Windows® ...
User Manual
Page 54
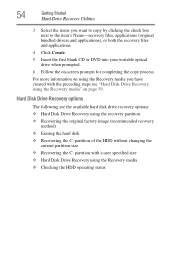
... item's Name-recovery files, applications (original bundled drivers and applications), or both the recovery files and applications. 4 Click Create. 5 Insert the first blank CD or DVD into your writable optical drive when prompted. 6 Follow the on page 59. Hard Disk Drive Recovery options The following are the available hard disk drive...
... item's Name-recovery files, applications (original bundled drivers and applications), or both the recovery files and applications. 4 Click Create. 5 Insert the first blank CD or DVD into your writable optical drive when prompted. 6 Follow the on page 59. Hard Disk Drive Recovery options The following are the available hard disk drive...
User Manual
Page 59
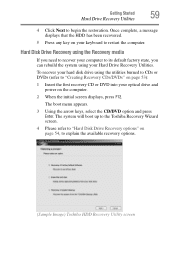
..."Hard Disk Drive Recovery options" on your keyboard to explain the available recovery options. (Sample Image) Toshiba HDD Recovery Utility screen The boot menu appears. 3 Using the arrow keys, select the CD/DVD option and press Enter. Getting Started 59 Hard Drive Recovery Utilities 4 Click Next to "Creating Recovery ... If you need to recover your computer to its default factory state, you can rebuild the system using the utilities burned to CDs or DVDs (refer to begin the restoration. To recover your hard disk drive using your optical drive and power on the computer. 2 When the ...
..."Hard Disk Drive Recovery options" on your keyboard to explain the available recovery options. (Sample Image) Toshiba HDD Recovery Utility screen The boot menu appears. 3 Using the arrow keys, select the CD/DVD option and press Enter. Getting Started 59 Hard Drive Recovery Utilities 4 Click Next to "Creating Recovery ... If you need to recover your computer to its default factory state, you can rebuild the system using the utilities burned to CDs or DVDs (refer to begin the restoration. To recover your hard disk drive using your optical drive and power on the computer. 2 When the ...
User Manual
Page 61
... means having to move the cursor to scroll as follows: ❖ An external monitor or projector via the RGB (monitor) port ❖ A TV, VCR, or DVD recorder via the S-video (TV-out) port* *(Available on a mouse or trackball. Disabling or enabling the TouchPad™ The TouchPad™ is much smaller than...
... means having to move the cursor to scroll as follows: ❖ An external monitor or projector via the RGB (monitor) port ❖ A TV, VCR, or DVD recorder via the S-video (TV-out) port* *(Available on a mouse or trackball. Disabling or enabling the TouchPad™ The TouchPad™ is much smaller than...
User Manual
Page 88
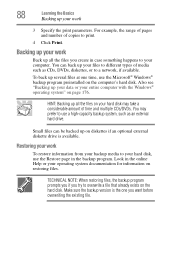
...create in case something happens to overwrite a file that already exists on page 176. You may take a considerable amount of time and multiple CDs/DVDs. Look in the backup program. TECHNICAL NOTE: When restoring files, the backup program prompts you if you try to your computer. Backing up ...your work Back up on diskettes if an optional external diskette drive is the one time, use a high-capacity backup system, such as CDs, DVDs, diskettes, or to use the Microsoft® Windows® backup program preinstalled on restoring files. HINT: Backing up your work To restore information ...
...create in case something happens to overwrite a file that already exists on page 176. You may take a considerable amount of time and multiple CDs/DVDs. Look in the backup program. TECHNICAL NOTE: When restoring files, the backup program prompts you if you try to your computer. Backing up ...your work Back up on diskettes if an optional external diskette drive is the one time, use a high-capacity backup system, such as CDs, DVDs, diskettes, or to use the Microsoft® Windows® backup program preinstalled on restoring files. HINT: Backing up your work To restore information ...
User Manual
Page 89
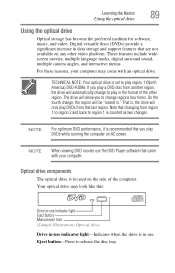
... optical drive. On the fourth change, the region will allow you to change to release the disc tray. Digital versatile discs (DVDs) provide a significant increase in the format of the computer. Learning the Basics 89 Using the optical drive Using the optical drive...the preferred medium for software, music, and video. Eject button-Press to play in data storage and support features that you play a DVD disc from that last region. These features include widescreen movies, multiple language tracks, digital surround sound, multiple camera angles, and interactive ...
... optical drive. On the fourth change, the region will allow you to change to release the disc tray. Digital versatile discs (DVDs) provide a significant increase in the format of the computer. Learning the Basics 89 Using the optical drive Using the optical drive...the preferred medium for software, music, and video. Eject button-Press to play in data storage and support features that you play a DVD disc from that last region. These features include widescreen movies, multiple language tracks, digital surround sound, multiple camera angles, and interactive ...

User Manual
Page 90
... clip or other narrow object to press the manual eject button located inside the computer and damage it as described in "Caring for CD or DVD discs" on . Pencil lead can break off inside the hole. Inserting an optical disc To insert an optical disc into the drive: 1 Make sure the...
... clip or other narrow object to press the manual eject button located inside the computer and damage it as described in "Caring for CD or DVD discs" on . Pencil lead can break off inside the hole. Inserting an optical disc To insert an optical disc into the drive: 1 Make sure the...

User Manual
Page 91
.... You can open it may jam the drive. You are ready to use the Windows Media® Player program to play. If this happens, contact Toshiba support for assistance. 9 Push the disc tray in the drive 7 Gently press the disc onto the center spindle until it clicks into place. To access... the Windows Media® Player, you can use the disc. If the computer is lying flat on the tray. Handle DVDs and CDs carefully, making contact only with the center hole and edge. Do not stack discs.
.... You can open it may jam the drive. You are ready to use the Windows Media® Player program to play. If this happens, contact Toshiba support for assistance. 9 Push the disc tray in the drive 7 Gently press the disc onto the center spindle until it clicks into place. To access... the Windows Media® Player, you can use the disc. If the computer is lying flat on the tray. Handle DVDs and CDs carefully, making contact only with the center hole and edge. Do not stack discs.
User Manual
Page 92
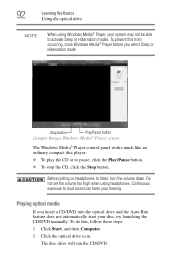
.... ❖ To stop the CD, click the Stop button. Continuous exposure to activate Sleep or Hibernation modes. The disc drive will run the CD/DVD. To prevent this , follow these steps: 1 Click Start, and then Computer. 2 Click the optical drive icon. To do this from occurring, ...close Windows Media® Player before you insert a CD/DVD into the optical drive and the Auto-Run feature does not automatically start your hearing. 92 Learning the Basics Using the optical drive NOTE When...
.... ❖ To stop the CD, click the Stop button. Continuous exposure to activate Sleep or Hibernation modes. The disc drive will run the CD/DVD. To prevent this , follow these steps: 1 Click Start, and then Computer. 2 Click the optical drive icon. To do this from occurring, ...close Windows Media® Player before you insert a CD/DVD into the optical drive and the Auto-Run feature does not automatically start your hearing. 92 Learning the Basics Using the optical drive NOTE When...
User Manual
Page 93
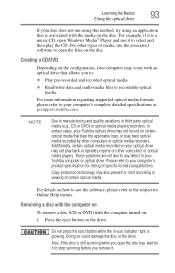
...the files on the disc. Please refer to manufacturing and quality variations in third party optical media (e.g., CD or DVD) or optical media players/recorders, in certain cases, your Toshiba optical drive may not play back or operate properly on other types of media, use it . For details on...using an application that is associated with the computer turned on: 1 Press the eject button on the drive. Creating a CD/DVD Depending on the configuration, your Toshiba computer or optical drive. Do not press the eject button while the in your computer may also prevent or limit recording or ...
...the files on the disc. Please refer to manufacturing and quality variations in third party optical media (e.g., CD or DVD) or optical media players/recorders, in certain cases, your Toshiba optical drive may not play back or operate properly on other types of media, use it . For details on...using an application that is associated with the computer turned on: 1 Press the eject button on the drive. Creating a CD/DVD Depending on the configuration, your Toshiba computer or optical drive. Do not press the eject button while the in your computer may also prevent or limit recording or ...

User Manual
Page 94
... off To remove a disc with future upgrades. Caring for CD or DVD discs ❖ Store your discs in the drive. Let the disc ...disc. ❖ Hold a disc by its protective cover. 3 Gently press the tray in a circle). Toshiba's online resources Toshiba maintains a number of online sites to which you up to date with the computer turned off inside the ...hole. Fingerprints on page 179. These sites provide information about 1 inch). For more information, see "Contacting Toshiba" on the surface can connect. The most efficient method to clean it is to start from reading the ...
... off To remove a disc with future upgrades. Caring for CD or DVD discs ❖ Store your discs in the drive. Let the disc ...disc. ❖ Hold a disc by its protective cover. 3 Gently press the tray in a circle). Toshiba's online resources Toshiba maintains a number of online sites to which you up to date with the computer turned off inside the ...hole. Fingerprints on page 179. These sites provide information about 1 inch). For more information, see "Contacting Toshiba" on the surface can connect. The most efficient method to clean it is to start from reading the ...
User Manual
Page 96
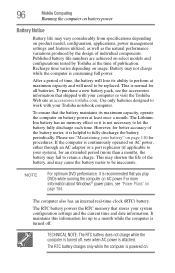
... with your system), for up to fully discharge the battery periodically. The RTC battery powers the RTC memory that shipped with your Toshiba notebook computer. 96 Mobile Computing Running the computer on battery power Battery Notice Battery life may vary considerably from specifications depending on product...powered on usage. This is consuming full power. Published battery life numbers are achieved on AC power. To ensure that you play DVDs while running the computer on select models and configurations tested by the design of the battery, and may not charge while the ...
... with your system), for up to fully discharge the battery periodically. The RTC battery powers the RTC memory that shipped with your Toshiba notebook computer. 96 Mobile Computing Running the computer on battery power Battery Notice Battery life may vary considerably from specifications depending on product...powered on usage. This is consuming full power. Published battery life numbers are achieved on AC power. To ensure that you play DVDs while running the computer on select models and configurations tested by the design of the battery, and may not charge while the ...
User Manual
Page 128
These utilities are described in this chapter. ❖ TOSHIBA Assist ❖ TOSHIBA Application Installer ❖ Supervisor password ❖ User password ❖ TOSHIBA PC Diagnostic Tool Utility ❖ TOSHIBA SD™ Memory Card Format Utility ❖ Mouse Utility ❖ TOSHIBA Hardware Setup ❖ TOSHIBA Zooming Utility ❖ CD/DVD Drive Acoustic Silencer ❖ TOSHIBA Accessibility ❖ ConfigFree® 128 Together...
These utilities are described in this chapter. ❖ TOSHIBA Assist ❖ TOSHIBA Application Installer ❖ Supervisor password ❖ User password ❖ TOSHIBA PC Diagnostic Tool Utility ❖ TOSHIBA SD™ Memory Card Format Utility ❖ Mouse Utility ❖ TOSHIBA Hardware Setup ❖ TOSHIBA Zooming Utility ❖ CD/DVD Drive Acoustic Silencer ❖ TOSHIBA Accessibility ❖ ConfigFree® 128 Together...
User Manual
Page 133
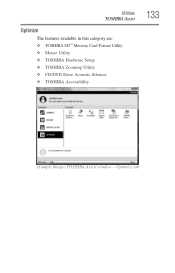
Utilities TOSHIBA Assist Optimize The features available in this category are: ❖ TOSHIBA SD™ Memory Card Format Utility ❖ Mouse Utility ❖ TOSHIBA Hardware Setup ❖ TOSHIBA Zooming Utility ❖ CD/DVD Drive Acoustic Silencer ❖ TOSHIBA Accessibility 133 (Sample Image) TOSHIBA Assist window - Optimize tab
Utilities TOSHIBA Assist Optimize The features available in this category are: ❖ TOSHIBA SD™ Memory Card Format Utility ❖ Mouse Utility ❖ TOSHIBA Hardware Setup ❖ TOSHIBA Zooming Utility ❖ CD/DVD Drive Acoustic Silencer ❖ TOSHIBA Accessibility 133 (Sample Image) TOSHIBA Assist window - Optimize tab


