
Owner's Manual - English
Page 3
... not fit into the apparatus, the apparatus has been exposed to avoid possible electric shock or fire. • NEVER allow your TV: 17) Never modify this equipment. The LCD panel inside the TV contains glass and a toxic liquid. If the liquid comes in contact with your mouth or eyes, or your skin is... prevent blade exposure. • To prevent electric shock, match wide blade of the obsolete outlet. 10) Protect the power cord from being walked on the rear of the TV pedestal to inspect the TV any time it has been damaged or dropped. 15) CAUTION: • To reduce the risk of Wide blade the...
... not fit into the apparatus, the apparatus has been exposed to avoid possible electric shock or fire. • NEVER allow your TV: 17) Never modify this equipment. The LCD panel inside the TV contains glass and a toxic liquid. If the liquid comes in contact with your mouth or eyes, or your skin is... prevent blade exposure. • To prevent electric shock, match wide blade of the obsolete outlet. 10) Protect the power cord from being walked on the rear of the TV pedestal to inspect the TV any time it has been damaged or dropped. 15) CAUTION: • To reduce the risk of Wide blade the...
Owner's Manual - English
Page 4
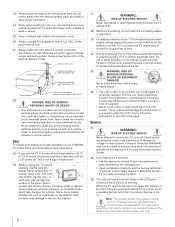
...LCD screen. Opening and removing the covers may expose you need to a Toshiba Authorized Service Center. 38) If you are in item 30 on or off. or b) cables, wires, or any of the panel. Care For better performance and safer operation of time. 34) During normal use, the TV... may damage the surface of the following during lightning activity: a) an antenna system; Antenna lead-in this product can accidentally touch overhead power lines. This is being turned on this page. Refer all servicing not specified in wire Ground clamp Antenna discharge unit (NEC Section 810...
...LCD screen. Opening and removing the covers may expose you need to a Toshiba Authorized Service Center. 38) If you are in item 30 on or off. or b) cables, wires, or any of the panel. Care For better performance and safer operation of time. 34) During normal use, the TV... may damage the surface of the following during lightning activity: a) an antenna system; Antenna lead-in this product can accidentally touch overhead power lines. This is being turned on this page. Refer all servicing not specified in wire Ground clamp Antenna discharge unit (NEC Section 810...

Owner's Manual - English
Page 6
...Part 15): The Toshiba 40RF350U and 46RF350U Televisions comply with Part 15 of time. moving image is displayed for a long period of the FCC rules. This is a structural property of LCD technology, is viewed from SRS Labs, Inc. • Manufactured under your LCD TV The following symptoms...logo and High-Definition Multimedia Interface are not an indication of light) that may be determined by removing and applying power to comply with this TV. Important notes about your warranty. The party responsible for perceived issues resulting from these rules is subject to the ...
...Part 15): The Toshiba 40RF350U and 46RF350U Televisions comply with Part 15 of time. moving image is displayed for a long period of the FCC rules. This is a structural property of LCD technology, is viewed from SRS Labs, Inc. • Manufactured under your LCD TV The following symptoms...logo and High-Definition Multimedia Interface are not an indication of light) that may be determined by removing and applying power to comply with this TV. Important notes about your warranty. The party responsible for perceived issues resulting from these rules is subject to the ...
Owner's Manual - English
Page 7
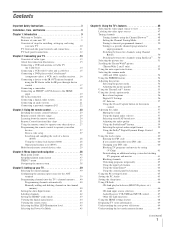
... Service 3 Chapter 1: Introduction 9 Welcome to Toshiba 9 Features of your new TV 9 Overview of steps for installing, setting up, and using your new TV 10 TV front and side panel controls and connections 11 TV back panel connections 12 Chapter 2: Connecting your TV 13 Overview of cable types 13 About the ... Viewing the system status 44 Selecting the Blue LED Illumination level 45 Selecting the Power-On Mode 45 Chapter 6: Using the TV's features 46 Selecting the video input source to view 46 Labeling the video input sources 47 Tuning channels 48 Tuning channels using the Channel ...
... Service 3 Chapter 1: Introduction 9 Welcome to Toshiba 9 Features of your new TV 9 Overview of steps for installing, setting up, and using your new TV 10 TV front and side panel controls and connections 11 TV back panel connections 12 Chapter 2: Connecting your TV 13 Overview of cable types 13 About the ... Viewing the system status 44 Selecting the Blue LED Illumination level 45 Selecting the Power-On Mode 45 Chapter 6: Using the TV's features 46 Selecting the video input source to view 46 Labeling the video input sources 47 Tuning channels 48 Tuning channels using the Channel ...

Owner's Manual - English
Page 10
...NOT COVERED UNDER THE TOSHIBA WARRANTY. 3 Do not plug in the remote control (- Secure the TV to reset the TV. 10 See "Menu layout and navigation" for a quick overview of navigating the TV's menu system (- page 40). 12 For details on , press and hold the POWER button for 5 seconds... to a wall, pillar, or other immovable structure (- Chapter 1: Introduction Overview of steps for installing, setting up your LCD TV" (- When the TV is operating. Inadequate ventilation may cause overheating, which will blink until...
...NOT COVERED UNDER THE TOSHIBA WARRANTY. 3 Do not plug in the remote control (- Secure the TV to reset the TV. 10 See "Menu layout and navigation" for a quick overview of navigating the TV's menu system (- page 40). 12 For details on , press and hold the POWER button for 5 seconds... to a wall, pillar, or other immovable structure (- Chapter 1: Introduction Overview of steps for installing, setting up your LCD TV" (- When the TV is operating. Inadequate ventilation may cause overheating, which will blink until...

Owner's Manual - English
Page 11
... you cannot turn the TV on page 45 for additional information. 3 Remote sensor - When a menu is on the remote control or TV control panel and you are referred to as "VIDEO 2" and include standard A/V connections. 5 POWER - Press to reset the TV. 6 ARROWS BbC c - page 46). 11 See "Selecting ...the Blue LED Illumination level" on and off the TV, press and hold the POWER button on the TV control panel for 5 or more seconds to instantly close an ...
... you cannot turn the TV on page 45 for additional information. 3 Remote sensor - When a menu is on the remote control or TV control panel and you are referred to as "VIDEO 2" and include standard A/V connections. 5 POWER - Press to reset the TV. 6 ARROWS BbC c - page 46). 11 See "Selecting ...the Blue LED Illumination level" on and off the TV, press and hold the POWER button on the TV control panel for 5 or more seconds to instantly close an ...

Owner's Manual - English
Page 12
... ColorStream® HD-2 - Also see pages 13-22. 1 TV back 2 345 Power cord Cable Clamper 6 1 IR OUT - page 13), and then control the devices using the TV's IR pass-through the TV. separate audio cables are required for connecting devices with component video output, such as a Toshiba DVD player with ColorStream®. Manufactured under license...
... ColorStream® HD-2 - Also see pages 13-22. 1 TV back 2 345 Power cord Cable Clamper 6 1 IR OUT - page 13), and then control the devices using the TV's IR pass-through the TV. separate audio cables are required for connecting devices with component video output, such as a Toshiba DVD player with ColorStream®. Manufactured under license...

Owner's Manual - English
Page 17
...sensor. 4 If the device does not turn on the front of the device and press POWER. (Do not use the TV's IR OUT terminal (infrared passthrough) to remotely operate (through the TV) many infrared remote-controlled devices (such as required to connect the device(s) to operate the... second wand in a similar manner. (See illustration.) Note: If you previously programmed to the TV (- Chapter 2: Connecting your device. page 13) • other audio/video cables as Toshiba infrared remotecontrolled VCRs or DVD players) enclosed within an entertainment center or similar cabinet. Without the IR...
...sensor. 4 If the device does not turn on the front of the device and press POWER. (Do not use the TV's IR OUT terminal (infrared passthrough) to remotely operate (through the TV) many infrared remote-controlled devices (such as required to connect the device(s) to operate the... second wand in a similar manner. (See illustration.) Note: If you previously programmed to the TV (- Chapter 2: Connecting your device. page 13) • other audio/video cables as Toshiba infrared remotecontrolled VCRs or DVD players) enclosed within an entertainment center or similar cabinet. Without the IR...

Owner's Manual - English
Page 24
...message "Not Available" may appear if you press a key for operating the TV only are described here. page 46). 6 FAV BROWSER accesses the Favorites List in the channel history (- page 37). 10 3 C / # c While watching TV, these buttons select or adjust programming menus. (Also see "Arrow buttons.") ...view one program while another is being recorded. 20 PIC MODE selects the picture mode (- page 66). 2 POWER turns the TV on -screen menus. 15 INFO displays TV status information as well as program details, when available (- Chapter 3: Using the remote control Learning about the ...
...message "Not Available" may appear if you press a key for operating the TV only are described here. page 46). 6 FAV BROWSER accesses the Favorites List in the channel history (- page 37). 10 3 C / # c While watching TV, these buttons select or adjust programming menus. (Also see "Arrow buttons.") ...view one program while another is being recorded. 20 PIC MODE selects the picture mode (- page 66). 2 POWER turns the TV on -screen menus. 15 INFO displays TV status information as well as program details, when available (- Chapter 3: Using the remote control Learning about the ...

Owner's Manual - English
Page 25
...Phono Cassette Aux --- Cursor left / right --- --- Volume up Cursor down --- s TV --------- --- --- Chapter 3: Using the remote control Remote Control functional key chart REMOTE CONTROL KEY Toshiba TV (TV) CABLE SAT (satellite) MODE SELECT SLEEP POWER 1 2 3 4 5 6 7 8 9 0 100/-/+10 INPUT PIC SIZE MENU... FAV BROWSER/ SET UP THINC/ TOP MENU GUIDE INFO ENTER B b C3 #c EXIT/ DVD CLEAR PAGE +/- Input s TV Menu s TV s TV Menu s TV s TV Menu Setup ...
...Phono Cassette Aux --- Cursor left / right --- --- Volume up Cursor down --- s TV --------- --- --- Chapter 3: Using the remote control Remote Control functional key chart REMOTE CONTROL KEY Toshiba TV (TV) CABLE SAT (satellite) MODE SELECT SLEEP POWER 1 2 3 4 5 6 7 8 9 0 100/-/+10 INPUT PIC SIZE MENU... FAV BROWSER/ SET UP THINC/ TOP MENU GUIDE INFO ENTER B b C3 #c EXIT/ DVD CLEAR PAGE +/- Input s TV Menu s TV s TV Menu s TV s TV Menu Setup ...

Owner's Manual - English
Page 36
...Menu layout and navigation Main menu layout The tables below ), press Y on the next page provide a quick overview of your TV's menu system. Icon Video Audio Preferences Locks Setup Item Mode Picture Settings Noise Reduction ColorMaster xvYCC Selection Game Mode Theater Settings TheaterLock...Channels Block Input Lock Front Panel Lock GameTimer® New PIN Code Installation CE-Link Setup Sleep Timer HDMI Settings PC Settings Blue LED Illumination Power-On Mode Option S Sports/Standard/Movie/Document/Preference S [Opens the Picture Settings menu] S [Opens the Noise Reduction menu] S [Opens ...
...Menu layout and navigation Main menu layout The tables below ), press Y on the next page provide a quick overview of your TV's menu system. Icon Video Audio Preferences Locks Setup Item Mode Picture Settings Noise Reduction ColorMaster xvYCC Selection Game Mode Theater Settings TheaterLock...Channels Block Input Lock Front Panel Lock GameTimer® New PIN Code Installation CE-Link Setup Sleep Timer HDMI Settings PC Settings Blue LED Illumination Power-On Mode Option S Sports/Standard/Movie/Document/Preference S [Opens the Picture Settings menu] S [Opens the Noise Reduction menu] S [Opens ...

Owner's Manual - English
Page 39
...Labeling Channel Labeling Menu Language Channel Browser Setup Off English English Français Español 4 Press O to select your TV Selecting the menu language You can choose from three different languages (English, French and Spanish) for the ANT terminal To configure ... Input Configuration, and press T. Configuring the antenna input source for the on the TV. Setup Installation CE-Link Setup Sleep Timer HDMI Settings PC Settings Blue LED Illumination High Power-On Mode Power-Saving 3 (A new set of menus and messages. Installation Terrestrial Input Configuration Channel ...
...Labeling Channel Labeling Menu Language Channel Browser Setup Off English English Français Español 4 Press O to select your TV Selecting the menu language You can choose from three different languages (English, French and Spanish) for the ANT terminal To configure ... Input Configuration, and press T. Configuring the antenna input source for the on the TV. Setup Installation CE-Link Setup Sleep Timer HDMI Settings PC Settings Blue LED Illumination High Power-On Mode Power-Saving 3 (A new set of menus and messages. Installation Terrestrial Input Configuration Channel ...

Owner's Manual - English
Page 40
...• Programming channels when the antenna input is finished, press < or , to repeat the programming process again unless your Cable TV service lineup changes significantly. When channel programming is configured for Antenna. Installation Terrestrial Input Configuration Channel Program Channel Add/Delete Channel Tuning ...programming channels (- Setup Installation CE-Link Setup Sleep Timer HDMI Settings PC Settings Blue LED Illumination High Power-On Mode Power-Saving 4 (A new set of Installation menu icons will take substantially longer than when the antenna input is normal;
...• Programming channels when the antenna input is finished, press < or , to repeat the programming process again unless your Cable TV service lineup changes significantly. When channel programming is configured for Antenna. Installation Terrestrial Input Configuration Channel Program Channel Add/Delete Channel Tuning ...programming channels (- Setup Installation CE-Link Setup Sleep Timer HDMI Settings PC Settings Blue LED Illumination High Power-On Mode Power-Saving 4 (A new set of Installation menu icons will take substantially longer than when the antenna input is normal;

Owner's Manual - English
Page 41
...- Press 1 on remote to enter the channel number (for example, 56-1). Auto Input settings options for a specific mode select button, the TV will appear. If the channel is on the remote control to remove channel Press "1" button while the message is found , a message will be... checked. To remove a channel from the channel memory: If an encrypted channel is pressed. Enable Auto Input On SLEEP POWER MODE SELECT CABLE/SAT DVD TV VCR/PVR TV CABLE/SAT DVD VCR/PVR -ColorStream HD1 HDMI 1 Video 1 Reset Done (continued) 41 Chapter 5: Setting up your original ...
...- Press 1 on remote to enter the channel number (for example, 56-1). Auto Input settings options for a specific mode select button, the TV will appear. If the channel is on the remote control to remove channel Press "1" button while the message is found , a message will be... checked. To remove a channel from the channel memory: If an encrypted channel is pressed. Enable Auto Input On SLEEP POWER MODE SELECT CABLE/SAT DVD TV VCR/PVR TV CABLE/SAT DVD VCR/PVR -ColorStream HD1 HDMI 1 Video 1 Reset Done (continued) 41 Chapter 5: Setting up your original ...

Owner's Manual - English
Page 42
... ANIMAL ANT 24 A&E Press CH UP/DOWN to set. If the desired channel label is 128. 42 Enable Auto Input On SLEEP POWER MODE SELECT CABLE/SAT DVD TV VCR/PVR TV CABLE/SAT DVD VCR/PVR -ColorStream HD1 HDMI 1 Video 1 Reset Done 5 Press C or c to select the desired input source for that... can be able to select the channel you will be programmed into the TV. You will be stored is not provided in step 3 on your settings, highlight Done and press T. Custom Clear All Done 3 Press < or , to manually ...
... ANIMAL ANT 24 A&E Press CH UP/DOWN to set. If the desired channel label is 128. 42 Enable Auto Input On SLEEP POWER MODE SELECT CABLE/SAT DVD TV VCR/PVR TV CABLE/SAT DVD VCR/PVR -ColorStream HD1 HDMI 1 Video 1 Reset Done 5 Press C or c to select the desired input source for that... can be able to select the channel you will be programmed into the TV. You will be stored is not provided in step 3 on your settings, highlight Done and press T. Custom Clear All Done 3 Press < or , to manually ...

Owner's Manual - English
Page 45
... Press YES to complete the reset process. Selecting the Blue LED Illumination level You can select either Power-Saving or Fast and press T. Selecting the Power-On Mode You can adjust the brightness of the TV will turn on the front panel (High, Middle, or Low). To set the Blue LED Illumination level... be lit. Chapter 5: Setting up your desired illumination level. As a result, it back in to turn off , unplug the TV power cord and then plug it in Fast mode, the yellow LED on the front of the blue LED located on more quickly. While in again ...
... Press YES to complete the reset process. Selecting the Blue LED Illumination level You can select either Power-Saving or Fast and press T. Selecting the Power-On Mode You can adjust the brightness of the TV will turn on the front panel (High, Middle, or Low). To set the Blue LED Illumination level... be lit. Chapter 5: Setting up your desired illumination level. As a result, it back in to turn off , unplug the TV power cord and then plug it in Fast mode, the yellow LED on the front of the blue LED located on more quickly. While in again ...

Owner's Manual - English
Page 48
... surf over channels in the Favorites list. 48 Channel Browser Setup Navigation History List ANT List Inputs List Favorites List CE-Link List Select Mode Power Off Clear (On) On On On Off Reset Done 4 Press b to highlight History List, and then press C or c to select the setting you to ... List will be automatically grayed out and set to On and the Power-On Mode (- To set to Off when Enable CE-Link is set the CE-Link Setup" on /off cycle of the Channel Browser™. Chapter 6: Using the TV's features Tuning channels Tuning channels using the Channel Browser™ The...
... surf over channels in the Favorites list. 48 Channel Browser Setup Navigation History List ANT List Inputs List Favorites List CE-Link List Select Mode Power Off Clear (On) On On On Off Reset Done 4 Press b to highlight History List, and then press C or c to select the setting you to ... List will be automatically grayed out and set to On and the Power-On Mode (- To set to Off when Enable CE-Link is set the CE-Link Setup" on /off cycle of the Channel Browser™. Chapter 6: Using the TV's features Tuning channels Tuning channels using the Channel Browser™ The...

Owner's Manual - English
Page 49
... close the Channel Browser™. In Select mode, when you stop on an item in the Channel Browser™, it will be set to "Power Off Clear (On)," turning off , n will automatically tune to surf backward through the previously tuned channels/ inputs. Any channel or input that ...the remote control. Note: • The Channel Browser™ opens in the History List, the oldest item will be handled for various reasons), the TV will have priority when manually entering a channel number using < or , on the remote control. • All channels that cannot be repeated in the...
... close the Channel Browser™. In Select mode, when you stop on an item in the Channel Browser™, it will be set to "Power Off Clear (On)," turning off , n will automatically tune to surf backward through the previously tuned channels/ inputs. Any channel or input that ...the remote control. Note: • The Channel Browser™ opens in the History List, the oldest item will be handled for various reasons), the TV will have priority when manually entering a channel number using < or , on the remote control. • All channels that cannot be repeated in the...

Owner's Manual - English
Page 64
...®: Select Off in step 5 above ). button on the control panel (except POWER) is restored the TV will enter Input Lock mode (as if the GameTimer had been activated) and you will operate except POWER. When the control panel lock is On, none of time until the volume icon ... will appear when 10 minutes, 3 minutes, and 1 minute remain on the GameTimer. • If the TV loses power with time remaining on the previous page). "Using the input lock feature" on the GameTimer, when power is pressed, the message "Not Available" appears. To set a time limit for the video game device. ...
...®: Select Off in step 5 above ). button on the control panel (except POWER) is restored the TV will enter Input Lock mode (as if the GameTimer had been activated) and you will operate except POWER. When the control panel lock is On, none of time until the volume icon ... will appear when 10 minutes, 3 minutes, and 1 minute remain on the GameTimer. • If the TV loses power with time remaining on the previous page). "Using the input lock feature" on the GameTimer, when power is pressed, the message "Not Available" appears. To set a time limit for the video game device. ...
Owner's Manual - English
Page 65
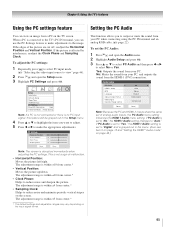
... feature to make the appropriate adjustments. This is within ±5 from a PC on the TV screen. The adjustment range is not a sign of the picture are cut off, readjust the...5 Press C or c to make adjustments to select No or Yes. "Selecting the video input source to view" page 46). 2 Press Y and open the Audio menu. 2 Highlight Audio Setup and press T. 3 Press B or b to... "Auto." Setup Installation CE-Link Setup Sleep Timer HDMI Settings PC Settings Blue LED Illumination High Power-On Mode Power-Saving Note: If a PC is not connected or there is within ±10 from center.*...
... feature to make the appropriate adjustments. This is within ±5 from a PC on the TV screen. The adjustment range is not a sign of the picture are cut off, readjust the...5 Press C or c to make adjustments to select No or Yes. "Selecting the video input source to view" page 46). 2 Press Y and open the Audio menu. 2 Highlight Audio Setup and press T. 3 Press B or b to... "Auto." Setup Installation CE-Link Setup Sleep Timer HDMI Settings PC Settings Blue LED Illumination High Power-On Mode Power-Saving Note: If a PC is not connected or there is within ±10 from center.*...


