Owner's Manual
Page 8
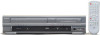
...the index or time search menu. 13. CM SKIP button (DVD) During playback, press to enter values for CD or to clear the selecting marker number in the marker setup mode or to clear the program once entered in slow motion of the tape. AUDIO button (VCR) During playback a HiFi ... or a TV channel. REC/OTR button (DVD/VCR) Press once to display the Disc menu. MENU/LIST button (DVD) Press to start Functional overview (cont'd) Remote Control 1 2 3 4 5 6 7 8 10 9 11 12 13 POWER REC SPEED AUDIO OPEN/CLOSE .@/: 1 GHI 4 PQRS 7 DISPLAY ABC 2 JKL 5 TUV 8 SPACE 0 VCR DEF 3 MNO CH 6 WXYZ VIDEO/...
...the index or time search menu. 13. CM SKIP button (DVD) During playback, press to enter values for CD or to clear the selecting marker number in the marker setup mode or to clear the program once entered in slow motion of the tape. AUDIO button (VCR) During playback a HiFi ... or a TV channel. REC/OTR button (DVD/VCR) Press once to display the Disc menu. MENU/LIST button (DVD) Press to start Functional overview (cont'd) Remote Control 1 2 3 4 5 6 7 8 10 9 11 12 13 POWER REC SPEED AUDIO OPEN/CLOSE .@/: 1 GHI 4 PQRS 7 DISPLAY ABC 2 JKL 5 TUV 8 SPACE 0 VCR DEF 3 MNO CH 6 WXYZ VIDEO/...
Owner's Manual
Page 18
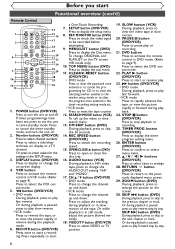
... SETUP button to turn on the unit. Setup 1 Press POWER button to display SETUP/DISC menu. Screen: 6 Select "Auto Preset" using the Number buttons: • When selecting cable channels which the unit is can select the line input mode ("L1" or "L2").To select "L1" by...in the unit when purchased.We recommend that you receive the TV channels. Getting channels automatically Channel settings 4 Select SETUP using the Number buttons on the remote control. celled during scanning: Press RETURN button or SETUP button to exit. •You can select a channel by using the CHANNEL...
... SETUP button to turn on the unit. Setup 1 Press POWER button to display SETUP/DISC menu. Screen: 6 Select "Auto Preset" using the Number buttons: • When selecting cable channels which the unit is can select the line input mode ("L1" or "L2").To select "L1" by...in the unit when purchased.We recommend that you receive the TV channels. Getting channels automatically Channel settings 4 Select SETUP using the Number buttons on the remote control. celled during scanning: Press RETURN button or SETUP button to exit. •You can select a channel by using the CHANNEL...
Owner's Manual
Page 35
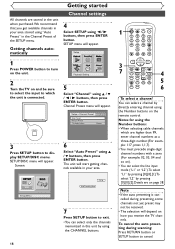
Recording Timer recording (cont'd) Before you start Connections Getting started Recording Playing discs 8 Select the channel number to record using K / L buttons. Setup > Recording > Timer Programming Date JAN/12 - - - Timer Programming list will need. 4 To clear the timer programming, select your...To stop the timer recording in advance of the main unit. STOP C button on the front display. Your program setting will appear on the remote control is entered. button to the timer standby mode. Start 10:00PM End CH DVD VCR Speed 10:30PM CH8 DVD 1H Refer to turn...
Recording Timer recording (cont'd) Before you start Connections Getting started Recording Playing discs 8 Select the channel number to record using K / L buttons. Setup > Recording > Timer Programming Date JAN/12 - - - Timer Programming list will need. 4 To clear the timer programming, select your...To stop the timer recording in advance of the main unit. STOP C button on the front display. Your program setting will appear on the remote control is entered. button to the timer standby mode. Start 10:00PM End CH DVD VCR Speed 10:30PM CH8 DVD 1H Refer to turn...
Owner's Manual
Page 94
...protect the tape and the video head from damage. 2 Press STOP button when the recording is selected by pressing REC SPEED button on the remote control. First: VCR 1 Press REC/OTR button to begin playback. 5 Press STOP C button to stop recording or to view. Recording ...play) or SLP (super long play . 2 Insert a prerecorded tape, then press PLAY B button to resume play ) mode by pressing Number buttons on the remote control. phane tape. If you want to resume it will be automatically adjusted upon playback.To adjust the tracking manually, press the CHANNEL K/L...
...protect the tape and the video head from damage. 2 Press STOP button when the recording is selected by pressing REC SPEED button on the remote control. First: VCR 1 Press REC/OTR button to begin playback. 5 Press STOP C button to stop recording or to view. Recording ...play) or SLP (super long play . 2 Insert a prerecorded tape, then press PLAY B button to resume play ) mode by pressing Number buttons on the remote control. phane tape. If you want to resume it will be automatically adjusted upon playback.To adjust the tracking manually, press the CHANNEL K/L...
Owner's Manual
Page 95
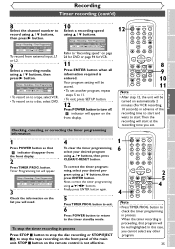
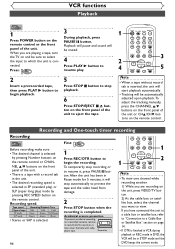
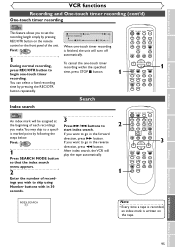
... PAUSE 1 During normal recording, press REC/OTR button to begin one-touch timer To cancel the one -touch timer recording is written on the remote control or the front panel of the unit. Playing discs Editing Changing the SETUP menu VCR functions Others Español 95 MENU/LIST TOP... SLOW DVD PAUSE PLAY STOP REC/OTR SETUP TIMER PROG. First: VCR 1 Press SEARCH MODE button so that the index search menu appears. 2 Enter the number of each recordings you make.You may skip to go in the reverse direction, press h button. After index search, the VCR will turn off automatically...
... PAUSE 1 During normal recording, press REC/OTR button to begin one-touch timer To cancel the one -touch timer recording is written on the remote control or the front panel of the unit. Playing discs Editing Changing the SETUP menu VCR functions Others Español 95 MENU/LIST TOP... SLOW DVD PAUSE PLAY STOP REC/OTR SETUP TIMER PROG. First: VCR 1 Press SEARCH MODE button so that the index search menu appears. 2 Enter the number of each recordings you make.You may skip to go in the reverse direction, press h button. After index search, the VCR will turn off automatically...
Owner's Manual
Page 96
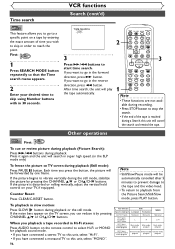
.../TV 9 SLOW DVD PAUSE PLAY STOP REC/OTR SETUP TIMER PROG. When you playback a tape recorded in Hi-Fi stereo: Press AUDIO button on the remote control to select Hi-Fi or MONO for playback sound mode. • If you have connected a stereo TV to this unit, select "Hi-Fi". •... search in super high speed. (in slow motion: Press SLOW button during playback. If the noise bars appear on your desired time to skip using Number buttons with in order to vibrate vertically during a Search, this unit, select "MONO". 96 Your Selection Type of time you can reduce it again and...
.../TV 9 SLOW DVD PAUSE PLAY STOP REC/OTR SETUP TIMER PROG. When you playback a tape recorded in Hi-Fi stereo: Press AUDIO button on the remote control to select Hi-Fi or MONO for playback sound mode. • If you have connected a stereo TV to this unit, select "Hi-Fi". •... search in super high speed. (in slow motion: Press SLOW button during playback. If the noise bars appear on your desired time to skip using Number buttons with in order to vibrate vertically during a Search, this unit, select "MONO". 96 Your Selection Type of time you can reduce it again and...
Owner's Manual
Page 108
... excluded from this product or damage which occurs during normal use. This warranty is void and of no effect if any serial numbers on the product are caused by repairs, alterations or product not supplied by an unauthorized service center. AND ITS REPRESENTATIVES OR AGENTS...for one (1) year from fire, flood, lightning or other person or transferee. THIS WARRANTY DOES NOT COVER PACKING MATERIALS, ANY ACCESSORIES (EXCEPT REMOTE CONTROL), ANY COSMETIC PARTS, COMPLETE ASSEMBLY PARTS, DEMO OR FLOOR MODELS. ALL WARRANTY INSPECTIONS AND REPAIRS MUST BE PERFORMED BY A FUNAI AUTHORIZED SERVICE...
... excluded from this product or damage which occurs during normal use. This warranty is void and of no effect if any serial numbers on the product are caused by repairs, alterations or product not supplied by an unauthorized service center. AND ITS REPRESENTATIVES OR AGENTS...for one (1) year from fire, flood, lightning or other person or transferee. THIS WARRANTY DOES NOT COVER PACKING MATERIALS, ANY ACCESSORIES (EXCEPT REMOTE CONTROL), ANY COSMETIC PARTS, COMPLETE ASSEMBLY PARTS, DEMO OR FLOOR MODELS. ALL WARRANTY INSPECTIONS AND REPAIRS MUST BE PERFORMED BY A FUNAI AUTHORIZED SERVICE...


