

User Guide
Page 2
... Ports...13 About the Indicator Lights ...19 Connecting a Power Source ...21 Using the Battery Pack ...22 Shutting Down Your Computer Safely ...30 Using Your VAIO Computer ...31 Using the Keyboard ...32 Using the Touch Pad ...34 Using Special-function Buttons ...35 Using the Built-in MOTION EYE Camera...36 Using... the Optical Disc Drive ...39 Using the ExpressCard Module ...49 Using the Memory Stick ...52 Using the SD Memory Card ...58 Using the Internet...61 Using the Network (LAN) ...63 Using the Wireless LAN (WLAN) ...65
... Ports...13 About the Indicator Lights ...19 Connecting a Power Source ...21 Using the Battery Pack ...22 Shutting Down Your Computer Safely ...30 Using Your VAIO Computer ...31 Using the Keyboard ...32 Using the Touch Pad ...34 Using Special-function Buttons ...35 Using the Built-in MOTION EYE Camera...36 Using... the Optical Disc Drive ...39 Using the ExpressCard Module ...49 Using the Memory Stick ...52 Using the SD Memory Card ...58 Using the Internet...61 Using the Network (LAN) ...63 Using the Wireless LAN (WLAN) ...65
User Guide
Page 3
... ...99 Connecting a Universal Serial Bus (USB) Device...100 Connecting a Printer ...103 Connecting an i.LINK Device ...104 Customizing Your VAIO Computer ...106 Selecting Performance Modes ...107 Setting the Password ...108 Using Fingerprint Authentication ...120 Using the Trusted Platform Module (TPM)...128... Setting Up Your Computer with the VAIO Control Center 138 Using the VAIO Status Monitor ...139 Using the Power Saving Modes ...140 Managing Power with the VAIO Power Management 145 Protecting the Hard Disk ...147 Upgrading Your VAIO Computer...148 Adding and Removing Memory...149
... ...99 Connecting a Universal Serial Bus (USB) Device...100 Connecting a Printer ...103 Connecting an i.LINK Device ...104 Customizing Your VAIO Computer ...106 Selecting Performance Modes ...107 Setting the Password ...108 Using Fingerprint Authentication ...120 Using the Trusted Platform Module (TPM)...128... Setting Up Your Computer with the VAIO Control Center 138 Using the VAIO Status Monitor ...139 Using the Power Saving Modes ...140 Managing Power with the VAIO Power Management 145 Protecting the Hard Disk ...147 Upgrading Your VAIO Computer...148 Adding and Removing Memory...149

User Guide
Page 4
n4 N Precautions ...155 Handling the LCD Screen ...156 Using the Power Source ...157 Handling Your Computer ...158 Handling the Built-in MOTION EYE Camera...160 Handling Floppy Disks ...161 Handling Discs ...162 Using the Battery Pack ...163 Using Headphones ...165 Handling the Memory Stick ...166 Handling the Hard Disk ...167 Updating Your Computer ...168 Troubleshooting ...169 Computer ...171 System Security ...179 Battery...180 Built-in MOTION EYE Camera...182 Internet ...184 Networking ...186 Bluetooth Technology ...189 Optical Discs ...193 Display ...198 Printing ...202 Microphone ...203
n4 N Precautions ...155 Handling the LCD Screen ...156 Using the Power Source ...157 Handling Your Computer ...158 Handling the Built-in MOTION EYE Camera...160 Handling Floppy Disks ...161 Handling Discs ...162 Using the Battery Pack ...163 Using Headphones ...165 Handling the Memory Stick ...166 Handling the Hard Disk ...167 Updating Your Computer ...168 Troubleshooting ...169 Computer ...171 System Security ...179 Battery...180 Built-in MOTION EYE Camera...182 Internet ...184 Networking ...186 Bluetooth Technology ...189 Optical Discs ...193 Display ...198 Printing ...202 Microphone ...203

User Guide
Page 5
n5 N Mouse ...204 Speakers ...205 Touch Pad...206 Keyboard...207 Floppy Disks ...208 Audio/Video...209 Memory Stick ...213 Peripherals ...214 Docking Station ...215 Support Options ...216 Sony Support Information ...216 Trademarks ...220
n5 N Mouse ...204 Speakers ...205 Touch Pad...206 Keyboard...207 Floppy Disks ...208 Audio/Video...209 Memory Stick ...213 Peripherals ...214 Docking Station ...215 Support Options ...216 Sony Support Information ...216 Trademarks ...220

User Guide
Page 14
See the online specifications to find out about your computer may include a built-in flash memory storage drive depending on the model you purchased. n 14 N Getting Started A STAMINA mode indicator (page 19) B Performance selector switch (page 107) C ... (page 19) G Hard disk drive*1/Optical disc drive indicator (page 19) H Media Access indicator (page 19) I WIRELESS indicator (page 19) J SD memory card slot (page 58) K Memory Stick slot*2 (page 52) L WIRELESS switch (page 65) M Built-in microphone (monaural) *1 The storage device configuration of your configuration. *2 Your computer supports...
See the online specifications to find out about your computer may include a built-in flash memory storage drive depending on the model you purchased. n 14 N Getting Started A STAMINA mode indicator (page 19) B Performance selector switch (page 107) C ... (page 19) G Hard disk drive*1/Optical disc drive indicator (page 19) H Media Access indicator (page 19) I WIRELESS indicator (page 19) J SD memory card slot (page 58) K Memory Stick slot*2 (page 52) L WIRELESS switch (page 65) M Built-in microphone (monaural) *1 The storage device configuration of your configuration. *2 Your computer supports...

User Guide
Page 18
Bottom n 18 N Getting Started A Docking station connector (page 77) B Air vents C Memory module compartment cover (page 149)
Bottom n 18 N Getting Started A Docking station connector (page 77) B Air vents C Memory module compartment cover (page 149)

User Guide
Page 19
... performance. Illuminates while the computer is in SPEED mode to turn off when this indicator is lit.) When the indicator is unlit, the memory card is not in uppercase. Normal scrolling resumes when the Scroll lock indicator is charging. See Charging the Battery Pack (page 25) for... unlit. n 19 N Getting Started About the Indicator Lights Your computer is equipped with all programs. Press the Fn+Scr Lk keys to a memory card. (Do not place the computer into Sleep mode or turn it off the indicator. Illuminates while the battery pack is unlit. Illuminates while...
... performance. Illuminates while the computer is in SPEED mode to turn off when this indicator is lit.) When the indicator is unlit, the memory card is not in uppercase. Normal scrolling resumes when the Scroll lock indicator is charging. See Charging the Battery Pack (page 25) for... unlit. n 19 N Getting Started About the Indicator Lights Your computer is equipped with all programs. Press the Fn+Scr Lk keys to a memory card. (Do not place the computer into Sleep mode or turn it off the indicator. Illuminates while the battery pack is unlit. Illuminates while...

User Guide
Page 20
See the online specifications to find out about your computer may include a built-in flash memory storage drive depending on . * The storage device configuration of your configuration. n 20 N Getting Started Indicator Functions WIRELESS Illuminates when the WIRELESS switch is turned on the model you purchased.
See the online specifications to find out about your computer may include a built-in flash memory storage drive depending on . * The storage device configuration of your configuration. n 20 N Getting Started Indicator Functions WIRELESS Illuminates when the WIRELESS switch is turned on the model you purchased.
User Guide
Page 31
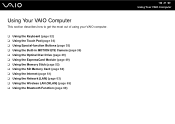
... This section describes how to get the most out of using your VAIO computer. ❑ Using the Keyboard (page 32) ❑ Using the Touch Pad (page 34) ❑ Using Special-function Buttons (page 35) ❑ Using the Built-... EYE Camera (page 36) ❑ Using the Optical Disc Drive (page 39) ❑ Using the ExpressCard Module (page 49) ❑ Using the Memory Stick (page 52) ❑ Using the SD Memory Card (page 58) ❑ Using the Internet (page 61) ❑ Using the Network (LAN) (page 63) ❑ Using the Wireless LAN...
... This section describes how to get the most out of using your VAIO computer. ❑ Using the Keyboard (page 32) ❑ Using the Touch Pad (page 34) ❑ Using Special-function Buttons (page 35) ❑ Using the Built-... EYE Camera (page 36) ❑ Using the Optical Disc Drive (page 39) ❑ Using the ExpressCard Module (page 49) ❑ Using the Memory Stick (page 52) ❑ Using the SD Memory Card (page 58) ❑ Using the Internet (page 61) ❑ Using the Network (LAN) (page 63) ❑ Using the Wireless LAN...

User Guide
Page 43
As with discs that are required for use memory-resident utility software while the optical disc drive is not possible. Sony does NOT guarantee the compatibility of VAIO optical disc drives with other side. Region settings are not compliant with the High-bandwidth Digital Content...copyright protected Blu-ray Disc media. Some contents may limit compatibility or prevent Blu-ray Disc media playback. n 43 N Using Your VAIO Computer ! This product is a two sided disc product with your computer to the Compact Disc Digital Audio standard specifications (CD Standard)....
As with discs that are required for use memory-resident utility software while the optical disc drive is not possible. Sony does NOT guarantee the compatibility of VAIO optical disc drives with other side. Region settings are not compliant with the High-bandwidth Digital Content...copyright protected Blu-ray Disc media. Some contents may limit compatibility or prevent Blu-ray Disc media playback. n 43 N Using Your VAIO Computer ! This product is a two sided disc product with your computer to the Compact Disc Digital Audio standard specifications (CD Standard)....

User Guide
Page 52
Because it can be used for exchanging and sharing digital data with compatible products, such as digital cameras, mobile phones, and other devices. n 52 N Using Your VAIO Computer Using the Memory Stick The Memory Stick is removable, it is a compact, portable, and versatile IC recording media especially designed for external data storage.
Because it can be used for exchanging and sharing digital data with compatible products, such as digital cameras, mobile phones, and other devices. n 52 N Using Your VAIO Computer Using the Memory Stick The Memory Stick is removable, it is a compact, portable, and versatile IC recording media especially designed for external data storage.

User Guide
Page 53
... (M2), be used only within the law. However, not all the Memory Stick that are available as the compatible media are guaranteed of the copyright protection technology developed by Sony. n 53 N Using Your VAIO Computer Before You Use the Memory Stick The Memory Stick slot on your personal use, it is against the copyright law...
... (M2), be used only within the law. However, not all the Memory Stick that are available as the compatible media are guaranteed of the copyright protection technology developed by Sony. n 53 N Using Your VAIO Computer Before You Use the Memory Stick The Memory Stick slot on your personal use, it is against the copyright law...

User Guide
Page 54
If nothing appears on the Memory Stick are displayed. The Memory Stick is automatically detected by your system and the contents on the desktop, click Start, Computer, and double-click the Memory Stick icon. n 54 N Using Your VAIO Computer Inserting a Memory Stick To insert a Memory Stick 1 Locate the Memory Stick slot. 2 Hold the Memory Stick with the arrow facing upward and pointing toward the slot. 3 Carefully slide the Memory Stick into the slot until it clicks into place.
If nothing appears on the Memory Stick are displayed. The Memory Stick is automatically detected by your system and the contents on the desktop, click Start, Computer, and double-click the Memory Stick icon. n 54 N Using Your VAIO Computer Inserting a Memory Stick To insert a Memory Stick 1 Locate the Memory Stick slot. 2 Hold the Memory Stick with the arrow facing upward and pointing toward the slot. 3 Carefully slide the Memory Stick into the slot until it clicks into place.

User Guide
Page 55
...computer or the media, do not force the Memory Stick into the slot if you insert it smoothly. Do not insert more than one Memory Stick into the slot. Improper insertion of data... files saved in the correct direction as you cannot insert it into the slot. To view the contents on the Memory Stick 1 ...Click Start and Computer to open the Computer window. 2 Double-click the Memory Stick icon to hold the Memory Stick with the arrow pointing in the Memory Stick. To avoid damaging...
...computer or the media, do not force the Memory Stick into the slot if you insert it smoothly. Do not insert more than one Memory Stick into the slot. Improper insertion of data... files saved in the correct direction as you cannot insert it into the slot. To view the contents on the Memory Stick 1 ...Click Start and Computer to open the Computer window. 2 Double-click the Memory Stick icon to hold the Memory Stick with the arrow pointing in the Memory Stick. To avoid damaging...

User Guide
Page 56
...make sure that is ready for use the device that it may change. It may take time to open the Computer window. 3 Right-click the Memory Stick icon and select Format. 4 Click Restore device defaults. ! Do not select NTFS from the slot while formatting. This could cause a malfunction. ...your valuable data. Be sure to use . Do not remove the Memory Stick from the File system drop-down list as it does not contain your computer, follow these steps. ! n 56 N Using Your VAIO Computer To format a Memory Stick The Memory Stick has been formatted in Format options. 5 Click Start. 6 ...
...make sure that is ready for use the device that it may change. It may take time to open the Computer window. 3 Right-click the Memory Stick icon and select Format. 4 Click Restore device defaults. ! Do not select NTFS from the slot while formatting. This could cause a malfunction. ...your valuable data. Be sure to use . Do not remove the Memory Stick from the File system drop-down list as it does not contain your computer, follow these steps. ! n 56 N Using Your VAIO Computer To format a Memory Stick The Memory Stick has been formatted in Format options. 5 Click Start. 6 ...

User Guide
Page 57
Do not remove the Memory Stick while the Media Access indicator light is unlit. 2 Push in the Memory Stick toward the computer and release. If you do, you may pop out unexpectedly. n 57 N Using Your VAIO Computer Removing a Memory Stick ! The Memory Stick ejects. 3 Pull the Memory Stick out of data may take time to load, so make sure the indicator is unlit before removing the Memory Stick. Large volumes of the slot. ! Always remove the Memory Stick gently, or it may lose data. To remove a Memory Stick 1 Check that the Media Access indicator light is lit.
Do not remove the Memory Stick while the Media Access indicator light is unlit. 2 Push in the Memory Stick toward the computer and release. If you do, you may pop out unexpectedly. n 57 N Using Your VAIO Computer Removing a Memory Stick ! The Memory Stick ejects. 3 Pull the Memory Stick out of data may take time to load, so make sure the indicator is unlit before removing the Memory Stick. Large volumes of the slot. ! Always remove the Memory Stick gently, or it may lose data. To remove a Memory Stick 1 Check that the Media Access indicator light is lit.

User Guide
Page 58
... computer supports the following memory cards: ❑ SD memory card ❑ SDHC memory card ❑ MultiMediaCard (MMC) For the latest information on your computer. The SD memory card slot on compatible memory cards, see Sony Support Information (page 216) to 2 GB and SDHC memory cards with an SD memory card slot. n 58 N Using Your VAIO Computer Using the SD...
... computer supports the following memory cards: ❑ SD memory card ❑ SDHC memory card ❑ MultiMediaCard (MMC) For the latest information on your computer. The SD memory card slot on compatible memory cards, see Sony Support Information (page 216) to 2 GB and SDHC memory cards with an SD memory card slot. n 58 N Using Your VAIO Computer Using the SD...

User Guide
Page 59
Inserting an SD Memory Card To insert an SD memory card 1 Locate the SD memory card slot. 2 Hold the SD memory card with the arrow facing upward and pointing toward the slot. 3 Carefully slide the SD memory card into the slot until it in the proper direction. n 59 N Using Your VAIO Computer ✍ If the SD memory card does not go into the slot easily, remove it gently and verify you are inserting it clicks into the slot. Do not force the card into place.
Inserting an SD Memory Card To insert an SD memory card 1 Locate the SD memory card slot. 2 Hold the SD memory card with the arrow facing upward and pointing toward the slot. 3 Carefully slide the SD memory card into the slot until it in the proper direction. n 59 N Using Your VAIO Computer ✍ If the SD memory card does not go into the slot easily, remove it gently and verify you are inserting it clicks into the slot. Do not force the card into place.

User Guide
Page 60
To remove an SD memory card 1 Check that the Media Access indicator light is lit. The SD memory card ejects. 3 Pull the SD memory card out of the slot. Do not remove an SD memory card while the Media Access indicator light is unlit. 2 Push in the SD memory card toward the computer and release. If you do, the card or its data may become damaged. n 60 N Using Your VAIO Computer Removing an SD Memory Card !
To remove an SD memory card 1 Check that the Media Access indicator light is lit. The SD memory card ejects. 3 Pull the SD memory card out of the slot. Do not remove an SD memory card while the Media Access indicator light is unlit. 2 Push in the SD memory card toward the computer and release. If you do, the card or its data may become damaged. n 60 N Using Your VAIO Computer Removing an SD Memory Card !

User Guide
Page 105
... video cameras, ports labeled DV Out, DV In/Out, or i.LINK are i.LINK-compatible. Your digital video camcorder may need to be connected differently. The Sony digital video camcorder shown here is an example. n 105 N Using Peripheral Devices Connecting a Digital Video Camcorder To connect a digital video camcorder Plug one end of... an i.LINK cable (1) (not supplied) into the i.LINK port (2) on the computer and the other end into the DV In/ Out port (3) on a Memory Stick when using an i.LINK connection.
... video cameras, ports labeled DV Out, DV In/Out, or i.LINK are i.LINK-compatible. Your digital video camcorder may need to be connected differently. The Sony digital video camcorder shown here is an example. n 105 N Using Peripheral Devices Connecting a Digital Video Camcorder To connect a digital video camcorder Plug one end of... an i.LINK cable (1) (not supplied) into the i.LINK port (2) on the computer and the other end into the DV In/ Out port (3) on a Memory Stick when using an i.LINK connection.


