
User Guide
Page 20
n 20 N Getting Started To connect the supplied 2-channel speakers 1 Plug the speaker cable (1) from the back of the right speaker to the FRONT jack (2) on the back of the computer. 2 Plug the power cable from the right speaker to a grounded AC wall outlet, surge protector, or Universal Power Supply (UPS) (3).
n 20 N Getting Started To connect the supplied 2-channel speakers 1 Plug the speaker cable (1) from the back of the right speaker to the FRONT jack (2) on the back of the computer. 2 Plug the power cable from the right speaker to a grounded AC wall outlet, surge protector, or Universal Power Supply (UPS) (3).

User Guide
Page 27
Use only the power cord supplied with your wireless keyboard and wireless mouse. ! n 27 N Getting Started Connecting the Power Cord Your computer's power cord must be plugged into an AC power source, such as an AC wall outlet, surge protector, or Uninterruptible Power Supply (UPS), before you can establish communication with the computer.
Use only the power cord supplied with your wireless keyboard and wireless mouse. ! n 27 N Getting Started Connecting the Power Cord Your computer's power cord must be plugged into an AC power source, such as an AC wall outlet, surge protector, or Uninterruptible Power Supply (UPS), before you can establish communication with the computer.

User Guide
Page 28
n 28 N Getting Started To connect the power cord 1 Insert the power cord into the AC In port (1) on the back of the computer. 2 Insert the power cord plugs from the display, computer, and speakers into a grounded AC wall outlet, surge protector, or Universal Power Supply (UPS) (2).
n 28 N Getting Started To connect the power cord 1 Insert the power cord into the AC In port (1) on the back of the computer. 2 Insert the power cord plugs from the display, computer, and speakers into a grounded AC wall outlet, surge protector, or Universal Power Supply (UPS) (2).

User Guide
Page 32
... arrows Move the pointer on and off. D Standby button Provides for the lowest level of power consumption. F Applications key Displays a shortcut menu in certain software applications. n 32 N Using Your VAIO Computer Using the Keyboard A wireless keyboard is supplied with additional keys that perform specific functions. Using the Wireless Keyboard A Function keys Perform certain tasks...
... arrows Move the pointer on and off. D Standby button Provides for the lowest level of power consumption. F Applications key Displays a shortcut menu in certain software applications. n 32 N Using Your VAIO Computer Using the Keyboard A wireless keyboard is supplied with additional keys that perform specific functions. Using the Wireless Keyboard A Function keys Perform certain tasks...

User Guide
Page 36
...control the movement by moving the entire mouse (the scroll function is available only with your computer. C Right button Press the right button once to enable communication between the computer and the wireless mouse. Press the wheel once to select items. To drag and drop ... button down a page. D Power switch Slide the switch to plug in and uses a light-emitting diode (LED) instead of a ball. n 36 N Using Your VAIO Computer Using the Mouse A wireless mouse is supplied with applications that support it). Using the Wireless Mouse Your computer is supplied with a wireless optical mouse, ...
...control the movement by moving the entire mouse (the scroll function is available only with your computer. C Right button Press the right button once to enable communication between the computer and the wireless mouse. Press the wheel once to select items. To drag and drop ... button down a page. D Power switch Slide the switch to plug in and uses a light-emitting diode (LED) instead of a ball. n 36 N Using Your VAIO Computer Using the Mouse A wireless mouse is supplied with applications that support it). Using the Wireless Mouse Your computer is supplied with a wireless optical mouse, ...

User Guide
Page 38
n 38 N Using Your VAIO Computer 2 Turn on the computer. 3 Press the CONNECT button on the bottom of each other. Step 3 and 4 must be established. ! Communication between the wireless mouse and the computer should now be completed within 10 seconds of the radio frequency receiver. 4 Turn over the wireless mouse, slide the power switch to the ON position, and press the CONNECT button. To connect the wireless mouse 1 Insert the supplied two AA batteries into the wireless mouse as shown below.
n 38 N Using Your VAIO Computer 2 Turn on the computer. 3 Press the CONNECT button on the bottom of each other. Step 3 and 4 must be established. ! Communication between the wireless mouse and the computer should now be completed within 10 seconds of the radio frequency receiver. 4 Turn over the wireless mouse, slide the power switch to the ON position, and press the CONNECT button. To connect the wireless mouse 1 Insert the supplied two AA batteries into the wireless mouse as shown below.

User Guide
Page 50
Connect the other end to a VHF/UHF RF combiner/transformer (3) (not supplied). 2 Connect one end of another TV coaxial cable (4) (not supplied) to the VHF/UHF port (5) on the computer. Connect the other power sources or connectors to standard cable access (CATV) (page 48). Depending on...may need to your computer to an indoor/outdoor antenna system, using Option 1 or Option 2 from other end to the combiner/transformer (3). Move the antenna cable away from the previous section, Connecting to reduce reception interference. n 50 N Using Your VAIO Computer Connecting to a standard...
Connect the other end to a VHF/UHF RF combiner/transformer (3) (not supplied). 2 Connect one end of another TV coaxial cable (4) (not supplied) to the VHF/UHF port (5) on the computer. Connect the other power sources or connectors to standard cable access (CATV) (page 48). Depending on...may need to your computer to an indoor/outdoor antenna system, using Option 1 or Option 2 from other end to the combiner/transformer (3). Move the antenna cable away from the previous section, Connecting to reduce reception interference. n 50 N Using Your VAIO Computer Connecting to a standard...

User Guide
Page 78
n 78 N Using Peripheral Devices Connecting a Printer Using the Printer Port To connect a printer using the printer port 1 Plug the printer power cord (1) into an AC outlet. 2 Plug the printer cable (2) supplied with your printer into the printer port (3) on the back of the computer. ✍ Before connecting the printer, turn off the computer and the printer, and unplug the AC adapter and the power cord.
n 78 N Using Peripheral Devices Connecting a Printer Using the Printer Port To connect a printer using the printer port 1 Plug the printer power cord (1) into an AC outlet. 2 Plug the printer cable (2) supplied with your printer into the printer port (3) on the back of the computer. ✍ Before connecting the printer, turn off the computer and the printer, and unplug the AC adapter and the power cord.

User Guide
Page 79
n 79 N Using Peripheral Devices Connecting an i.LINK Device Notes on connecting i.LINK devices ❑ The computer includes an i.LINK (IEEE1394) port, which you connect them to the computer. The total power supplied by the 6-pin i.LINK port does not exceed 6 watts. ❑ The i.LINK port supports transfer rates up to a ...to an i.LINK device such as a digital video camcorder or to connect two VAIO computers in order to the manual that came with your software for example, an HDD or CD-RW drive) before you can supply power (10V to 12V) to a connected i.LINK device, if the device is ...
n 79 N Using Peripheral Devices Connecting an i.LINK Device Notes on connecting i.LINK devices ❑ The computer includes an i.LINK (IEEE1394) port, which you connect them to the computer. The total power supplied by the 6-pin i.LINK port does not exceed 6 watts. ❑ The i.LINK port supports transfer rates up to a ...to an i.LINK device such as a digital video camcorder or to connect two VAIO computers in order to the manual that came with your software for example, an HDD or CD-RW drive) before you can supply power (10V to 12V) to a connected i.LINK device, if the device is ...

User Guide
Page 128
... sure that the AC outlet is easily accessible. ❑ Use the power cord supplied with a surge protector. Never pull the cord itself. ❑ Unplug the computer from the AC outlet if you are planning to not use any other power-consuming equipment, such as it out by the plug. n 128 N...10065; Do not share the AC outlet with other power cord as a photocopier or shredder. ❑ You can purchase a power strip with the computer or genuine Sony products. Do not use the computer for example. ❑ Do not place heavy objects on the power cord. ❑ To disconnect the cord, pull ...
... sure that the AC outlet is easily accessible. ❑ Use the power cord supplied with a surge protector. Never pull the cord itself. ❑ Unplug the computer from the AC outlet if you are planning to not use any other power-consuming equipment, such as it out by the plug. n 128 N...10065; Do not share the AC outlet with other power cord as a photocopier or shredder. ❑ You can purchase a power strip with the computer or genuine Sony products. Do not use the computer for example. ❑ Do not place heavy objects on the power cord. ❑ To disconnect the cord, pull ...

User Guide
Page 136
.... ❑ Condensation may cause the computer to malfunction. Make sure the VAIO power indicator shows the power is on. ❑ Make sure the optical disc drive (if applicable) is empty. ❑ If the computer is plugged into a power strip or uninterruptible power supply (UPS), make sure the power strip or UPS is plugged into a power source and turned on. ❑...
.... ❑ Condensation may cause the computer to malfunction. Make sure the VAIO power indicator shows the power is on. ❑ Make sure the optical disc drive (if applicable) is empty. ❑ If the computer is plugged into a power strip or uninterruptible power supply (UPS), make sure the power strip or UPS is plugged into a power source and turned on. ❑...

User Guide
Page 149
... to open the submenu. 6 Double-click the listed drive, and select the Properties tab. 7 Click to malfunction. ❑ Make sure the computer is running on the computer, do not use the computer for this CD-ROM device check box, if it to the CD or DVD. Check the DVD package to make sure... to malfunction. ❑ If a region code warning appears, the disc may be incompatible with the optical disc drive. ❑ If you notice condensation on AC power supply and try the disc again. You can cause the computer to select the Enable digital CD audio for at least one hour.
... to open the submenu. 6 Double-click the listed drive, and select the Properties tab. 7 Click to malfunction. ❑ Make sure the computer is running on the computer, do not use the computer for this CD-ROM device check box, if it to the CD or DVD. Check the DVD package to make sure... to malfunction. ❑ If a region code warning appears, the disc may be incompatible with the optical disc drive. ❑ If you notice condensation on AC power supply and try the disc again. You can cause the computer to select the Enable digital CD audio for at least one hour.

User Guide
Page 155
...do if the pointer doesn't move when I do if the computer doesn't recognize the mouse? ❑ Confirm that the supplied AA batteries are playing a disc, press the Ctrl+Alt+Delete keys simultaneously to stop playback and restart the computer. ❑ If you are properly installed. ❑ Press ... frequency receiver to re-establish the connection between the two devices. When the computer turns off, wait 10 to 15 seconds then press the power button again to restart the computer. ❑ Press and hold the power button. What should I use the mouse? ❑ Make sure another mouse...
...do if the pointer doesn't move when I do if the computer doesn't recognize the mouse? ❑ Confirm that the supplied AA batteries are playing a disc, press the Ctrl+Alt+Delete keys simultaneously to stop playback and restart the computer. ❑ If you are properly installed. ❑ Press ... frequency receiver to re-establish the connection between the two devices. When the computer turns off, wait 10 to 15 seconds then press the power button again to restart the computer. ❑ Press and hold the power button. What should I use the mouse? ❑ Make sure another mouse...

User Guide
Page 157
... volume is turned up loud enough to hear sound. ❑ The speaker volume may not be designed for computer use. ❑ If the speakers have a muting button, set the button to off. ❑ If ...turned off. See the manual that came with the speakers. ❑ If the speakers require external power, make sure the speakers are properly connected and the volume is turned up loud enough to hear ...cable to the Headphones jack, disconnect the cable and use the speaker cable that was supplied with the speakers for more information. n 157 N Troubleshooting Speakers Why won't my speakers work? &#...
... volume is turned up loud enough to hear sound. ❑ The speaker volume may not be designed for computer use. ❑ If the speakers have a muting button, set the button to off. ❑ If ...turned off. See the manual that came with the speakers. ❑ If the speakers require external power, make sure the speakers are properly connected and the volume is turned up loud enough to hear ...cable to the Headphones jack, disconnect the cable and use the speaker cable that was supplied with the speakers for more information. n 157 N Troubleshooting Speakers Why won't my speakers work? &#...

User Guide
Page 163
...first time you connect the device directly to the AC outlet. ❑ Try using its own power supply. If you are using a digital camera, check the battery is connected properly to the computer without a hub. We recommend you connected the device. ❑ Check the manual provided with ...the USB device. For example, if you connect the device. ❑ Try connecting a simple, low-powered device such as a mouse to install software ...
...first time you connect the device directly to the AC outlet. ❑ Try using its own power supply. If you are using a digital camera, check the battery is connected properly to the computer without a hub. We recommend you connected the device. ❑ Check the manual provided with ...the USB device. For example, if you connect the device. ❑ Try connecting a simple, low-powered device such as a mouse to install software ...

Marketing Specifications
Page 2
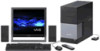
...Video / Audio Inputs (front and rear) Coaxial Input (VHF/UHF) Power Management: ACPI 1.0 Compliant Processor: Intel® Pentium® D ...Spyware 30-Day Subscription VAIO® Recovery Wizard VAIO® Support Central VAIO® Security Center VAIO® Update Supplied Software: Adobe®...Sony Desktop Computer are trademarks of this document. Performance will be provided via thrid-party technician to be accomplished with Onsite Service6 Online and Email Support: Support available from the applicable 3rd party vendor. VGC-RC210G VAIO® Digital Studio™ Desktop...
...Video / Audio Inputs (front and rear) Coaxial Input (VHF/UHF) Power Management: ACPI 1.0 Compliant Processor: Intel® Pentium® D ...Spyware 30-Day Subscription VAIO® Recovery Wizard VAIO® Support Central VAIO® Security Center VAIO® Update Supplied Software: Adobe®...Sony Desktop Computer are trademarks of this document. Performance will be provided via thrid-party technician to be accomplished with Onsite Service6 Online and Email Support: Support available from the applicable 3rd party vendor. VGC-RC210G VAIO® Digital Studio™ Desktop...


