
Operating Instructions / Mode d’emploi
Page 3
... Do 4 Checking the Packing List 4 Requirements 5 Names of Parts 6 Setup and Connection 7 Attaching the Stands to the Printer 7 Connecting the Printer to a Computer 7 Connecting the Power Supply 8 Turning the Power On/Off 8 Installing the Printer Driver 9 With Windows 98 9 With Windows 95 12 With the Macintosh OS 13 GB English Preparing to Print 14...
... Do 4 Checking the Packing List 4 Requirements 5 Names of Parts 6 Setup and Connection 7 Attaching the Stands to the Printer 7 Connecting the Printer to a Computer 7 Connecting the Power Supply 8 Turning the Power On/Off 8 Installing the Printer Driver 9 With Windows 98 9 With Windows 95 12 With the Macintosh OS 13 GB English Preparing to Print 14...

Operating Instructions / Mode d’emploi
Page 4
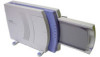
...light and easy to tear off the blank strips of paper on each of UPC-10P23 and UPC10P34) (1) CD-ROM (driver, application) (1) Operating Manual (this printer makes it can be easily cleared simply by this manual) (1) Software license agreement (1) Warranty (1) Notes • We ...recommend saving the box and the packing materials in a horizontal position. Introduction What the Digital Photo Printer Can Do High-quality Photo Printing The sublimation printing process used for printing 10 sheets) (1) Print paper (5 sheets each edge. Stands (2) ...
...light and easy to tear off the blank strips of paper on each of UPC-10P23 and UPC10P34) (1) CD-ROM (driver, application) (1) Operating Manual (this printer makes it can be easily cleared simply by this manual) (1) Software license agreement (1) Warranty (1) Notes • We ...recommend saving the box and the packing materials in a horizontal position. Introduction What the Digital Photo Printer Can Do High-quality Photo Printing The sublimation printing process used for printing 10 sheets) (1) Print paper (5 sheets each edge. Stands (2) ...

Operating Instructions / Mode d’emploi
Page 5
Note When using device driver (Windows\system\lpt.vxd) version 4.00.953 in order to use the UP-DP10. When using a Windows computer < Requirements in order to connect to the illustration below.) Male type A connector Male type B connector 5 In this page.)...cable with a male type A connector and a male type B connector. (Refer to a printer port: • A personal computer on this event, obtain the most recent driver from your computer for the appropriate type of hard disk space • A printer port* *Please see the user's manual provided with a male type A connector and a male...
Note When using device driver (Windows\system\lpt.vxd) version 4.00.953 in order to use the UP-DP10. When using a Windows computer < Requirements in order to connect to the illustration below.) Male type A connector Male type B connector 5 In this page.)...cable with a male type A connector and a male type B connector. (Refer to a printer port: • A personal computer on this event, obtain the most recent driver from your computer for the appropriate type of hard disk space • A printer port* *Please see the user's manual provided with a male type A connector and a male...

Operating Instructions / Mode d’emploi
Page 7
When connecting to a printer port, we recommend using a shielded printer cable not more than 2m long and with a double-ended ferrite core. • Make sure that you insert the cable connectors all of the way when making the connections. • The driver provided with a Macintosh that does not have... a USB port as a standard feature.) 7 Connect it using both a USB cable and a parallel cable. Setup and Connection Attaching the Stands to the Printer The stands can not be assured when USB...
When connecting to a printer port, we recommend using a shielded printer cable not more than 2m long and with a double-ended ferrite core. • Make sure that you insert the cable connectors all of the way when making the connections. • The driver provided with a Macintosh that does not have... a USB port as a standard feature.) 7 Connect it using both a USB cable and a parallel cable. Setup and Connection Attaching the Stands to the Printer The stands can not be assured when USB...

Operating Instructions / Mode d’emploi
Page 9
... appear when Windows 98 starts up , the "Add New Hardware Wizard" window appears. 4 Place the "Printer Software UP-DP10" CD- Installing the Printer Driver With Windows 98 Install the printer driver that is contained in the CD-ROM, and then click [Next]. The window changes as shown below .... to the computer. 3 Select [Search for the best driver for your device], and then click [Next]. Before installing the printer driver, turn the computer on the UP-DP10, using the Print function of typical application software. The "printer driver" is the software that is copied, the window changes ...
... appear when Windows 98 starts up , the "Add New Hardware Wizard" window appears. 4 Place the "Printer Software UP-DP10" CD- Installing the Printer Driver With Windows 98 Install the printer driver that is contained in the CD-ROM, and then click [Next]. The window changes as shown below .... to the computer. 3 Select [Search for the best driver for your device], and then click [Next]. Before installing the printer driver, turn the computer on the UP-DP10, using the Print function of typical application software. The "printer driver" is the software that is copied, the window changes ...

Operating Instructions / Mode d’emploi
Page 10
... . 8 Click [Next]. The window changes as shown below . 13Click [Finish]. Installation is now complete. 10 Installing the Printer Driver 7 Click [Finish]. The window changes as shown below . 9 Select [Search for the best driver for the printer in the CD-ROM, and then click [Next]. The window changes as shown below . 11Click [Next]. Then, click...
... . 8 Click [Next]. The window changes as shown below . 13Click [Finish]. Installation is now complete. 10 Installing the Printer Driver 7 Click [Finish]. The window changes as shown below . 9 Select [Search for the best driver for the printer in the CD-ROM, and then click [Next]. The window changes as shown below . 11Click [Next]. Then, click...

Operating Instructions / Mode d’emploi
Page 11
... 98 starts up , install the printer by a Printer Cable 1 Turn the printer on first, and then turn the computer on. If the "Add New Hardware Wizard" dialog box does not appear when Windows 98 starts up , the "Add New Hardware Wizard" window appears. 3 Select [Search for the best driver for your device], and then..., and then click [Next]. The window changes as shown below . The window changes as shown below . 11 The window changes as shown below . 4 Place the "Printer Software UP-DP10" CD- The window changes as shown below . 6 Click [Next]. When the...
... 98 starts up , install the printer by a Printer Cable 1 Turn the printer on first, and then turn the computer on. If the "Add New Hardware Wizard" dialog box does not appear when Windows 98 starts up , the "Add New Hardware Wizard" window appears. 3 Select [Search for the best driver for your device], and then..., and then click [Next]. The window changes as shown below . The window changes as shown below . 11 The window changes as shown below . 4 Place the "Printer Software UP-DP10" CD- The window changes as shown below . 6 Click [Next]. When the...

Operating Instructions / Mode d’emploi
Page 12
... is contained in the CD-ROM that is now complete. ROM in the [Printer name] field. Then, click [Finish]. Before installing the printer driver, turn the computer on. The window changes as shown below . 4 Place the "Printer Software UP-DP10" CD- Installing the Printer Driver 7 If necessary, you can type a name for instructions. 3 Select [Other Locations]. The...
... is contained in the CD-ROM that is now complete. ROM in the [Printer name] field. Then, click [Finish]. Before installing the printer driver, turn the computer on. The window changes as shown below . 4 Place the "Printer Software UP-DP10" CD- Installing the Printer Driver 7 If necessary, you can type a name for instructions. 3 Select [Other Locations]. The...

Operating Instructions / Mode d’emploi
Page 13
...-click the "Chooser" icon to open the folder. 4 Double-click the "UP-DP10 Install-E" icon to read the "ReadMe" file in the "Chooser" folder. 13 With the Macintosh OS Install the printer driver that is provided with the printer. 1 Place the "PRINTER SOFTWARE UP- 5 Click [Browse], specify the [Win95\English] folder in the CD-ROM...
...-click the "Chooser" icon to open the folder. 4 Double-click the "UP-DP10 Install-E" icon to read the "ReadMe" file in the "Chooser" folder. 13 With the Macintosh OS Install the printer driver that is provided with the printer. 1 Place the "PRINTER SOFTWARE UP- 5 Click [Browse], specify the [Win95\English] folder in the CD-ROM...

Operating Instructions / Mode d’emploi
Page 14
...× 180 mm 10S01 photostickers 25 sheets These sheets have no perforations, and are printed on these sheets and the border is selected in the printer driver, each of the sheets in a UPC-10P23 Print Pack, a white border may not be purchased separately. Product No. UPC- Note If "...is then cut off along the perforations. The maximum printing area is designed to allow you to prepare a Sony Print Pack (printing paper and an ink ribbon cartridge, sold as a set). A Sony Print Pack must be printed on Using Print Packs • The ink ribbon cartridge is 100 ×...
...× 180 mm 10S01 photostickers 25 sheets These sheets have no perforations, and are printed on these sheets and the border is selected in the printer driver, each of the sheets in a UPC-10P23 Print Pack, a white border may not be purchased separately. Product No. UPC- Note If "...is then cut off along the perforations. The maximum printing area is designed to allow you to prepare a Sony Print Pack (printing paper and an ink ribbon cartridge, sold as a set). A Sony Print Pack must be printed on Using Print Packs • The ink ribbon cartridge is 100 ×...

Operating Instructions / Mode d’emploi
Page 21
... the [Paper] tab to "25." < [Scaling] Specify the enlargement/reduction ratio. If this option is selected, the image size that can be set for the printer driver. < [Restore Defaults] Clicking this checkbox is selected, prints are printed with a white border around the edges.
... the [Paper] tab to "25." < [Scaling] Specify the enlargement/reduction ratio. If this option is selected, the image size that can be set for the printer driver. < [Restore Defaults] Clicking this checkbox is selected, prints are printed with a white border around the edges.


