
Operating Instructions
Page 4
... is clearly indicated in the text, for model HT-SF2300 and HT-SS2300. "BRAVIA" and Sony Corporation. are trademarks of : • Receiver • Speaker systema) STR-KS2300 - Front speaker SS-MSP23F - Center speaker SS-CNP23 - About area codes The area code of SPEAKERS FRONT R FRONT L SUR R SUR L CENTER SUBWOOFER Area code Any differences in operation, according to use...
... is clearly indicated in the text, for model HT-SF2300 and HT-SS2300. "BRAVIA" and Sony Corporation. are trademarks of : • Receiver • Speaker systema) STR-KS2300 - Front speaker SS-MSP23F - Center speaker SS-CNP23 - About area codes The area code of SPEAKERS FRONT R FRONT L SUR R SUR L CENTER SUBWOOFER Area code Any differences in operation, according to use...

Operating Instructions
Page 6
...speakers 14 2: Connecting the speakers 17 3: Connecting the audio/video components 19 4: Connecting the antennas 24 5: Preparing the receiver and the remote .....24 6: Calibrating the appropriate settings automatically (AUTO CALIBRATION 26 7: Adjusting the speaker levels and balance (TEST TONE 30 Playback Selecting a component 32 Listening/Watching a component... Control for HDMI function ........ 56 Watching a DVD (One-Touch Play 57 Enjoying the TV sound from the speakers connected to the receiver (System Audio Control 58 Turning off the receiver with the TV (System Power Off 59 Other...
...speakers 14 2: Connecting the speakers 17 3: Connecting the audio/video components 19 4: Connecting the antennas 24 5: Preparing the receiver and the remote .....24 6: Calibrating the appropriate settings automatically (AUTO CALIBRATION 26 7: Adjusting the speaker levels and balance (TEST TONE 30 Playback Selecting a component 32 Listening/Watching a component... Control for HDMI function ........ 56 Watching a DVD (One-Touch Play 57 Enjoying the TV sound from the speakers connected to the receiver (System Audio Control 58 Turning off the receiver with the TV (System Power Off 59 Other...

Operating Instructions
Page 7
...select the input source to adjust the volume level of all speakers at the same time (page 31, 32, 33, 34). Name H MASTER VOLUME I MUTING J Remote sensor Function Turn to playback (page 32, 33, 34, 49, 50, 51). Receives signals from remote commander. station (page 51). G AUTO ...CAL MIC jack Connects to restore the sound (page 32). C Display The current status of the selected component or a list of selectable items appears here (page 8). Press MUTING again...
...select the input source to adjust the volume level of all speakers at the same time (page 31, 32, 33, 34). Name H MASTER VOLUME I MUTING J Remote sensor Function Turn to playback (page 32, 33, 34, 49, 50, 51). Receives signals from remote commander. station (page 51). G AUTO ...CAL MIC jack Connects to restore the sound (page 32). C Display The current status of the selected component or a list of selectable items appears here (page 8). Press MUTING again...

Operating Instructions
Page 9
... L SUR R SUR L CENTER SUBWOOFER 3 C SPEAKERS section Connects to a DVD player, satellite tuner, or a Blu-ray disc player. HDMI IN/ OUT jacks Connects to the supplied speakers and subwoofer (page 17). D DMPORT DMPORT jack Connects to this receiver (page 20). The COAX IN jack COAX IN jack provides a better ...sound quality (page 22). The image is output to a TV or a projector while the sound can be output from a TV or/and speakers connected to a DIGITAL MEDIA PORT ...
... L SUR R SUR L CENTER SUBWOOFER 3 C SPEAKERS section Connects to a DVD player, satellite tuner, or a Blu-ray disc player. HDMI IN/ OUT jacks Connects to the supplied speakers and subwoofer (page 17). D DMPORT DMPORT jack Connects to this receiver (page 20). The COAX IN jack COAX IN jack provides a better ...sound quality (page 22). The image is output to a TV or a projector while the sound can be output from a TV or/and speakers connected to a DIGITAL MEDIA PORT ...

Operating Instructions
Page 11
... to enjoy optimal image suited for details. Note This button will turn off the Sony audio/video components that the remote is compatible with the TV for movies and to output the sound from the speakers connected to select a sound field. MASTER VOL +a)/- Press to enter the value after...you press any of the DVD or Blu-ray disc on page 63. Refer to the operating instructions supplied with Theater Mode. Press to activate the TV's muting function. Press MUTING and TV (O) at the same time to turn the receiver on or off the receiver and other Sony components (SYSTEM STANDBY). and ...
... to enjoy optimal image suited for details. Note This button will turn off the Sony audio/video components that the remote is compatible with the TV for movies and to output the sound from the speakers connected to select a sound field. MASTER VOL +a)/- Press to enter the value after...you press any of the DVD or Blu-ray disc on page 63. Refer to the operating instructions supplied with Theater Mode. Press to activate the TV's muting function. Press MUTING and TV (O) at the same time to turn the receiver on or off the receiver and other Sony components (SYSTEM STANDBY). and ...

Operating Instructions
Page 14
... multi channel surround sound, be sure to use a 5.1 channel speaker system. 1: Installing the speakers This receiver allows you want. 14GB HT-SF2300 only HT-SS2300 only AFront speaker (left) BFront speaker (right) CCenter speaker DSurround speaker (left) ESurround speaker (right) FSubwoofer AFront speaker (left) BFront speaker (right) CCenter speaker DSurround speaker (left) ESurround speaker (right) FSubwoofer Tip Since the subwoofer does not emit...
... multi channel surround sound, be sure to use a 5.1 channel speaker system. 1: Installing the speakers This receiver allows you want. 14GB HT-SF2300 only HT-SS2300 only AFront speaker (left) BFront speaker (right) CCenter speaker DSurround speaker (left) ESurround speaker (right) FSubwoofer AFront speaker (left) BFront speaker (right) CCenter speaker DSurround speaker (left) ESurround speaker (right) FSubwoofer Tip Since the subwoofer does not emit...

Operating Instructions
Page 15
...HT-SF2300 only You need to attach the supplied foot pads to the center speaker and subwoofer only. Example of HT-SS2300 front speaker Installing the speakers on a flat surface Before you install the speaker and subwoofer, be sure to attach the supplied foot pads to prevent vibration or... movement as shown in the illustration below. Getting Started Installing the speakers on the speaker stand HT-SS2300 only ...
...HT-SF2300 only You need to attach the supplied foot pads to the center speaker and subwoofer only. Example of HT-SS2300 front speaker Installing the speakers on a flat surface Before you install the speaker and subwoofer, be sure to attach the supplied foot pads to prevent vibration or... movement as shown in the illustration below. Getting Started Installing the speakers on the speaker stand HT-SS2300 only ...

Operating Instructions
Page 16
...the wall, you do not need to the wall. Install the speakers on a vertical and flat wall where reinforcement is applied. • Contact a screw shop or installer regarding the wall material or screws to be used. • Sony is especially fragile, attach the screws securely to a beam and ...fasten them to attach the supplied speaker stand. 16GB Installing the speakers on the wall You can install your speakers on the wall. 1 Prepare screws (not supplied) that are ...
...the wall, you do not need to the wall. Install the speakers on a vertical and flat wall where reinforcement is applied. • Contact a screw shop or installer regarding the wall material or screws to be used. • Sony is especially fragile, attach the screws securely to a beam and ...fasten them to attach the supplied speaker stand. 16GB Installing the speakers on the wall You can install your speakers on the wall. 1 Prepare screws (not supplied) that are ...

Operating Instructions
Page 17
Getting Started 2: Connecting the speakers Before connecting the cords, be sure to disconnect the AC power cord (mains lead). C F A SPEAKERS A FRONT R FRONT L SUR R SUR L CENTER SUBWOOFER Connector A B A E A Speaker cord (supplied) AFront speaker (left) BFront speaker (right) CCenter speaker DSurround speaker (left) ESurround speaker (right) FSubwoofer D continued 17GB
Getting Started 2: Connecting the speakers Before connecting the cords, be sure to disconnect the AC power cord (mains lead). C F A SPEAKERS A FRONT R FRONT L SUR R SUR L CENTER SUBWOOFER Connector A B A E A Speaker cord (supplied) AFront speaker (left) BFront speaker (right) CCenter speaker DSurround speaker (left) ESurround speaker (right) FSubwoofer D continued 17GB

Operating Instructions
Page 18
... sure to match the colored connector to the speaker jack on the receiver: Connector Red White Grey Blue Green Purple Speaker jack FRONT R FRONT L SUR R SUR L CENTER SUBWOOFER To connect the speakers correctly Check the speaker type by referring to the speaker label* at the rear panel of the speaker cords are the same color as the...
... sure to match the colored connector to the speaker jack on the receiver: Connector Red White Grey Blue Green Purple Speaker jack FRONT R FRONT L SUR R SUR L CENTER SUBWOOFER To connect the speakers correctly Check the speaker type by referring to the speaker label* at the rear panel of the speaker cords are the same color as the...

Operating Instructions
Page 20
Blu-ray disc player Audio/video signals TV, projector, etc. This signal supports Dolby Digital, DTS and Linear PCM. • This receiver supports xvYCC transmission. • This receiver supports the Control for HighDefinition Multimedia Interface. Satellite tuner, Set-top box Audio/video signals DVD player Audio/video signals HDMI features • A digital audio signals transmitted by...
Blu-ray disc player Audio/video signals TV, projector, etc. This signal supports Dolby Digital, DTS and Linear PCM. • This receiver supports xvYCC transmission. • This receiver supports the Control for HighDefinition Multimedia Interface. Satellite tuner, Set-top box Audio/video signals DVD player Audio/video signals HDMI features • A digital audio signals transmitted by...

Operating Instructions
Page 21
... sound from an HDMI jack may need to 720p, 1080i or 1080p when you can only be suppressed by the connected component. However, the sound will not output from the TV speaker. • The multi/stereo area audio signals of a Super Audio CD are not output. • Audio signals (...sampling frequency, bit length, etc.) transmitted from the TV speaker, set to "AMP". Check the setup of the connected component if the image is poor or the sound does not come out of a component connected via the HDMI cable. • Sound may be interrupted when the sampling frequency...
... sound from an HDMI jack may need to 720p, 1080i or 1080p when you can only be suppressed by the connected component. However, the sound will not output from the TV speaker. • The multi/stereo area audio signals of a Super Audio CD are not output. • Audio signals (...sampling frequency, bit length, etc.) transmitted from the TV speaker, set to "AMP". Check the setup of the connected component if the image is poor or the sound does not come out of a component connected via the HDMI cable. • Sound may be interrupted when the sampling frequency...

Operating Instructions
Page 23
... "Changing button assignments" (page 63). Refer to : - Refer to the operating instructions of each connected component for the remote is displayed on the remote to control your DVD player to the operating instructions supplied with 32 kHz, 44.1 kHz, 48 kHz, and 96 kHz sampling... with the DVD player. • To output sound from the speakers connected to the receiver, be sure to the operating instructions supplied with this receiver. Tips • To output the sound of the receiver. - Getting Started When you connect a DVD player or DVD recorder You can use the DVD input button ...
... "Changing button assignments" (page 63). Refer to : - Refer to the operating instructions of each connected component for the remote is displayed on the remote to control your DVD player to the operating instructions supplied with 32 kHz, 44.1 kHz, 48 kHz, and 96 kHz sampling... with the DVD player. • To output sound from the speakers connected to the receiver, be sure to the operating instructions supplied with this receiver. Tips • To output the sound of the receiver. - Getting Started When you connect a DVD player or DVD recorder You can use the DVD input button ...

Operating Instructions
Page 26
... effect of the sound cannot be set up and connect the speakers (page 14, 17). • The AUTO CAL MIC jack is designed to this jack. 6: Calibrating the appropriate settings automatically (AUTO CALIBRATION) This receiver is equipped with DCAC (Digital Cinema Auto Calibration) Technology which... sound balance in your neighborhood. • Perform the Auto Calibration in the path between each speaker and the receiver. • Adjust the speaker level. • Measure the distance of each speaker from the measurement area to your preference. Pay attention to the presence of children or to...
... effect of the sound cannot be set up and connect the speakers (page 14, 17). • The AUTO CAL MIC jack is designed to this jack. 6: Calibrating the appropriate settings automatically (AUTO CALIBRATION) This receiver is equipped with DCAC (Digital Cinema Auto Calibration) Technology which... sound balance in your neighborhood. • Perform the Auto Calibration in the path between each speaker and the receiver. • Adjust the speaker level. • Measure the distance of each speaker from the measurement area to your preference. Pay attention to the presence of children or to...

Operating Instructions
Page 27
... Speaker gain, distance, frequency response Subwoofer gain and distance Display TONE T.S.P. CAL menu. A.CAL [5] t A.CAL [4] t A.CAL [3] t A.CAL [2] t A.CAL [1] The measurement process will get a more accurate measurement. parameters in the A. MOVIE MUSIC 1 4 7 >10 - CLEAR DISPLAY THEATRE 23 DVD/BD MENU 56 AUTO CAL D.... 1 Connect the supplied optimizer microphone to complete. Place the optimizer microphone at your ears. Tip When you face the speaker towards the optimizer microphone, you will take approximately 30 seconds to the AUTO CAL MIC jack on the display. WOOFER...
... Speaker gain, distance, frequency response Subwoofer gain and distance Display TONE T.S.P. CAL menu. A.CAL [5] t A.CAL [4] t A.CAL [3] t A.CAL [2] t A.CAL [1] The measurement process will get a more accurate measurement. parameters in the A. MOVIE MUSIC 1 4 7 >10 - CLEAR DISPLAY THEATRE 23 DVD/BD MENU 56 AUTO CAL D.... 1 Connect the supplied optimizer microphone to complete. Place the optimizer microphone at your ears. Tip When you face the speaker towards the optimizer microphone, you will take approximately 30 seconds to the AUTO CAL MIC jack on the display. WOOFER...
Operating Instructions
Page 28
.... LEVEL Displays the measurement result for speaker distance. Error code ERROR 32 ERROR F 33 Cause and remedies None of phase). When the measurement ends, a beep sounds and the measurement result appears on the receiver. - See "When you select "WARN CHK"" (page 29). Press input ...select the item. SAVE Saves the measurement results and exits the setting process. The measurement results are connected or only one front speaker is connected. • The optimizer microphone is connected properly but the error code appears, the optimizer microphone cable may be canceled...
.... LEVEL Displays the measurement result for speaker distance. Error code ERROR 32 ERROR F 33 Cause and remedies None of phase). When the measurement ends, a beep sounds and the measurement result appears on the receiver. - See "When you select "WARN CHK"" (page 29). Press input ...select the item. SAVE Saves the measurement results and exits the setting process. The measurement results are connected or only one front speaker is connected. • The optimizer microphone is connected properly but the error code appears, the optimizer microphone cable may be canceled...
Operating Instructions
Page 29
...the other way around. * xx represent a speaker channel FL Front left FR Front right C Center SL Surround left or right surround speaker is quiet during Auto Calibration. Try to use the receiver with that can check the phase of each speaker (in phase. Display xx* IN xx* OUT... Explanation The speaker is displayed. The "+" and "-" terminals of the speaker may be performed in a quiet ...
...the other way around. * xx represent a speaker channel FL Front left FR Front right C Center SL Surround left or right surround speaker is quiet during Auto Calibration. Try to use the receiver with that can check the phase of each speaker (in phase. Display xx* IN xx* OUT... Explanation The speaker is displayed. The "+" and "-" terminals of the speaker may be performed in a quiet ...
Operating Instructions
Page 30
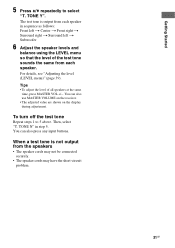
MOVIE MUSIC THEATRE 123 DVD/BD MENU 456 AUTO CAL D.TUNING 789 D.SKIP >10 MEMORY AMP MENU ... the Auto Calibration and saved the settings. 7: Adjusting the speaker levels and balance (TEST TONE) You can adjust the speaker levels and balance while listening to the test tone from the receiver. For details on the display. 2 Press or b to...• LOAD NO Select this parameter only when you have changed the position of the menus" (page 36). Tip The receiver employs a test tone with a frequency centered at 800 Hz. 2-5 2CH A.F.D. TV CH + PRESET - Select "8-A. Note...
MOVIE MUSIC THEATRE 123 DVD/BD MENU 456 AUTO CAL D.TUNING 789 D.SKIP >10 MEMORY AMP MENU ... the Auto Calibration and saved the settings. 7: Adjusting the speaker levels and balance (TEST TONE) You can adjust the speaker levels and balance while listening to the test tone from the receiver. For details on the display. 2 Press or b to...• LOAD NO Select this parameter only when you have changed the position of the menus" (page 36). Tip The receiver employs a test tone with a frequency centered at 800 Hz. 2-5 2CH A.F.D. TV CH + PRESET - Select "8-A. Note...
Operating Instructions
Page 31
The test tone is not output from each speaker in step 5. You can also use MASTER VOLUME on the receiver. • The adjusted value are shown on the display during adjustment. When a test tone is output from each speaker. To turn off the test tone Repeat steps 1 to select "T. TONE N" in sequence as follows...
The test tone is not output from each speaker in step 5. You can also use MASTER VOLUME on the receiver. • The adjusted value are shown on the display during adjustment. When a test tone is output from each speaker. To turn off the test tone Repeat steps 1 to select "T. TONE N" in sequence as follows...

Operating Instructions
Page 32
... receiver. to select a component. TV CH + PRESET - The muting function will be canceled when you turn down the volume level. 32GB To avoid damaging your speakers Before you do the following. • Press MUTING again. • Increase the volume. • Turn off the receiver,... be played back DMPORT [DMPORT] DIGITAL MEDIA PORT adapter connected to the DMPORT jack VIDEO 1 or VIDEO 2 [VIDEO 1 or VIDEO 2] VCR, etc., connected to the VIDEO 1 or VIDEO 2 jack BD [BD] Blu-ray disc player, etc., connected to the BD jack DVD [DVD] DVD player, DVD recorder,...
... receiver. to select a component. TV CH + PRESET - The muting function will be canceled when you turn down the volume level. 32GB To avoid damaging your speakers Before you do the following. • Press MUTING again. • Increase the volume. • Turn off the receiver,... be played back DMPORT [DMPORT] DIGITAL MEDIA PORT adapter connected to the DMPORT jack VIDEO 1 or VIDEO 2 [VIDEO 1 or VIDEO 2] VCR, etc., connected to the VIDEO 1 or VIDEO 2 jack BD [BD] Blu-ray disc player, etc., connected to the BD jack DVD [DVD] DVD player, DVD recorder,...


