
User Guide
Page 2
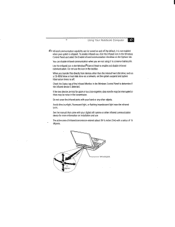
... will not occur in a particular Refer to qualified personnel only. Refer servicing to the model and serial number when you call your Sony VAIO Notebook Computer. AVERTISSEMENT J Pour prevenir tout risque d'incendie ou d'electrocution, garder cet appareil a l'abri de la pluie et de l'humidite... interference in a residential installation. Record the serial number in accordance with Part 15 of Conformity Trade Name: SONY Model No: PCG-818 Responsible Party: Sony Electronics Inc. Refer servicing to disassemble the cabinet. J Never install telephone jacks in wet locations unless the ...
... will not occur in a particular Refer to qualified personnel only. Refer servicing to the model and serial number when you call your Sony VAIO Notebook Computer. AVERTISSEMENT J Pour prevenir tout risque d'incendie ou d'electrocution, garder cet appareil a l'abri de la pluie et de l'humidite... interference in a residential installation. Record the serial number in accordance with Part 15 of Conformity Trade Name: SONY Model No: PCG-818 Responsible Party: Sony Electronics Inc. Refer servicing to disassemble the cabinet. J Never install telephone jacks in wet locations unless the ...

User Guide
Page 5
Contents Welcome Ergonomic Considerations 2 Using Your Notebook Computer Locating the Controls and Connectors 5 Connecting a Power Source 8 Starting Your Computer 12 Shutting Down Your Computer 13 Registering Windows® 98 14 Registering Your Computer 15 Using the Keyboard 16 Using the Touchpad 22 Using the Floppy Disk Drive 23 Using the DVD-ROM Drive 26 Using the Headphone with Remote Control 30 Using PC Cards 33 Using Infrared Communication Devices 36 Using Power Saving Modes 38 Using a Second Battery Pack 40 Using the Weight Saver 42 ix
Contents Welcome Ergonomic Considerations 2 Using Your Notebook Computer Locating the Controls and Connectors 5 Connecting a Power Source 8 Starting Your Computer 12 Shutting Down Your Computer 13 Registering Windows® 98 14 Registering Your Computer 15 Using the Keyboard 16 Using the Touchpad 22 Using the Floppy Disk Drive 23 Using the DVD-ROM Drive 26 Using the Headphone with Remote Control 30 Using PC Cards 33 Using Infrared Communication Devices 36 Using Power Saving Modes 38 Using a Second Battery Pack 40 Using the Weight Saver 42 ix
User Guide
Page 7
...using your purchase of your computer as an electronic document. Welcome Congratulations on your notebook computer. Sony has combined leading-edge technology in audio, video, computing, and communications to ...customize your warranty for an additional nine months. About the User Guide The User Guide offers a quick introduction and reference to your Sony Notebook computer. • Using Your VAIO Notebook Computer shows you how to use the standard components of the Sony VAIO Notebook...
...using your purchase of your computer as an electronic document. Welcome Congratulations on your notebook computer. Sony has combined leading-edge technology in audio, video, computing, and communications to ...customize your warranty for an additional nine months. About the User Guide The User Guide offers a quick introduction and reference to your Sony Notebook computer. • Using Your VAIO Notebook Computer shows you how to use the standard components of the Sony VAIO Notebook...

User Guide
Page 9
Using Your Notebook Computer This section describes how to start using your computer and how to use your computer's internal and external devices, such as the touchpad, floppy disk drive, and DVD-ROM drive. Locating the Controls and Connectors Front :reqn !oar..s 10, 101, op'. 1,.? 1,3qt? an aro NUM Lod, (oa,Le C3OS -Lik.aLor ;kw.? 19) ad' Lock ino,(atoi (page 19) 5 S9) thvions pi Num Caps Scroll Lock Lock Lock Pot,ior ,,,;;! -Lro!ipoos I erf I an roioFs :age,- )9.
Using Your Notebook Computer This section describes how to start using your computer and how to use your computer's internal and external devices, such as the touchpad, floppy disk drive, and DVD-ROM drive. Locating the Controls and Connectors Front :reqn !oar..s 10, 101, op'. 1,.? 1,3qt? an aro NUM Lod, (oa,Le C3OS -Lik.aLor ;kw.? 19) ad' Lock ino,(atoi (page 19) 5 S9) thvions pi Num Caps Scroll Lock Lock Lock Pot,ior ,,,;;! -Lro!ipoos I erf I an roioFs :age,- )9.

User Guide
Page 11
... steps below to insert and charge the battery pack. Battery pack (supplied) 7 law Label side facing down 3 Close the cover of purchase. Ei Using Your Notebook Computer Using Battery Power You can use one or two battery packs as a separate option. To insert the battery pack 1 Open the cover of the...
... steps below to insert and charge the battery pack. Battery pack (supplied) 7 law Label side facing down 3 Close the cover of purchase. Ei Using Your Notebook Computer Using Battery Power You can use one or two battery packs as a separate option. To insert the battery pack 1 Open the cover of the...

User Guide
Page 12
... the battery pack fi Open the cover of the battery bay. Close the cover of the battery bay. 2 Pull out the battery pack. Using Your Notebook Computer III OD When the battery is a lithium ion battery and can extend battery life by changing the power management modes in -the drive bay...
... the battery pack fi Open the cover of the battery bay. Close the cover of the battery bay. 2 Pull out the battery pack. Using Your Notebook Computer III OD When the battery is a lithium ion battery and can extend battery life by changing the power management modes in -the drive bay...

User Guide
Page 13
... down your computer. 1 Click the Start button on page 77. If you can slide the power switch forward and hold for four seconds. Using Your Notebook Computer In Shutting Down Your Computer ! The power indicator (green) turns off. 6 Turn off automatically. lot was VA* dem welt P conver it, do? If you...
... down your computer. 1 Click the Start button on page 77. If you can slide the power switch forward and hold for four seconds. Using Your Notebook Computer In Shutting Down Your Computer ! The power indicator (green) turns off. 6 Turn off automatically. lot was VA* dem welt P conver it, do? If you...
User Guide
Page 14
...day; Protect your Warranty nine months for up , whichever occurs first. Limit of problems. J Free Internet access - Click the Sony VAIO Registration icon on the VAIO desktop. 2 Enter the information requested on page 44. 1. The computer automatically transfers your built-in modem and a toll-free ... to box. 3 Click the Next button to advance to troubleshoot problems you complete a form. Follow these steps to use your notebook computer's online registration service. 05) You must connect your phone line before using your registration information using any online services, induding ...
...day; Protect your Warranty nine months for up , whichever occurs first. Limit of problems. J Free Internet access - Click the Sony VAIO Registration icon on the VAIO desktop. 2 Enter the information requested on page 44. 1. The computer automatically transfers your built-in modem and a toll-free ... to box. 3 Click the Next button to advance to troubleshoot problems you complete a form. Follow these steps to use your notebook computer's online registration service. 05) You must connect your phone line before using your registration information using any online services, induding ...

User Guide
Page 15
... menu of clicking the right mouse button. When held down Ctrl and press S (referred to give commands. it's used in the Windows Clipboard. Using Your Notebook Computer Keys Print Screen key Operator keys Windows 98 key Fn key Applications key Descriptions The Print Screen key takes an electronic snapshot of the...
... menu of clicking the right mouse button. When held down Ctrl and press S (referred to give commands. it's used in the Windows Clipboard. Using Your Notebook Computer Keys Print Screen key Operator keys Windows 98 key Fn key Applications key Descriptions The Print Screen key takes an electronic snapshot of the...

User Guide
Page 16
... side of the battery inserted in the numeric keypad are active. Turns on when the screen scrolls differently. (Exactly how it = 2 Hard disk Using Your Notebook Computer D Functions Lights when the power to the hard drive. Indicates the status of the computer. Turns off the computer when this indicator light is...
... side of the battery inserted in the numeric keypad are active. Turns on when the screen scrolls differently. (Exactly how it = 2 Hard disk Using Your Notebook Computer D Functions Lights when the power to the hard drive. Indicates the status of the computer. Turns off the computer when this indicator light is...

User Guide
Page 17
Turns off the LCD in or out when the display is set to save power. Using Your Notebook Computer Combinations/ Feature Fn+F Change the display size Fn+D Video standby Functions Zooms the display size in order to a low resolution.
Turns off the LCD in or out when the display is set to save power. Using Your Notebook Computer Combinations/ Feature Fn+F Change the display size Fn+D Video standby Functions Zooms the display size in order to a low resolution.

User Guide
Page 18
The computer comes with the DVD-ROM drive in the VAIO Notebook Computer User Guide for details. If you want to use both the DVD-ROM and the floppy disk drive at the same time, use the Sony Notebook Setup utility to select Floppy Disk Drive. O f=1 0000000000000 000000000000 Floppy disk drive...while your computer: J Externally, by inserting it to the computer's FDD/Printer connector. See "Displaying the Sony Notebook Setup Screen" in the drive bay. Using Your Notebook Computer El Using the Floppy Disk Drive There are two ways to connect the floppy disk drive to your computer...
The computer comes with the DVD-ROM drive in the VAIO Notebook Computer User Guide for details. If you want to use both the DVD-ROM and the floppy disk drive at the same time, use the Sony Notebook Setup utility to select Floppy Disk Drive. O f=1 0000000000000 000000000000 Floppy disk drive...while your computer: J Externally, by inserting it to the computer's FDD/Printer connector. See "Displaying the Sony Notebook Setup Screen" in the drive bay. Using Your Notebook Computer El Using the Floppy Disk Drive There are two ways to connect the floppy disk drive to your computer...

User Guide
Page 19
... Eject lever on page 42. To remove the floppy disk drive Turn off and then press the Eject button to remove the diskette. Using Your Notebook Computer To remove a diskette _1 When you have difficulty removing a diskette from the floppy disk drive, remove the floppy disk drive from the drive bay...
... Eject lever on page 42. To remove the floppy disk drive Turn off and then press the Eject button to remove the diskette. Using Your Notebook Computer To remove a diskette _1 When you have difficulty removing a diskette from the floppy disk drive, remove the floppy disk drive from the drive bay...

User Guide
Page 20
... modes. When you may not be able to open the tray. If.the disc does not come out when you cannot remove a disC. Using Your Notebook Computer lE •/IIIIII CD Label side facing up 4 Close the tray by pushing it gently. 40 Be sure to remove the disc. When the...
... modes. When you may not be able to open the tray. If.the disc does not come out when you cannot remove a disC. Using Your Notebook Computer lE •/IIIIII CD Label side facing up 4 Close the tray by pushing it gently. 40 Be sure to remove the disc. When the...

User Guide
Page 21
The DVD player automatically adjusts the screen resolution when you play DVD-ROM discs To achieve optimum performance when playing DVD-ROM discs, you may need to use the following recommendations. Depending on the display setup properties you have selected, you should not be connected to full screen size. Close any open applications before using DVD applications. Your computer should use the Fn + F command to expand the movie to the docking station while playing DVD movies or using a DVD-ROM disc. Using Your Notebook Computer D To play a DVD movie.
The DVD player automatically adjusts the screen resolution when you play DVD-ROM discs To achieve optimum performance when playing DVD-ROM discs, you may need to use the following recommendations. Depending on the display setup properties you have selected, you should not be connected to full screen size. Close any open applications before using DVD applications. Your computer should use the Fn + F command to expand the movie to the docking station while playing DVD movies or using a DVD-ROM disc. Using Your Notebook Computer D To play a DVD movie.

User Guide
Page 22
... more information about System Suspend mode. Use Only the supplied headphone remote control. If the tray does not open the DVD-ROM drive. Using Your Notebook Computer 'MI 3 While holding down the Fn key, press Esc. To recover from the shortcut menu, and adjust the volume levels. The tray slides out...
... more information about System Suspend mode. Use Only the supplied headphone remote control. If the tray does not open the DVD-ROM drive. Using Your Notebook Computer 'MI 3 While holding down the Fn key, press Esc. To recover from the shortcut menu, and adjust the volume levels. The tray slides out...
User Guide
Page 23
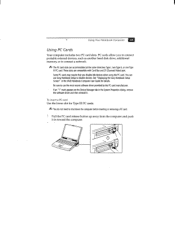
... Type II, or one Type III PC card. Using Your Notebook Computer El Using PC Cards Your computer includes two PC card slots. mark appears on the Device Manager tab in toward the computer. See "Displaying the Sony Notebook Setup Screen" in the VAIO Notebook Computer User Guide for Type III PC cards. Be sure...
... Type II, or one Type III PC card. Using Your Notebook Computer El Using PC Cards Your computer includes two PC card slots. mark appears on the Device Manager tab in toward the computer. See "Displaying the Sony Notebook Setup Screen" in the VAIO Notebook Computer User Guide for Type III PC cards. Be sure...

User Guide
Page 24
Using Your Notebook Computer 0 To remove a PC card 1 Close any applications that are using the PC card. 2 Click the PC card icon in the taskbar and close the card. 3 Pull the PC card release button up and press it in toward the computer. 4 Gently grasp the card and pull it out. 5 Insert the PC card slot protector back into the empty slot.
Using Your Notebook Computer 0 To remove a PC card 1 Close any applications that are using the PC card. 2 Click the PC card icon in the taskbar and close the card. 3 Pull the PC card release button up and press it in toward the computer. 4 Gently grasp the card and pull it out. 5 Insert the PC card slot protector back into the empty slot.
User Guide
Page 25
... communication checkbox on and off . Do not use , click the infrared icon in the Windows®Control Panel to conserve battery life. Eri Using Your Notebook Computer OD Infrared communication capability can disable infrared communication when you transfer files directly from devices other than the internal hard disk drive, such as...
... communication checkbox on and off . Do not use , click the infrared icon in the Windows®Control Panel to conserve battery life. Eri Using Your Notebook Computer OD Infrared communication capability can disable infrared communication when you transfer files directly from devices other than the internal hard disk drive, such as...

User Guide
Page 26
Using Your Notebook Computer 39 To return to normal mode Turn on the hard disk is erased and the computer starts normally if you slide the power switch forward and hold for more power than four seconds. The computer returns to normal mode: System Suspend requires less time than System Hibernation J Power consumption: System Suspend uses more than System Hibernation J Time to return to its previous state. iD When returning from System Hibernation mode, the system status stored on the computer by sliding the power switch forward.
Using Your Notebook Computer 39 To return to normal mode Turn on the hard disk is erased and the computer starts normally if you slide the power switch forward and hold for more power than four seconds. The computer returns to normal mode: System Suspend requires less time than System Hibernation J Power consumption: System Suspend uses more than System Hibernation J Time to return to its previous state. iD When returning from System Hibernation mode, the system status stored on the computer by sliding the power switch forward.

