

Operating Instructions
Page 2
... a circuit different from that any changes or modifications not expressly approved in this manual could void your authority to operate this equipment does cause harmful interference to radio or... newspapers, table-cloths, curtains, etc. Connect the equipment into an outlet on CATV system installer: This reminder is connected. - CAUTION You are designed to provide reasonable protection ...model: The following measures: - registered mark. As an ENERGY STAR® partner, Sony Corporation has determined that interference will increase eye hazard. This appliance is located inside the ...
... a circuit different from that any changes or modifications not expressly approved in this manual could void your authority to operate this equipment does cause harmful interference to radio or... newspapers, table-cloths, curtains, etc. Connect the equipment into an outlet on CATV system installer: This reminder is connected. - CAUTION You are designed to provide reasonable protection ...model: The following measures: - registered mark. As an ENERGY STAR® partner, Sony Corporation has determined that interference will increase eye hazard. This appliance is located inside the ...

Operating Instructions
Page 3
...Locations and Reference Pages Main unit 4 Remote control 5 Getting Started Hooking up to music - CD Synchro Recording/High Speed Dubbing/Recording Manually/ Program Edit 14 Timer-recording radio programs ......... 15 Sound Adjustment Adjusting the sound 16 Selecting the audio emphasis effect .... 17 Making a... personal audio emphasis file -- Sleep Timer 18 Waking up the system 6 Inserting two size AA (R6) batteries into the remote 8 Setting the clock 8 CD Loading the CD 9 Playing the CD -- ...
...Locations and Reference Pages Main unit 4 Remote control 5 Getting Started Hooking up to music - CD Synchro Recording/High Speed Dubbing/Recording Manually/ Program Edit 14 Timer-recording radio programs ......... 15 Sound Adjustment Adjusting the sound 16 Selecting the audio emphasis effect .... 17 Making a... personal audio emphasis file -- Sleep Timer 18 Waking up the system 6 Inserting two size AA (R6) batteries into the remote 8 Setting the clock 8 CD Loading the CD 9 Playing the CD -- ...
Operating Instructions
Page 11
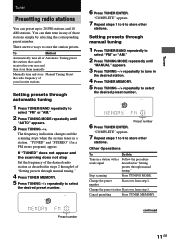
... Tuning preset the stations that can then tune in "Setting presets through manual tuning 1 Press TUNER/BAND repeatedly to store other stations. The frequency indication changes and the scanning stops when the system tunes in the desired station. 4 Press TUNER MEMORY. 5 Press TUNING... Repeat steps 1 to 6 to select "FM" or "AM." 2 Press TUNING MODE repeatedly until "AUTO" appears. 3 Press TUNING -/+. "TUNED" and "STEREO" (for a FM stereo program) appear. "COMPLETE" appears. 7 Repeat steps 1 to 6 to select the desired preset number. If "TUNED" does not appear and the scanning does...
... Tuning preset the stations that can then tune in "Setting presets through manual tuning 1 Press TUNER/BAND repeatedly to store other stations. The frequency indication changes and the scanning stops when the system tunes in the desired station. 4 Press TUNER MEMORY. 5 Press TUNING... Repeat steps 1 to 6 to select "FM" or "AM." 2 Press TUNING MODE repeatedly until "AUTO" appears. 3 Press TUNING -/+. "TUNED" and "STEREO" (for a FM stereo program) appear. "COMPLETE" appears. 7 Repeat steps 1 to 6 to select the desired preset number. If "TUNED" does not appear and the scanning does...
Operating Instructions
Page 12
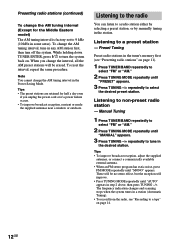
...set to 9 kHz (10 kHz in the desired station. There will be no stereo effect, but the reception will be erased. The frequency indication changes and scanning stops when the system tunes in step 2 above, then press TUNING -/+. Presetting radio stations (continued) ...; To improve broadcast reception, adjust the supplied antennas, or connect a commercially available external antenna. • When an FM stereo program has static noise, press FM MODE repeatedly until "MANUAL" appears. 3 Press TUNING -/+ repeatedly to select "FM" or "AM." 2 Press TUNING MODE repeatedly until "MONO" appears...
...set to 9 kHz (10 kHz in the desired station. There will be no stereo effect, but the reception will be erased. The frequency indication changes and scanning stops when the system tunes in step 2 above, then press TUNING -/+. Presetting radio stations (continued) ...; To improve broadcast reception, adjust the supplied antennas, or connect a commercially available external antenna. • When an FM stereo program has static noise, press FM MODE repeatedly until "MANUAL" appears. 3 Press TUNING -/+ repeatedly to select "FM" or "AM." 2 Press TUNING MODE repeatedly until "MONO" appears...

Operating Instructions
Page 14
... To stop recording Press x. Tips • When you want to reduce the noise. 14GB CD Synchro Recording/High Speed Dubbing/Recording Manually/ Program Edit You can use have different lengths, the tapes in both decks reverse together. • To record with the surround effect...a CD (CD Synchro Recording) Recording from a CD, tape (or connected components) or radio. You can record from a tape (High-Speed Dubbing) Recording Manually 1 Insert a recordable tape into deck B. 2 Insert the CD you want to record on the reverse side, press h. 4 Press DIRECTION repeatedly to select ...
... To stop recording Press x. Tips • When you want to reduce the noise. 14GB CD Synchro Recording/High Speed Dubbing/Recording Manually/ Program Edit You can use have different lengths, the tapes in both decks reverse together. • To record with the surround effect...a CD (CD Synchro Recording) Recording from a CD, tape (or connected components) or radio. You can record from a tape (High-Speed Dubbing) Recording Manually 1 Insert a recordable tape into deck B. 2 Insert the CD you want to record on the reverse side, press h. 4 Press DIRECTION repeatedly to select ...

Operating Instructions
Page 22
Each time you start recording. 22GB To record the mixed sound, press GAME MIXING after step 4 of "Recording Manually" on page 4). Enhancing video game sound -- Note If you press this button, the level of Button Locations and Reference Pages" on page 14, and then ...
Each time you start recording. 22GB To record the mixed sound, press GAME MIXING after step 4 of "Recording Manually" on page 4). Enhancing video game sound -- Note If you press this button, the level of Button Locations and Reference Pages" on page 14, and then ...

Operating Instructions
Page 27
..." on page 14. Recording audio from a connected component Recording on a connected component Making an analogue recording from an analogue component on page 24. 2 Start recording manually. Making a digital recording 1 Connect the digital optical cord. Optional Components 27GB See "Hooking up optional components" on a tape 1 Connect the audio cords. See "Recording to...
..." on page 14. Recording audio from a connected component Recording on a connected component Making an analogue recording from an analogue component on page 24. 2 Start recording manually. Making a digital recording 1 Connect the digital optical cord. Optional Components 27GB See "Hooking up optional components" on a tape 1 Connect the audio cords. See "Recording to...

