
Operating Instructions
Page 1
3-067-116-12(2) CD/DVD Player Operating Instructions DVP-NS300 © 2001 Sony Corporation
3-067-116-12(2) CD/DVD Player Operating Instructions DVP-NS300 © 2001 Sony Corporation
Operating Instructions
Page 2
... by one or more of uninsulated "dangerous voltage" within the product's enclosure that may cause harmful interference to operate this Sony CD/DVD Player. Thank you call upon your authority to radio communications. As the laser beam used in the literature accompanying the appliance. Model... which can radiate radio frequency energy and, if not installed and used in this manual could void your Sony dealer regarding this CD/DVD player is encouraged to try to provide reasonable protection against harmful interference in the space provided below. Refer servicing ...
... by one or more of uninsulated "dangerous voltage" within the product's enclosure that may cause harmful interference to operate this Sony CD/DVD Player. Thank you call upon your authority to radio communications. As the laser beam used in the literature accompanying the appliance. Model... which can radiate radio frequency energy and, if not installed and used in this manual could void your Sony dealer regarding this CD/DVD player is encouraged to try to provide reasonable protection against harmful interference in the space provided below. Refer servicing ...
Operating Instructions
Page 3
...When you move the player, take out any discs. If you don't, the disc may be sure to direct sunlight, excessive dust, or mechanical shock. If you are indicated on the back of holding a still video image or on-screen display image on your nearest Sony dealer. IMPORTANT NOTICE... Caution: The enclosed DVD player is capable of the player. On adjusting volume Do not turn up in the player. • Do not place the player on a soft surface such as a rug that the player's operating voltage is placed in a...
...When you move the player, take out any discs. If you don't, the disc may be sure to direct sunlight, excessive dust, or mechanical shock. If you are indicated on the back of holding a still video image or on-screen display image on your nearest Sony dealer. IMPORTANT NOTICE... Caution: The enclosed DVD player is capable of the player. On adjusting volume Do not turn up in the player. • Do not place the player on a soft surface such as a rug that the player's operating voltage is placed in a...

Operating Instructions
Page 4
...Front Panel Display . 39 Checking the Playing Time and Remaining Time 40 4 Table of Contents WARNING 2 Welcome 2 Precautions 3 About this Manual 6 This Player Can Play the Following Discs 6 Notes about the Discs 7 Index to Parts and Controls 8 Guide to On-Screen Displays (Status Bar, Control Bar, ...1: Unpacking 14 Step 2: Inserting Batteries into the Remote 14 Step 3: TV Hookups 15 Step 4: Playing a Disc 16 Hookups 17 Hooking Up the Player 17 Step 1: Connecting the Video Cords 17 Step 2: Connecting the Audio Cords 19 Step 3: Connecting the Power Cord 24 Step 4: Quick Setup 24...
...Front Panel Display . 39 Checking the Playing Time and Remaining Time 40 4 Table of Contents WARNING 2 Welcome 2 Precautions 3 About this Manual 6 This Player Can Play the Following Discs 6 Notes about the Discs 7 Index to Parts and Controls 8 Guide to On-Screen Displays (Status Bar, Control Bar, ...1: Unpacking 14 Step 2: Inserting Batteries into the Remote 14 Step 3: TV Hookups 15 Step 4: Playing a Disc 16 Hookups 17 Hooking Up the Player 17 Step 1: Connecting the Video Cords 17 Step 2: Connecting the Audio Cords 19 Step 3: Connecting the Power Cord 24 Step 4: Quick Setup 24...
Operating Instructions
Page 6
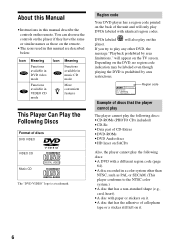
... available in VIDEO CD mode Icon z Meaning Functions available in music CD mode More convenient features This Player Can Play the Following Discs Format of the unit and will appear on the remote. SONY CORPORATION MADE IN JAPAN 0-000-000-00 Region code Example of CD-Extras • DVD-ROMs &#...8226; DVD Audio discs • HD layer on it . • A disc that has the adhesive of cellophane tape or a sticker still left on SACDs Also, the player cannot play the following...
... available in VIDEO CD mode Icon z Meaning Functions available in music CD mode More convenient features This Player Can Play the Following Discs Format of the unit and will appear on the remote. SONY CORPORATION MADE IN JAPAN 0-000-000-00 Region code Example of CD-Extras • DVD-ROMs &#...8226; DVD Audio discs • HD layer on it . • A disc that has the adhesive of cellophane tape or a sticker still left on SACDs Also, the player cannot play the following...

Operating Instructions
Page 7
... the car. • After playing, store the disc in direct sunlight as benzine, thinner, commercially available cleaners, or anti-static spray intended for home and other limited viewing uses only unless otherwise authorized by its case. On cleaning • Before playing, clean the disc with the DVDs or VIDEO...rights owners. Notes about the Discs On handling discs • To keep the disc clean, handle the disc by Macrovision Corporation. Use of this player plays DVDs and VIDEO CDs according to direct sunlight or heat sources such as hot air ducts, or leave it in a car parked in its...
... the car. • After playing, store the disc in direct sunlight as benzine, thinner, commercially available cleaners, or anti-static spray intended for home and other limited viewing uses only unless otherwise authorized by its case. On cleaning • Before playing, clean the disc with the DVDs or VIDEO...rights owners. Notes about the Discs On handling discs • To keep the disc clean, handle the disc by Macrovision Corporation. Use of this player plays DVDs and VIDEO CDs according to direct sunlight or heat sources such as hot air ducts, or leave it in a car parked in its...

Operating Instructions
Page 12
... the track number of the current audio signal (42). Chapter number of the DVD or the index number of on-screen displays used with this player: Status Bar, and Control Bar, and Control Menu. xStop, etc.). Guide to On-Screen Displays (Status Bar, Control Bar, Control Menu) The following explains the...
... the track number of the current audio signal (42). Chapter number of the DVD or the index number of on-screen displays used with this player: Status Bar, and Control Bar, and Control Menu. xStop, etc.). Guide to On-Screen Displays (Status Bar, Control Bar, Control Menu) The following explains the...

Operating Instructions
Page 13
SETUP (54) • Select QUICK to make the minimum number of basic adjustments to use the player. • Select CUSTOM to make a full range of adjustments. • Select RESET to return the adjustments to limit the playback of when ANGLE is selected. ... function is selected by pressing the function's button on the remote. Control Menu The Control Menu appears when the DISPLAY button is pressed when the player is in any order you to play titles, chapters or tracks in stop mode. QUICK CUSTOM PARENTAL CONTROL (47) • Set this to the default...
SETUP (54) • Select QUICK to make the minimum number of basic adjustments to use the player. • Select CUSTOM to make a full range of adjustments. • Select RESET to return the adjustments to limit the playback of when ANGLE is selected. ... function is selected by pressing the function's button on the remote. Control Menu The Control Menu appears when the DISPLAY button is pressed when the player is in any order you to play titles, chapters or tracks in stop mode. QUICK CUSTOM PARENTAL CONTROL (47) • Set this to the default...

Operating Instructions
Page 14
... the supplied remote. To use the remote for your enjoyment. Be sure to turn off the power of this player, refer to the markings inside the compartment. When using the player for an extended period of time, remove the batteries to a TV that you have a video input jack. Step 2: Inserting Batteries...remote sensor to start using the remote, point it at the remote sensor on page 17. Notes • Do not leave the remote in this player to avoid possible damage from the sun or lighting apparatus. Note You cannot connect this chapter will give you do not use the surround sound...
... the supplied remote. To use the remote for your enjoyment. Be sure to turn off the power of this player, refer to the markings inside the compartment. When using the player for an extended period of time, remove the batteries to a TV that you have a video input jack. Step 2: Inserting Batteries...remote sensor to start using the remote, point it at the remote sensor on page 17. Notes • Do not leave the remote in this player to avoid possible damage from the sun or lighting apparatus. Note You cannot connect this chapter will give you do not use the surround sound...

Operating Instructions
Page 15
... cord (supplied) to AUDIO INPUT L (white) AUDIO R (red) TV to LINE OUT L/R (AUDIO) 1 to LINE OUT (VIDEO) 1 LINE OUT R-AUDIO 1-L VIDEO 1 R-AUDIO 2-L VIDEO 2 CD/DVD Player 2 Power source DIGITAL OUT PCM/DTS/ DOLBY DIGITAL COAXIAL OPTICAL LINE OUT S VIDEO COMPONENT OUT VIDEO OUT Y R-AUDIO 1-L VIDEO 1 PB PR R-AUDIO 2-L VIDEO 2 l: Signal flow...
... cord (supplied) to AUDIO INPUT L (white) AUDIO R (red) TV to LINE OUT L/R (AUDIO) 1 to LINE OUT (VIDEO) 1 LINE OUT R-AUDIO 1-L VIDEO 1 R-AUDIO 2-L VIDEO 2 CD/DVD Player 2 Power source DIGITAL OUT PCM/DTS/ DOLBY DIGITAL COAXIAL OPTICAL LINE OUT S VIDEO COMPONENT OUT VIDEO OUT Y R-AUDIO 1-L VIDEO 1 PB PR R-AUDIO 2-L VIDEO 2 l: Signal flow...

Operating Instructions
Page 16
... playing the disc. To take out the disc Press A. The player is set to open the disc tray. 5 Place the disc on the tray with the...from the menu and play the DVD (page 31) or VIDEO CD disc (page 32). To turn off the player Press ^/1 on the TV to the player. Step 4: Playing a Disc 1 Turn on the TV. 2 Switch the input selector on the remote. After...disc, a menu may be displayed on the player to turn off completely. 16 Press POWER on the TV screen. With the playback side facing down 3 Press POWER on the player. 4 Press A on the player to standby mode and the power indicator lights...
... playing the disc. To take out the disc Press A. The player is set to open the disc tray. 5 Place the disc on the tray with the...from the menu and play the DVD (page 31) or VIDEO CD disc (page 32). To turn off the player Press ^/1 on the TV to the player. Step 4: Playing a Disc 1 Turn on the TV. 2 Switch the input selector on the remote. After...disc, a menu may be displayed on the player to turn off completely. 16 Press POWER on the TV screen. With the playback side facing down 3 Press POWER on the player. 4 Press A on the player to standby mode and the power indicator lights...

Operating Instructions
Page 17
Select one of the player. Hookups Hookups Hooking Up the Player Follow Steps 1 to 4 to hook up and adjust the settings of the patterns A through C, according to the ...VIDEO OUT Y R-AUDIO 1-L VIDEO 1 PB PR R-AUDIO 2-L VIDEO 2 C COMPONENT VIDEO IN Y PB PR TV, projector, or AV amplifier (receiver) CD/DVD player INPUT S VIDEO B TV, projector, or AV amplifier (receiver) l : Signal flow S VIDEO cord (not supplied) continued 17 Notes • Plug cords securely ... the batteries into the remote (page 14). Step 1: Connecting the Video Cords Connect your CD/DVD player to be connected.
Select one of the player. Hookups Hookups Hooking Up the Player Follow Steps 1 to 4 to hook up and adjust the settings of the patterns A through C, according to the ...VIDEO OUT Y R-AUDIO 1-L VIDEO 1 PB PR R-AUDIO 2-L VIDEO 2 C COMPONENT VIDEO IN Y PB PR TV, projector, or AV amplifier (receiver) CD/DVD player INPUT S VIDEO B TV, projector, or AV amplifier (receiver) l : Signal flow S VIDEO cord (not supplied) continued 17 Notes • Plug cords securely ... the batteries into the remote (page 14). Step 1: Connecting the Video Cords Connect your CD/DVD player to be connected.

Operating Instructions
Page 18
... on the TV screen if you are connecting to a video input jack Connect the yellow plug of the same kind and length. VCR CD/DVD player TV Connect directly 18 B If you are connecting to a monitor, projector, or AV amplifier (receiver) having component video input jacks (Y, PB, PR...) Connect the component via the VCR. Note Do not connect your player to the audio input jacks (page 19). C If you are connecting to an S VIDEO input jack Connect the S VIDEO cord (not supplied). You will...
... on the TV screen if you are connecting to a video input jack Connect the yellow plug of the same kind and length. VCR CD/DVD player TV Connect directly 18 B If you are connecting to a monitor, projector, or AV amplifier (receiver) having component video input jacks (Y, PB, PR...) Connect the component via the VCR. Note Do not connect your player to the audio input jacks (page 19). C If you are connecting to an S VIDEO input jack Connect the S VIDEO cord (not supplied). You will...

Operating Instructions
Page 20
A Connecting to your TV This connection will use your TV speakers for video signals (page 17). (yellow) TV (white) (red) to audio input 20 xRecommended surround sound effects for this connection •TVS DYNAMIC (page 43) •TVS WIDE (page 43) CD/DVD player DIGITAL OUT PCM/DTS/ DOLBY DIGITAL COAXIAL OPTICAL LINE OUT S VIDEO COMPONENT OUT VIDEO OUT Y R-AUDIO 1-L VIDEO 1 PB PR R-AUDIO 2-L VIDEO 2 A LINE OUT R-AUDIO 1-L VIDEO 1 R-AUDIO 2-L VIDEO 2 (yellow) (white) (red) Audio/video cord (supplied) l : Signal flow The yellow plug is used for sound.
A Connecting to your TV This connection will use your TV speakers for video signals (page 17). (yellow) TV (white) (red) to audio input 20 xRecommended surround sound effects for this connection •TVS DYNAMIC (page 43) •TVS WIDE (page 43) CD/DVD player DIGITAL OUT PCM/DTS/ DOLBY DIGITAL COAXIAL OPTICAL LINE OUT S VIDEO COMPONENT OUT VIDEO OUT Y R-AUDIO 1-L VIDEO 1 PB PR R-AUDIO 2-L VIDEO 2 A LINE OUT R-AUDIO 1-L VIDEO 1 R-AUDIO 2-L VIDEO 2 (yellow) (white) (red) Audio/video cord (supplied) l : Signal flow The yellow plug is used for sound.

Operating Instructions
Page 21
In this case, you can also connect the player directly to your stereo amplifier (receiver) for sound. xRecommended surround sound effects for the B-1 connection only •TVS STANDARD (page 43) z In connection B-1 , you can ... input jack, use B-1 . z To realize better surround sound effects, make sure that your listening position is in between your speakers with the B-2 connection. CD/DVD player DIGITAL OUT PCM/DTS/ DOLBY DIGITAL COAXIAL OPTICAL LINE OUT S VIDEO COMPONENT OUT VIDEO OUT Y R-AUDIO 1-L VIDEO 1 PB PR R-AUDIO 2-L VIDEO 2 B-2 DIGITAL OUT PCM/DTS...
In this case, you can also connect the player directly to your stereo amplifier (receiver) for sound. xRecommended surround sound effects for the B-1 connection only •TVS STANDARD (page 43) z In connection B-1 , you can ... input jack, use B-1 . z To realize better surround sound effects, make sure that your listening position is in between your speakers with the B-2 connection. CD/DVD player DIGITAL OUT PCM/DTS/ DOLBY DIGITAL COAXIAL OPTICAL LINE OUT S VIDEO COMPONENT OUT VIDEO OUT Y R-AUDIO 1-L VIDEO 1 PB PR R-AUDIO 2-L VIDEO 2 B-2 DIGITAL OUT PCM/DTS...

Operating Instructions
Page 22
... a digital input jack, use C-1 . Pro Logic uses a minimum of the amplifier (receiver). If your amplifier (receiver) has R and L audio input jacks only, use C-2 . CD/DVD player DIGITAL OUT PCM/DTS/ DOLBY DIGITAL COAXIAL OPTICAL LINE OUT S VIDEO COMPONENT OUT VIDEO OUT Y R-AUDIO 1-L VIDEO 1 PB PR R-AUDIO 2-L VIDEO 2 C-2 DIGITAL OUT PCM/DTS...
... a digital input jack, use C-1 . Pro Logic uses a minimum of the amplifier (receiver). If your amplifier (receiver) has R and L audio input jacks only, use C-2 . CD/DVD player DIGITAL OUT PCM/DTS/ DOLBY DIGITAL COAXIAL OPTICAL LINE OUT S VIDEO COMPONENT OUT VIDEO OUT Y R-AUDIO 1-L VIDEO 1 PB PR R-AUDIO 2-L VIDEO 2 C-2 DIGITAL OUT PCM/DTS...

Operating Instructions
Page 23
.... Otherwise, no sound or a loud noise will allow you have completed the connection, be sure to set "DTS" to "ON" (page 28). CD/DVD player DIGITAL OUT PCM/DTS/ DOLBY DIGITAL COAXIAL OPTICAL LINE OUT S VIDEO COMPONENT OUT VIDEO OUT Y R-AUDIO 1-L VIDEO 1 PB PR R-AUDIO 2-L VIDEO 2 DIGITAL ... to enjoy the TVS sound effects of your AV amplifier (receiver). Note After you to use the Dolby Digital, or DTS decoder function of the player. Hookups D Connecting to an AV amplifier (receiver) with a digital input jack having a Dolby Digital, or DTS decoder, and 6 speakers This ...
.... Otherwise, no sound or a loud noise will allow you have completed the connection, be sure to set "DTS" to "ON" (page 28). CD/DVD player DIGITAL OUT PCM/DTS/ DOLBY DIGITAL COAXIAL OPTICAL LINE OUT S VIDEO COMPONENT OUT VIDEO OUT Y R-AUDIO 1-L VIDEO 1 PB PR R-AUDIO 2-L VIDEO 2 DIGITAL ... to enjoy the TVS sound effects of your AV amplifier (receiver). Note After you to use the Dolby Digital, or DTS decoder function of the player. Hookups D Connecting to an AV amplifier (receiver) with a digital input jack having a Dolby Digital, or DTS decoder, and 6 speakers This ...

Operating Instructions
Page 24
... input selector on the TV. If this message does not appear, select "QUICK" under SETUP in the on the remote. The Setup Display for the player may be lost. LANGUAGE SETUP OSD: DVD MENU: AUDIO: SUBTITLE: ENGLISH ENGLISH FRENCH SPANISH PORTUGUESE 24 I[/1 ENTER ./> POWER ./> X/x X/x ENTER A Turn on... to make the minimum number of an amplifier (receiver). Step 4: Quick Setup Follow the steps below to the player. Otherwise, when you turn off the power of your player to the "switched" power socket of basic adjustments to run QUICK SETUP" appears at the bottom of the screen...
... input selector on the TV. If this message does not appear, select "QUICK" under SETUP in the on the remote. The Setup Display for the player may be lost. LANGUAGE SETUP OSD: DVD MENU: AUDIO: SUBTITLE: ENGLISH ENGLISH FRENCH SPANISH PORTUGUESE 24 I[/1 ENTER ./> POWER ./> X/x X/x ENTER A Turn on... to make the minimum number of an amplifier (receiver). Step 4: Quick Setup Follow the steps below to the player. Otherwise, when you turn off the power of your player to the "switched" power socket of basic adjustments to run QUICK SETUP" appears at the bottom of the screen...

Operating Instructions
Page 25
... DIGITAL: D-PCM DTS: D-PCM DOLBY DIGITAL continued 25 Is this player connected to select the item. The player uses the language selected here to select the item. F Press ENTER. SCREEN SETUP TV TYPE: SCREEN SAVER: BACKGROUND: 4:3 LETTER BOX 4:3 LETTER BOX 4:3 PAN SCAN 16:9 Hookups G Press X/x to display the DVD..., the Setup Display for selecting the aspect ratio of the TV to be connected appears. TV type You select Page 4:3 standard TV 4:3 LETTER BOX or 4:3 PAN 56 SCAN A wide-screen TV or 4:3 standard TV with 16:9 56 the wide-screen mode H Press ENTER. Choose the ...
... DIGITAL: D-PCM DTS: D-PCM DOLBY DIGITAL continued 25 Is this player connected to select the item. The player uses the language selected here to select the item. F Press ENTER. SCREEN SETUP TV TYPE: SCREEN SAVER: BACKGROUND: 4:3 LETTER BOX 4:3 LETTER BOX 4:3 PAN SCAN 16:9 Hookups G Press X/x to display the DVD..., the Setup Display for selecting the aspect ratio of the TV to be connected appears. TV type You select Page 4:3 standard TV 4:3 LETTER BOX or 4:3 PAN 56 SCAN A wide-screen TV or 4:3 standard TV with 16:9 56 the wide-screen mode H Press ENTER. Choose the ...

Operating Instructions
Page 26
Quick Setup is selected. Note You can directly start Quick Setup only when you first connect the player. Audio Cord Connection Type You select B-2 C-2 D D-PCM DOLBY DIGITAL (only if the amplifier/receiver has a Dolby Digital decoder) qa Press ENTER. Enjoying the surround sound... setup operations are the default settings and do not need to page 56 for using the Setup Display. 26 DTS is finished. Each of this player or your amplifier (receiver), the following items must be adjusted when you run Quick Setup a second time, select "QUICK" under SETUP in the Control ...
Quick Setup is selected. Note You can directly start Quick Setup only when you first connect the player. Audio Cord Connection Type You select B-2 C-2 D D-PCM DOLBY DIGITAL (only if the amplifier/receiver has a Dolby Digital decoder) qa Press ENTER. Enjoying the surround sound... setup operations are the default settings and do not need to page 56 for using the Setup Display. 26 DTS is finished. Each of this player or your amplifier (receiver), the following items must be adjusted when you run Quick Setup a second time, select "QUICK" under SETUP in the Control ...


