User Guide
Page 12
Using your computer Enjoying your Windows computer 56 Installing the software (supplied 58 Copying images to your computer 59 Viewing image files stored on a computer with your camera (using a "Memory Stick Duo 65 Using the "Cyber-shot Viewer" (supplied 66 Using your Macintosh computer 70 Printing still images How to print still images 72 Printing...
Using your computer Enjoying your Windows computer 56 Installing the software (supplied 58 Copying images to your computer 59 Viewing image files stored on a computer with your camera (using a "Memory Stick Duo 65 Using the "Cyber-shot Viewer" (supplied 66 Using your Macintosh computer 70 Printing still images How to print still images 72 Printing...
User Guide
Page 43
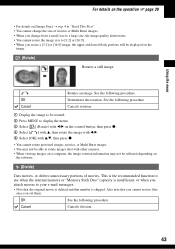
... protected images, movies, or Multi Burst images. • You may not be able to rotate images shot with other cameras. • When viewing images on a computer, the image rotation information may not be displayed on the software. (Divide) Cuts movies, or deletes unnecessary portions of movies or Multi Burst images. • When you...
... protected images, movies, or Multi Burst images. • You may not be able to rotate images shot with other cameras. • When viewing images on a computer, the image rotation information may not be displayed on the software. (Divide) Cuts movies, or deletes unnecessary portions of movies or Multi Burst images. • When you...
User Guide
Page 56
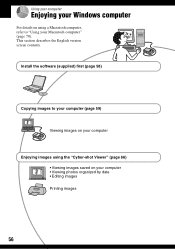
This section describes the English version screen contents. Install the software (supplied) first (page 58) Copying images to "Using your computer • Viewing photos organized by date • Editing images Printing images 56 Using your computer Enjoying your Windows computer For details on using the "Cyber-shot Viewer" (page 66) • Viewing images saved on your computer Enjoying images using a Macintosh computer, refer to your computer (page 59) Viewing images on your Macintosh computer" (page 70).
This section describes the English version screen contents. Install the software (supplied) first (page 58) Copying images to "Using your computer • Viewing photos organized by date • Editing images Printing images 56 Using your computer Enjoying your Windows computer For details on using the "Cyber-shot Viewer" (page 66) • Viewing images saved on your computer Enjoying images using a Macintosh computer, refer to your computer (page 59) Viewing images on your Macintosh computer" (page 70).
User Guide
Page 57
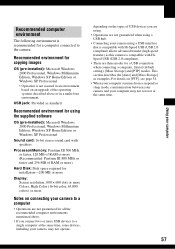
...Recommended computer environment The following environment is recommended for a computer connected to a single computer at the same time. 57 Using your camera using a USB interface that is compatible with Hi-Speed USB (USB 2.0 compliant) allows advanced transfer (high speed transfer) as examples... This section describes the [Auto] and [Mass Storage] as this camera is not assured in a multi-boot environment. USB jack: Provided as standard Recommended environment for using the supplied software OS (pre-installed): Microsoft Windows 2000 Professional, Windows Millennium Edition, Windows...
...Recommended computer environment The following environment is recommended for a computer connected to a single computer at the same time. 57 Using your camera using a USB interface that is compatible with Hi-Speed USB (USB 2.0 compliant) allows advanced transfer (high speed transfer) as examples... This section describes the [Auto] and [Mass Storage] as this camera is not assured in a multi-boot environment. USB jack: Provided as standard Recommended environment for using the supplied software OS (pre-installed): Microsoft Windows 2000 Professional, Windows Millennium Edition, Windows...
User Guide
Page 58
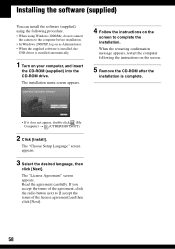
... appears. 3 Select the desired language, then click [Next]. Read the agreement carefully. Installing the software (supplied) You can install the software (supplied) using Windows 2000/Me, do not connect the camera to the computer before installation. • In Windows 2000/XP, log on as Administrator. •...; When the supplied software is installed, the USB driver is complete. • If it does not appear, double-click (My Computer) t (...
... appears. 3 Select the desired language, then click [Next]. Read the agreement carefully. Installing the software (supplied) You can install the software (supplied) using Windows 2000/Me, do not connect the camera to the computer before installation. • In Windows 2000/XP, log on as Administrator. •...; When the supplied software is installed, the USB driver is complete. • If it does not appear, double-click (My Computer) t (...
User Guide
Page 59
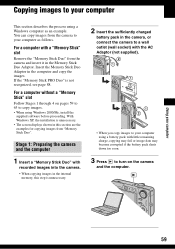
...the process using a Windows computer as follows. With Windows XP, the installation is unnecessary. • The screen displays shown in the camera, or connect the camera to a wall outlet (wall socket) with the AC Adaptor (not supplied). • When you copy images to your computer using... Windows 2000/Me, install the supplied software before proceeding. Stage 1: Preparing the camera and the computer 1 Insert a "Memory Stick Duo" with a "Memory Stick" slot Remove the "Memory Stick Duo" from the camera to turn on the camera and the computer. Insert the Memory Stick Duo ...
...the process using a Windows computer as follows. With Windows XP, the installation is unnecessary. • The screen displays shown in the camera, or connect the camera to a wall outlet (wall socket) with the AC Adaptor (not supplied). • When you copy images to your computer using... Windows 2000/Me, install the supplied software before proceeding. Stage 1: Preparing the camera and the computer 1 Insert a "Memory Stick Duo" with a "Memory Stick" slot Remove the "Memory Stick Duo" from the camera to turn on the camera and the computer. Insert the Memory Stick Duo ...
User Guide
Page 66
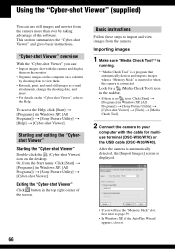
This section summarizes the "Cyber-shot Viewer" and gives basic instructions. To access the Help, click [Start] t [Programs] (in the top right corner of the software. Basic instructions Follow these steps to import and view images from the camera more than ever by shooting .... • If there is no icon: Click [Start] t [Programs] (in Windows XP, [All Programs]) t [Sony Picture Utility] t [Cyber-shot Viewer]. "Cyber-shot Viewer" overview With the "Cyber-shot Viewer" you will use still images and movies from the camera. Look for multiuse terminal (DSC-W50/W70) or the USB cable...
This section summarizes the "Cyber-shot Viewer" and gives basic instructions. To access the Help, click [Start] t [Programs] (in the top right corner of the software. Basic instructions Follow these steps to import and view images from the camera more than ever by shooting .... • If there is no icon: Click [Start] t [Programs] (in Windows XP, [All Programs]) t [Sony Picture Utility] t [Cyber-shot Viewer]. "Cyber-shot Viewer" overview With the "Cyber-shot Viewer" you will use still images and movies from the camera. Look for multiuse terminal (DSC-W50/W70) or the USB cable...
User Guide
Page 69
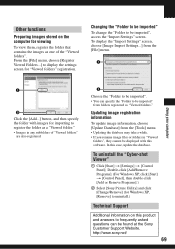
...Start] t [Control Panel], then double-click [Add or Remove Programs].) 2 Select [Sony Picture Utility] and click [Change/Remove] (for "Viewed folders" registration. To uninstall the "Cyber-shot Viewer" 1 Click [Start] t [Settings] t [Control Panel]. Changing the "Folder ..." are also registered. 2 Choose the "Folder to be imported". • You can be found at the Sony Customer Support Website. Updating image registration information To update image information, choose [Update Database] from the [File] ... any subfolders of the "Viewed folders". http://www.sony.net/ 69 In this software.
...Start] t [Control Panel], then double-click [Add or Remove Programs].) 2 Select [Sony Picture Utility] and click [Change/Remove] (for "Viewed folders" registration. To uninstall the "Cyber-shot Viewer" 1 Click [Start] t [Settings] t [Control Panel]. Changing the "Folder ..." are also registered. 2 Choose the "Folder to be imported". • You can be found at the Sony Customer Support Website. Updating image registration information To update image information, choose [Update Database] from the [File] ... any subfolders of the "Viewed folders". http://www.sony.net/ 69 In this software.
User Guide
Page 70
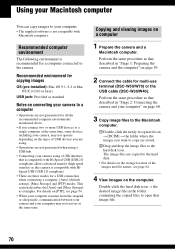
...• The supplied software is not compatible with HiSpeed USB (USB 2.0 compliant). • There are three modes for a USB connection when connecting a computer, [Auto] (default setting), [Mass Storage] and [PTP] modes. Perform the same procedure as that described in "Stage 2: Connecting the camera and your computer" ...location of USB devices you connect two or more USB devices to the camera. Copying and viewing images on page 59. 2 Connect the cable for multi-use terminal (DSC-W50/W70) or the USB cable (DSC-W30/W40). Perform the same procedure as that described in the folder ...
...• The supplied software is not compatible with HiSpeed USB (USB 2.0 compliant). • There are three modes for a USB connection when connecting a computer, [Auto] (default setting), [Mass Storage] and [PTP] modes. Perform the same procedure as that described in "Stage 2: Connecting the camera and your computer" ...location of USB devices you connect two or more USB devices to the camera. Copying and viewing images on page 59. 2 Connect the cable for multi-use terminal (DSC-W50/W70) or the USB cable (DSC-W30/W40). Perform the same procedure as that described in the folder ...
User Guide
Page 72
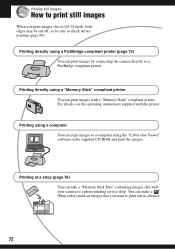
... to a PictBridge compliant printer. Printing directly using a PictBridge compliant printer (page 73) You can take a "Memory Stick Duo" containing images shot with your camera to print out in the supplied CD-ROM and print the images. Printing using a "Memory Stick" compliant printer You can print images with ... images to check before printing (page 89). Printing directly using a computer You can make a (Print order) mark on images that you print images shot in [16:9] mode, both edges may be cut off, so be sure to a computer using the "Cyber-shot Viewer" software in advance. 72
... to a PictBridge compliant printer. Printing directly using a PictBridge compliant printer (page 73) You can take a "Memory Stick Duo" containing images shot with your camera to print out in the supplied CD-ROM and print the images. Printing using a "Memory Stick" compliant printer You can print images with ... images to check before printing (page 89). Printing directly using a computer You can make a (Print order) mark on images that you print images shot in [16:9] mode, both edges may be cut off, so be sure to a computer using the "Cyber-shot Viewer" software in advance. 72
User Guide
Page 86
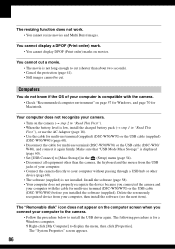
...; Use the cable for multi-use terminal (supplied) (DSC-W50/W70) or the USB cable (supplied) (DSC-W30/W40) (page 60). • Disconnect the cable for multi-use terminal (DSC-W50/W70) or the USB cable (DSC-W30/W40) before you connect your camera. • Turn on page 57 for Windows, and ...your computer is for multi-use terminal (DSC-W50/W70) or the USB cable (DSC-W30/ W40), and connect it again firmly. Your computer does not recognize your computer to the camera. • Follow the procedure below to your computer, then install the software (see the next item). The resizing ...
...; Use the cable for multi-use terminal (supplied) (DSC-W50/W70) or the USB cable (supplied) (DSC-W30/W40) (page 60). • Disconnect the cable for multi-use terminal (DSC-W50/W70) or the USB cable (DSC-W30/W40) before you connect your camera. • Turn on page 57 for Windows, and ...your computer is for multi-use terminal (DSC-W50/W70) or the USB cable (DSC-W30/ W40), and connect it again firmly. Your computer does not recognize your computer to the camera. • Follow the procedure below to your computer, then install the software (see the next item). The resizing ...
User Guide
Page 87
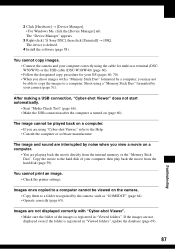
... the Help. • Consult the computer or software manufacturer. If the images are not displayed correctly with a "Memory Stick Duo" formatted by the camera, such as "101MSDCF" (page 64). • Operate correctly (page 65). The "Device Manager" appears. 3 Right-click [ Sony DSC], then click [Uninstall] t [OK]. Shoot using "Cyber-shot Viewer," refer to a folder recognized by...
... the Help. • Consult the computer or software manufacturer. If the images are not displayed correctly with a "Memory Stick Duo" formatted by the camera, such as "101MSDCF" (page 64). • Operate correctly (page 65). The "Device Manager" appears. 3 Right-click [ Sony DSC], then click [Uninstall] t [OK]. Shoot using "Cyber-shot Viewer," refer to a folder recognized by...
User Guide
Page 103
... Clock Set 55 Cloudy 35 Color 15 Color Mode 32 Compression ratio 16 Computer 56 Copying images ...... 59, 70 Macintosh 70 Recommended environment 57, 70 Software 58, 66 Viewing image files stored on t step 5 in "Read This First" Flash Level 38 Flash mode t step 5 in "Read This First" ... Cable for multi-use terminal 60, 74, 78 Camera 47 CD-ROM 58 Center AF 33 Center-weighted metering .... 34 Change REC. Folder 51 Cyber-shot Viewer 66 D Daylight 35 DC IN jack 18 Delete t step 6 in "Read This First" Format 50, 51 Digital Zoom 47 Divide 43 DPOF 76 E Effective pixels 101...
... Clock Set 55 Cloudy 35 Color 15 Color Mode 32 Compression ratio 16 Computer 56 Copying images ...... 59, 70 Macintosh 70 Recommended environment 57, 70 Software 58, 66 Viewing image files stored on t step 5 in "Read This First" Flash Level 38 Flash mode t step 5 in "Read This First" ... Cable for multi-use terminal 60, 74, 78 Camera 47 CD-ROM 58 Center AF 33 Center-weighted metering .... 34 Change REC. Folder 51 Cyber-shot Viewer 66 D Daylight 35 DC IN jack 18 Delete t step 6 in "Read This First" Format 50, 51 Digital Zoom 47 Divide 43 DPOF 76 E Effective pixels 101...
User Guide
Page 105
...Self-diagnosis display...........92 Self-timer t step 5 in "Read This First" Set the clock t step 2 in "Read This First" Setup 38, 45, 46 Camera 47 Internal Memory Tool....50 Memory Stick Tool........51 Setup 1 53 Setup 2 54 Setup 1 53 Setup 2 54 Sharpness 38 Shooting Movie t step 5 in "...step 5 in "Read This First" Smart zoom 47 Snow mode t step 5 in "Read This First" Soft snap mode t step 5 in "Read This First" Software 66 Specifications 101 Spot metering 34 Spot metering cross hairs ..... 34 Standard 36 T Trimming 45 Troubleshooting 80 TV 78 Twilight mode t step 5 in "Read This...
...Self-diagnosis display...........92 Self-timer t step 5 in "Read This First" Set the clock t step 2 in "Read This First" Setup 38, 45, 46 Camera 47 Internal Memory Tool....50 Memory Stick Tool........51 Setup 1 53 Setup 2 54 Setup 1 53 Setup 2 54 Sharpness 38 Shooting Movie t step 5 in "...step 5 in "Read This First" Smart zoom 47 Snow mode t step 5 in "Read This First" Soft snap mode t step 5 in "Read This First" Software 66 Specifications 101 Spot metering 34 Spot metering cross hairs ..... 34 Standard 36 T Trimming 45 Troubleshooting 80 TV 78 Twilight mode t step 5 in "Read This...


