
User Guide
Page 1
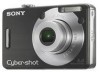
... space provided below. Operating Instructions Before operating the unit, please read this product. Record the serial number in Japan Enjoying the camera Digital Still Camera User's Guide/ Troubleshooting DSC-W30/W40/W50/ W70 "Read This First" (separate volume) Explains the set-up and basic operations for future reference. Model No. DSC-W30/W40/W50/W70 Serial No © 2006 Sony Corporation Using the menu Using the Setup screen Using your computer Printing still images Connecting your camera to frequently asked...
... space provided below. Operating Instructions Before operating the unit, please read this product. Record the serial number in Japan Enjoying the camera Digital Still Camera User's Guide/ Troubleshooting DSC-W30/W40/W50/ W70 "Read This First" (separate volume) Explains the set-up and basic operations for future reference. Model No. DSC-W30/W40/W50/W70 Serial No © 2006 Sony Corporation Using the menu Using the Setup screen Using your computer Printing still images Connecting your camera to frequently asked...

User Guide
Page 4
... operating instructions. If liquid has been spilled or objects have the same characteristics as opening or removing covers may result in performance - This will often require extensive work by the manufacturer) to restore the set yourself as the original parts. Lightning For added protection for this indicates a need for long periods of time, unplug it is damaged or frayed. - Service Damage Requiring Service...
... operating instructions. If liquid has been spilled or objects have the same characteristics as opening or removing covers may result in performance - This will often require extensive work by the manufacturer) to restore the set yourself as the original parts. Lightning For added protection for this indicates a need for long periods of time, unplug it is damaged or frayed. - Service Damage Requiring Service...
User Guide
Page 6
... instructions, may influence the picture and sound of materials will not occur in the EMC Directive for your household waste disposal service or the shop where you change the fuse. This equipment generates, uses, and can be determined by turning the equipment off and on a circuit different from that interference will help . The supplied interface cable must be used in a residential installation...
... instructions, may influence the picture and sound of materials will not occur in the EMC Directive for your household waste disposal service or the shop where you change the fuse. This equipment generates, uses, and can be determined by turning the equipment off and on a circuit different from that interference will help . The supplied interface cable must be used in a residential installation...
User Guide
Page 7
..." data may not be destroyed. This is not fully charged, you record one-time events, make a trial recording to get the camera wet. Internal memory and "Memory Stick Duo" back up the existing charge and remove it from your camera. This may not be repairable. • Do not aim the camera at the sun or other bright light. Also, even if the battery pack is to record or play...
..." data may not be destroyed. This is not fully charged, you record one-time events, make a trial recording to get the camera wet. Internal memory and "Memory Stick Duo" back up the existing charge and remove it from your camera. This may not be repairable. • Do not aim the camera at the sun or other bright light. Also, even if the battery pack is to record or play...
User Guide
Page 11
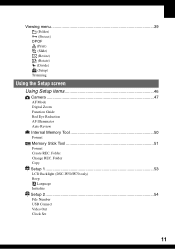
Folder Copy Setup 1 53 1 LCD Backlight (DSC-W50/W70 only) Beep Language Initialize Setup 2 54 2 File Number USB Connect Video Out Clock Set 11 Viewing menu 39 (Folder) - (Protect) DPOF (Print) (Slide) (Resize) (Rotate) (Divide) (Setup) Trimming Using the Setup screen Using Setup items 46 Camera 47 AF Mode Digital Zoom Function Guide Red Eye Reduction AF Illuminator Auto Review Internal Memory Tool 50 Format Memory Stick Tool 51 Format Create REC. Folder Change REC.
Folder Copy Setup 1 53 1 LCD Backlight (DSC-W50/W70 only) Beep Language Initialize Setup 2 54 2 File Number USB Connect Video Out Clock Set 11 Viewing menu 39 (Folder) - (Protect) DPOF (Print) (Slide) (Resize) (Rotate) (Divide) (Setup) Trimming Using the Setup screen Using Setup items 46 Camera 47 AF Mode Digital Zoom Function Guide Red Eye Reduction AF Illuminator Auto Review Internal Memory Tool 50 Format Memory Stick Tool 51 Format Create REC. Folder Change REC.
User Guide
Page 12
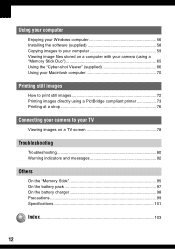
... with your camera (using a "Memory Stick Duo 65 Using the "Cyber-shot Viewer" (supplied 66 Using your Macintosh computer 70 Printing still images How to print still images 72 Printing images directly using a PictBridge compliant printer 73 Printing at a shop 76 Connecting your camera to your TV Viewing images on a TV screen 78 Troubleshooting Troubleshooting 80 Warning indicators and messages 92 Others On the "Memory Stick 95 On the battery pack 97 On the battery charger 98 Precautions 99 Specifications 101...
... with your camera (using a "Memory Stick Duo 65 Using the "Cyber-shot Viewer" (supplied 66 Using your Macintosh computer 70 Printing still images How to print still images 72 Printing images directly using a PictBridge compliant printer 73 Printing at a shop 76 Connecting your camera to your TV Viewing images on a TV screen 78 Troubleshooting Troubleshooting 80 Warning indicators and messages 92 Others On the "Memory Stick 95 On the battery pack 97 On the battery charger 98 Precautions 99 Specifications 101...
User Guide
Page 23
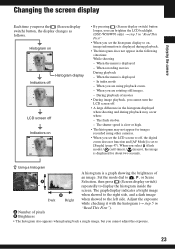
...the (Screen display switch) button, the display changes as follows. When you select (flash mode) / (self-timer) / (macro), the image is displayed. - When recording movies During playback - When the menu is displayed for images recorded using playback zoom. - During playback of movies • During image playback, you set the histogram display to on • By pressing (Screen display switch) button longer, you can brighten the LCD backlight. (DSC-W50/W70 only) t step 5 in the following situations: While shooting - Enjoying the camera Changing the screen display Each time you...
...the (Screen display switch) button, the display changes as follows. When you select (flash mode) / (self-timer) / (macro), the image is displayed. - When recording movies During playback - When the menu is displayed for images recorded using playback zoom. - During playback of movies • During image playback, you set the histogram display to on • By pressing (Screen display switch) button longer, you can brighten the LCD backlight. (DSC-W50/W70 only) t step 5 in the following situations: While shooting - Enjoying the camera Changing the screen display Each time you...
User Guide
Page 53
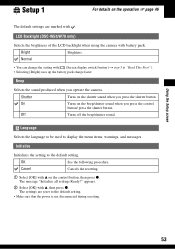
... display the menu items, warnings, and messages. The message "Initialize all settings Ready?" Beep Selects the sound produced when you press the control button/ press the shutter button. Using the Setup screen Setup 1 1 For details on the operation 1 page 46 The default settings are reset to the default setting. • Make sure that the power is not disconnected during resetting. 53 LCD Backlight (DSC-W50/W70 only) Selects the brightness of the LCD backlight when using the camera with . Shutter Turns...
... display the menu items, warnings, and messages. The message "Initialize all settings Ready?" Beep Selects the sound produced when you press the control button/ press the shutter button. Using the Setup screen Setup 1 1 For details on the operation 1 page 46 The default settings are reset to the default setting. • Make sure that the power is not disconnected during resetting. 53 LCD Backlight (DSC-W50/W70 only) Selects the brightness of the LCD backlight when using the camera with . Shutter Turns...
User Guide
Page 54
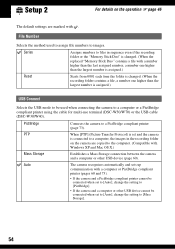
... assigned.) USB Connect Selects the USB mode to be connected when set to [Auto], change the setting to a computer or a PictBridge compliant printer using the cable for multi-use terminal (DSC-W50/W70) or the USB cable (DSC-W30/W40). Auto The camera recognizes automatically and sets up communication with a number higher than the last assigned number, a number one higher than the largest number is assigned.) Reset Starts from 0001 each time the folder is changed. (When the recording folder contains a file, a number one...
... assigned.) USB Connect Selects the USB mode to be connected when set to [Auto], change the setting to a computer or a PictBridge compliant printer using the cable for multi-use terminal (DSC-W50/W70) or the USB cable (DSC-W30/W40). Auto The camera recognizes automatically and sets up communication with a number higher than the last assigned number, a number one higher than the largest number is assigned.) Reset Starts from 0001 each time the folder is changed. (When the recording folder contains a file, a number one...
User Guide
Page 58
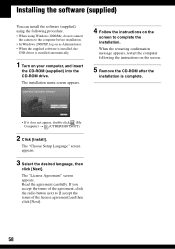
... the agreement, click the radio button next to the computer before installation. • In Windows 2000/XP, log on as Administrator. • When the supplied software is installed, the USB driver is complete. • If it does not appear, double-click (My Computer) t (CYBERSHOTSOFT). 2 Click [Install]. Read the agreement carefully. The installation menu screen appears. 4 Follow the instructions on your computer, and...
... the agreement, click the radio button next to the computer before installation. • In Windows 2000/XP, log on as Administrator. • When the supplied software is installed, the USB driver is complete. • If it does not appear, double-click (My Computer) t (CYBERSHOTSOFT). 2 Click [Install]. Read the agreement carefully. The installation menu screen appears. 4 Follow the instructions on your computer, and...
User Guide
Page 65
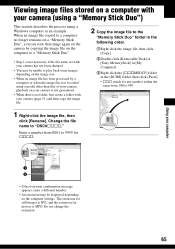
... the camera by a computer or when the image file was recorded using a Windows computer as an example. Enter a number from 0001 to 9999 for any number within the range from 100 to 999. 1 Right-click the image file, then click [Rename]. Change the file name to the "Memory Stick Duo" folder in the following order. 1Right-click the image file, then click [Copy]. 2Double-click [Removable Disk] or [Sony MemoryStick...
... the camera by a computer or when the image file was recorded using a Windows computer as an example. Enter a number from 0001 to 9999 for any number within the range from 100 to 999. 1 Right-click the image file, then click [Rename]. Change the file name to the "Memory Stick Duo" folder in the following order. 1Right-click the image file, then click [Copy]. 2Double-click [Removable Disk] or [Sony MemoryStick...
User Guide
Page 66
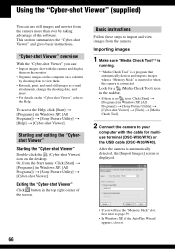
... the camera and display them . • Retouch, print, and send still images as e-mail attachments, change the shooting date, and more than ever by shooting date to view them on the monitor. • Organize images on the computer on the desktop. Or, from the camera. After the camera is automatically detected, the [Import Images] screen is connected. Exiting the "Cyber-shot Viewer" Click button in Windows XP, [All Programs]) t [Sony Picture Utility] t [Help] t [Cyber-shot Viewer]. "Cyber-shot...
... the camera and display them . • Retouch, print, and send still images as e-mail attachments, change the shooting date, and more than ever by shooting date to view them on the monitor. • Organize images on the computer on the desktop. Or, from the camera. After the camera is automatically detected, the [Import Images] screen is connected. Exiting the "Cyber-shot Viewer" Click button in Windows XP, [All Programs]) t [Sony Picture Utility] t [Help] t [Cyber-shot Viewer]. "Cyber-shot...
User Guide
Page 70
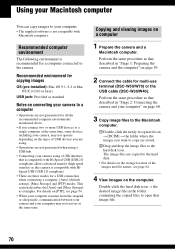
...-use terminal (DSC-W50/W70) or the USB cable (DSC-W30/W40). Copying and viewing images on page 59. 2 Connect the cable for all the recommended computer environments mentioned above. • If you connect two or more USB devices to open that image file. 70 Double-click the hard disk icon t the desired image file in the folder containing the copied files to a single computer at the same time. Recommended environment for a USB connection when connecting a computer, [Auto] (default setting...
...-use terminal (DSC-W50/W70) or the USB cable (DSC-W30/W40). Copying and viewing images on page 59. 2 Connect the cable for all the recommended computer environments mentioned above. • If you connect two or more USB devices to open that image file. 70 Double-click the hard disk icon t the desired image file in the folder containing the copied files to a single computer at the same time. Recommended environment for a USB connection when connecting a computer, [Auto] (default setting...
User Guide
Page 82
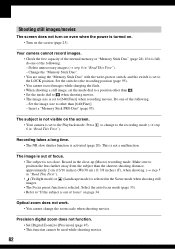
... work. • You cannot change to when shooting movies. • The image size is full, do one of the following : - Delete unnecessary images (t step 6 in the close . Set the switch to the recording position (page 95). • You cannot record images while charging the flash. • When shooting a still image, set the mode dial to a position other than . • Set the mode dial to the recording mode (t step Recording takes a long time. • The NR slow shutter function...
... work. • You cannot change to when shooting movies. • The image size is full, do one of the following : - Delete unnecessary images (t step 6 in the close . Set the switch to the recording position (page 95). • You cannot record images while charging the flash. • When shooting a still image, set the mode dial to a position other than . • Set the mode dial to the recording mode (t step Recording takes a long time. • The NR slow shutter function...
User Guide
Page 83
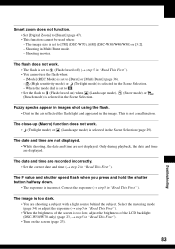
... of the LCD backlight (DSC-W50/W70 only) (page 23, t step5 in the Scene Selection. Shooting in "Read This First" ). This is incorrect. The date and time are not displayed. The image is too low, adjust the brightness of the screen is too dark. • You are displayed. Shooting movies. Correct the exposure (t step5 in Multi Burst mode. - Fuzzy specks appear in images shot using the flash. • Dust...
... of the LCD backlight (DSC-W50/W70 only) (page 23, t step5 in the Scene Selection. Shooting in "Read This First" ). This is incorrect. The date and time are not displayed. The image is too low, adjust the brightness of the screen is too dark. • You are displayed. Shooting movies. Correct the exposure (t step5 in Multi Burst mode. - Fuzzy specks appear in images shot using the flash. • Dust...
User Guide
Page 86
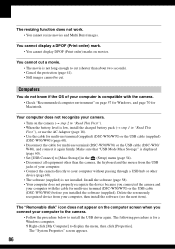
... the computer screen when you installed the software (supplied). You cannot cut a movie. • The movie is displayed (page 60). • Set [USB Connect] to cut . Install the software (page 58). • Your computer does not properly recognize the device because you connected the camera and your camera. • Turn on page 57 for Windows, and page 70 for multi-use terminal (DSC-W50/W70) or the USB cable (DSC-W30/W40...
... the computer screen when you installed the software (supplied). You cannot cut a movie. • The movie is displayed (page 60). • Set [USB Connect] to cut . Install the software (page 58). • Your computer does not properly recognize the device because you connected the camera and your camera. • Turn on page 57 for Windows, and page 70 for multi-use terminal (DSC-W50/W70) or the USB cable (DSC-W30/W40...
User Guide
Page 87
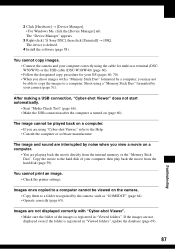
... "Viewed folders". The device is registered in "Viewed folders", update the database (page 69). 87 Troubleshooting Shoot using a "Memory Stick Duo" formatted by the camera, such as "101MSDCF" (page 64). • Operate correctly (page 65). The image and sound are playing back the movie directly from the hard disk (page 59). Copy the movie to the Help. • Consult the computer or software manufacturer. You cannot copy images. • Connect the camera and your computer correctly using "Cyber-shot...
... "Viewed folders". The device is registered in "Viewed folders", update the database (page 69). 87 Troubleshooting Shoot using a "Memory Stick Duo" formatted by the camera, such as "101MSDCF" (page 64). • Operate correctly (page 65). The image and sound are playing back the movie directly from the hard disk (page 59). Copy the movie to the Help. • Consult the computer or software manufacturer. You cannot copy images. • Connect the camera and your computer correctly using "Cyber-shot...
User Guide
Page 90
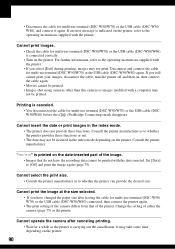
... index mode. • The printer does not provide these functions. Consult the printer manufacturer. Cannot print the image at the size selected. • If you have the recording data cannot be printed with the date inserted. is indicated on , then connect the cable again. • Movies cannot be printed. • Images shot using cameras other than this camera or images modified with the printer. Disconnect and connect the cable for multi-use terminal (DSC-W50/ W70) or the USB cable (DSC...
... index mode. • The printer does not provide these functions. Consult the printer manufacturer. Cannot print the image at the size selected. • If you have the recording data cannot be printed with the date inserted. is indicated on , then connect the cable again. • Movies cannot be printed. • Images shot using cameras other than this camera or images modified with the printer. Disconnect and connect the cable for multi-use terminal (DSC-W50/ W70) or the USB cable (DSC...

User Guide
Page 104
... Format 50, 51 Function Guide 48 H High sensitivity t step 5 in "Read This First" Histogram 23 Holding the camera t step 5 in "Read This First" I Identifying parts 17 Image file storage destinations and file names 64 Image quality 15, 36 Image size 15 t step 4 in "Read This First" Incandescent 35 Index mode printing 73 Index screen t step 6 in "Read This First" Indicator see "Screen" Initialize 53 Install 58 Internal memory 26 Internal Memory...
... Format 50, 51 Function Guide 48 H High sensitivity t step 5 in "Read This First" Histogram 23 Holding the camera t step 5 in "Read This First" I Identifying parts 17 Image file storage destinations and file names 64 Image quality 15, 36 Image size 15 t step 4 in "Read This First" Incandescent 35 Index mode printing 73 Index screen t step 6 in "Read This First" Indicator see "Screen" Initialize 53 Install 58 Internal memory 26 Internal Memory...
User Guide
Page 105
... Self-diagnosis display...........92 Self-timer t step 5 in "Read This First" Set the clock t step 2 in "Read This First" Setup 38, 45, 46 Camera 47 Internal Memory Tool....50 Memory Stick Tool........51 Setup 1 53 Setup 2 54 Setup 1 53 Setup 2 54 Sharpness 38 Shooting Movie t step 5 in "Read This First" Still image t step 5 in "Read This First" Shooting menu 32 Shooting movies t step 5 in "Read This First" Shutter speed 14 Single 47 Single-image mode printing...
... Self-diagnosis display...........92 Self-timer t step 5 in "Read This First" Set the clock t step 2 in "Read This First" Setup 38, 45, 46 Camera 47 Internal Memory Tool....50 Memory Stick Tool........51 Setup 1 53 Setup 2 54 Setup 1 53 Setup 2 54 Sharpness 38 Shooting Movie t step 5 in "Read This First" Still image t step 5 in "Read This First" Shooting menu 32 Shooting movies t step 5 in "Read This First" Shutter speed 14 Single 47 Single-image mode printing...


