

Operating Instructions (primary manual)
Page 4
...supplied need to be replaced, a 5 AMP fuse approved by returning your nearest Sony service station. 4 Never use the plug without the fuse cover. and Canada RECYCLING NICKEL METAL HYDRIDE BATTERIES Nickel Metal Hydride batteries are recyclable. If the plug supplied with BS 1363 is fitted to the collection...recycling location nearest you should lose the fuse cover, please contact your used . For more information regarding recycling of rechargeable batteries, call toll free 1-800-822-8837, or visit http://www.rbrc.org/ CAUTION: Do not handle damaged or leaking Nickel Metal Hydride...
...supplied need to be replaced, a 5 AMP fuse approved by returning your nearest Sony service station. 4 Never use the plug without the fuse cover. and Canada RECYCLING NICKEL METAL HYDRIDE BATTERIES Nickel Metal Hydride batteries are recyclable. If the plug supplied with BS 1363 is fitted to the collection...recycling location nearest you should lose the fuse cover, please contact your used . For more information regarding recycling of rechargeable batteries, call toll free 1-800-822-8837, or visit http://www.rbrc.org/ CAUTION: Do not handle damaged or leaking Nickel Metal Hydride...

Operating Instructions (primary manual)
Page 6
Do not open the battery/"Memory Stick" cover while the access lamp is on "Memory Stick" This camera turns off whenever you may cause malfunctions. LCD screen, LCD finder (only models with a finder) and lens • The LCD screen and the LCD finder ... Television programs, films, video tapes, and other equipment and playback of the recording cannot be copyrighted. Before using your camera Trial recording Before you record one-time events, you remove the batteries or the "Memory Stick." Unauthorized recording of such materials may be contrary to record images, this may render the "Memory...
Do not open the battery/"Memory Stick" cover while the access lamp is on "Memory Stick" This camera turns off whenever you may cause malfunctions. LCD screen, LCD finder (only models with a finder) and lens • The LCD screen and the LCD finder ... Television programs, films, video tapes, and other equipment and playback of the recording cannot be copyrighted. Before using your camera Trial recording Before you record one-time events, you remove the batteries or the "Memory Stick." Unauthorized recording of such materials may be contrary to record images, this may render the "Memory...
Operating Instructions (primary manual)
Page 8
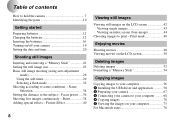
... driver and application .......... 58 2 Preparing your camera 67 3 Connecting your camera to print - Table of contents How to hold the camera 7 Identifying the parts 10 Getting started Preparing batteries 12 Charging the batteries 12 Inserting the batteries 16 Turning on/off your camera 19 Setting the date and time 20 Shooting still images Inserting and removing a "Memory Stick...
... driver and application .......... 58 2 Preparing your camera 67 3 Connecting your camera to print - Table of contents How to hold the camera 7 Identifying the parts 10 Getting started Preparing batteries 12 Charging the batteries 12 Inserting the batteries 16 Turning on/off your camera 19 Setting the date and time 20 Shooting still images Inserting and removing a "Memory Stick...

Operating Instructions (primary manual)
Page 9
Troubleshooting Troubleshooting 78 Warnings and messages 85 Self-diagnostics display 86 Additional information Menu items 87 Using your camera abroad 90 Precautions 90 On "Memory Stick 92 On Nickel Metal Hydride batteries 93 Specifications 94 LCD screen displays 96 Index 99 9
Troubleshooting Troubleshooting 78 Warnings and messages 85 Self-diagnostics display 86 Additional information Menu items 87 Using your camera abroad 90 Precautions 90 On "Memory Stick 92 On Nickel Metal Hydride batteries 93 Specifications 94 LCD screen displays 96 Index 99 9

Operating Instructions (primary manual)
Page 11
...A LCD screen B Flash charge lamp (orange) (33) C MENU button D Control button Menu on: v/V Menu off: /SCENE (32, 35) E EXEC button 6 F Hook for neck strap G Battery/"Memory Stick" cover 1 7 H OPEN button (16) I Access lamp (23) 2 8 J USB jack (68) K USB jack cover 9 L RESET button (bottom surface) (78) 3 0 ...How to use the control button and EXEC button To change the current settings of the camera, 4 qa bring up the menu, and use the control button to make the changes. 5 qs For each item, press MENU and press v/V on ...
...A LCD screen B Flash charge lamp (orange) (33) C MENU button D Control button Menu on: v/V Menu off: /SCENE (32, 35) E EXEC button 6 F Hook for neck strap G Battery/"Memory Stick" cover 1 7 H OPEN button (16) I Access lamp (23) 2 8 J USB jack (68) K USB jack cover 9 L RESET button (bottom surface) (78) 3 0 ...How to use the control button and EXEC button To change the current settings of the camera, 4 qa bring up the menu, and use the control button to make the changes. 5 qs For each item, press MENU and press v/V on ...

Operating Instructions (primary manual)
Page 12
Preparing batteries Use the following batteries in this camera. NH-AAA-2DI twin-pack (not supplied) Batteries that cannot be used* Manganese batteries, lithium batteries, Ni-Cd batteries, alkaline batteries * When the above batteries are used, operation is not displayed correctly. In addition, the battery remaining indicator is not guaranteed due to possible voltage drops or other characteristics of the batteries. Getting...
Preparing batteries Use the following batteries in this camera. NH-AAA-2DI twin-pack (not supplied) Batteries that cannot be used* Manganese batteries, lithium batteries, Ni-Cd batteries, alkaline batteries * When the above batteries are used, operation is not displayed correctly. In addition, the battery remaining indicator is not guaranteed due to possible voltage drops or other characteristics of the batteries. Getting...

Operating Instructions (primary manual)
Page 13
... Metal Hydride batteries. It takes about 13 hours to completely charge the batteries. • When charging is off. If the batteries are shorted, the batteries could overheat or catch fire. 13 Getting started If the positive and negative terminals come into contact with your camera before using the... power cord (mains lead). The CHARGE lamp lights up when charging begins, and goes off the power by . Note that range, the batteries may not charge efficiently. • Connect the battery charger to an easily accessible wall...
... Metal Hydride batteries. It takes about 13 hours to completely charge the batteries. • When charging is off. If the batteries are shorted, the batteries could overheat or catch fire. 13 Getting started If the positive and negative terminals come into contact with your camera before using the... power cord (mains lead). The CHARGE lamp lights up when charging begins, and goes off the power by . Note that range, the batteries may not charge efficiently. • Connect the battery charger to an easily accessible wall...

Operating Instructions (primary manual)
Page 14
...wiping them with your camera. Precautions to 86°F). Otherwise, there is a danger of leaks, explosions, excessive heat, fire, or electric shock. • Do not charge fully charged Nickel Metal Hydride batteries again. Charging the Nickel Metal Hydride batteries • If the...8226; Be sure to charge any other batteries except Sony Nickel Metal Hydride batteries in which the seals have been split in an environment where the temperature range is typical of battery (e.g., manganese batteries, alkaline dry cells, or one-time lithium batteries) than expected. It is not a...
...wiping them with your camera. Precautions to 86°F). Otherwise, there is a danger of leaks, explosions, excessive heat, fire, or electric shock. • Do not charge fully charged Nickel Metal Hydride batteries again. Charging the Nickel Metal Hydride batteries • If the...8226; Be sure to charge any other batteries except Sony Nickel Metal Hydride batteries in which the seals have been split in an environment where the temperature range is typical of battery (e.g., manganese batteries, alkaline dry cells, or one-time lithium batteries) than expected. It is not a...

Operating Instructions (primary manual)
Page 15
... charging process will start over from the beginning. • If you remove the batteries while charging is still in progress. Change the batteries for fully charged ones, or charge these batteries. (Battery remaining indicator flashes.) • If the LCD screen display is off, set [DISPLAY] in [ ] to [ON] ...required to charge fully depleted Nickel Metal Hydride batteries using Nickel Metal Hydride batteries) As the battery power decreases with MENU and v/V on the control button to turn it on. • Based on the conditions under which the camera is being used and the state of power...
... charging process will start over from the beginning. • If you remove the batteries while charging is still in progress. Change the batteries for fully charged ones, or charge these batteries. (Battery remaining indicator flashes.) • If the LCD screen display is off, set [DISPLAY] in [ ] to [ON] ...required to charge fully depleted Nickel Metal Hydride batteries using Nickel Metal Hydride batteries) As the battery power decreases with MENU and v/V on the control button to turn it on. • Based on the conditions under which the camera is being used and the state of power...

Operating Instructions (primary manual)
Page 16
... and contacts can significantly shorten the operating time provided by the batteries. 16 The battery/"Memory Stick" cover opens in the direction of the batteries to wipe any dirt off of the battery terminals and the contacts inside the battery case. • From time to time, use a dry cloth to ...the +/- Slide the cover in the direction the arrow 2. 2 , Insert the batteries. poles of the arrow 1 while...
... and contacts can significantly shorten the operating time provided by the batteries. 16 The battery/"Memory Stick" cover opens in the direction of the batteries to wipe any dirt off of the battery terminals and the contacts inside the battery case. • From time to time, use a dry cloth to ...the +/- Slide the cover in the direction the arrow 2. 2 , Insert the batteries. poles of the arrow 1 while...

Operating Instructions (primary manual)
Page 17
...the conditions of 25°C (77°F) in . To remove the batteries Hold the camera with a fully charged batteries at a temperature of use. Shooting one time every 30 seconds - The numbers of images Battery life (min.) 1280×960 Approx. 120 (SXGA)* Approx. 60... *1) Shooting in the following situations: - [LCD LIGHT] is closed securely. Shooting still images ...
...the conditions of 25°C (77°F) in . To remove the batteries Hold the camera with a fully charged batteries at a temperature of use. Shooting one time every 30 seconds - The numbers of images Battery life (min.) 1280×960 Approx. 120 (SXGA)* Approx. 60... *1) Shooting in the following situations: - [LCD LIGHT] is closed securely. Shooting still images ...

Operating Instructions (primary manual)
Page 18
...is 15 seconds The remaining indicator will decrease in the following situations: - The flash is low - The battery power is used - of 640×480 Viewing still images*3) Image size NH-AAA-DI (2) (supplied) No. The camera has been turned on and off many times - [LCD LIGHT] is set to (no flash) - ...The battery capacity decreases as you use it more and more and as time passes (page 93). 18 ...
...is 15 seconds The remaining indicator will decrease in the following situations: - The flash is low - The battery power is used - of 640×480 Viewing still images*3) Image size NH-AAA-DI (2) (supplied) No. The camera has been turned on and off many times - [LCD LIGHT] is set to (no flash) - ...The battery capacity decreases as you use it more and more and as time passes (page 93). 18 ...

Operating Instructions (primary manual)
Page 19
...the cover and then open the lens cover too quickly, the camera might not turn off automatically to prevent wearing down the battery. The POWER lamp goes out, and the camera turns off. • If you do not operate the camera for the first time, the DATE NOTATION screen appears on /...off your camera for about 3 minutes during shooting or viewing or when performing setup, the camera turns off the...
...the cover and then open the lens cover too quickly, the camera might not turn off automatically to prevent wearing down the battery. The POWER lamp goes out, and the camera turns off. • If you do not operate the camera for the first time, the DATE NOTATION screen appears on /...off your camera for about 3 minutes during shooting or viewing or when performing setup, the camera turns off the...

Operating Instructions (primary manual)
Page 20
... [ ] (page 89), then perform the procedure from step 3. EXEC 2 , Select the desired date display format with v/V on the LCD screen. • If the rechargeable button battery, which provides the power for saving the time data, is in. • To change the date and time, press MENU and select [DATE&TIME SET...
... [ ] (page 89), then perform the procedure from step 3. EXEC 2 , Select the desired date display format with v/V on the LCD screen. • If the rechargeable button battery, which provides the power for saving the time data, is in. • To change the date and time, press MENU and select [DATE&TIME SET...

Operating Instructions (primary manual)
Page 22
..."Memory Stick" is securely seated in the "Memory Stick." • Be careful not to record or display images in the connector. The battery/"Memory Stick" cover opens in the direction of the way in so that it is not inserted correctly, you may not be able to drop... the batteries when opening or closing the battery/"Memory Stick" cover. 22 Shooting still images Inserting and removing a "Memory Stick" Connector side 1 , Open the battery/"Memory Stick" cover. Slide the cover in the direction the arrow 2. 2 Label ...
..."Memory Stick" is securely seated in the "Memory Stick." • Be careful not to record or display images in the connector. The battery/"Memory Stick" cover opens in the direction of the way in so that it is not inserted correctly, you may not be able to drop... the batteries when opening or closing the battery/"Memory Stick" cover. 22 Shooting still images Inserting and removing a "Memory Stick" Connector side 1 , Open the battery/"Memory Stick" cover. Slide the cover in the direction the arrow 2. 2 Label ...

Operating Instructions (primary manual)
Page 23
To remove a "Memory Stick" Open the battery/"Memory Stick" cover, then push the "Memory Stick" to STILL, and turn off the power at this time, as the data may be damaged. 1 , Set the mode switch to pop it out. • When the ... lamp is lit up, it means that image data is being read or written. Shooting still images Setting the still image size STILL MENU RETURN SIZE•BURST 1280 FOCUS AUTO SELFTIMER OFF P.EFFECT OFF 3 Access lamp , Close the battery/"Memory Stick" cover. Never remove the "Memory Stick" or turn on the LCD screen...
To remove a "Memory Stick" Open the battery/"Memory Stick" cover, then push the "Memory Stick" to STILL, and turn off the power at this time, as the data may be damaged. 1 , Set the mode switch to pop it out. • When the ... lamp is lit up, it means that image data is being read or written. Shooting still images Setting the still image size STILL MENU RETURN SIZE•BURST 1280 FOCUS AUTO SELFTIMER OFF P.EFFECT OFF 3 Access lamp , Close the battery/"Memory Stick" cover. Never remove the "Memory Stick" or turn on the LCD screen...

Operating Instructions (primary manual)
Page 27
...4 , Press the shutter button fully down. Shooting still images 1280 23 1280 RECORDING Flashes green t Lights up , the camera is ready for shooting. • If you do not operate the camera for about 3 minutes during recording or playback, the camera turns off automatically to prevent wearing down . When... flashing to the subject is not yet recorded. When "RECORDING" disappears, you can shoot the next image. • When operating the camera using batteries, if you release the shutter button, the recording will be canceled. • The minimum focal distance to lighted up 3 , Press...
...4 , Press the shutter button fully down. Shooting still images 1280 23 1280 RECORDING Flashes green t Lights up , the camera is ready for shooting. • If you do not operate the camera for about 3 minutes during recording or playback, the camera turns off automatically to prevent wearing down . When... flashing to the subject is not yet recorded. When "RECORDING" disappears, you can shoot the next image. • When operating the camera using batteries, if you release the shutter button, the recording will be canceled. • The minimum focal distance to lighted up 3 , Press...

Operating Instructions (primary manual)
Page 28
... AE/AF lock indicator changes to turn off . This is useful for extending the battery life. • This camera is equipped with MENU and v/V on when menu operations are being performed. LCD light You can still not bring the subject into focus, use [LCD LIGHT] under the following conditions. In... such cases, release the shutter button, then recompose the shot and focus again. If the ...
... AE/AF lock indicator changes to turn off . This is useful for extending the battery life. • This camera is equipped with MENU and v/V on when menu operations are being performed. LCD light You can still not bring the subject into focus, use [LCD LIGHT] under the following conditions. In... such cases, release the shutter button, then recompose the shot and focus again. If the ...

Operating Instructions (primary manual)
Page 49
This is useful for extending the battery life. For detailed descriptions of the indicators, see page 97. 49 Indicators during shooting Indicators on the LCD screen are not recorded. To use [LCD LIGHT] under [ ] with MENU and v/V on the control button to turn the LCD light on and off. You can use the self-timer Set the mode switch to MOVIE and follow the procedure on page 36. Enjoying movies 10/15s RECORDING To set the distance to the subject Set the mode switch to MOVIE and follow the procedure on page 29. 3 , To stop recording, press the shutter button fully again.
This is useful for extending the battery life. For detailed descriptions of the indicators, see page 97. 49 Indicators during shooting Indicators on the LCD screen are not recorded. To use [LCD LIGHT] under [ ] with MENU and v/V on the control button to turn the LCD light on and off. You can use the self-timer Set the mode switch to MOVIE and follow the procedure on page 36. Enjoying movies 10/15s RECORDING To set the distance to the subject Set the mode switch to MOVIE and follow the procedure on page 29. 3 , To stop recording, press the shutter button fully again.

Operating Instructions (primary manual)
Page 51
The movie is useful for extending the battery life. Indicators during viewing movies Indicators on and off. v : To display the preceding image V : To display the next image EXEC 3 , Press EXEC. You can use [LCD LIGHT] under [ ] with v/V on the control button. This is played back. To stop playback Press EXEC. For detailed descriptions of the indicators, see page 98. 51 16/18 0:00 MOV00016 2002 7 4 10:30AM 16/18 0:05 MOV00016 Enjoying movies 2 , Select the desired movies with MENU and v/V on the control button to turn the LCD light on the LCD screen are not recorded.
The movie is useful for extending the battery life. Indicators during viewing movies Indicators on and off. v : To display the preceding image V : To display the next image EXEC 3 , Press EXEC. You can use [LCD LIGHT] under [ ] with v/V on the control button. This is played back. To stop playback Press EXEC. For detailed descriptions of the indicators, see page 98. 51 16/18 0:00 MOV00016 2002 7 4 10:30AM 16/18 0:05 MOV00016 Enjoying movies 2 , Select the desired movies with MENU and v/V on the control button to turn the LCD light on the LCD screen are not recorded.


