Instruction Manual
Page 3
... opening or removing covers may result in fire, electric shock, or other materials. - Do not place the set near water - If the set , ask the service technician to normal operation. - Do not use power-line operated sets near or over a radiator or heat register, or where it is exposed to direct sunlight. [ Lightning For added protection for this indicates a need for long periods of time...
... opening or removing covers may result in fire, electric shock, or other materials. - Do not place the set near water - If the set , ask the service technician to normal operation. - Do not use power-line operated sets near or over a radiator or heat register, or where it is exposed to direct sunlight. [ Lightning For added protection for this indicates a need for long periods of time...
Instruction Manual
Page 5
... Customers in the countries applying EU Directives The manufacturer of Conformity Trade Name: SONY Model No.: DSC-T90 Responsible Party: Sony Electronics Inc. This product has received UL Listing. Telephone No.: 858-942-2230 This device complies with the instructions, may influence the picture and sound of GB FCC Rules. However, there is connected. - This product has been tested and...
... Customers in the countries applying EU Directives The manufacturer of Conformity Trade Name: SONY Model No.: DSC-T90 Responsible Party: Sony Electronics Inc. This product has received UL Listing. Telephone No.: 858-942-2230 This device complies with the instructions, may influence the picture and sound of GB FCC Rules. However, there is connected. - This product has been tested and...
Instruction Manual
Page 8
Deleting images 37 Deleting the currently displayed image 37 Deleting multiple images 37 Deleting all images (Format 38 Connecting to other devices 39 Viewing images on a TV 39 Printing still images 39 Using the camera with a computer 41 Changing camera settings 45 Changing the operation sounds 45 Using the HOME screen 45 Using the MENU items 48 Using functions in Program Auto mode 50 Others 51 List of icons displayed on the screen 51 Learning more about the camera ("Cyber-shot Handbook 53 Troubleshooting 54 Precautions 57 Specifications 58 8GB
Deleting images 37 Deleting the currently displayed image 37 Deleting multiple images 37 Deleting all images (Format 38 Connecting to other devices 39 Viewing images on a TV 39 Printing still images 39 Using the camera with a computer 41 Changing camera settings 45 Changing the operation sounds 45 Using the HOME screen 45 Using the MENU items 48 Using functions in Program Auto mode 50 Others 51 List of icons displayed on the screen 51 Learning more about the camera ("Cyber-shot Handbook 53 Troubleshooting 54 Precautions 57 Specifications 58 8GB
Instruction Manual
Page 9
... file. On the overheat protection Depending on the camera and battery temperature, you may be displayed on the LCD screen before use , but it wet, immediately wipe off the camera, remove the battery pack, or remove the "Memory Stick Duo" media while the access lamp is used to water. In some tiny black and/ or bright dots (white, red, blue or green) may not properly record or play back images recorded with...
... file. On the overheat protection Depending on the camera and battery temperature, you may be displayed on the LCD screen before use , but it wet, immediately wipe off the camera, remove the battery pack, or remove the "Memory Stick Duo" media while the access lamp is used to water. In some tiny black and/ or bright dots (white, red, blue or green) may not properly record or play back images recorded with...

Instruction Manual
Page 40
... printer, and press (Playback) button, then set t [Print] t [Date] to print. 4 Touch the desired setting item, then [OK]. Superimposing dates on images using PMB: With the supplied "PMB" software installed on print settings. However, note that images be duplicated depending on a PC (page 42), you want to [Date] or [Day&Time]. For details on images This camera does not include a function for multi- 3 Touch t (Print) t desired item t . (This Image): Print the currently displayed image. (Multiple Images): Touch / to display...
... printer, and press (Playback) button, then set t [Print] t [Date] to print. 4 Touch the desired setting item, then [OK]. Superimposing dates on images using PMB: With the supplied "PMB" software installed on print settings. However, note that images be duplicated depending on a PC (page 42), you want to [Date] or [Day&Time]. For details on images This camera does not include a function for multi- 3 Touch t (Print) t desired item t . (This Image): Print the currently displayed image. (Multiple Images): Touch / to display...

Instruction Manual
Page 50
Item (Delete) (Protect) (Print) (Rotate) (Volume Settings) Description Deletes images. ( This Image/ Multiple Images/ All in Date Range*) * The displayed text differs according to each View Mode. Prints images using a PictBridge compliant printer. ( This Image/ Multiple Images/ All in Date Range*) * The displayed text differs according to each View Mode. Rotates a still image. Adds a Print order mark to the image you want to print in a "Memory Stick Duo" media. ( This Image/ Multiple Images/ Set All in Date Range*/ Remove All in Date Range*) * The displayed text differs according ...
Item (Delete) (Protect) (Print) (Rotate) (Volume Settings) Description Deletes images. ( This Image/ Multiple Images/ All in Date Range*) * The displayed text differs according to each View Mode. Prints images using a PictBridge compliant printer. ( This Image/ Multiple Images/ All in Date Range*) * The displayed text differs according to each View Mode. Rotates a still image. Adds a Print order mark to the image you want to print in a "Memory Stick Duo" media. ( This Image/ Multiple Images/ Set All in Date Range*/ Remove All in Date Range*) * The displayed text differs according ...
Instruction Manual
Page 54
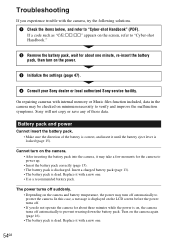
..., a message is displayed on the LCD screen before the power turns off. • If you experience trouble with internal memory or Music files function included, data in the camera may take a few moments for the camera to protect the camera. Troubleshooting If you do not operate the camera for about one minute, re-insert the battery pack, then turn on the power. 3 Initialize the settings (page 47). 4 Consult your Sony dealer or local authorized Sony service facility...
..., a message is displayed on the LCD screen before the power turns off. • If you experience trouble with internal memory or Music files function included, data in the camera may take a few moments for the camera to protect the camera. Troubleshooting If you do not operate the camera for about one minute, re-insert the battery pack, then turn on the power. 3 Initialize the settings (page 47). 4 Consult your Sony dealer or local authorized Sony service facility...

Cyber-shot® Handbook
Page 96
When using the flash - During burst or bracket shooting - When Face Detection function does not work depending on the LCD screen. Table of contents Operation Search Anti Blink When Scene Selection is set to [Auto] but only images with the subject's eyes open are shooting an image, the camera automatically shoots two images consecutively. The camera will select, display and record the image which the eyes are not blinked automatically. 1 Lower the lens cover to switch to (Soft...
When using the flash - During burst or bracket shooting - When Face Detection function does not work depending on the LCD screen. Table of contents Operation Search Anti Blink When Scene Selection is set to [Auto] but only images with the subject's eyes open are shooting an image, the camera automatically shoots two images consecutively. The camera will select, display and record the image which the eyes are not blinked automatically. 1 Lower the lens cover to switch to (Soft...

Cyber-shot® Handbook
Page 121
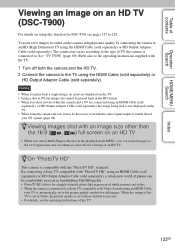
...). Refer also to the operating instructions supplied with the camera appear on the TV. Images shot with the TV. 1 Turn off both the camera and the TV. 2 Attach the camera to the multi-output stand (supplied). 3 Connect the multi-output stand to the TV using the AV Cable (supplied). Index 121GB Touch / displayed on the LCD screen of this function for DSC-T90, see pages 127 to...
...). Refer also to the operating instructions supplied with the camera appear on the TV. Images shot with the TV. 1 Turn off both the camera and the TV. 2 Attach the camera to the multi-output stand (supplied). 3 Connect the multi-output stand to the TV using the AV Cable (supplied). Index 121GB Touch / displayed on the LCD screen of this function for DSC-T90, see pages 127 to...
Cyber-shot® Handbook
Page 122
... set to Video, the picture quality is compatible with an image size other than the 16:9 ( , ) full screen on an HD TV • When you select [Multi-Purpose Resize] in the playback mode MENU, you shoot movies while the camera and a TV are connected using an HDMI Cable (sold separately), or HD Output Adaptor Cable (sold separately) the image being shot is not displayed on the TV. • When using the camera...
... set to Video, the picture quality is compatible with an image size other than the 16:9 ( , ) full screen on an HD TV • When you select [Multi-Purpose Resize] in the playback mode MENU, you shoot movies while the camera and a TV are connected using an HDMI Cable (sold separately), or HD Output Adaptor Cable (sold separately) the image being shot is not displayed on the TV. • When using the camera...

Cyber-shot® Handbook
Page 123
... stand to the TV using the HDMI Cable (sold separately) 3 Turn on the TV and set the input. 4 Press (Playback) button to turn on the camera. Touch / displayed on the TV. Images shot with the HDMI logo. Notes • Select t (Settings) t [Main Settings] to select [Auto] or [1080i] for [HDMI Resolution]. • The beep sound is fixed to [Shutter]. • Do not connect the camera and equipment to be...
... stand to the TV using the HDMI Cable (sold separately) 3 Turn on the TV and set the input. 4 Press (Playback) button to turn on the camera. Touch / displayed on the TV. Images shot with the HDMI logo. Notes • Select t (Settings) t [Main Settings] to select [Auto] or [1080i] for [HDMI Resolution]. • The beep sound is fixed to [Shutter]. • Do not connect the camera and equipment to be...

Cyber-shot® Handbook
Page 124
... operate the remote controller, the remote controller operation is connected to a TV set using an HDMI Cable (sold separately). 4 Turn on the TV and set the input. 5 Press the (playback) button of the camera to turn on the camera. 6 Press the SYNC MENU button of the TV's remote controller to select the desired mode. Plays back a single image at the same time. Plays back enlarged images. Menu Slideshow Single Image Image Index Wide Zoom Delete Playback Zoom Rotate Filter by Faces View Mode Function Automatically plays back images with sound...
... operate the remote controller, the remote controller operation is connected to a TV set using an HDMI Cable (sold separately). 4 Turn on the TV and set the input. 5 Press the (playback) button of the camera to turn on the camera. 6 Press the SYNC MENU button of the TV's remote controller to select the desired mode. Plays back a single image at the same time. Plays back enlarged images. Menu Slideshow Single Image Image Index Wide Zoom Delete Playback Zoom Rotate Filter by Faces View Mode Function Automatically plays back images with sound...
Cyber-shot® Handbook
Page 133
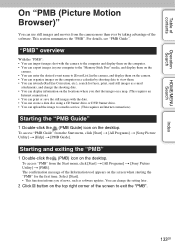
.... The confirmation message of the software. For details, see "PMB Guide". This section summarizes the "PMB". To access "PMB" from the Start menu, click [Start] t [All Programs] t [Sony Picture Utility] t [Help] t [PMB Guide]. Table of contents Operation Search HOME/MENU Search Index On "PMB (Picture Motion Browser)" You can use still images and movies from the camera more than ever by shooting date to view them. • You can retouch (Red Eye Correction...
.... The confirmation message of the software. For details, see "PMB Guide". This section summarizes the "PMB". To access "PMB" from the Start menu, click [Start] t [All Programs] t [Sony Picture Utility] t [Help] t [PMB Guide]. Table of contents Operation Search HOME/MENU Search Index On "PMB (Picture Motion Browser)" You can use still images and movies from the camera more than ever by shooting date to view them. • You can retouch (Red Eye Correction...

Cyber-shot® Handbook
Page 140
... the camera. (Playback) button on the storage location of the images and file names, see page 137. 7 Double-click the hard disk icon t the desired image file in the folder containing the copied files. DSC-T900 DSC-T90 Multi-output stand (supplied) USB Cable 2To a USB jack 1 To a USB jack of the computer Cable for multi-use terminal 1 To a USB jack of contents Operation Search HOME/MENU Search Importing and viewing images on a computer When importing images in the internal memory...
... the camera. (Playback) button on the storage location of the images and file names, see page 137. 7 Double-click the hard disk icon t the desired image file in the folder containing the copied files. DSC-T900 DSC-T90 Multi-output stand (supplied) USB Cable 2To a USB jack 1 To a USB jack of the computer Cable for multi-use terminal 1 To a USB jack of contents Operation Search HOME/MENU Search Importing and viewing images on a computer When importing images in the internal memory...
Cyber-shot® Handbook
Page 144
.... (CIPA: Camera & Imaging Products Association) Note • You cannot print movies. "PictBridge" is not established, touch t (Settings) t [Main Settings] t t [USB Connect] t t [PictBridge] t and start over the procedure. After the connection is made, the indicator appears on the screen of the printer Cable for USB connection to the printer. 1 Insert the sufficiently charged battery pack into the camera. 2 Connect the camera to a PictBridge compliant printer. DSC-T900 DSC-T90 Multi-output stand (supplied) USB Cable 2To a USB jack 1 To a USB jack...
.... (CIPA: Camera & Imaging Products Association) Note • You cannot print movies. "PictBridge" is not established, touch t (Settings) t [Main Settings] t t [USB Connect] t t [PictBridge] t and start over the procedure. After the connection is made, the indicator appears on the screen of the printer Cable for USB connection to the printer. 1 Insert the sufficiently charged battery pack into the camera. 2 Connect the camera to a PictBridge compliant printer. DSC-T900 DSC-T90 Multi-output stand (supplied) USB Cable 2To a USB jack 1 To a USB jack...

Cyber-shot® Handbook
Page 148
... battery charge. When you use the flash and zoom frequently. - Try charging the battery pack again within the proper charging temperature range (10°C to 30°C (50°F to charge the battery. Table of contents Operation Search HOME/MENU Search Battery pack and power Cannot insert the battery pack. • Make sure the direction of the (screen display) is dead (page 165). The remaining charge indicator is locked. When you use the camera...
... battery charge. When you use the flash and zoom frequently. - Try charging the battery pack again within the proper charging temperature range (10°C to 30°C (50°F to charge the battery. Table of contents Operation Search HOME/MENU Search Battery pack and power Cannot insert the battery pack. • Make sure the direction of the (screen display) is dead (page 165). The remaining charge indicator is locked. When you use the camera...
Cyber-shot® Handbook
Page 149
... function does not work . • You cannot use the Digital Zoom when: - When [Anti Blink] is set to [Off] (page 96). Set [Demo Mode] to [Off]. The image is out of the internal memory or a "Memory Stick Duo" media. Zoom does not work when appears on a "Memory Stick PRO Duo" media. Delete unnecessary images (pages 43, 114). - Recording takes a long time. • When the shutter speed becomes slower than (Movie Mode) (DSC-T90 only). • Set the shooting mode to (Movie Mode...
... function does not work . • You cannot use the Digital Zoom when: - When [Anti Blink] is set to [Off] (page 96). Set [Demo Mode] to [Off]. The image is out of the internal memory or a "Memory Stick Duo" media. Zoom does not work when appears on a "Memory Stick PRO Duo" media. Delete unnecessary images (pages 43, 114). - Recording takes a long time. • When the shutter speed becomes slower than (Movie Mode) (DSC-T90 only). • Set the shooting mode to (Movie Mode...
Cyber-shot® Handbook
Page 152
... Touch to set [Display Setup] to [Normal] or [Simple] (page 17). • Touch the center of the screen during shooting, the buttons and icons will reappear when you take your TV (page 68). • Check whether the connection is correct (pages 121, 127). • If the USB Cable (DSC-T900) or the cable for multi-use terminal (DSC-T90 only), an HDMI Cable (sold separately) (DSC-T900 only...
... Touch to set [Display Setup] to [Normal] or [Simple] (page 17). • Touch the center of the screen during shooting, the buttons and icons will reappear when you take your TV (page 68). • Check whether the connection is correct (pages 121, 127). • If the USB Cable (DSC-T900) or the cable for multi-use terminal (DSC-T90 only), an HDMI Cable (sold separately) (DSC-T900 only...

Cyber-shot® Handbook
Page 158
.... • The inserted "Memory Stick Duo" media cannot be used in Folder View mode (page 50). 158GB Set the switch to cool • The camera temperature has risen. "Memory Stick" type error • The inserted "Memory Stick Duo" media cannot be used in the camera (page 163). No memory space on internal memory No memory space on this folder of contents Operation Search HOME/MENU Search Index Camera overheating Allow it...
.... • The inserted "Memory Stick Duo" media cannot be used in Folder View mode (page 50). 158GB Set the switch to cool • The camera temperature has risen. "Memory Stick" type error • The inserted "Memory Stick Duo" media cannot be used in the camera (page 163). No memory space on internal memory No memory space on this folder of contents Operation Search HOME/MENU Search Index Camera overheating Allow it...
Cyber-shot® Handbook
Page 160
... in [Digital Zoom] when the image size is compatible of recording movies with a normal Music file. • Execute [Format Music], then download a new Music files. 160GB Printer error • Check the printer. • Check if the image you are shooting in the internal memory to insufficient light. Use "Memory Stick PRO Duo" media or set to print is finished. Index • The data transmission to the printer may take time, depending on a tripod to secure the camera. 1280...
... in [Digital Zoom] when the image size is compatible of recording movies with a normal Music file. • Execute [Format Music], then download a new Music files. 160GB Printer error • Check the printer. • Check if the image you are shooting in the internal memory to insufficient light. Use "Memory Stick PRO Duo" media or set to print is finished. Index • The data transmission to the printer may take time, depending on a tripod to secure the camera. 1280...


