
Operating Instructions (primary manual)
Page 2
...not expose the unit to persons. Regulatory Information Declaration of Conformity Trade Name: SONY Model No.: DSC-P7 Responsible Party:Sony Electronics Inc. Declaration of Conformity Trade Name: SONY Model No.: DSC-P9 Responsible Party:Sony Electronics Inc. This symbol is intended to alert the user to the presence...expose the battery pack to temperature above 60°C (140°F), such as in a car parked in the sun or under direct sunlight. This symbol is subject to operate this equipment. If you have any questions about this product, you may call: Sony Customer ...
...not expose the unit to persons. Regulatory Information Declaration of Conformity Trade Name: SONY Model No.: DSC-P7 Responsible Party:Sony Electronics Inc. Declaration of Conformity Trade Name: SONY Model No.: DSC-P9 Responsible Party:Sony Electronics Inc. This symbol is intended to alert the user to the presence...expose the battery pack to temperature above 60°C (140°F), such as in a car parked in the sun or under direct sunlight. This symbol is subject to operate this equipment. If you have any questions about this product, you may call: Sony Customer ...

Operating Instructions (primary manual)
Page 3
...recycling of FCC Rules. You can radiate radio frequency energy and, if not installed and used rechargeable batteries to correct the interference by ASTA or BSI to BS 1362, (i.e., marked with the EMC standard... and receiver. -Connect the equipment into an outlet on the supplied AC power adaptor for a digital device pursuant to provide reasonable protection against harmful interference in the U.S.A. Never use the plug without the... experienced radio/TV technician for your nearest Sony service station. For more of the FCC Rules. These limits are recyclable.
...recycling of FCC Rules. You can radiate radio frequency energy and, if not installed and used rechargeable batteries to correct the interference by ASTA or BSI to BS 1362, (i.e., marked with the EMC standard... and receiver. -Connect the equipment into an outlet on the supplied AC power adaptor for a digital device pursuant to provide reasonable protection against harmful interference in the U.S.A. Never use the plug without the... experienced radio/TV technician for your nearest Sony service station. For more of the FCC Rules. These limits are recyclable.

Operating Instructions (primary manual)
Page 4
...Sony Corporation. • "MagicGate" and are trademarks of Sony Corporation. • "InfoLITHIUM" is a trademark of Sony Corporation. • Microsoft and Windows are , in general, trademarks or registered trademarks of Apple Computer, Inc. • In addition, system and product names used in all cases in this digital camera...Mac OS, and QuickTime, are trademarks or registered trademarks of their respective developers or manufacturers. "Memory Stick" and battery pack N50 For the Customers in Europe This product has been tested and found compliant with the limits sets out...
...Sony Corporation. • "MagicGate" and are trademarks of Sony Corporation. • "InfoLITHIUM" is a trademark of Sony Corporation. • Microsoft and Windows are , in general, trademarks or registered trademarks of Apple Computer, Inc. • In addition, system and product names used in all cases in this digital camera...Mac OS, and QuickTime, are trademarks or registered trademarks of their respective developers or manufacturers. "Memory Stick" and battery pack N50 For the Customers in Europe This product has been tested and found compliant with the limits sets out...

Operating Instructions (primary manual)
Page 6
...contents Before using your camera 5 Identifying the parts 8 Getting started Charging the battery pack 10 Using an external power source 14 Using your camera abroad 14 Turning on/off your camera 15 How to use the control button 15 Setting the date and time 16 Shooting still images Inserting and removing... a "Memory Stick 18 Deciding the still image size and quality 19 Basic still image shooting (using auto adjustment mode 22 Checking the last image shot (Quick...
...contents Before using your camera 5 Identifying the parts 8 Getting started Charging the battery pack 10 Using an external power source 14 Using your camera abroad 14 Turning on/off your camera 15 How to use the control button 15 Setting the date and time 16 Shooting still images Inserting and removing... a "Memory Stick 18 Deciding the still image size and quality 19 Basic still image shooting (using auto adjustment mode 22 Checking the last image shot (Quick...

Operating Instructions (primary manual)
Page 7
... to your computer ......... 77 For Windows 98, 98SE, 2000, Me users 77 For Windows XP users 77 For Macintosh users 78 Still image editing Protecting images (Protect 66 For the single screen 66 For the Index (nine images) screen.....66 Troubleshooting Troubleshooting 79 Warnings ...still image viewing Enlarging a portion of images that can be saved/ shooting time 88 Menu items 89 SET UP items 93 Precautions 95 Enjoying movies Shooting movies 71 Viewing movies on the LCD screen .......72 Deleting movies 73 For the single screen 73 The "Memory Stick 96 The "InfoLITHIUM" battery...
... to your computer ......... 77 For Windows 98, 98SE, 2000, Me users 77 For Windows XP users 77 For Macintosh users 78 Still image editing Protecting images (Protect 66 For the single screen 66 For the Index (nine images) screen.....66 Troubleshooting Troubleshooting 79 Warnings ...still image viewing Enlarging a portion of images that can be saved/ shooting time 88 Menu items 89 SET UP items 93 Precautions 95 Enjoying movies Shooting movies 71 Viewing movies on the LCD screen .......72 Deleting movies 73 For the single screen 73 The "Memory Stick 96 The "InfoLITHIUM" battery...

Operating Instructions (primary manual)
Page 9
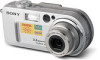
... (44) (Menu on) (v/V/b/B/z) (15)/ H Mode dial (16) (Menu off) ( / /7/ ) (26/25/23/ SCN: To shoot in the Scene 24) selection mode B Finder (28) : To shoot still images Self-timer/recording : To view or edit images lamp (red) : To shoot movies /Clip Motion AE/AF lock lamp images/Multi Burst mode images... shooting) (24)/ (11, 26) Index button (for viewing) (33) C LCD screen D DSPL/LCD ON/OFF button (28) E DC IN jack (10, 14) F MENU button (19) J Battery/"Memory Stick" cover K RESET button (79) L Access lamp (18...
... (44) (Menu on) (v/V/b/B/z) (15)/ H Mode dial (16) (Menu off) ( / /7/ ) (26/25/23/ SCN: To shoot in the Scene 24) selection mode B Finder (28) : To shoot still images Self-timer/recording : To view or edit images lamp (red) : To shoot movies /Clip Motion AE/AF lock lamp images/Multi Burst mode images... shooting) (24)/ (11, 26) Index button (for viewing) (33) C LCD screen D DSPL/LCD ON/OFF button (28) E DC IN jack (10, 14) F MENU button (19) J Battery/"Memory Stick" cover K RESET button (79) L Access lamp (18...

Operating Instructions (primary manual)
Page 10
... only with a dry cotton bud. Do not use any other battery pack (page 96). 2 Battery eject lever , Insert the battery pack, and close the cover. • While pushing the battery eject lever down using the front edge of the camera. DC plug Jack cover 3 AC power adaptor , Open the jack cover, ...LS1A AC power adaptor (supplied) to the DC IN jack of the battery pack, you can easily insert the battery pack. Open the cover in the direction of the arrow. • When charging the battery pack, make sure the camera is properly inserted, then close the cover. This may not properly ...
... only with a dry cotton bud. Do not use any other battery pack (page 96). 2 Battery eject lever , Insert the battery pack, and close the cover. • While pushing the battery eject lever down using the front edge of the camera. DC plug Jack cover 3 AC power adaptor , Open the jack cover, ...LS1A AC power adaptor (supplied) to the DC IN jack of the battery pack, you can easily insert the battery pack. Open the cover in the direction of the arrow. • When charging the battery pack, make sure the camera is properly inserted, then close the cover. This may not properly ...

Operating Instructions (primary manual)
Page 11
...charge). • When charging is finished, disconnect the AC power adaptor both from the camera and the wall outlet (wall socket). Battery eject lever Open the battery/"Memory Stick" cover, and push down the battery eject lever in the arrow direction as illustrated above. • Make sure you do ... indicated depending on conditions of use or circumstances. 11 Getting started 2 To a wall outlet (wall socket) Power cord (mains lead) To remove the battery pack 1 4 AC power adaptor , Connect the power cord (mains lead) to the AC power adaptor and to a wall outlet (wall socket). Charging...
...charge). • When charging is finished, disconnect the AC power adaptor both from the camera and the wall outlet (wall socket). Battery eject lever Open the battery/"Memory Stick" cover, and push down the battery eject lever in the arrow direction as illustrated above. • Make sure you do ... indicated depending on conditions of use or circumstances. 11 Getting started 2 To a wall outlet (wall socket) Power cord (mains lead) To remove the battery pack 1 4 AC power adaptor , Connect the power cord (mains lead) to the AC power adaptor and to a wall outlet (wall socket). Charging...

Operating Instructions (primary manual)
Page 12
... the ambient temperature is 25°C (77°F), and the supplied battery pack is fully charged. The guidelines for the number of use. 12 Shooting* still images Image size DSC-P9 2272×1704 640×480 DSC-P7 2048×1536 640×480 LCD screen ON OFF ON OFF NP...1800 * Shooting one approximately every three seconds Shooting*** movies DSC-P9 DSC-P7 LCD screen ON OFF ON OFF NP-FC10 (supplied) Battery life (min.) Approx. 80 Approx. 110 Approx. 80 Approx. 110 *** Continuous shooting with an image size of time the camera can be used when image quality is set to charge...
... the ambient temperature is 25°C (77°F), and the supplied battery pack is fully charged. The guidelines for the number of use. 12 Shooting* still images Image size DSC-P9 2272×1704 640×480 DSC-P7 2048×1536 640×480 LCD screen ON OFF ON OFF NP...1800 * Shooting one approximately every three seconds Shooting*** movies DSC-P9 DSC-P7 LCD screen ON OFF ON OFF NP-FC10 (supplied) Battery life (min.) Approx. 80 Approx. 110 Approx. 80 Approx. 110 *** Continuous shooting with an image size of time the camera can be used when image quality is set to charge...

Operating Instructions (primary manual)
Page 13
... you want to [OFF]. You cannot change the settings for a longer period of images recordable are decreased under the following conditions: - Getting started • The battery life and the number of time. Turning on the control button, and select " " (Forced flash) or Auto (page 26). • When shooting sill images..., the focus only works while the shutter button is [ON] (page 94). Using the battery pack used repeatedly or self-discharged after charging (page 97). The factory setting is pressed down halfway. 13
... you want to [OFF]. You cannot change the settings for a longer period of images recordable are decreased under the following conditions: - Getting started • The battery life and the number of time. Turning on the control button, and select " " (Forced flash) or Auto (page 26). • When shooting sill images..., the focus only works while the shutter button is [ON] (page 94). Using the battery pack used repeatedly or self-discharged after charging (page 97). The factory setting is pressed down halfway. 13

Operating Instructions (primary manual)
Page 15
... (MONO) jack * When [POWER SAVE] is set to [ON]: approximately 90 seconds When [POWER SAVE] is automatically shut off to preserve battery power. When you turn on your camera POWER ON/OFF(CHG) POWER POWER lamp , Press POWER to turn on the power. Please be careful not to make the changes...item, then press the center z or b/B to touch the lens portion. Getting started Turning on/off your camera for a while* when shooting, viewing images, or setting up the camera while using the battery pack, power is set to [OFF]: approximately three minutes How to use the control button 0EV 0EV EV...
... (MONO) jack * When [POWER SAVE] is set to [ON]: approximately 90 seconds When [POWER SAVE] is automatically shut off to preserve battery power. When you turn on your camera POWER ON/OFF(CHG) POWER POWER lamp , Press POWER to turn on the power. Please be careful not to make the changes...item, then press the center z or b/B to touch the lens portion. Getting started Turning on/off your camera for a while* when shooting, viewing images, or setting up the camera while using the battery pack, power is set to [OFF]: approximately three minutes How to use the control button 0EV 0EV EV...

Operating Instructions (primary manual)
Page 16
... date that have been previously set, set the mode dial to . • You can select from [Y/M/D] (year/month/ day), [M/D/Y], and [D/M/Y]. • If the rechargeable button battery, which provides the power for the date, the month and the year using v/V on the control button, then press the center z. Setting the date and...
... date that have been previously set, set the mode dial to . • You can select from [Y/M/D] (year/month/ day), [M/D/Y], and [D/M/Y]. • If the rechargeable button battery, which provides the power for the date, the month and the year using v/V on the control button, then press the center z. Setting the date and...

Operating Instructions (primary manual)
Page 18
To remove the "Memory Stick" Open the battery/"Memory Stick" cover, then push the "Memory Stick" to pop it clicks. Insert the "Memory Stick"... a proper recording or playback may not be carried out. 3 Access lamp , Close the battery/"Memory Stick" cover. Inserting and removing a "Memory Stick" Connector side Shooting still images 1 , Open the battery/"Memory Stick" cover. Never remove the "Memory Stick" or turn off the power at this... the "Memory Stick." Slide the cover in until it out. • Whenever the Access lamp is lit, the camera is recording or reading out an image.
To remove the "Memory Stick" Open the battery/"Memory Stick" cover, then push the "Memory Stick" to pop it clicks. Insert the "Memory Stick"... a proper recording or playback may not be carried out. 3 Access lamp , Close the battery/"Memory Stick" cover. Inserting and removing a "Memory Stick" Connector side Shooting still images 1 , Open the battery/"Memory Stick" cover. Never remove the "Memory Stick" or turn off the power at this... the "Memory Stick." Slide the cover in until it out. • Whenever the Access lamp is lit, the camera is recording or reading out an image.

Operating Instructions (primary manual)
Page 23
...as that is saved in the following subjects. About Auto Focus When you are shooting with the battery pack, if no tasks are performed for a while with in the "Memory Stick." Checking the last image shot (Quick Review) 60min REVIEW 2272 8/8 100-0029 2002 7 4 10:30PM , Press b ...the center z. 3 Press v on , the AE/AF lock indicator will be difficult to use with the camera turned on, power is a luminous body and a lustrous subject • A flashing subject. Shooting still images 60min 2272 FINE 4 , Press the shutter button fully down. In such cases, release the shutter ...
...as that is saved in the following subjects. About Auto Focus When you are shooting with the battery pack, if no tasks are performed for a while with in the "Memory Stick." Checking the last image shot (Quick Review) 60min REVIEW 2272 8/8 100-0029 2002 7 4 10:30PM , Press b ...the center z. 3 Press v on , the AE/AF lock indicator will be difficult to use with the camera turned on, power is a luminous body and a lustrous subject • A flashing subject. Shooting still images 60min 2272 FINE 4 , Press the shutter button fully down. In such cases, release the shutter ...

Operating Instructions (primary manual)
Page 28
...; For details on the screen for approximately two seconds so you want to save battery power, or when it is convenient when you can start shooting (page 22). • When the LCD screen is turned off, the digital zoom does not function (page 24). • When the LCD screen is turned off...
...; For details on the screen for approximately two seconds so you want to save battery power, or when it is convenient when you can start shooting (page 22). • When the LCD screen is turned off, the digital zoom does not function (page 24). • When the LCD screen is turned off...

Operating Instructions (primary manual)
Page 79
... on the power again. (This will erase the date/time settings, etc.) RESET Troubleshooting 3 Consult your Sony dealer or local authorized Sony service facility. p Replace the battery pack with a charged battery pack (page 10). Troubleshooting If you have used the camera for a long time in an extremely hot or an extremely cold location. • The...
... on the power again. (This will erase the date/time settings, etc.) RESET Troubleshooting 3 Consult your Sony dealer or local authorized Sony service facility. p Replace the battery pack with a charged battery pack (page 10). Troubleshooting If you have used the camera for a long time in an extremely hot or an extremely cold location. • The...

Operating Instructions (primary manual)
Page 80
...down too quickly. p Set the macro recording mode when you used the camera. Battery and power (continued) Symptom The battery pack runs down the battery (when [POWER SAVE] is [OFF], after three minutes.) (page 15). • The battery pack is discharged. The image is out of focus. • The ...subject is dead (page 97). - Shooting still images / movies Symptom Cause The LCD screen does not • The power was turned off suddenly. ...
...down too quickly. p Set the macro recording mode when you used the camera. Battery and power (continued) Symptom The battery pack runs down the battery (when [POWER SAVE] is [OFF], after three minutes.) (page 15). • The battery pack is discharged. The image is out of focus. • The ...subject is dead (page 97). - Shooting still images / movies Symptom Cause The LCD screen does not • The power was turned off suddenly. ...

Operating Instructions (primary manual)
Page 83
...install the USB driver (pages 42, 46). p In Windows 2000, log on as Administrator (authorized Administrators) (page 42). • The camera is turned off. • The battery level is too low. • You are not using the supplied USB cable. • The USB cable is not connected securely. •... [USB CONNECT] is not installed. • Your computer does not properly recognize the device because you connected the camera and your camera. p Turn on...
...install the USB driver (pages 42, 46). p In Windows 2000, log on as Administrator (authorized Administrators) (page 42). • The camera is turned off. • The battery level is too low. • You are not using the supplied USB cable. • The USB cable is not connected securely. •... [USB CONNECT] is not installed. • Your computer does not properly recognize the device because you connected the camera and your camera. p Turn on...

Operating Instructions (primary manual)
Page 85
...etc.) p Check the indicator (pages 99 to a wall outlet (wall socket) (page 14). Others Symptom The camera does not work . camera does not work , no operations can be performed. p Charge the battery (page 10). p Replace it with a pointed object, then turn the power on the LCD screen. Cause &#... power sources. If this does not work, press the RESET button located inside the battery/"Memory Stick" cover with a fully charged battery or use it securely to the DC IN jack of your camera and to 101). p This is occurring. The power is not working properly. Troubleshooting...
...etc.) p Check the indicator (pages 99 to a wall outlet (wall socket) (page 14). Others Symptom The camera does not work . camera does not work , no operations can be performed. p Charge the battery (page 10). p Replace it with a pointed object, then turn the power on the LCD screen. Cause &#... power sources. If this does not work, press the RESET button located inside the battery/"Memory Stick" cover with a fully charged battery or use it securely to the DC IN jack of your camera and to 101). p This is occurring. The power is not working properly. Troubleshooting...

Operating Instructions (primary manual)
Page 86
...movie). • You are still 5 to be divided. • The file is dirty. • Insert the "Memory Stick" correctly (page 18). Depending on the conditions of use or the type of battery pack, the indicator may flash even though there are not holding the camera steadly enough. FORMAT ERROR &#...on the "Memory Stick." MEMORY STICK ERROR • The inserted "Memory Stick" cannot be played back on equipment other than this camera. • The battery level is insufficient. NO FILE • No images have been recorded on the LCD screen. Set it to the LOCK position. ...
...movie). • You are still 5 to be divided. • The file is dirty. • Insert the "Memory Stick" correctly (page 18). Depending on the conditions of use or the type of battery pack, the indicator may flash even though there are not holding the camera steadly enough. FORMAT ERROR &#...on the "Memory Stick." MEMORY STICK ERROR • The inserted "Memory Stick" cannot be played back on equipment other than this camera. • The battery level is insufficient. NO FILE • No images have been recorded on the LCD screen. Set it to the LOCK position. ...


