Operating Instructions
Page 7
... 67 Changing the setup settings (SETUP 69 Additional information Precautions 71 On "Memory Sticks 72 About "InfoLITHIUM" battery pack (not supplied 73 Using your camera abroad 74 Troubleshooting 75 Warning and notice messages 81 Self-diagnosis display 83 Specifications 84 LCD screen indicators 85 Notes on Using Batteries 88 Index 89 7 Table...
... 67 Changing the setup settings (SETUP 69 Additional information Precautions 71 On "Memory Sticks 72 About "InfoLITHIUM" battery pack (not supplied 73 Using your camera abroad 74 Troubleshooting 75 Warning and notice messages 81 Self-diagnosis display 83 Specifications 84 LCD screen indicators 85 Notes on Using Batteries 88 Index 89 7 Table...

Operating Instructions
Page 34
...Troubleshooting" on Windows and double click the newly recognized drive. (Example: "Removable Disk (E:)") The folders inside the "Memory Stick" are displayed. to the USB connector to the USB jack (mini-B) Personal computer Push the USB cable connector in as far as it will go. 3 Insert a "Memory Stick" into your camera..., and connect the AC power adaptor to your camera and then to load. 2 Connect the USB jack (mini-B) on the camera with the USB connector on your camera. Viewing images When viewing moving images on a Windows system, ...
...Troubleshooting" on Windows and double click the newly recognized drive. (Example: "Removable Disk (E:)") The folders inside the "Memory Stick" are displayed. to the USB connector to the USB jack (mini-B) Personal computer Push the USB cable connector in as far as it will go. 3 Insert a "Memory Stick" into your camera..., and connect the AC power adaptor to your camera and then to load. 2 Connect the USB jack (mini-B) on the camera with the USB connector on your camera. Viewing images When viewing moving images on a Windows system, ...
Operating Instructions
Page 75
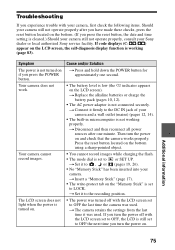
...Sony service facility. t Insert a "Memory Stick" (page 17). • The write-protect tab on the "Memory Stick" is not working (page 83). Cause and/or Solution t Press and hold down the POWER button for approximately one minute. t Set it firmly to the DC IN jack of your camera...you press the reset button, the date and time setting is working properly. Additional information 75 Troubleshooting If you experience trouble with your camera, first check the following items. Should your camera still not operate properly after one second. • The battery level is still set to ...
...Sony service facility. t Insert a "Memory Stick" (page 17). • The write-protect tab on the "Memory Stick" is not working (page 83). Cause and/or Solution t Press and hold down the POWER button for approximately one minute. t Set it firmly to the DC IN jack of your camera...you press the reset button, the date and time setting is working properly. Additional information 75 Troubleshooting If you experience trouble with your camera, first check the following items. Should your camera still not operate properly after one second. • The battery level is still set to ...

