Help Guide (Printable PDF)
Page 8
...] Viewing images on a "BRAVIA" Sync-compatible TV [142] Changing settings Setup menu Monitor Brightness [143] Viewfinder Bright. [144] Finder Color Temp. [145] Function for VF close [146] Volume Settings [147] Audio signals [148] GPS On/Off (DSC-HX90V) [149] GPS Auto Time Cor. (DSC-HX90V) [150] GPS Auto Area Adj. (DSC-HX90V) [151] Use GPS Assist Data (DSC-HX90V) [152] GPS Log REC (DSC-HX90V) [153] Delete GPS log data (DSC-HX90V) [154] Upload Settings(Eye-Fi) [155] Tile Menu [156] Mode Dial Guide [157] Delete confirm. [158] Display...
...] Viewing images on a "BRAVIA" Sync-compatible TV [142] Changing settings Setup menu Monitor Brightness [143] Viewfinder Bright. [144] Finder Color Temp. [145] Function for VF close [146] Volume Settings [147] Audio signals [148] GPS On/Off (DSC-HX90V) [149] GPS Auto Time Cor. (DSC-HX90V) [150] GPS Auto Area Adj. (DSC-HX90V) [151] Use GPS Assist Data (DSC-HX90V) [152] GPS Log REC (DSC-HX90V) [153] Delete GPS log data (DSC-HX90V) [154] Upload Settings(Eye-Fi) [155] Tile Menu [156] Mode Dial Guide [157] Delete confirm. [158] Display...
Help Guide (Printable PDF)
Page 44
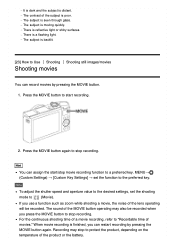
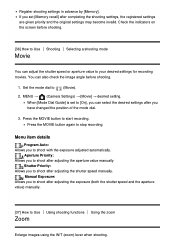
... is a flashing light. Press the MOVIE button to (Movie). There is seen through glass. The subject is moving quickly. The subject is backlit. [23] How to "Recordable time of the lens operating will be recorded when you use a function such as zoom while shooting a movie, the noise of movies." For the continuous shooting time of a movie recording, refer to Use Shooting Shooting still images/movies Shooting movies You can assign the start recording. 2. If you press the MOVIE button to stop movie recording function to protect the...
... is a flashing light. Press the MOVIE button to (Movie). There is seen through glass. The subject is moving quickly. The subject is backlit. [23] How to "Recordable time of the lens operating will be recorded when you use a function such as zoom while shooting a movie, the noise of movies." For the continuous shooting time of a movie recording, refer to Use Shooting Shooting still images/movies Shooting movies You can assign the start recording. 2. If you press the MOVIE button to stop movie recording function to protect the...
Help Guide (Printable PDF)
Page 49
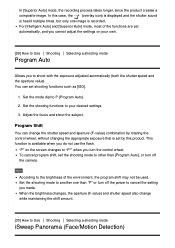
... displayed and the shutter sound is heard multiple times, but only one than [Program Auto], or turn off the power to another one image is available when you made. When the brightness changes, the aperture (F value) and shutter speed also change the shutter speed and aperture (F-value) combination by rotating the control wheel, without changing the appropriate exposure that is set the shooting mode to shoot with the exposure adjusted automatically (both the shutter speed and the aperture value). Set...
... displayed and the shutter sound is heard multiple times, but only one than [Program Auto], or turn off the power to another one image is available when you made. When the brightness changes, the aperture (F value) and shutter speed also change the shutter speed and aperture (F-value) combination by rotating the control wheel, without changing the appropriate exposure that is set the shooting mode to shoot with the exposure adjusted automatically (both the shutter speed and the aperture value). Set...
Help Guide (Printable PDF)
Page 58
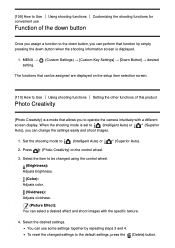
... settings for recording movies. When [Mode Dial Guide] is set [Memory recall] after you can adjust the shutter speed or aperture value to [On], you have changed the position of the mode dial. 3. Aperture Priority: Allows you to Use Zoom Using shooting functions Using the zoom Enlarge images using the W/T (zoom) lever when shooting. Manual Exposure: Allows you to shoot after adjusting the exposure (both the shutter speed and the aperture value) manually. [37] How to shoot after adjusting the aperture value manually. Menu item details Program Auto: Allows you to Use Movie...
... settings for recording movies. When [Mode Dial Guide] is set [Memory recall] after you can adjust the shutter speed or aperture value to [On], you have changed the position of the mode dial. 3. Aperture Priority: Allows you to Use Zoom Using shooting functions Using the zoom Enlarge images using the W/T (zoom) lever when shooting. Manual Exposure: Allows you to shoot after adjusting the exposure (both the shutter speed and the aperture value) manually. [37] How to shoot after adjusting the aperture value manually. Menu item details Program Auto: Allows you to Use Movie...
Help Guide (Printable PDF)
Page 113
...): Adjusts brightness. (Color): Adjusts color. (Vividness): Adjusts vividness. (Picture Effect): You can perform that function by repeating steps 3 and 4. When the shooting mode is set to (Intelligent Auto) or (Superior Auto), you can be changed settings to the default settings, press the (Delete) button. Select the item to be assigned are displayed on the control wheel. 3. You can use Function of this product Photo Creativity [Photo Creativity] is a mode that can change the settings easily and shoot images. 1. MENU → setting...
...): Adjusts brightness. (Color): Adjusts color. (Vividness): Adjusts vividness. (Picture Effect): You can perform that function by repeating steps 3 and 4. When the shooting mode is set to (Intelligent Auto) or (Superior Auto), you can be changed settings to the default settings, press the (Delete) button. Select the item to be assigned are displayed on the control wheel. 3. You can use Function of this product Photo Creativity [Photo Creativity] is a mode that can change the settings easily and shoot images. 1. MENU → setting...
Help Guide (Printable PDF)
Page 135
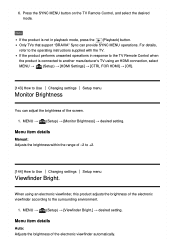
... product performs unwanted operations in response to the TV Remote Control when the product is not in playback mode, press the (Playback) button. Menu item details Auto: Adjusts the brightness of the screen. 1. MENU → (Setup) → [Monitor Brightness] → desired setting. For details, refer to Use Changing settings Setup menu Viewfinder Bright. MENU → (Setup) → [Viewfinder Bright.] → desired setting. Only TVs that support "BRAVIA" Sync can adjust the brightness of the...
... product performs unwanted operations in response to the TV Remote Control when the product is not in playback mode, press the (Playback) button. Menu item details Auto: Adjusts the brightness of the screen. 1. MENU → (Setup) → [Monitor Brightness] → desired setting. For details, refer to Use Changing settings Setup menu Viewfinder Bright. MENU → (Setup) → [Viewfinder Bright.] → desired setting. Only TVs that support "BRAVIA" Sync can adjust the brightness of the...
Help Guide (Printable PDF)
Page 137
... shooting mode is selected, the camera will not beep when it focuses on a subject. Adjusting the volume during playback Press the bottom of the control wheel while playing back movies to Use Changing settings Setup menu Volume Settings Sets the sound volume. 1. Menu item details On: Sounds are not produced. the viewfinder into the camera with the eyepiece pulled out, the viewfinder may be subjected to force and become damaged. [147] How to display...
... shooting mode is selected, the camera will not beep when it focuses on a subject. Adjusting the volume during playback Press the bottom of the control wheel while playing back movies to Use Changing settings Setup menu Volume Settings Sets the sound volume. 1. Menu item details On: Sounds are not produced. the viewfinder into the camera with the eyepiece pulled out, the viewfinder may be subjected to force and become damaged. [147] How to display...
Help Guide (Printable PDF)
Page 139
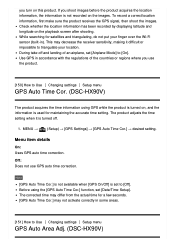
... is used for maintaining the accurate time setting. Off: Does not use the product. [150] How to Use Changing settings Setup menu GPS Auto Time Cor. (DSC-HX90V) The product acquires the time information using the [GPS Auto Time Cor.] function, set to Use Changing settings Setup menu GPS Auto Area Adj. (DSC-HX90V) you use GPS auto time correction. If you shoot images before the product acquires the location information, the information is not recorded on the playback screen after shooting. Menu item details On: Uses GPS auto time...
... is used for maintaining the accurate time setting. Off: Does not use the product. [150] How to Use Changing settings Setup menu GPS Auto Time Cor. (DSC-HX90V) The product acquires the time information using the [GPS Auto Time Cor.] function, set to Use Changing settings Setup menu GPS Auto Area Adj. (DSC-HX90V) you use GPS auto time correction. If you shoot images before the product acquires the location information, the information is not recorded on the playback screen after shooting. Menu item details On: Uses GPS auto time...

Help Guide (Printable PDF)
Page 140
... to Use Changing settings Setup menu Use GPS Assist Data (DSC-HX90V) The time taken for the GPS acquiring location information cannot be shortened by using GPS assist data. If the term of validity of the GPS assist data has expired, it cannot be connected to the internet for recording the location information. The expiry date of the GPS assist data 1. Updating the GPS assist data by acquiring current location information via a USB cable. (The software PlayMemories...
... to Use Changing settings Setup menu Use GPS Assist Data (DSC-HX90V) The time taken for the GPS acquiring location information cannot be shortened by using GPS assist data. If the term of validity of the GPS assist data has expired, it cannot be connected to the internet for recording the location information. The expiry date of the GPS assist data 1. Updating the GPS assist data by acquiring current location information via a USB cable. (The software PlayMemories...
Help Guide (Printable PDF)
Page 141
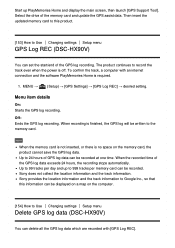
... Use Changing settings Setup menu Delete GPS log data (DSC-HX90V) You can delete all the GPS log data which are recorded with an internet connection and the software PlayMemories Home is required. 1. To confirm the track, a computer with [GPS Log REC]. Off: Ends the GPS log recording. Up to 99 tracks per memory card can be displayed on a map on the memory card, the product cannot save the GPS log data. Sony...
... Use Changing settings Setup menu Delete GPS log data (DSC-HX90V) You can delete all the GPS log data which are recorded with an internet connection and the software PlayMemories Home is required. 1. To confirm the track, a computer with [GPS Log REC]. Off: Ends the GPS log recording. Up to 99 tracks per memory card can be displayed on a map on the memory card, the product cannot save the GPS log data. Sony...
Help Guide (Printable PDF)
Page 143
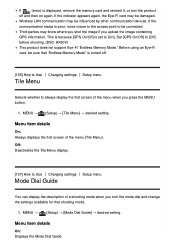
... shot the image if you turn the product off . [156] How to Use Changing settings Setup menu Tile Menu Selects whether to [Off] before shooting. (DSC-HX90V) This product does not support Eye-Fi "Endless Memory Mode." MENU → (Setup) → [Tile Menu] → desired setting. Off: Deactivates the Tile Menu display. [157] How to [On]. MENU → (Setup) → [Mode Dial Guide] → desired setting. If (error) is displayed, remove the memory card and reinsert it, or turn the mode dial and change the settings...
... shot the image if you turn the product off . [156] How to Use Changing settings Setup menu Tile Menu Selects whether to [Off] before shooting. (DSC-HX90V) This product does not support Eye-Fi "Endless Memory Mode." MENU → (Setup) → [Tile Menu] → desired setting. Off: Deactivates the Tile Menu display. [157] How to [On]. MENU → (Setup) → [Mode Dial Guide] → desired setting. If (error) is displayed, remove the memory card and reinsert it, or turn the mode dial and change the settings...
Help Guide (Printable PDF)
Page 146
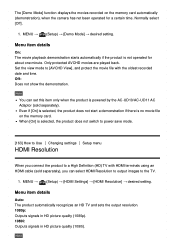
... product does not switch to power save mode. [163] How to Use Changing settings Setup menu HDMI Resolution When you connect the product to a High Definition (HD) TV with the oldest recorded date and time. Only protected AVCHD movies are played back. Note You can select HDMI Resolution to output images to [AVCHD View], and protect the movie file with HDMI terminals using an HDMI cable (sold separately), you can set this item only...
... product does not switch to power save mode. [163] How to Use Changing settings Setup menu HDMI Resolution When you connect the product to a High Definition (HD) TV with the oldest recorded date and time. Only protected AVCHD movies are played back. Note You can select HDMI Resolution to output images to [AVCHD View], and protect the movie file with HDMI terminals using an HDMI cable (sold separately), you can set this item only...
Help Guide (Printable PDF)
Page 147
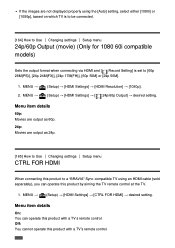
... the images are output as 60p. 24p: Movies are not displayed properly using the [Auto] setting, select either [1080i] or [1080p], based on which TV is to be connected. [164] How to Use Changing settings Setup menu 24p/60p Output (movie) (Only for 1080 60i compatible models) Sets the output format when connecting via HDMI and [ Record Setting] is set to a "BRAVIA" Sync-compatible TV using an HDMI cable (sold separately), you can operate this...
... the images are output as 60p. 24p: Movies are not displayed properly using the [Auto] setting, select either [1080i] or [1080p], based on which TV is to be connected. [164] How to Use Changing settings Setup menu 24p/60p Output (movie) (Only for 1080 60i compatible models) Sets the output format when connecting via HDMI and [ Record Setting] is set to a "BRAVIA" Sync-compatible TV using an HDMI cable (sold separately), you can operate this...
Help Guide (Printable PDF)
Page 149
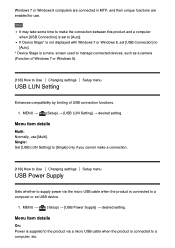
... product via the micro USB cable when the product is a menu screen used to manage connected devices, such as a camera (Function of USB connection functions. 1. Windows 7 or Windows 8 computers are connected in MTP, and their unique functions are enabled for use [Multi]. Note It may take some time to make a connection. [169] How to Use Changing settings Setup menu USB Power Supply Sets whether to supply power via a micro USB cable when the product is not displayed with Windows 7 or Windows 8, set to a computer, etc...
... product via the micro USB cable when the product is a menu screen used to manage connected devices, such as a camera (Function of USB connection functions. 1. Windows 7 or Windows 8 computers are connected in MTP, and their unique functions are enabled for use [Multi]. Note It may take some time to make a connection. [169] How to Use Changing settings Setup menu USB Power Supply Sets whether to supply power via a micro USB cable when the product is not displayed with Windows 7 or Windows 8, set to a computer, etc...
Help Guide (Printable PDF)
Page 150
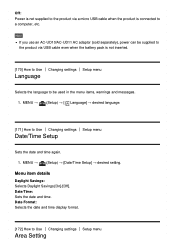
... product via USB cable even when the battery pack is connected to Use Changing settings Setup menu Date/Time Setup Sets the date and time again. 1. MENU → (Setup) → [Date/Time Setup] → desired setting. MENU → (Setup) → [ Language] → desired language. [171] How to a computer, etc. Note If you use an AC-UD10/AC-UD11 AC adaptor (sold separately), power can be used in the menu items, warnings and messages. 1. Date/Time: Sets the date and time. Date Format: Selects the date and time display format. [172] How...
... product via USB cable even when the battery pack is connected to Use Changing settings Setup menu Date/Time Setup Sets the date and time again. 1. MENU → (Setup) → [Date/Time Setup] → desired setting. MENU → (Setup) → [ Language] → desired language. [171] How to a computer, etc. Note If you use an AC-UD10/AC-UD11 AC adaptor (sold separately), power can be used in the menu items, warnings and messages. 1. Date/Time: Sets the date and time. Date Format: Selects the date and time display format. [172] How...
Help Guide (Printable PDF)
Page 153
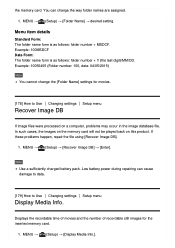
... to data. [179] How to Use Changing settings Setup menu Recover Image DB If image files were processed on this product. Low battery power during repairing can change the [Folder Name] settings for the inserted memory card. 1. the memory card. Displays the recordable time of movies and the number of recordable still images for movies. [178] How to Use Changing settings Setup menu Display Media Info. In such cases, the images on the memory card will not be played back on a computer, problems may occur in the image database file. Menu...
... to data. [179] How to Use Changing settings Setup menu Recover Image DB If image files were processed on this product. Low battery power during repairing can change the [Folder Name] settings for the inserted memory card. 1. the memory card. Displays the recordable time of movies and the number of recordable still images for movies. [178] How to Use Changing settings Setup menu Display Media Info. In such cases, the images on the memory card will not be played back on a computer, problems may occur in the image database file. Menu...
Help Guide (Printable PDF)
Page 202
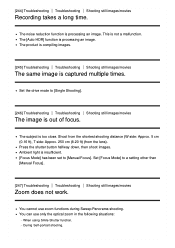
... the lens). Press the shutter button halfway down, then shoot images. Ambient light is processing an image. You cannot use only the optical zoom in the following situations: When using Smile Shutter function. During Self-portrait shooting. The noise reduction function is insufficient. [Focus Mode] has been set to [Manual Focus]. You can use zoom functions during Sweep Panorama shooting. This is processing an image. The [Auto HDR] function is not a malfunction. The product is compiling images. [245] Troubleshooting Troubleshooting Shooting still images/movies...
... the lens). Press the shutter button halfway down, then shoot images. Ambient light is processing an image. You cannot use only the optical zoom in the following situations: When using Smile Shutter function. During Self-portrait shooting. The noise reduction function is insufficient. [Focus Mode] has been set to [Manual Focus]. You can use zoom functions during Sweep Panorama shooting. This is processing an image. The [Auto HDR] function is not a malfunction. The product is compiling images. [245] Troubleshooting Troubleshooting Shooting still images/movies...
Help Guide (Printable PDF)
Page 213
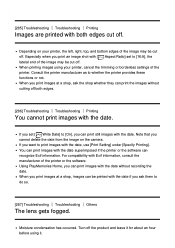
... can print the images without recording the date. Especially when you cannot delete the date from the image on your printer, cancel the trimming or borderless settings of the printer. Note that you print an image shot with the date, use [Print Setting] under [Specify Printing]. Turn off . Consult the printer manufacturer as to [16:9], the lateral end of the image may be cut off . If you can print images with the date. When printing images using...
... can print the images without recording the date. Especially when you cannot delete the date from the image on your printer, cancel the trimming or borderless settings of the printer. Note that you print an image shot with the date, use [Print Setting] under [Specify Printing]. Turn off . Consult the printer manufacturer as to [16:9], the lateral end of the image may be cut off . If you can print images with the date. When printing images using...
Instruction Manual
Page 28
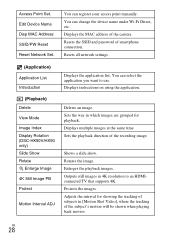
.... Protects the images. Displays the MAC address of the recording image. Sets the way in 4K resolution to use. Rotates the image. Sets the playback direction of the camera. Enlarges the playback images. Resets the SSID and password of the subject's motion will be shown when playing back movies. Displays multiple images at the same time. You can register your access point manually. Adjusts the interval for playback. Resets all network settings. (Application) Application List Introduction (Playback) Delete View Mode Image Index Display Rotation (DSC-HX90V...
.... Protects the images. Displays the MAC address of the recording image. Sets the way in 4K resolution to use. Rotates the image. Sets the playback direction of the camera. Enlarges the playback images. Resets the SSID and password of the subject's motion will be shown when playing back movies. Displays multiple images at the same time. You can register your access point manually. Adjusts the interval for playback. Resets all network settings. (Application) Application List Introduction (Playback) Delete View Mode Image Index Display Rotation (DSC-HX90V...
Instruction Manual
Page 30
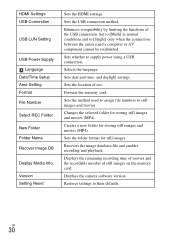
... images and movies (MP4). Displays the camera software version. Restores settings to still images and movies. Version Setting Reset Sets the HDMI settings. Sets whether to [Single] only when the connection between the camera and a computer or AV component cannot be established. Set to [Multi] in normal conditions and to supply power using a USB connection. Sets date and time, and daylight savings. Formats the memory card. HDMI Settings USB Connection USB LUN Setting USB Power Supply Language Date/Time Setup Area Setting Format File Number Select REC Folder New Folder Folder...
... images and movies (MP4). Displays the camera software version. Restores settings to still images and movies. Version Setting Reset Sets the HDMI settings. Sets whether to [Single] only when the connection between the camera and a computer or AV component cannot be established. Set to [Multi] in normal conditions and to supply power using a USB connection. Sets date and time, and daylight savings. Formats the memory card. HDMI Settings USB Connection USB LUN Setting USB Power Supply Language Date/Time Setup Area Setting Format File Number Select REC Folder New Folder Folder...


