Operating Guide
Page 6
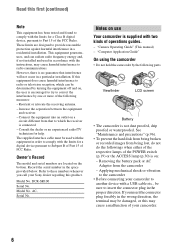
... the equipment off and on a circuit different from the camcorder - Record the serial number in a particular installation. DCR-SR100 Serial No. "Camera Operating Guide" (This manual) - "Computer Application Guide" On using the camcorder • Do not hold the camcorder by one or more of the following parts. However, ... from being broken or recorded images from being lost, do not do the followings when either of the respective lamps of your Sony dealer regarding this may cause harmful interference to Subpart B of Part 15 of FCC Rules. If you insert the connector plug ...
... the equipment off and on a circuit different from the camcorder - Record the serial number in a particular installation. DCR-SR100 Serial No. "Camera Operating Guide" (This manual) - "Computer Application Guide" On using the camcorder • Do not hold the camcorder by one or more of the following parts. However, ... from being broken or recorded images from being lost, do not do the followings when either of the respective lamps of your Sony dealer regarding this may cause harmful interference to Subpart B of Part 15 of FCC Rules. If you insert the connector plug ...

Operating Guide
Page 7
... points and/or bright points (white, red, blue, or green in Germany, and Sony Corporation, and produces superior images. On this manual • The images of images &#...conditions, such as at the sun. You also cannot play back both movies and still images other DCR-SR100. Also, the lens for Modulation Transfer Function. Black point White, red, blue or green point...this manual are captured using a digital still camera, and thus may cause malfunctions. To view your camcorder. It adopts the MTF* measurement system for illustrating the operating procedures. On recording • Before...
... points and/or bright points (white, red, blue, or green in Germany, and Sony Corporation, and produces superior images. On this manual • The images of images &#...conditions, such as at the sun. You also cannot play back both movies and still images other DCR-SR100. Also, the lens for Modulation Transfer Function. Black point White, red, blue or green point...this manual are captured using a digital still camera, and thus may cause malfunctions. To view your camcorder. It adopts the MTF* measurement system for illustrating the operating procedures. On recording • Before...
Operating Guide
Page 8
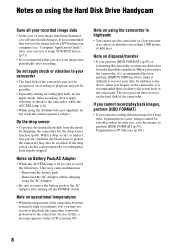
... When a drop occurs, or under a non-gravity condition, the block noise to your data. When you may not record or playback the camcorder to provide protection to remove the battery pack or the AC Adaptor after recording. After recording, do not apply shock. This may prevent data recovery...[EMPTY HDD] (p.60) to perform [HDD FORMAT] (p.59). Notes on the LCD screen (p.89). Notes on a DVD using the Hard Disk Drive Handycam Save all your computer (see "Computer Application Guide"). Removing the battery pack - In such case, save all your recorded image data • In the...
... When a drop occurs, or under a non-gravity condition, the block noise to your data. When you may not record or playback the camcorder to provide protection to remove the battery pack or the AC Adaptor after recording. After recording, do not apply shock. This may prevent data recovery...[EMPTY HDD] (p.60) to perform [HDD FORMAT] (p.59). Notes on the LCD screen (p.89). Notes on a DVD using the Hard Disk Drive Handycam Save all your computer (see "Computer Application Guide"). Removing the battery pack - In such case, save all your recorded image data • In the...

Operating Guide
Page 9
... Step 1: Checking supplied items 15 Step 2: Charging the battery pack 16 Step 3: Turning the power on using the Hard Disk Drive Handycam 8 Enjoying with your camcorder 19 Step 4: Adjusting the LCD screen and viewfinder 20 Step 5: Using the touch panel 21 Step 6: Setting the date and time ...22 Step 7: Selecting the aspect ratio (16:9 or 4:3) of the recording image 23 Easy Handycam - Table of Contents IMPORTANT SAFEGUARDS 3 Read this first 5...
... Step 1: Checking supplied items 15 Step 2: Charging the battery pack 16 Step 3: Turning the power on using the Hard Disk Drive Handycam 8 Enjoying with your camcorder 19 Step 4: Adjusting the LCD screen and viewfinder 20 Step 5: Using the touch panel 21 Step 6: Setting the date and time ...22 Step 7: Selecting the aspect ratio (16:9 or 4:3) of the recording image 23 Easy Handycam - Table of Contents IMPORTANT SAFEGUARDS 3 Read this first 5...
Operating Guide
Page 10
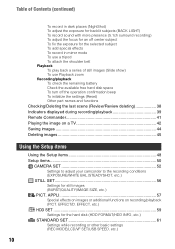
... Saving images 44 Deleting images 45 Using the Setup items Using the Setup items 48 Setup items 50 CAMERA SET 52 Settings to adjust your camcorder to the recording conditions (EXPOSURE/WHITE BAL./STEADYSHOT, etc.) STILL SET 56 Settings for the hard disk (HDD FORMAT/HDD INFO, etc.) STANDARD SET 61...
... Saving images 44 Deleting images 45 Using the Setup items Using the Setup items 48 Setup items 50 CAMERA SET 52 Settings to adjust your camcorder to the recording conditions (EXPOSURE/WHITE BAL./STEADYSHOT, etc.) STILL SET 56 Settings for the hard disk (HDD FORMAT/HDD INFO, etc.) STANDARD SET 61...

Operating Guide
Page 11
... images (PictBridge compliant printer 75 Jacks to connect external devices 77 Troubleshooting Troubleshooting 78 Warning indicators and messages 88 Additional Information Using your camcorder abroad 92 Files on the camcorder hard disk/folder structure 94 About the "InfoLITHIUM" battery pack 95 Maintenance and precautions 96 Specifications 99 Glossary, Index Glossary 101 Index...
... images (PictBridge compliant printer 75 Jacks to connect external devices 77 Troubleshooting Troubleshooting 78 Warning indicators and messages 88 Additional Information Using your camcorder abroad 92 Files on the camcorder hard disk/folder structure 94 About the "InfoLITHIUM" battery pack 95 Maintenance and precautions 96 Specifications 99 Glossary, Index Glossary 101 Index...

Operating Guide
Page 12
... quickly by date using the VISUAL INDEX screen (p.31). Hard Disk Drive Handycam offers more than the tape or the DVD camcorder for your Handycam directly to a TV to VCR/DVD devices. 12 Enjoying with your Hard Disk Drive Handycam What you can do with your movie, and you can start recording whenever... you are ready. * If you change the image quality of the camcorder. Also, you can ...
... quickly by date using the VISUAL INDEX screen (p.31). Hard Disk Drive Handycam offers more than the tape or the DVD camcorder for your Handycam directly to a TV to VCR/DVD devices. 12 Enjoying with your Hard Disk Drive Handycam What you can do with your movie, and you can start recording whenever... you are ready. * If you change the image quality of the camcorder. Also, you can ...
Operating Guide
Page 14
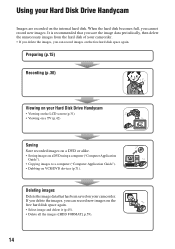
...image and delete it (p.45). • Delete all the images ([HDD FORMAT], p.59). 14 Using your camcorder. It is recommended that has been saved on your Hard Disk Drive Handycam Images are recorded on VCR/DVD devices (p.71). If you delete the images, you save the image data ...; Copying images to a computer ("Computer Application Guide"). • Dubbing on the internal hard disk. Preparing (p.15) Recording (p.30) Viewing on your camcorder. • If you delete the images, you cannot record new images. When the hard disk becomes full, you can record new images on the free...
...image and delete it (p.45). • Delete all the images ([HDD FORMAT], p.59). 14 Using your camcorder. It is recommended that has been saved on your Hard Disk Drive Handycam Images are recorded on VCR/DVD devices (p.71). If you delete the images, you save the image data ...; Copying images to a computer ("Computer Application Guide"). • Dubbing on the internal hard disk. Preparing (p.15) Recording (p.30) Viewing on your camcorder. • If you delete the images, you cannot record new images. When the hard disk becomes full, you can record new images on the free...

Operating Guide
Page 15
The number in the parentheses indicates the number of that you have following items supplied with your camcorder. Getting Started Getting Started Step 1: Checking supplied items Make sure that item supplied. AC Adaptor (1) (p.16) Rechargeable battery pack NP-FP60 (1) (p.17) Power cord (1) (p.16) CD-ROM "ImageMixer for HDD Camcorder" (1) "Camera Operating Guide" (This manual) (1) "Computer Application Guide" (1) A/V connecting cable (1) (p.42, 71, 73) USB cable (1) (p.75, 77) Wireless Remote Commander (1) (p.41) A button-type lithium battery is already installed. 15
The number in the parentheses indicates the number of that you have following items supplied with your camcorder. Getting Started Getting Started Step 1: Checking supplied items Make sure that item supplied. AC Adaptor (1) (p.16) Rechargeable battery pack NP-FP60 (1) (p.17) Power cord (1) (p.16) CD-ROM "ImageMixer for HDD Camcorder" (1) "Camera Operating Guide" (This manual) (1) "Computer Application Guide" (1) A/V connecting cable (1) (p.42, 71, 73) USB cable (1) (p.75, 77) Wireless Remote Commander (1) (p.41) A button-type lithium battery is already installed. 15

Operating Guide
Page 16
... the AC Adaptor. MODEON(COHFGF) POWER 3 Connect the AC Adaptor to the AC Adaptor and the wall outlet. Open the jack cover to camcorder malfunction such as deterioration in battery pack performance or difficulty in the direction of the arrow until it clicks. 2 Slide the POWER switch in ...the battery pack You can charge the battery after attaching the "InfoLITHIUM" battery pack (P series) (p.95) to your camcorder. • You cannot use an NP-FP30 battery pack with your camcorder. POWER switch CHG lamp DC IN jack Jack cover DC plug Battery pack Power cord AC Adaptor To the wall...
... the AC Adaptor. MODEON(COHFGF) POWER 3 Connect the AC Adaptor to the AC Adaptor and the wall outlet. Open the jack cover to camcorder malfunction such as deterioration in battery pack performance or difficulty in the direction of the arrow until it clicks. 2 Slide the POWER switch in ...the battery pack You can charge the battery after attaching the "InfoLITHIUM" battery pack (P series) (p.95) to your camcorder. • You cannot use an NP-FP30 battery pack with your camcorder. POWER switch CHG lamp DC IN jack Jack cover DC plug Battery pack Power cord AC Adaptor To the wall...

Operating Guide
Page 17
... storing the battery pack Use up the battery pack completely if you repeat recording start/stop, turning the power on your camcorder. • Remove the AC Adaptor holding both your camcorder and the DC plug. Top: When the LCD backlight turns on . Bottom: Recording time when recording with the viewfinder while the...
... storing the battery pack Use up the battery pack completely if you repeat recording start/stop, turning the power on your camcorder. • Remove the AC Adaptor holding both your camcorder and the DC plug. Top: When the LCD backlight turns on . Bottom: Recording time when recording with the viewfinder while the...
Operating Guide
Page 18
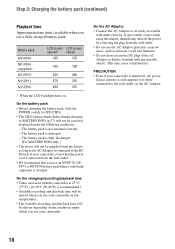
...conditions under the following conditions. - The battery pack is recommended.) • Available recording and playback time will be shorter when you use your camcorder, even when the power cord is removed from the battery as long as the AC Adaptor is connected to OFF (CHG). • The...) is damaged. - On the battery pack • Before changing the battery pack, slide the POWER switch to the DC IN jack of your camcorder in low temperatures. • The available recording and playback time will not be shorter depending on . Step 2: Charging the battery pack (continued) Playback...
...conditions under the following conditions. - The battery pack is recommended.) • Available recording and playback time will be shorter when you use your camcorder, even when the power cord is removed from the battery as long as the AC Adaptor is connected to OFF (CHG). • The...) is damaged. - On the battery pack • Before changing the battery pack, slide the POWER switch to the DC IN jack of your camcorder in low temperatures. • The available recording and playback time will not be shorter depending on . Step 2: Charging the battery pack (continued) Playback...

Operating Guide
Page 19
...you have set the date and time ([CLOCK SET], p.22), the next time you turn on the power of your camcorder, the current date and time will be displayed on the LCD screen for approximately five minutes, to save battery power. ...movies (Still): To record still images (PLAY/EDIT): To play back images on your camcorder, or to edit/delete them To turn on the respective lamp. Step 3: Turning the power on, and holding your... camcorder To record, slide the POWER switch to OFF (CHG). • At the time of...
...you have set the date and time ([CLOCK SET], p.22), the next time you turn on the power of your camcorder, the current date and time will be displayed on the LCD screen for approximately five minutes, to save battery power. ...movies (Still): To record still images (PLAY/EDIT): To play back images on your camcorder, or to edit/delete them To turn on the respective lamp. Step 3: Turning the power on, and holding your... camcorder To record, slide the POWER switch to OFF (CHG). • At the time of...

Operating Guide
Page 20
...) to make the battery last longer Press and hold DISP/BATT INFO for a few seconds until it clicks. 2 90 degrees 1 90 degrees to the (max.) camcorder • Be careful not to press the buttons on the LCD frame accidentally, when you open or adjust the LCD screen. • If you open... SET [LCD/VF SET] - [VF B.LIGHT] (p.62). Step 4: Adjusting the LCD screen and viewfinder The LCD screen Open the LCD screen 90 degrees to the camcorder (1), then rotate it to the best angle to record or play (2). 2 180 degrees (max.) DISP/BATT INFO The viewfinder You can view images using the...
...) to make the battery last longer Press and hold DISP/BATT INFO for a few seconds until it clicks. 2 90 degrees 1 90 degrees to the (max.) camcorder • Be careful not to press the buttons on the LCD frame accidentally, when you open or adjust the LCD screen. • If you open... SET [LCD/VF SET] - [VF B.LIGHT] (p.62). Step 4: Adjusting the LCD screen and viewfinder The LCD screen Open the LCD screen 90 degrees to the camcorder (1), then rotate it to the best angle to record or play (2). 2 180 degrees (max.) DISP/BATT INFO The viewfinder You can view images using the...

Operating Guide
Page 22
... step 4 when you set the date and time, the [CLOCK SET] screen appears every time you turn on your camcorder or slide the POWER switch. • If you do not use your camcorder for some models. 3 Select [CLOCK SET] with / , then touch . 22 POWER switch Skip to 12:00 AM. If you... do not set the clock for the first time. Step 6: Setting the date and time Set the date and time when using this camcorder for the first time. 1 Touch t [SETUP]. 60min CAMERA SET PROGRAM AE SPOT METER EXPOSURE OK 2 Select (TIME/LANGU.) with / , then touch . 60min DISP OUTPUT SETUP...
... step 4 when you set the date and time, the [CLOCK SET] screen appears every time you turn on your camcorder or slide the POWER switch. • If you do not use your camcorder for some models. 3 Select [CLOCK SET] with / , then touch . 22 POWER switch Skip to 12:00 AM. If you... do not set the clock for the first time. Step 6: Setting the date and time Set the date and time when using this camcorder for the first time. 1 Touch t [SETUP]. 60min CAMERA SET PROGRAM AE SPOT METER EXPOSURE OK 2 Select (TIME/LANGU.) with / , then touch . 60min DISP OUTPUT SETUP...

Operating Guide
Page 23
...-angle, high-resolution images. • If you intend to [4:3], images may look different in the viewfinder. 23 when [D. To play back images after connecting your camcorder to a TV Set [TV TYPE] to [16:9] or [4:3] according to your TV (16:9/4:3) (p.42). • When viewing 16:9 (wide) images with [TV TYPE] set to...
...-angle, high-resolution images. • If you intend to [4:3], images may look different in the viewfinder. 23 when [D. To play back images after connecting your camcorder to a TV Set [TV TYPE] to [16:9] or [4:3] according to your TV (16:9/4:3) (p.42). • When viewing 16:9 (wide) images with [TV TYPE] set to...

Operating Guide
Page 24
... EASY LANGUAGE BEEP STBY CLOCK HDD SET FORMAT • Nearly all settings automatic with just one press of your camcorder with automatic settings Using Easy Handycam operation Easy Handycam operation is not displayed during Easy Handycam operation You cannot use following buttons or functions since they are automatically fixed. • is a function for easy...
... EASY LANGUAGE BEEP STBY CLOCK HDD SET FORMAT • Nearly all settings automatic with just one press of your camcorder with automatic settings Using Easy Handycam operation Easy Handycam operation is not displayed during Easy Handycam operation You cannot use following buttons or functions since they are automatically fixed. • is a function for easy...

Operating Guide
Page 25
using your camcorder with automatic settings 25 Easy Handycam -
using your camcorder with automatic settings 25 Easy Handycam -

Operating Guide
Page 27
...EASY Shutter click min EASY SETUP SETUP Flashing bLights up the lamp. (Still) 2 Press EASY. [Easy Handycam operation ON.] appears, then Easy Handycam operation ON. To cancel Easy Handycam Press EASY again. When disappears, the image has been recorded. • [ QUALITY] is heard. disappears ...the LCD screen. 60min 112 EASY SETUP 3 Press PHOTO D lightly to [FINE] (default settings) (p.57). Easy Handycam - appears on the LCD screen. 27 using your camcorder with automatic settings Still images 1 Slide the POWER switch A in the direction of the arrow to light up A ...
...EASY Shutter click min EASY SETUP SETUP Flashing bLights up the lamp. (Still) 2 Press EASY. [Easy Handycam operation ON.] appears, then Easy Handycam operation ON. To cancel Easy Handycam Press EASY again. When disappears, the image has been recorded. • [ QUALITY] is heard. disappears ...the LCD screen. 60min 112 EASY SETUP 3 Press PHOTO D lightly to [FINE] (default settings) (p.57). Easy Handycam - appears on the LCD screen. 27 using your camcorder with automatic settings Still images 1 Slide the POWER switch A in the direction of the arrow to light up A ...

Operating Guide
Page 29
Beginning of the still image to be played back. See "Deleting images" on the LCD screen. 29 using your camcorder with /. Movies Touch (Movie) tab, then touch the thumbnail of the movie to be played min EASY 100/112 Slide show button (p.36) Go to ...:12:34 JAN 1 2006 12:00:00 AM SETUP Toggles Play or Pause as you can delete images. disappears on page 45. To cancel Easy Handycam Press EASY again. Still Images Touch back. (Still) tab, then touch the thumbnail of the scene/ previous scene Stop (go to play back movie slowly...
Beginning of the still image to be played back. See "Deleting images" on the LCD screen. 29 using your camcorder with /. Movies Touch (Movie) tab, then touch the thumbnail of the movie to be played min EASY 100/112 Slide show button (p.36) Go to ...:12:34 JAN 1 2006 12:00:00 AM SETUP Toggles Play or Pause as you can delete images. disappears on page 45. To cancel Easy Handycam Press EASY again. Still Images Touch back. (Still) tab, then touch the thumbnail of the scene/ previous scene Stop (go to play back movie slowly...


