
Operating Instructions
Page 3
...measures: - For customers in a residential installation. Increase the separation between the equipment and receiver. - "Memory Stick" This Class B digital apparatus complies with Canadian ICES-003. 3 These limits are designed to provide reasonable protection against harmful interference in CANADA CAUTION TO PREVENT ELECTRIC...determined by turning the equipment off and on a circuit different from that to Part 15 of the FCC Rules. Consult the dealer or an experienced radio/TV technician for a Class B digital device, pursuant to which can radiate radio frequency energy and, if not ...
...measures: - For customers in a residential installation. Increase the separation between the equipment and receiver. - "Memory Stick" This Class B digital apparatus complies with Canadian ICES-003. 3 These limits are designed to provide reasonable protection against harmful interference in CANADA CAUTION TO PREVENT ELECTRIC...determined by turning the equipment off and on a circuit different from that to Part 15 of the FCC Rules. Consult the dealer or an experienced radio/TV technician for a Class B digital device, pursuant to which can radiate radio frequency energy and, if not ...

Operating Instructions
Page 4
... back a tape with picture effects ..... 49 Playing back a tape with analog video unit and personal computer - Date search 54 Quick Reference Identifying the parts and controls 145 Searching for a photo Quick Function Guide 153 - Photo save 112...Recording video or TV programs 72 Inserting a scene from a mini DV tape - Tape Photo recording 32 Adjusting the white balance manually ....... 35 Using the wide mode 36 Using the fader function 37 Using special effects - Memory PB ZOOM 117 Playing back images continuously - SLIDE SHOW 118 Preventing accidental erasure - Digital...
... back a tape with picture effects ..... 49 Playing back a tape with analog video unit and personal computer - Date search 54 Quick Reference Identifying the parts and controls 145 Searching for a photo Quick Function Guide 153 - Photo save 112...Recording video or TV programs 72 Inserting a scene from a mini DV tape - Tape Photo recording 32 Adjusting the white balance manually ....... 35 Using the wide mode 36 Using the fader function 37 Using special effects - Memory PB ZOOM 117 Playing back images continuously - SLIDE SHOW 118 Preventing accidental erasure - Digital...

Operating Instructions
Page 11
...Playing time on LCD screen 60 (55) 135 (125) 210 (190) 50 (45) 110 (95) 160 (145) Playing time with the metal parts of the connecting cord of the AC adaptor. The battery life will not be shorter if you use your camcorder in a cold environment. ** Approximate ...the temperature of minutes when you use a fully charged battery Numbers in parentheses "( )" indicate the time when using a normally charged battery. * Approximate continuous recording time at 77°F (25°C). If it will be charged. •Prevent metallic objects from this unit. Keep the battery pack in a cold ...
...Playing time on LCD screen 60 (55) 135 (125) 210 (190) 50 (45) 110 (95) 160 (145) Playing time with the metal parts of the connecting cord of the AC adaptor. The battery life will not be shorter if you use your camcorder in a cold environment. ** Approximate ...the temperature of minutes when you use a fully charged battery Numbers in parentheses "( )" indicate the time when using a normally charged battery. * Approximate continuous recording time at 77°F (25°C). If it will be charged. •Prevent metallic objects from this unit. Keep the battery pack in a cold ...

Operating Instructions
Page 15
When you press any part of the arrow and open the lid. The cassette compartment automatically lifts up and opens. (3) Push the middle portion of the back of the cassette ...
When you press any part of the arrow and open the lid. The cassette compartment automatically lifts up and opens. (3) Push the middle portion of the back of the cassette ...

Operating Instructions
Page 68
...END The IN point of the first program is set , then the bottom part of the first scene you connect using the i.LINK cable (DV connecting cable) With digital-to-digital connection, video and audio signals are transmitted in digital form for the end of the first scene you connect with the i.LINK ... menu settings (p. 89). When you want to operate the dubbing function correctly, depending on page 61. Then press EXEC. (4) Search for recording into your camcorder, and insert a tape for the beginning of the program mark changes to light blue. (8) Repeat steps 4 to insert using the...
...END The IN point of the first program is set , then the bottom part of the first scene you connect using the i.LINK cable (DV connecting cable) With digital-to-digital connection, video and audio signals are transmitted in digital form for the end of the first scene you connect with the i.LINK ... menu settings (p. 89). When you want to operate the dubbing function correctly, depending on page 61. Then press EXEC. (4) Search for recording into your camcorder, and insert a tape for the beginning of the program mark changes to light blue. (8) Repeat steps 4 to insert using the...

Operating Instructions
Page 82
...a title on the tape. The titles superimposed with your camcorder •They are displayed by only the DV format video equipment with other video equipment. If the tape has too many index signals You may not be displayed correctly. HAPPY BIRTHDAY HAPPY HOLIDAYS CONGRATULATIONS...3 4 TITLE PRESET TITLE EXIT HELLO! To use the custom title, select in the middle of the recorded parts The title may not be detected as an index signal when searching a recording with index titler function. •The point you do not need. 82 HAPPY BIRTHDAY HAPPY HOLIDAYS CONGRATULATIONS!...
...a title on the tape. The titles superimposed with your camcorder •They are displayed by only the DV format video equipment with other video equipment. If the tape has too many index signals You may not be displayed correctly. HAPPY BIRTHDAY HAPPY HOLIDAYS CONGRATULATIONS...3 4 TITLE PRESET TITLE EXIT HELLO! To use the custom title, select in the middle of the recorded parts The title may not be detected as an index signal when searching a recording with index titler function. •The point you do not need. 82 HAPPY BIRTHDAY HAPPY HOLIDAYS CONGRATULATIONS!...

Operating Instructions
Page 96
...If you use or keep "Memory Stick"s in its label on a "Memory Stick" supplied with your personal computer. "Memory Stick" operations - You can record and play back, re-record or delete still images. Typical image data file name 100-0001: This file name appears on the display of your camcorder. Using a "Memory... gases. •When you remove the "Memory Stick", turn the power off or detach the battery for "Memory Stick" supplied with the metal parts of speakers and televisions. •Prevent metallic objects or your finger from coming into contact with your camcorder. -
...If you use or keep "Memory Stick"s in its label on a "Memory Stick" supplied with your personal computer. "Memory Stick" operations - You can record and play back, re-record or delete still images. Typical image data file name 100-0001: This file name appears on the display of your camcorder. Using a "Memory... gases. •When you remove the "Memory Stick", turn the power off or detach the battery for "Memory Stick" supplied with the metal parts of speakers and televisions. •Prevent metallic objects or your finger from coming into contact with your camcorder. -

Operating Instructions
Page 108
The last recorded or last composed image appears on the lower part of the screen as a thumbnail image. (4) Press -/+ on the left lower corner of the screen or the Remote Commander to select the still picture which ... I X MEM MIX OFF MCCAM OVER- MEM MIX OFF + M. MEM MIX OFF + M. MEMORY MIX Before operation Insert a mini DV tape and a recorded "Memory Stick" into your camcorder. (1) Set the POWER switch to CAMERA. (2) In the standby mode, press FN to display PAGE1 (p. 16). (3) Press MEM MIX. Superimposing a still picture in the "Memory Stick...
The last recorded or last composed image appears on the lower part of the screen as a thumbnail image. (4) Press -/+ on the left lower corner of the screen or the Remote Commander to select the still picture which ... I X MEM MIX OFF MCCAM OVER- MEM MIX OFF + M. MEM MIX OFF + M. MEMORY MIX Before operation Insert a mini DV tape and a recorded "Memory Stick" into your camcorder. (1) Set the POWER switch to CAMERA. (2) In the standby mode, press FN to display PAGE1 (p. 16). (3) Press MEM MIX. Superimposing a still picture in the "Memory Stick...

Operating Instructions
Page 142
...tape, and periodically turn on the power, operate the CAMERA and VCR sections and play back a tape for about...8226;If your camcorder is used to sense the type and thickness of the tape and if the recording tab is not to be used for a long time. Maintenance information and precautions Precautions Camcorder operation...AM receivers and video equipment disturb AM reception and video operation. These holes are used in a dusty place, protect it away from coming into contact with the metal parts of the ... operate it out by a Sony dealer before operating it . This is not a malfunction.
...tape, and periodically turn on the power, operate the CAMERA and VCR sections and play back a tape for about...8226;If your camcorder is used to sense the type and thickness of the tape and if the recording tab is not to be used for a long time. Maintenance information and precautions Precautions Camcorder operation...AM receivers and video equipment disturb AM reception and video operation. These holes are used in a dusty place, protect it away from coming into contact with the metal parts of the ... operate it out by a Sony dealer before operating it . This is not a malfunction.

Operating Instructions
Page 144
... 15/16 × 1 9/16 × 3 3/8 in. (49 × 39 × 85 mm) (w/h/d) excluding projecting parts Mass (approx.) 4.2 oz (120 g) excluding power cord Battery pack Output voltage DC 3.6 V Capacity 4.1 Wh Dimensions (approx.) 1...to the dark can be shot with infrared lighting. Specifications Video camera recorder System Video recording system 2 rotary heads Helical scanning system Audio recording system Rotary heads, PCM system Quantization: 12 bits (... 10× (Optical), 120× (Digital) Focal length 5/32 - 1 5/16 in. (3.3 - 33 mm) When converted to a 35 mm still camera 1 11/16 - 16 5/8 in. ...
... 15/16 × 1 9/16 × 3 3/8 in. (49 × 39 × 85 mm) (w/h/d) excluding projecting parts Mass (approx.) 4.2 oz (120 g) excluding power cord Battery pack Output voltage DC 3.6 V Capacity 4.1 Wh Dimensions (approx.) 1...to the dark can be shot with infrared lighting. Specifications Video camera recorder System Video recording system 2 rotary heads Helical scanning system Audio recording system Rotary heads, PCM system Quantization: 12 bits (... 10× (Optical), 120× (Digital) Focal length 5/32 - 1 5/16 in. (3.3 - 33 mm) When converted to a 35 mm still camera 1 11/16 - 16 5/8 in. ...

Operating Instructions
Page 145
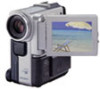
- When purchasing Sony video products, Sony recommends that this "GENUINE VIDEO ACCESSORIES" mark. Identifying the parts and controls Camcorder 1 5 6 2 7 8 3 9 4 0 1 Lens cap (p. 18) 2 OPEN button (p. 21, 27) 3 LCD screen/Touch panel (p. 16, 99) 4 Battery/Battery terminal cover (p. 12) 5 Eyecup 6 Viewfinder (p. 18) 7 LOCK (p. 18) 8 POWER switch (p. 18) 9 START/STOP button (p. 18) 0 BATTERY RELEASE lever (p. 12) This mark indicates that you purchase accessories with this product is a genuine accessory for Sony video products. Quick Reference 145 Quick Reference -
- When purchasing Sony video products, Sony recommends that this "GENUINE VIDEO ACCESSORIES" mark. Identifying the parts and controls Camcorder 1 5 6 2 7 8 3 9 4 0 1 Lens cap (p. 18) 2 OPEN button (p. 21, 27) 3 LCD screen/Touch panel (p. 16, 99) 4 Battery/Battery terminal cover (p. 12) 5 Eyecup 6 Viewfinder (p. 18) 7 LOCK (p. 18) 8 POWER switch (p. 18) 9 START/STOP button (p. 18) 0 BATTERY RELEASE lever (p. 12) This mark indicates that you purchase accessories with this product is a genuine accessory for Sony video products. Quick Reference 145 Quick Reference -

Operating Instructions
Page 146
The lens for video camera and offers a quality as the Carl Zeiss lens. * MTF is equipped with a Carl Zeiss lens which can reproduce a fine image. The value number indicates the ..., and Sony Corporation. Identifying the parts and controls qa qj qs qd qf qk ql qg w; qh qa Accessory shoe qs Microphone (p. 78) qd NIGHTSHOT switch (p. 24) qf SUPER NIGHTSHOT button (p. 24) qg S VIDEO jack (p. 31, 34, 58) qh Infrared rays emitter (p. 24) qj Focus ring (p. 48) qk Lens ql Remote sensor w; Camera recording lamp...
The lens for video camera and offers a quality as the Carl Zeiss lens. * MTF is equipped with a Carl Zeiss lens which can reproduce a fine image. The value number indicates the ..., and Sony Corporation. Identifying the parts and controls qa qj qs qd qf qk ql qg w; qh qa Accessory shoe qs Microphone (p. 78) qd NIGHTSHOT switch (p. 24) qf SUPER NIGHTSHOT button (p. 24) qg S VIDEO jack (p. 31, 34, 58) qh Infrared rays emitter (p. 24) qj Focus ring (p. 48) qk Lens ql Remote sensor w; Camera recording lamp...

Operating Instructions
Page 147
... L or REMOTE. This jack also accepts a "plug-in-power" microphone. ws AUDIO/VIDEO jack (p. 31, 34, 58) wd (LANC)/DIGITAL I/O jack (p.116) LANC stands for controlling the tape transport of video equipment and other peripherals connected to the video equipment. Identifying the parts and controls wa ws wd wf wa MIC jack (PLUG IN POWER...
... L or REMOTE. This jack also accepts a "plug-in-power" microphone. ws AUDIO/VIDEO jack (p. 31, 34, 58) wd (LANC)/DIGITAL I/O jack (p.116) LANC stands for controlling the tape transport of video equipment and other peripherals connected to the video equipment. Identifying the parts and controls wa ws wd wf wa MIC jack (PLUG IN POWER...

Operating Instructions
Page 148
ea wj es wg Speaker wh Power lamp (p. 7, 18) wj i (headphones) jack When you use headphones, the speaker on your camcorder is silent. wk PHOTO button (p. 32, 103) wl Power zoom lever (p. 22) e; DISPLAY/TOUCH PANEL button (p. 28) ea RESET button (p. 134) es Access lamp (p. 98) 148 Identifying the parts and controls wg wk wl wh e;
ea wj es wg Speaker wh Power lamp (p. 7, 18) wj i (headphones) jack When you use headphones, the speaker on your camcorder is silent. wk PHOTO button (p. 32, 103) wl Power zoom lever (p. 22) e; DISPLAY/TOUCH PANEL button (p. 28) ea RESET button (p. 134) es Access lamp (p. 98) 148 Identifying the parts and controls wg wk wl wh e;

Operating Instructions
Page 149
... Make sure that the length of the tripod screw is less than 9/32 inch (6.5 mm). Hold the Holding Grip firmly as illustrated. 149 Identifying the parts and controls ed ek ef el eg r;
... Make sure that the length of the tripod screw is less than 9/32 inch (6.5 mm). Hold the Holding Grip firmly as illustrated. 149 Identifying the parts and controls ed ek ef el eg r;

Operating Instructions
Page 150
...Power zoom button (p. 22) qd ./> buttons (p. 53, 54, 55, 56, 57) qf AUDIO DUB button (p. 79) 150 Identifying the parts and controls Remote Commander The buttons that have the same name on the Remote Commander as on your camcorder function identically to control your camcorder...qa 3 qs 4 qd 5 6 qf 7 1 PHOTO button (p. 32, 103) 2 DISPLAY button (p. 28) 3 Memory control buttons (p. 114) 4 SEARCH MODE button (p. 53, 54, 55, 56, 57) 5 Video control buttons (p. 27) 6 REC button (p. 18) 7 MARK button (p. 68) 8 Transmitter Point toward the remote sensor to the buttons on your camcorder.
...Power zoom button (p. 22) qd ./> buttons (p. 53, 54, 55, 56, 57) qf AUDIO DUB button (p. 79) 150 Identifying the parts and controls Remote Commander The buttons that have the same name on the Remote Commander as on your camcorder function identically to control your camcorder...qa 3 qs 4 qd 5 6 qf 7 1 PHOTO button (p. 32, 103) 2 DISPLAY button (p. 28) 3 Memory control buttons (p. 114) 4 SEARCH MODE button (p. 53, 54, 55, 56, 57) 5 Video control buttons (p. 27) 6 REC button (p. 18) 7 MARK button (p. 68) 8 Transmitter Point toward the remote sensor to the buttons on your camcorder.

Operating Instructions
Page 151
If you use another Sony VCR in the commander mode VCR 2. Quick Reference Identifying the parts and controls To prepare the Remote Commander Insert 2 size AA (R6) batteries by matching the + and - Notes on the batteries to avoid remote control ...misoperation. polarities on the Remote Commander •Point the remote sensor away from other Sony VCRs to the + - marks inside...
If you use another Sony VCR in the commander mode VCR 2. Quick Reference Identifying the parts and controls To prepare the Remote Commander Insert 2 size AA (R6) batteries by matching the + and - Notes on the batteries to avoid remote control ...misoperation. polarities on the Remote Commander •Point the remote sensor away from other Sony VCRs to the + - marks inside...

Operating Instructions
Page 152
...parts and controls Operation indicators qd 1 qf 2 qg 3 qh 4 qj 1 2 0 min STBY 0:12:34 5 - + 1 2 min qk 6 ST I LL 1 6 : 9W I T ws 8 100-0001 wd 9 wf 0 wg qa wh qs 152 1 Cassette memory indicator (p. 125) 2 Remaining battery time indicator (p. 23) 3 Zoom indicator (p. 22)/Exposure indicator (p. 46, 47)/Data file name indicator (p. 96) 4 Digital... off indicator (p. 90) qs Manual focus/Infinity indicator (p. 48) qd Recording mode indicator (p. 93) qf STBY/REC indicator (p. 18)/Video control mode indicator (p. 29)/Image quality mode indicator (p. 101) qg NIGHTSHOT...
...parts and controls Operation indicators qd 1 qf 2 qg 3 qh 4 qj 1 2 0 min STBY 0:12:34 5 - + 1 2 min qk 6 ST I LL 1 6 : 9W I T ws 8 100-0001 wd 9 wf 0 wg qa wh qs 152 1 Cassette memory indicator (p. 125) 2 Remaining battery time indicator (p. 23) 3 Zoom indicator (p. 22)/Exposure indicator (p. 46, 47)/Data file name indicator (p. 96) 4 Digital... off indicator (p. 90) qs Manual focus/Infinity indicator (p. 48) qd Recording mode indicator (p. 93) qf STBY/REC indicator (p. 18)/Video control mode indicator (p. 29)/Image quality mode indicator (p. 101) qg NIGHTSHOT...


